


React Native的编程思想类似于iOS, 导航栏也使用Navigator作为标识, 类似于Android的ActionBar. 导航栏作为最重要的应用组件之一, 除了处理页面导航功能以外, 还会提供页面栈的管理, 管理页面的跳入和跳出. 本文介绍一下 Navigator 组件的使用方式.

本文源码的GitHub下载地址
欢迎Follow我的GitHub: https://github.com/SpikeKing
关于React Native项目的启动, 参考1, 参考2.
基本功能
Navigator
添加 Navigator 的组件<Navigator/>. 设置方法: 初始化路由(initialRoute), 配置场景动画(configureScene), 渲染场景(renderScene). 初始化路由(initialRoute), 使用FirstPage页面作为首页.
// 主模块
class SimpleView extends Component {
  // ...
  render() {
    return (
      <Navigator
        style={{flex:1}}
        initialRoute={{component: FirstPage}}
        configureScene={this.configureScene}
        renderScene={this.renderScene}/>
    );
  }
}配置场景动画(configureScene): 根据路由的type属性, 判断使用的动画样式, 底部弹出或右侧弹出.
  /**
   * 配置场景动画
   * @param route 路由
   * @param routeStack 路由栈
   * @returns {*} 动画
   */
  configureScene(route, routeStack) {
    if (route.type == 'Bottom') {
      return Navigator.SceneConfigs.FloatFromBottom; // 底部弹出
    }
    return Navigator.SceneConfigs.PushFromRight; // 右侧弹出
}渲染场景(renderScene): 使用动态加载组件的方式. 设置加载页面的navigator参数, 其余使用route.passProps属性传递其他参数.
  /**
   * 使用动态页面加载
   * @param route 路由
   * @param navigator 导航器
   * @returns {XML} 页面
   */
  renderScene(route, navigator) {
    return <route.component navigator={navigator}  {...route.passProps} />;
}也可以使用静态加载组件, 需要预定义组件, 没有动态加载灵活.
/**
* 渲染场景, 通过不同参数, 设置不同页面
* @param route 路由, 场景信息
* @param navigator 导航器
* @returns {XML} 页面
*/
renderScene(route, navigator) {
if (route.name == 'FirstPage') {
return <FirstPage navigator={navigator} {...route.passProps}/>
} else if (route.name == 'SecondPage') {
return <SecondPage navigator={navigator} {...route.passProps}/>
}
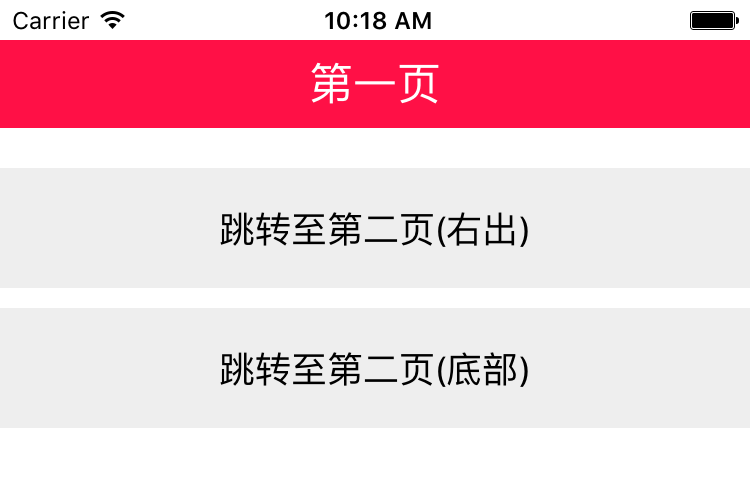
}第一页
FirstPage组件: 包含导航栏标题和两个跳转按钮. 提供两种跳转动画, 右出和底部. 点击按钮调用_navigate()方法, 跳转到第二页.
// 第一页. 使用Component可以自动生成注释, 符合标准
class FirstPage extends Component {

  // ...

  render() {
    return (
      <View style={styles.container}>
        <View style={styles.heading}>
          <Text style={styles.headText}>
            {'第一页'}
          </Text>
        </View>
        <TouchableOpacity
          style={styles.button}
          onPress={()=>this._navigate('你好! (来源第一页:右出)')}>
          <Text style={styles.buttonText}>
            {'跳转至第二页(右出)'}
          </Text>
        </TouchableOpacity>
        <TouchableOpacity
          style={styles.button}
          onPress={()=>this._navigate('你好! (来源第一页:底出)', 'Bottom')}>
          <Text style={styles.buttonText}>
            {'跳转至第二页(底部)'}
          </Text>
        </TouchableOpacity>
      </View>
    );
  }
}
也可以使用
var FirstPage = React.createClass()创建组件, 但没有使用继承Component方式规范, 不能自动生成注释.
_navigate()方法: 导航跳转, 调用navigator.push()方法. 传递参数passProps的name属性, type动画类型, component跳转组件.
  /**
   * 给Navigator传递参数.
   * @param name 参数
   * @private
   */
  _navigate(name, type = 'Normal') {
    this.props.navigator.push({
      component: SecondPage,
      passProps: {
        name: name
      },
      type: type
    })
  }
下划线表示私有方法, 类似Java的private限定符.
第二页
SecondPage组件: 第二页, 跳出返回第一页. 调用navigator.pop()方法, 使用当前页面出栈, 显示上一个栈内页面.
// 第二页, 点击跳出返回第一页
class SecondPage extends Component {
  render() {
    return (
      <View style={styles.container}>
        <View style={styles.heading}>
          <Text style={styles.headText}>
            第二页: {this.props.name}
          </Text>
        </View>
        <TouchableOpacity
          style={styles.button}
          onPress={()=>this.props.navigator.pop()}>
          <Text style={styles.buttonText}>
            返回上一页
          </Text>
        </TouchableOpacity>
      </View>
    );
  }
}
Navigator的主要功能, 是管理页面栈, 控制页面的跳入跳出.
统一导航栏
对于应用而言, 需要统一的导航栏, Navigator 组件也提供导航栏的定制.
Navigator
与上文类似, 额外添加navigationBar的属性, 自定义设置导航栏, 保持所有页面的导航栏一致. 属性添加<NavigationBar/>标签, 通过routeMapper控制导航栏的功能和样式.
// 主模块
class UniformView extends Component {
  //...

  render() {
    return (
      <Navigator
        style={{flex:1}}
        initialRoute={{name: 'FirstPage', component: FirstPage}}
        configureScene={this.configureScene}
        renderScene={this.renderScene}
        navigationBar={
          <Navigator.NavigationBar
            style={styles.navContainer}
            routeMapper={NavigationBarRouteMapper}/>}
        />
    );
  }
}
RouteMapper
NavigationBarRouteMapper: 导航栏路由映射器, 设置左键LeftButton, 右键RightButton, 标题Title.
// 导航栏的Mapper
var NavigationBarRouteMapper = {
  // 左键
  LeftButton(route, navigator, index, navState) {
    // ...
  },
  // 右键
  RightButton(route, navigator, index, navState) {
    // ...
  },
  // 标题
  Title(route, navigator, index, navState) {
    return (
      <View style={styles.navContainer}>
        <Text style={styles.title}>
          应用标题
        </Text>
      </View>
    );
  }
};左键LeftButton: index属性表示当前页面的索引, 通过判断index属性, 获知栈内是否有其他页面, 判断后退按钮是否显示. 点击调用navigator.pop()出栈.
  // 左键
  LeftButton(route, navigator, index, navState) {
    if (index > 0) {
      return (
        <View style={styles.navContainer}>
          <TouchableOpacity
            underlayColor='transparent'
            onPress={() => {if (index > 0) {navigator.pop()}}}>
            <Text style={styles.leftNavButtonText}>
              后退
            </Text>
          </TouchableOpacity>
        </View>
      );
    } else {
      return null;
    }
},右键RightButton: 点击调用路由(route)的onPress()方法, 提示信息. 根据路由的rightText属性添加显示文字.
  // 右键
  RightButton(route, navigator, index, navState) {
    if (route.onPress)
      return (
        <View style={styles.navContainer}>
          <TouchableOpacity
            onPress={() => route.onPress()}>
            <Text style={styles.rightNavButtonText}>
              {route.rightText || '右键'}
            </Text>
          </TouchableOpacity>
        </View>
      );
  },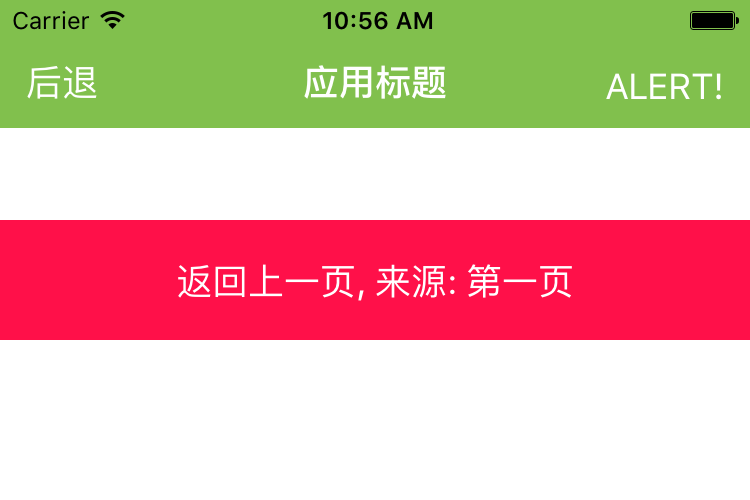
第一页/第二页
第一页与第二页与上文类似, 当第一页跳转时, 传递的路由信息有些变化, 控制第二页与导航栏的显示信息.
  // 填出提示框
  onPress() {
    alert("我是Spike!");
  }

  /**
   * 跳转页面至SecondPage
   * @param name 传递参数
   * @param type 动画类型
   */
  gotoNext(name, type = 'Normal') {
    this.props.navigator.push({
      component: SecondPage,
      passProps: {
        id: name
      },
      onPress: this.onPress,
      rightText: 'ALERT!',
      type: type
    })
  }
React Native 路由的基本功能就是这些, 控制页面的切换, 控制导航栏的功能. 导航栏作为应用最重要的组件之一, 一定要熟练掌握.
OK, that’s all ! Enjoy it!
原始地址:
http://www.wangchenlong.org/2016/04/19/1604/191-rn-navigator/
欢迎Follow我的GitHub, 关注我的简书, 微博, CSDN, 掘金.
我已委托“维权骑士”为我的文章进行维权行动. 未经授权, 禁止转载, 授权或合作请留言.


 2万+
2万+

 被折叠的 条评论
为什么被折叠?
被折叠的 条评论
为什么被折叠?
 到【灌水乐园】发言


