


iOS开发学习周报(六)
简介
| 课程名称 | IOS开发实训 | 任课老师 | 郑贵锋老师&字节跳动工程师 |
|---|---|---|---|
| 学号 | 16340015 | 专业(方向) | 软件工程(计应) |
| 姓名 | 陈彬彬 | 944131226@qq.com | |
| 开始日期 | 2019/04/20 | 完成日期 | 2019/04/25 |
文章目录
本周记录
0.概括
学习记录:
-
Cocoapods安装使用
-
UI学习
UITabBarController
-
继续完成项目
worldcup-demo- 重构项目,使用
UITabBarController+UINavigationController布局,创建射手榜界面+赛事信息界面+数据界面+用户界面
- 重构项目,使用
1.Cocoapods安装使用
参考
简要步骤:
- Cocopods安装
$ sudo gem install cocoapods
如果下载不动或者很慢,可以考虑翻墙或者换成淘宝源进行下载:
# 移除旧源
$ gem sources --remove https://rubygems.org/
# 添加新源
$ gem sources -a https://ruby.taobao.org/
# 查看当前源
$ gem sources -l
如果出现以下报错,则需要输入下面的安装命令
> While executing gem ... (Gem::FilePermissionError)
> You don't have write permissions for the /usr/bin directory.
$ sudo gem install -n /usr/local/bin cocoapods
- Cocopods使用
在项目的根目录下执行命令,会生成一个 Podfile 配置文件:
$ pod init
编辑 Podfile 文件添加 worldcup-demo 项目需要的第三方库,例如"ReactiveObjC","Colours"等:
# Uncomment the next line to define a global platform for your project
# platform :ios, '9.0'

target 'worldcup-demo' do
  # Uncomment the next line if you're using Swift or would like to use dynamic frameworks
  # use_frameworks!

  # Pods for worldcup-demo
  pod 'Colours'
  pod 'ReactiveObjC', '~> 3.1.0'
  target 'worldcup-demoTests' do
    inherit! :search_paths
    # Pods for testing
  end

  target 'worldcup-demoUITests' do
    inherit! :search_paths
    # Pods for testing
  end
end
根据配置文件 Podfile 安装依赖, CocoaPods就开始为我们做下载源码、配置依赖关系、引入需要的framework等一些列工作:
$ pod install
完成后,工程的根目录下多了三个东西:worldcup-demo.xcworkspace 、Podfile.lock 文件和 Pods 目录。
为了方便我们直观的管理工程和第三方库,CocoaPodsTest 工程和 Pods 工程会被以 workspace 的形式组织和管理,也就是 worldcup-demo.xcworkspace 文件,因此项目不再是像以前那样点击 worldcup-demo.xcodeproj 打开,而是点击 worldcup-demo.xcworkspace 打开。
2.[UI]——UITabBarController使用
参考:
UINavigationController遮挡解决方案:重新frame size
实例:
// MainPageViewController.h
// 继承自UITabBarController,作标签索引页界面
@interface MainPageViewController : UITabBarController
@end
// MainPageViewController.m
@interface MainPageViewController()
@end

@implementation MainPageViewController
- (void)viewDidLoad {
    [super viewDidLoad];
    NSLog(@"[mainpagecontroller] view did load");
    HomePageController *homepage = [[HomePageController alloc] init];
    UserpageController *userpage = [[UserpageController alloc] init];

    [self setViewControllers:@[homepage, userpage]];
}
@end
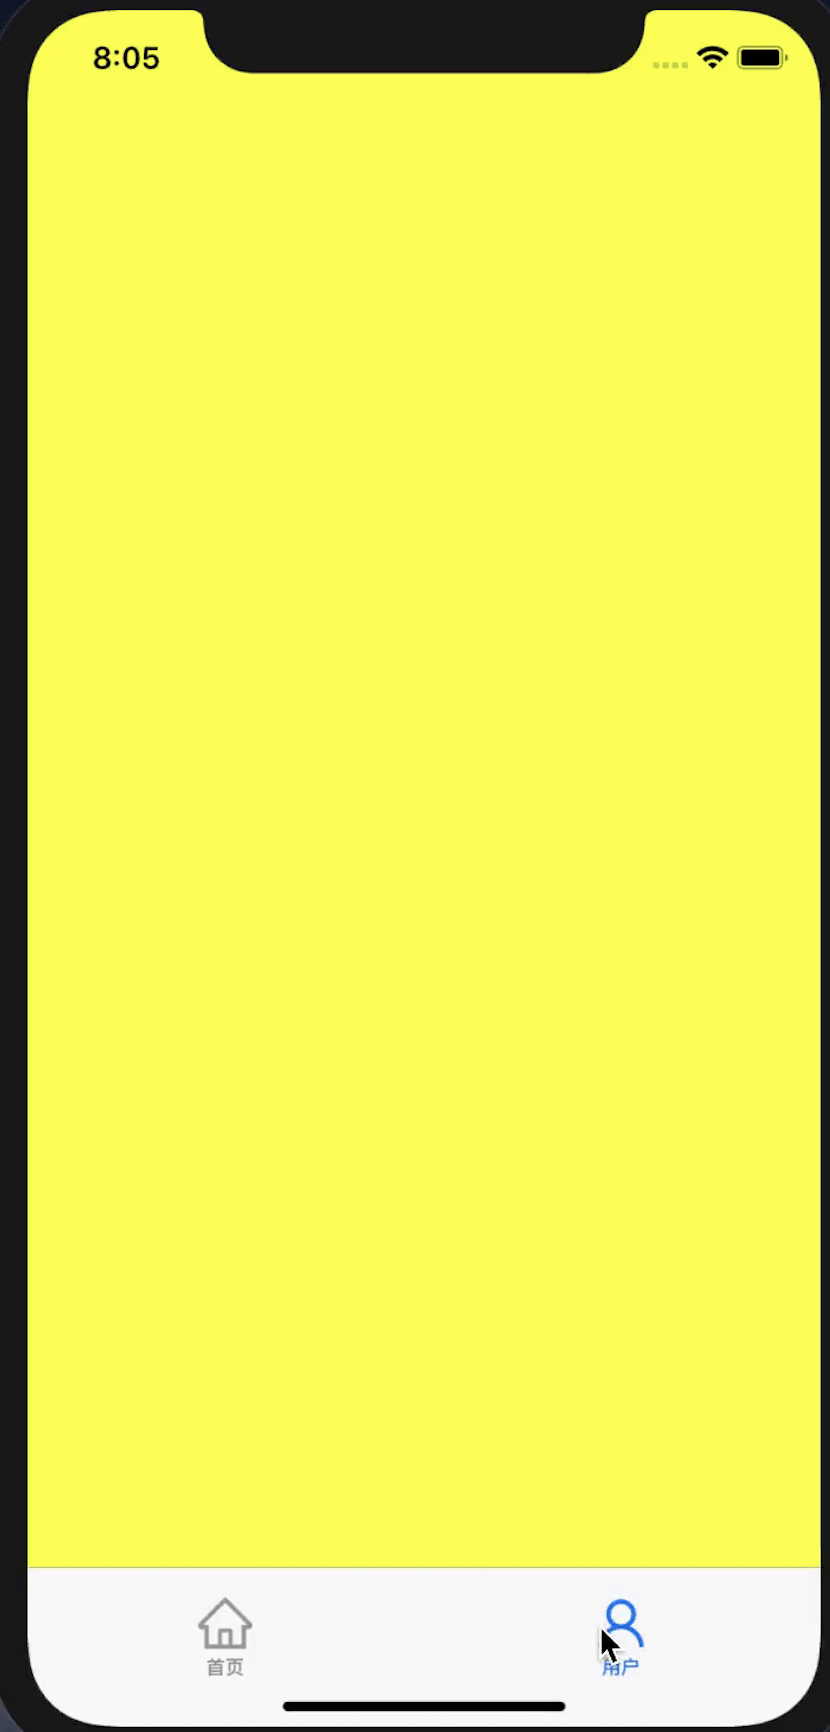
// 其中一个标签页,UserPageController
// 可以设置底部TabbarItem 的 标题名、图标的位置和尺寸
#import "UserPageController.h"

@interface UserpageController()
@end

@implementation UserpageController
- (void)viewDidLoad {
    NSLog(@"[homepagecontroller] view did load");
    [super viewDidLoad];

    [self.view setBackgroundColor:[UIColor yellowColor]];
    NSLog(@"tabbar%f", self.tabBarController.tabBar.frame.size.height);
}

- (instancetype)init
{
    self = [super init];
    if (self) {
        // 设置底部tabbar标题名
        [self.tabBarItem setTitle:@"用户"];
        [self.tabBarItem setTitlePositionAdjustment:UIOffsetMake(0, 10)];
        // 设置底部tabbar图标
        UIImage *icon = [UIImage imageNamed:@"user.png"];
        [self.tabBarItem setImage:icon];
        [self.tabBarItem setImageInsets:UIEdgeInsetsMake(10, 0, -10, 0)];
        // 设置view尺寸不包含底部tabbar
        [self setEdgesForExtendedLayout:UIRectEdgeNone];
    }
    return self;
}
@end
效果:

3.[Project]——worldcup-demo实现TabbarController+NavigationController布局
基本步骤:
- 设置应用启动主页为
MainPageViewController : UITabBarController,并添加射手榜界面、赛事信息界面、数据界面、用户界面四个标签页 - 为每个标签页添加
UINavigationController - 将射手榜界面重构到
UITabBarController+UINavigationController的布局中
关键代码:
在init中使用子线程进行网络访问获取射手榜数据:
// 网络访问获取射手榜数据
- (void)handleHttpGetScorerListData {
    // 构建并配置Session
    NSURLSessionConfiguration *defaultConfigObject = [NSURLSessionConfiguration defaultSessionConfiguration];
    NSURLSession *delegateFreeSession = [NSURLSession sessionWithConfiguration:defaultConfigObject delegate:self delegateQueue:nil];

    // 创建URL
    NSURL *url = [NSURL URLWithString:@"http://chenbb6.cn:3010/topscorer"];

    // 根据URL创建SessionDataTask
    NSURLSessionDataTask *dataTask = [delegateFreeSession dataTaskWithURL:url completionHandler:^(NSData *data, NSURLResponse *response, NSError *error) {
        // 处理返回的影响 Response & Error
        if(error == nil) {
            if(data) {
                // 获取数据
                NSArray *topScorer = [NSJSONSerialization JSONObjectWithData:data options:NSJSONReadingMutableContainers error:nil];
                self.topScorerList = [topScorer mutableCopy];
                // 更新tableview
                self.status = LoadingStatusLoding;
                dispatch_after(dispatch_time(DISPATCH_TIME_NOW, (int64_t)1*NSEC_PER_SEC), dispatch_get_main_queue(),^{
                    self.showCount = 10;
                    self.status = LoadingStatusDefault;
                    [self.tableView reloadData];
                    NSLog(@"load finish");
                });
            }
        }
        else {
            // 使用UIAlertController来替换UIAlertView
            UIAlertController *alert = [UIAlertController alertControllerWithTitle:@"提示框" message:@"网络访问出现了一点问题" preferredStyle:UIAlertControllerStyleAlert];
            // 添加按钮的响应事件
            UIAlertAction *okAction = [UIAlertAction actionWithTitle:@"好的" style:UIAlertActionStyleDefault handler:^(UIAlertAction * _Nonnull action) {
                // Do somethin
            }];
            [alert addAction:okAction];
            // 弹出提示框
            [self presentViewController:alert animated:YES completion:nil];
        }
    }];

    // 执行DataTask
    [dataTask resume];
}
完成效果:


遇到的问题
1.关于使用子线程进行网络访问,以及后续异步回调的问题。
问题描述:
当我们进入射手榜详情界面的时候,我们需要进行网络访问获得射手榜数据,但是之前我们写的demo使用的是主线程+页面跳转,我们这里需要更改成子线程网络访问+页面绘制或更新,我们发现子线程网络访问尚未完成,但此时主线程页面绘制就需要用到数据了,就出现异步访问空数据的错误了。
解决方案:
-
使用子线程进行网络访问:
只需要配置session即可,其余步骤与之前GET请求网络访问的demo一样(具体代码查看本周记录3
[Project] 实现中的关键代码)NSURLSession *delegateFreeSession = [NSURLSession sessionWithConfiguration:defaultConfigObject delegate:self delegateQueue:nil]; -
异步回调访问空数据解决
使用
dispatch_after通知主线程更新界面UI:(具体代码查看本周记录3[Project] 实现中的关键代码)dispatch_after(dispatch_time(DISPATCH_TIME_NOW, (int64_t)1*NSEC_PER_SEC), dispatch_get_main_queue(),^{ // do something in main_queue });
2.NSLog输出frame类型(CGRect)数据
问题描述:
有时候调试中,我们想知道某个View的CGRect大小位置数据,这时候该如何打印显示?
解决方案:
NSLog(@"%@", NSStringFromCGRect(self.view.frame));
总结
这周最主要还是学习了Cocopods安装和使用,因为小T老师给的项目基本都是基于Cocopods管理依赖库的项目,因此觉得这是之后学习的必须掌握的基础,所以就先了解了一下。然后就是比较常见的布局 UITabbarController + UINavigationController 的布局方式,先尝试一下基础的,比如如何让 Tabbar 是最常用的图标+文字组合,需要注意的是这种布局方式后view frame的大小和位置控制。


 243
243

 被折叠的 条评论
为什么被折叠?
被折叠的 条评论
为什么被折叠?
 到【灌水乐园】发言


