


目录
@Repository、@Service、@Controller
依赖注入
三种依赖注入的方式:
Setter依赖注入
配置文件中,给需要注入属性值的<bean>中设置<property>
1、创建持久层接口和持久层接口实现类和POJO类
public interface StudentDao {


    // 根据id查询学生
    Student findById(int id);
}
public class StudentDaoImpl implements StudentDao {

    @Override
    public Student findById(int id) {
        return new Student(1,"路飞",16,"男");
    }
}
public class Student {
    private int sid;
    private String sname;
    private int age;
    private String sex;

    public Student(int sid, String sname, int age, String sex) {
        this.sid = sid;
        this.sname = sname;
        this.age = age;
        this.sex = sex;
    }

    public Student() {
    }

    public int getSid() {
        return sid;
    }

    public void setSid(int sid) {
        this.sid = sid;
    }

    public String getSname() {
        return sname;
    }

    public void setSname(String sname) {
        this.sname = sname;
    }

    public int getAge() {
        return age;
    }

    public void setAge(int age) {
        this.age = age;
    }

    public String getSex() {
        return sex;
    }

    public void setSex(String sex) {
        this.sex = sex;
    }

    @Override
    public String toString() {
        return "Student{" +
                "sid=" + sid +
                ", sname='" + sname + '\'' +
                ", age=" + age +
                ", sex='" + sex + '\'' +
                '}';
    }
}
2、创建逻辑层
这个逻辑层中有一个StudentDao类型的属性,一定要为这个属性创建getter、setter方法
package com.itbaizhan.service;

import com.itbaizhan.dao.StudentDao;
import com.itbaizhan.pojo.Student;

import java.util.List;
import java.util.Map;
import java.util.Properties;
import java.util.Set;

public class StudentService {
    private StudentDao studentDao; // bean属性
    private String name; //字符串类型
    private int count; //基本数据类型
    private List<String> names; // 字符串类型List集合
    private List<Student> students1; // 对象类型List集合
    private Set<Student> students2; // 对象类型Set集合
    private Map<String,String> names2; // 字符串类型Map集合
    private Map<String,Student> students3; // 对象类型Map集合
    private Properties properties; //Properties类型

    public StudentDao getStudentDao() {
        return studentDao;
    }

    public void setStudentDao(StudentDao studentDao) {
        this.studentDao = studentDao;
    }

    public String getName() {
        return name;
    }

    public void setName(String name) {
        this.name = name;
    }

    public int getCount() {
        return count;
    }

    public void setCount(int count) {
        this.count = count;
    }

    public List<String> getNames() {
        return names;
    }

    public void setNames(List<String> names) {
        this.names = names;
    }

    public List<Student> getStudents1() {
        return students1;
    }

    public void setStudents1(List<Student> students1) {
        this.students1 = students1;
    }

    public Set<Student> getStudents2() {
        return students2;
    }

    public void setStudents2(Set<Student> students2) {
        this.students2 = students2;
    }

    public Map<String, String> getNames2() {
        return names2;
    }

    public void setNames2(Map<String, String> names2) {
        this.names2 = names2;
    }

    public Map<String, Student> getStudents3() {
        return students3;
    }

    public void setStudents3(Map<String, Student> students3) {
        this.students3 = students3;
    }

    public Properties getProperties() {
        return properties;
    }

    public void setProperties(Properties properties) {
        this.properties = properties;
    }

    public Student findById(int id){
        return studentDao.findById(id);
    }

    @Override
    public String toString() {
        return "StudentService{" +
                "studentDao=" + studentDao +
                ", name='" + name + '\'' +
                ", count=" + count +
                ", names=" + names +
                ", students1=" + students1 +
                ", students2=" + students2 +
                ", names2=" + names2 +
                ", students3=" + students3 +
                ", properties=" + properties +
                '}';
    }
}
3、编写bean.xml文件
<!--name:对象的属性名 ref:容器中对象的id值-->
<?xml version="1.0" encoding="UTF-8"?>
<beans xmlns="http://www.springframework.org/schema/beans"
       xmlns:context="http://www.springframework.org/schema/context"
       xmlns:xsi="http://www.w3.org/2001/XMLSchema-instance"
       xsi:schemaLocation="http://www.springframework.org/schema/beans
              http://www.springframework.org/schema/beans/spring-beans.xsd
              http://www.springframework.org/schema/context
              http://www.springframework.org/schema/context/spring-context.xsd">

        <bean id="studentDaoImpl" class="com.itbaizhan.dao.StudentDaoImpl"></bean>
        <bean id="studentService" class="com.itbaizhan.service.StudentService">
                <!-- 使用setter方法实现依赖注入 -->
                <property name="studentDao" ref="studentDaoImpl"></property>
        </bean>
</beans>
4、测试
public class TestContainer {
    @Test
    public void t1(){
        //创建Spring容器
        ApplicationContext ac = new ClassPathXmlApplicationContext("bean.xml");
        //获取对象
        StudentService studentService = (StudentService) ac.getBean("studentService");
        System.out.println(studentService.findById(1));
    }
}
构造方法依赖注入
给需要注入属性值的<bean>中设置<constructor-arg>
持久层接口和实现类和POJO类和Service类和测试类都延续上面的
bean.xml文件需要重新编写,将property标签改为constructor-arg标签,对应的被注入类需要添加构造方法
    <bean id="studentDaoImpl" class="com.itbaizhan.dao.StudentDaoImpl"></bean>

        <bean id="studentService" class="com.itbaizhan.service.StudentService">
                <!-- 使用constructor方法实现依赖注入 -->
                <constructor-arg name="studentDao" ref="studentDaoImpl"></constructor-arg>
        </bean>
测试:
public class TestContainer {
    @Test
    public void t1(){
        //创建Spring容器
        ApplicationContext ac = new ClassPathXmlApplicationContext("bean.xml");
        //获取对象
        StudentService studentService = (StudentService) ac.getBean("studentService");
        System.out.println(studentService.findById(1));
    }
}
自动注入
自动注入不需要在<bean>标签中添加其他标签注入属性值,而是自动从容器中找到相应的bean对象设置为属性值。
自动注入有两种配置方式:
- 全局配置:在<beans>中设置default-autowire属性可以定义所有bean对象的自动注入策略。
- 局部配置:在<bean>中设置autowire属性可以定义当前bean对象的自动注入策略。
autowire的取值如下:
- no:不会进行自动注入。
- default:全局配置default相当于no,局部配置default表示使用全局配置
- byName:在Spring容器中查找id与属性名相同的bean,并进行注入。需要提供set方法。
- byType:在Spring容器中查找类型与属性类型相同的bean,并进行注入。需要提供set方法。
- constructor:在Spring容器中查找id与属性名相同的bean,并进行注入。需要提供构造方法。
只需要修改bean.xml配置文件即可
<bean id="studentDao" class="com.itbaizhan.dao.StudentDaoImpl"></bean>
<!-- 使用自动注入实现依赖注入 -->
        <bean id="studentService" class="com.itbaizhan.service.StudentService" autowire="byName"></bean>
测试
public class TestContainer {
    @Test
    public void t1(){
        //创建Spring容器
        ApplicationContext ac = new ClassPathXmlApplicationContext("bean.xml");
        //获取对象
        StudentService studentService = (StudentService) ac.getBean("studentService");
        System.out.println(studentService.findById(1));
    }
}
注入bean类型
使用property标签
name:对象的属性名 ref:容器中对象的id值
第一种:
        <bean id="studentDaoImpl" class="com.itbaizhan.dao.StudentDaoImpl"></bean>
        <bean id="studentService" class="com.itbaizhan.service.StudentService">
                <!-- 使用setter方法实现依赖注入 -->
                <property name="studentDao" ref="studentDaoImpl"></property>
        </bean>
第二种:
    <bean id="studentDaoImpl" class="com.itbaizhan.dao.StudentDaoImpl"></bean>
        <bean id="studentService" class="com.itbaizhan.service.StudentService">
                <!-- 使用setter方法实现依赖注入 -->
                <property name="studentDao">
                        <ref bean="studentDaoImpl"></ref>
                </property>
        </bean>
注入基本数据类型、字符串类型
使用value标签
name:属性名 value:属性值
<bean id="studentDaoImpl" class="com.itbaizhan.dao.StudentDaoImpl"></bean>
<bean id="studentService" class="com.itbaizhan.service.StudentService">
<!-- 注入bean类型 -->
<property name="studentDao" ref="studentDaoImpl"></property>
<!-- 注入基本数据类型或字符串 -->
<property name="name" value="路飞"></property>
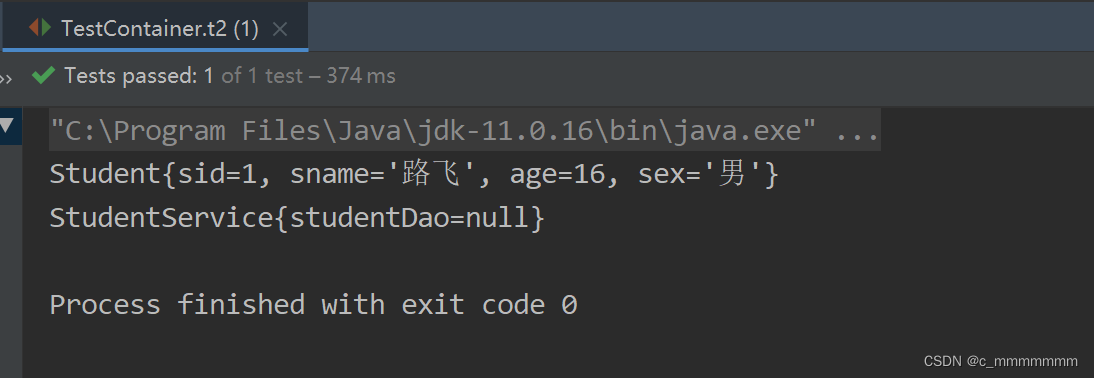
</bean>测试
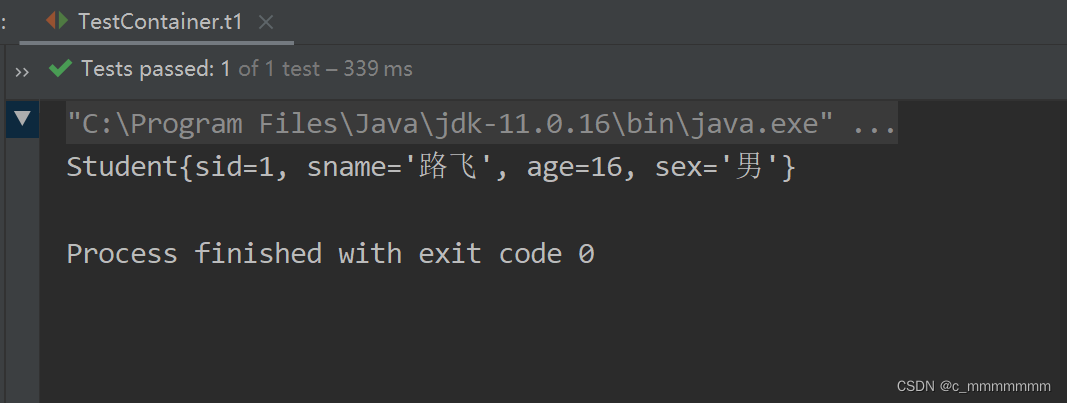
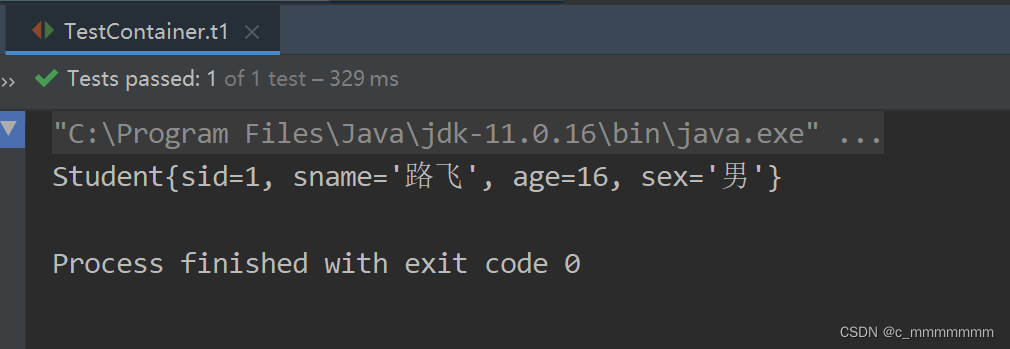
public class TestContainer {
    @Test
    public void t1(){
        //创建Spring容器
        ApplicationContext ac = new ClassPathXmlApplicationContext("bean.xml");
        //获取对象
        StudentService studentService = (StudentService) ac.getBean("studentService");
        System.out.println(studentService);
    }
}

注入list、set
根据StudentService类我们可以看到有List、Set类型的属性
package com.itbaizhan.service;

import com.itbaizhan.dao.StudentDao;
import com.itbaizhan.pojo.Student;

import java.util.List;
import java.util.Map;
import java.util.Properties;
import java.util.Set;

public class StudentService {
    private StudentDao studentDao; // bean属性
    private String name; //字符串类型
    private int count; //基本数据类型
    private List<String> names; // 字符串类型List集合
    private List<Student> students1; // 对象类型List集合
    private Set<Student> students2; // 对象类型Set集合
    private Map<String,String> names2; // 字符串类型Map集合
    private Map<String,Student> students3; // 对象类型Map集合
    private Properties properties; //Properties类型

    public StudentDao getStudentDao() {
        return studentDao;
    }

    public void setStudentDao(StudentDao studentDao) {
        this.studentDao = studentDao;
    }

    public String getName() {
        return name;
    }

    public void setName(String name) {
        this.name = name;
    }

    public int getCount() {
        return count;
    }

    public void setCount(int count) {
        this.count = count;
    }

    public List<String> getNames() {
        return names;
    }

    public void setNames(List<String> names) {
        this.names = names;
    }

    public List<Student> getStudents1() {
        return students1;
    }

    public void setStudents1(List<Student> students1) {
        this.students1 = students1;
    }

    public Set<Student> getStudents2() {
        return students2;
    }

    public void setStudents2(Set<Student> students2) {
        this.students2 = students2;
    }

    public Map<String, String> getNames2() {
        return names2;
    }

    public void setNames2(Map<String, String> names2) {
        this.names2 = names2;
    }

    public Map<String, Student> getStudents3() {
        return students3;
    }

    public void setStudents3(Map<String, Student> students3) {
        this.students3 = students3;
    }

    public Properties getProperties() {
        return properties;
    }

    public void setProperties(Properties properties) {
        this.properties = properties;
    }

    public Student findById(int id){
        return studentDao.findById(id);
    }

    @Override
    public String toString() {
        return "StudentService{" +
                "studentDao=" + studentDao +
                ", name='" + name + '\'' +
                ", count=" + count +
                ", names=" + names +
                ", students1=" + students1 +
                ", students2=" + students2 +
                ", names2=" + names2 +
                ", students3=" + students3 +
                ", properties=" + properties +
                '}';
    }
}
1、property标签使用list标签注入list集合
注入简单数据类型list集合
<bean id="studentDaoImpl" class="com.itbaizhan.dao.StudentDaoImpl"></bean>
        <bean id="studentService" class="com.itbaizhan.service.StudentService">
                <!-- 注入bean类型 -->
                <property name="studentDao" ref="studentDaoImpl"></property>
                <!-- 注入基本数据类型或字符串 -->
                <property name="name" value="路飞"></property>
                <property name="count" value="1"></property>
                <!-- 注入简单数据类型list -->
                <property name="names">
                        <list>
                                <value>索隆</value>
                                <value>乔巴</value>
                        </list>
                </property>
        </bean>
测试:
public class TestContainer {
    @Test
    public void t1(){
        //创建Spring容器
        ApplicationContext ac = new ClassPathXmlApplicationContext("bean.xml");
        //获取对象
        StudentService studentService = (StudentService) ac.getBean("studentService");
        System.out.println(studentService);
    }
}

注入bean类型list集合
<bean id="studentDaoImpl" class="com.itbaizhan.dao.StudentDaoImpl"></bean>
<bean id="studentService" class="com.itbaizhan.service.StudentService">
<!-- 注入bean类型 -->
<property name="studentDao" ref="studentDaoImpl"></property>
<!-- 注入基本数据类型或字符串 -->
<property name="name" value="路飞"></property>
<property name="count" value="1"></property>
<!-- 注入简单数据类型list -->
<property name="names">
<list>
<value>索隆</value>
<value>乔巴</value>
</list>
</property>
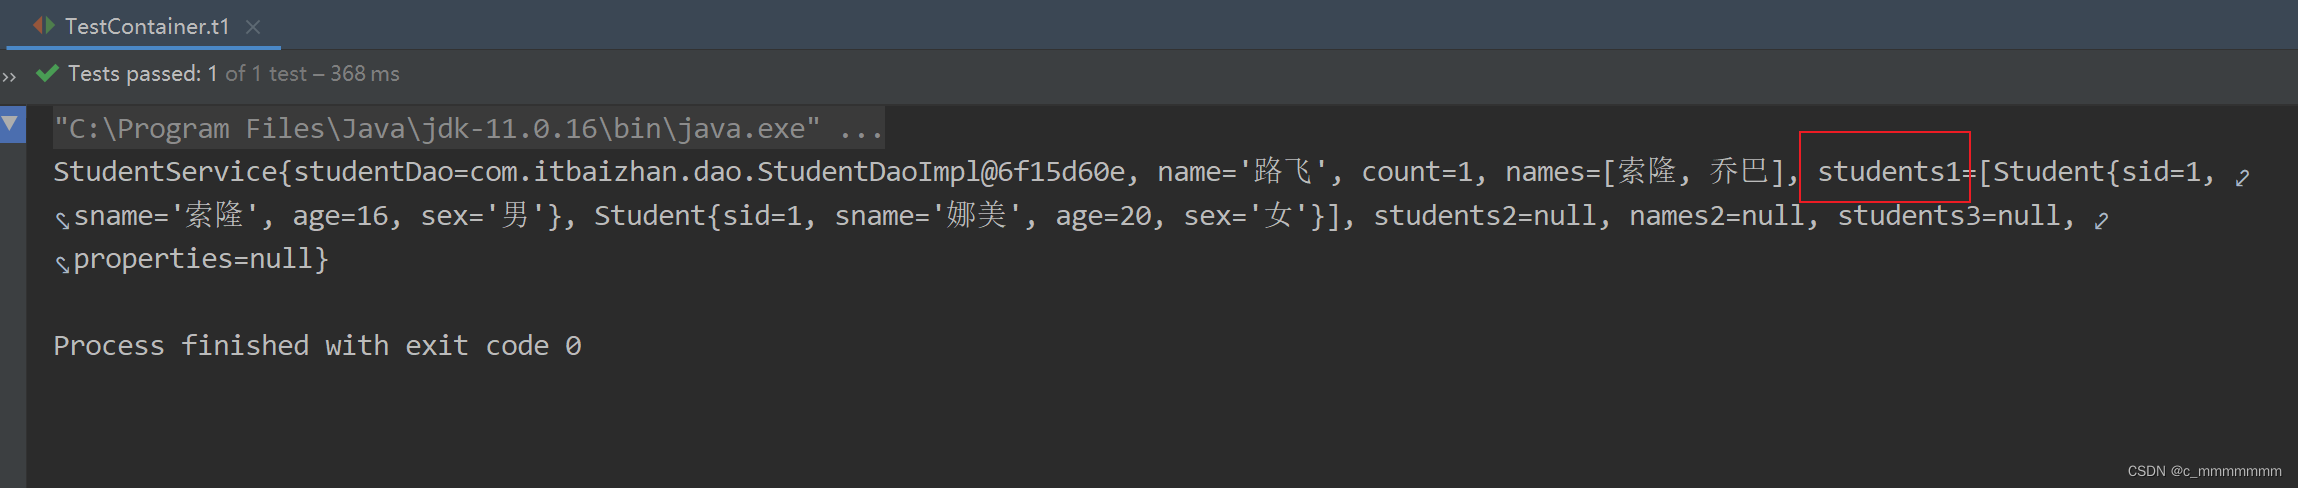
<!-- 注入bean类型list -->
<property name="students1">
<list>
<bean class="com.itbaizhan.pojo.Student">
<property name="sid" value="1"></property>
<property name="sname" value="索隆"></property>
<property name="sex" value="男"></property>
<property name="age" value="16"></property>
</bean>
<bean class="com.itbaizhan.pojo.Student">
<property name="sid" value="1"></property>
<property name="sname" value="娜美"></property>
<property name="sex" value="女"></property>
<property name="age" value="20"></property>
</bean>
</list>
</property>
</bean>测试
public class TestContainer {
    @Test
    public void t1(){
        //创建Spring容器
        ApplicationContext ac = new ClassPathXmlApplicationContext("bean.xml");
        //获取对象
        StudentService studentService = (StudentService) ac.getBean("studentService");
        System.out.println(studentService);
    }
}
注入map
简单数据类型Map集合:
<bean id="studentService" class="com.itbaizhan.service.StudentService">
<!-- 简单数据类型map集合 name:属性名 -->
  <property name="names2">
    <map>
      <entry key="student1" value="bz"/>
      <entry key="student2" value="sxt"/>
    </map>
  </property>
</bean>

对象类型Map集合:
<bean id="studentService" class="com.itbaizhan.service.StudentService">
<!-- 对象类型map集合 name:属性名 -->
  <property name="students3">
    <map>
      <entry key="student1" value-ref="s1"/>
      <entry key="student2" value-ref="s2"/>
    </map>
  </property>
</bean>
<bean id="s1" class="com.itbaizhan.domain.Student">
  <property name="id" value="1"/>
  <property name="name" value="尚学堂"/>
  <property name="address" value="北京"/>
</bean>
<bean id="s2"class="com.itbaizhan.domain.Student">
  <property name="id" value="2"/>
  <property name="name" value="百战"/>
  <property name="address" value="北京"/>
</bean>
注入Properties对象
注入Properties对象
<bean id="studentService" class="com.itbaizhan.service.StudentService">
  <property name="properties">
    <props>
      <prop key="配置1">值1</prop>
      <prop key="配置2">值2</prop>
    </props>
  </property>
</bean>
注解实现IOC
准备工作
注解配置和xml配置对于Spring的IOC要实现的功能都是一样的,只是配置的形式不一样。
- 创建一个新的Spring项目。
- 编写pojo,dao,service类。
- 编写空的配置文件,如果想让该文件支持注解,需要添加新的约束:
<?xml version="1.0" encoding="UTF-8"?>
<beans xmlns="http://www.springframework.org/schema/beans"
xmlns:context="http://www.springframework.org/schema/context"
xmlns:xsi="http://www.w3.org/2001/XMLSchema-instance"
xsi:schemaLocation="http://www.springframework.org/schema/beans
http://www.springframework.org/schema/beans/spring-beans.xsd
Index of /schema/context
http://www.springframework.org/schema/context/spring-context.xsd">
</beans>
@Component
作用:用于创建对象,放入Spring容器,相当于<bean id="" class="">
位置:类上方
@Component
public class StudentService {
    private StudentDao studentDao;

    public StudentDao getStudentDao() {
        return studentDao;
    }

    public void setStudentDao(StudentDao studentDao) {
        this.studentDao = studentDao;
    }

    public StudentService(StudentDao studentDao) {
        this.studentDao = studentDao;
    }

    public StudentService() {
    }
}
测试:
public class TestContainer {
    @Test
    public void t1(){
        //创建Spring容器
        ApplicationContext ac = new ClassPathXmlApplicationContext("bean.xml");
        //获取对象
        StudentService studentService = (StudentService) ac.getBean("studentService");
        System.out.println(studentService);
    }
}

注意:
- 要在配置文件中配置扫描的包,扫描到该注解才能生效。
<context:component-scan base-package="com.itbaizhan"></context:component-scan> - @Component注解配置bean的默认id是首字母小写的类名。
也可以手动设置bean的id值。
@Repository、@Service、@Controller
作用:这三个注解和@Component的用法和作用一样,
使用它们是为了区分该类属于什么层。
位置:
- @Repository用于Dao层
- @Service用于Service层
- @Controller用于Controller层
@Scope
作用:指定bean的创建策略
位置:类上方
取值:
singleton
prototype
request
session
globalsession
@Autowried
作用:从容器中查找符合属性类型的对象自动注入属性中。用于代替<bean>中的依赖注入配置。
位置:属性上方、setter方法上方、构造方法上方。
注意:
- @Autowired写在属性上方进行依赖注入时,可以省略setter方法
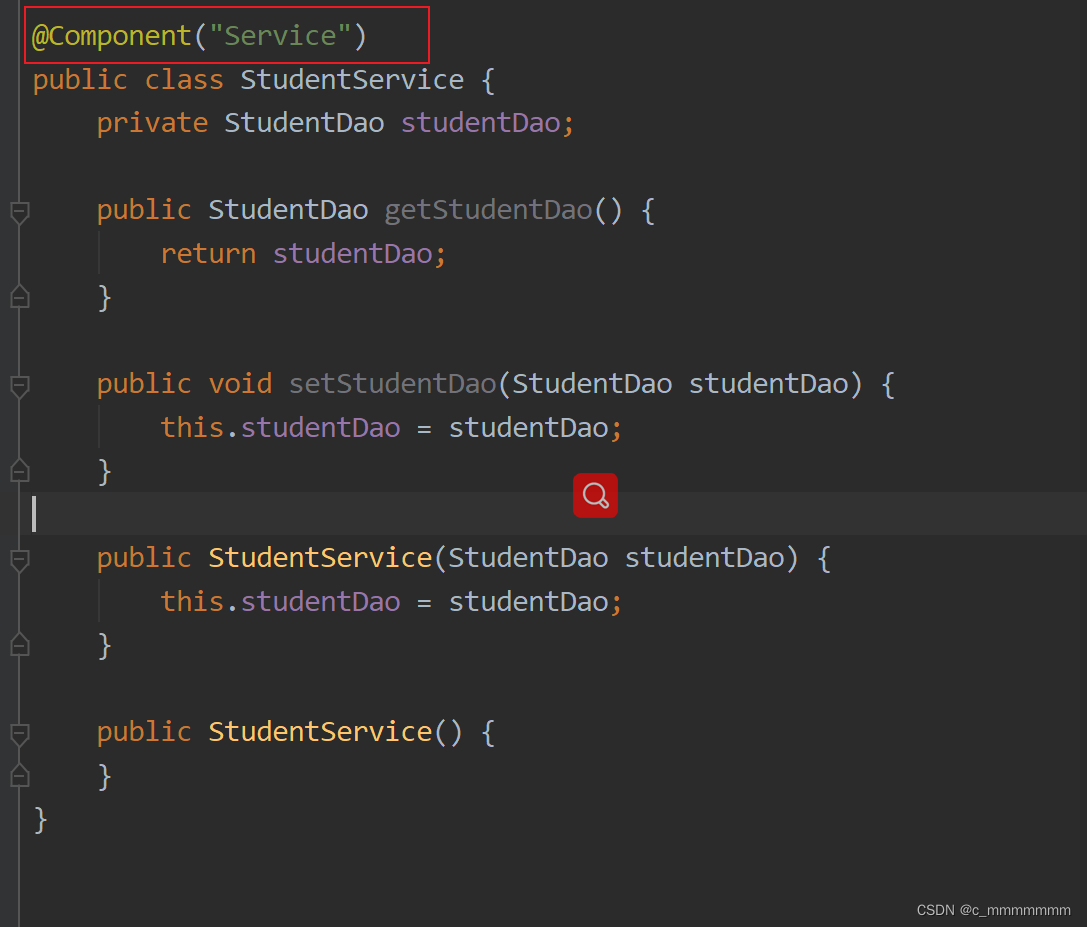
@Component("Service")
public class StudentService {

    @Autowired
    private StudentDao studentDao;

    public StudentDao getStudentDao() {
        return studentDao;
    }

    public void setStudentDao(StudentDao studentDao) {
        this.studentDao = studentDao;
    }


    public StudentService(StudentDao studentDao) {
        this.studentDao = studentDao;
    }

    public StudentService() {
    }

    @Override
    public String toString() {
        return "StudentService{" +
                "studentDao=" + studentDao +
                '}';
    }
}
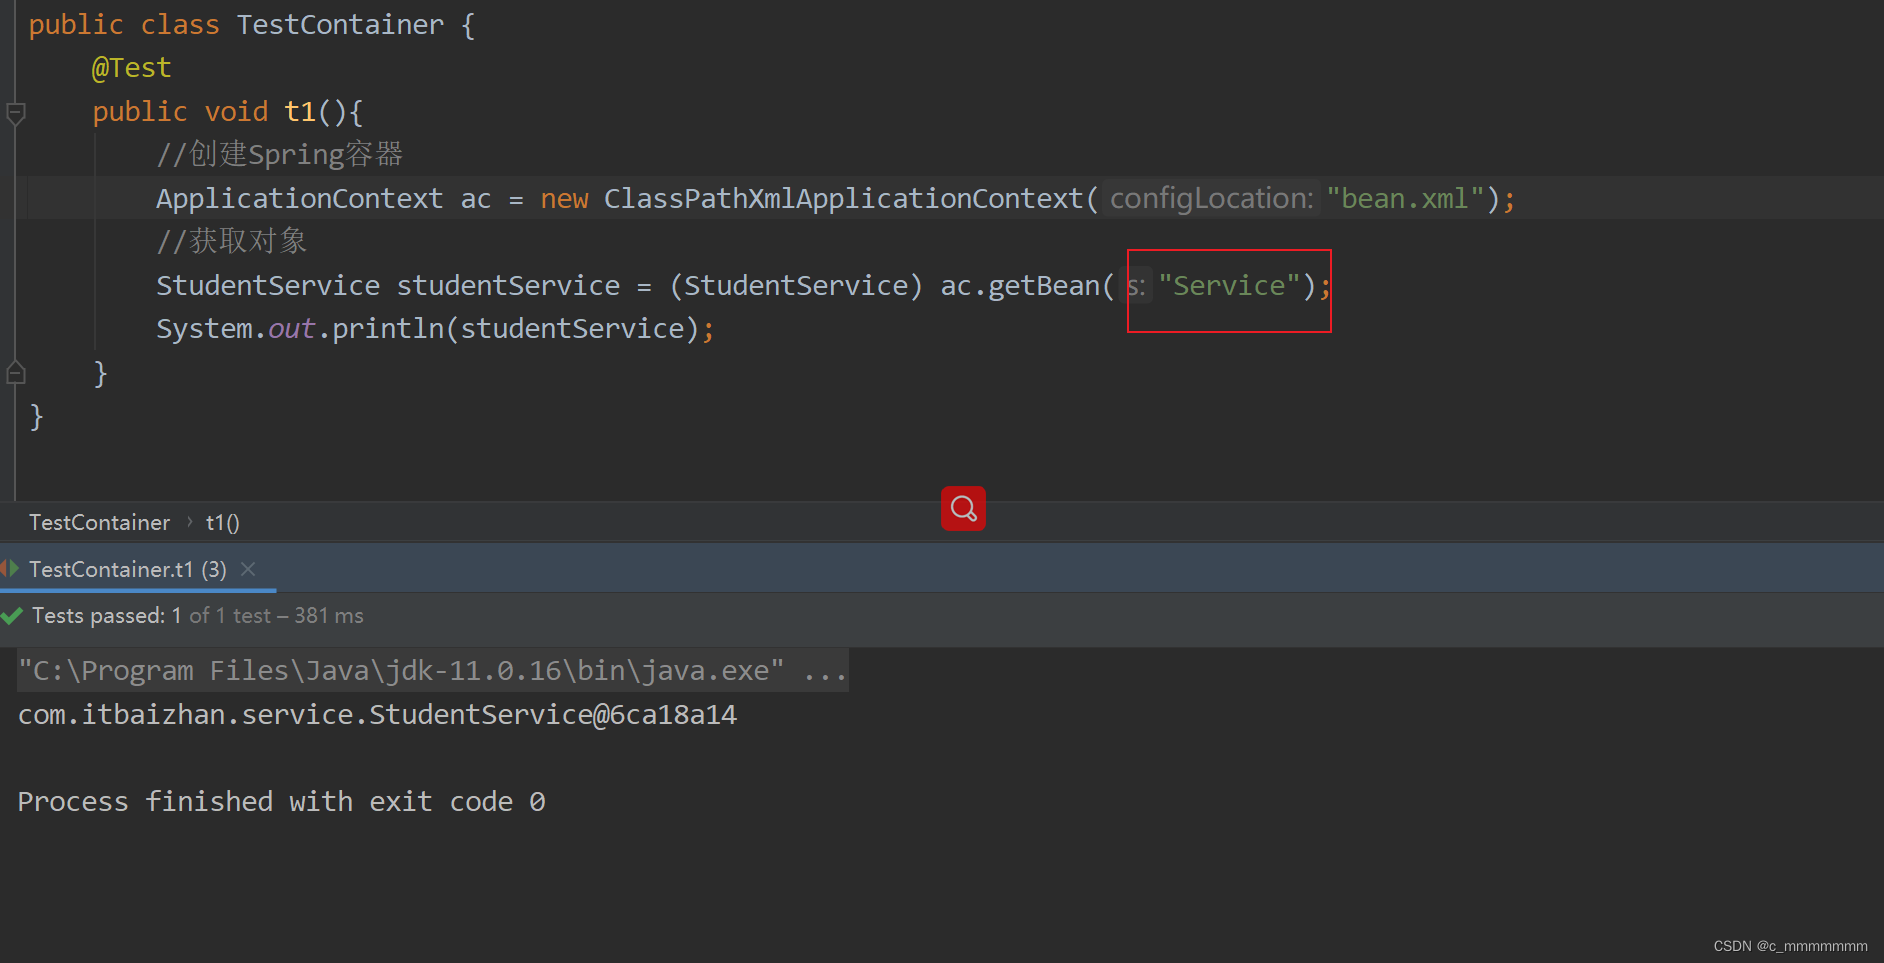
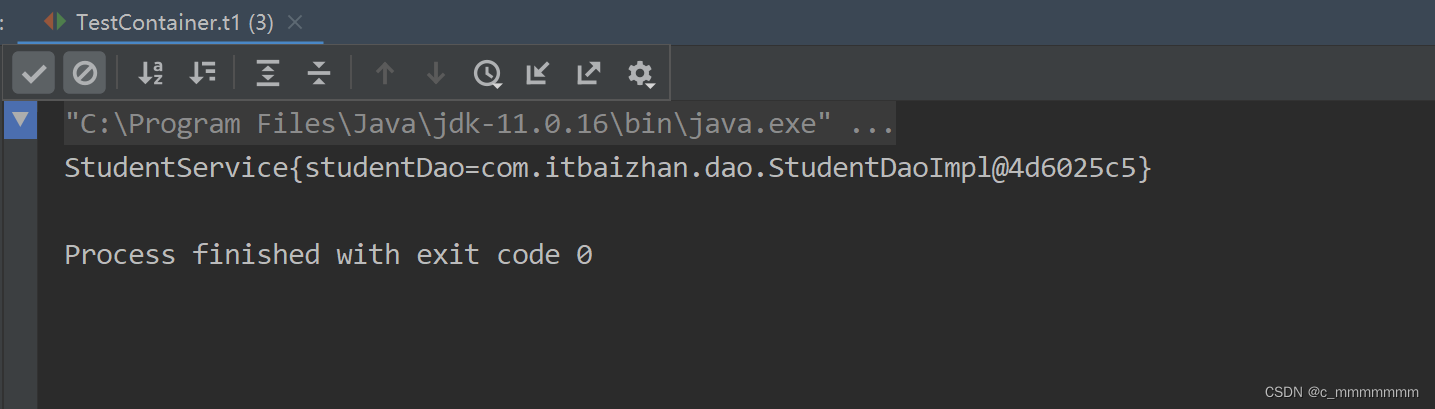
测试
public class TestContainer {
    @Test
    public void t1(){
        //创建Spring容器
        ApplicationContext ac = new ClassPathXmlApplicationContext("bean.xml");
        //获取对象
        StudentService studentService = (StudentService) ac.getBean("Service");
        System.out.println(studentService);
    }
}
2. 容器中没有对应类型的对象会报错
// 如果StudentDaoImpl没有放到容器中会报错
//@Component("studentDao")
public class StudentDaoImpl implements StudentDao{
  public StudentfindById(int id) {
    // 模拟根据id查询学生
    return new Student(1,"百战程序员","北京");
   }
}

3. 容器中有多个对象匹配类型时,会找beanId等于属性名的对象,找不到会报错。
// 如果容器中都多个同类型对象,会根据id值等于属性名找对象
@Component("studentDao")
public class StudentDaoImpl implements StudentDao{
  public Student findById(int id) {
    // 模拟根据id查询学生
    return new Student(1,"百战程序员","北京");
   }
}
@Component
public class StudentDaoImpl2 implements StudentDao{
  public Student findById(int id) {
    // 模拟根据id查询学生
    return new Student(1,"百战程序员","北京");
   }
}
@Qualifier
作用:在按照类型注入对象的基础上,再按照bean的id注入。
位置:属性上方
注意:@Qualifier必须和@Autowired一起使用。
@Component
public class StudentService{
  @Autowired
  @Qualifier("studentDaoImpl2")
  private StudentDao studentDao;
  public Student findStudentById(int id){
    return student Dao.findById(id);
   }
}
@Value
作用:注入String类型和基本数据类型的属性值。
位置:属性上方
用法:
直接设置固定的属性值
@Service
public class StudentService{
  @Value("1")
  private int count;
  @Value("hello")
  private String str;
}
@Configuration
bean.xml,使用纯注解实现IOC。
在真实开发中,我们一般还是会保留xml配置文件,很多情况下使用配置文件更加方便。
纯注解实现IOC需要一个Java类代替xml文件。这个Java类上方需要添加@Configuration,表示该类是一个配置类,作用是代替配置文件。
@Configuration
public class SpringConfig{

}
@ComponentScan
作用:指定spring在初始化容器时扫描的包。
位置:配置类上方
@Configuration
@ComponentScan("com.itbaizhan")
public class SpringConfig{
}
@PropertySource
作用:代替配置文件中的<context:property-placeholder>扫描配置文件
位置:配置类上方
注意:配置文件位置前要加关键字classpath
@Configuration
@PropertySource("classpath:db.properties")
public class SpringConfig{
}
@Bean
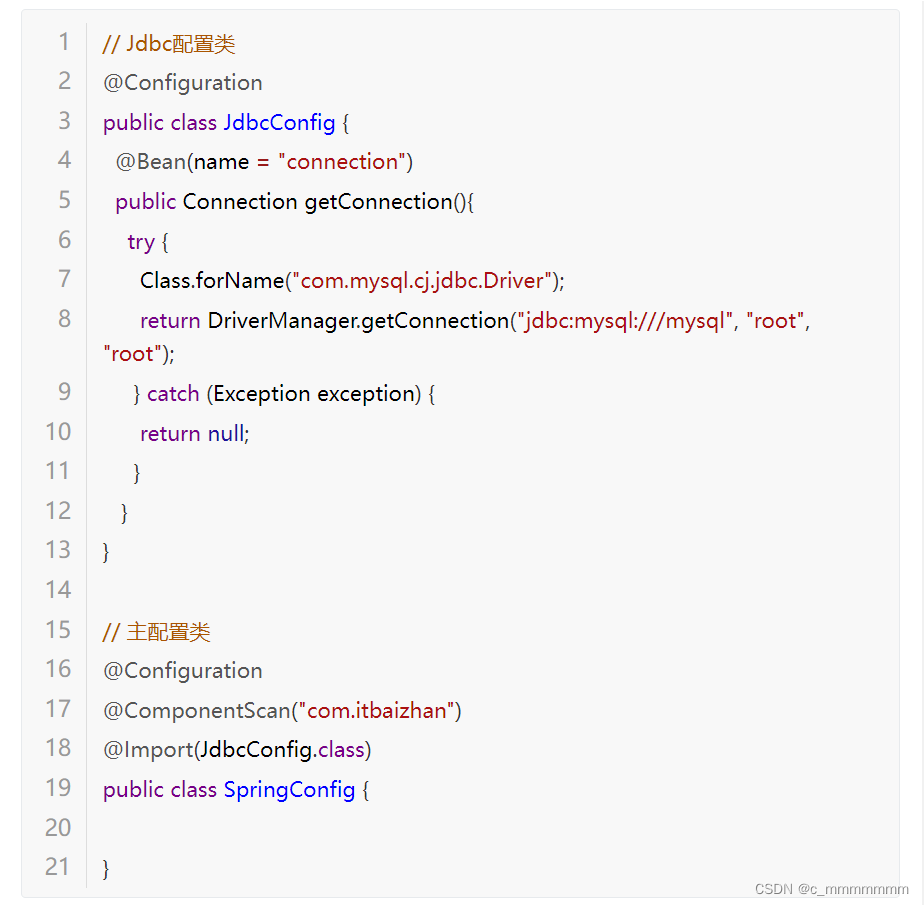
作用:将方法的返回值对象放入Spring容器中。如果想将第三方类的对象放入容器,可以使用@Bean
位置:配置类的方法上方。
属性:name:给bean对象设置id
注意:@Bean修饰的方法如果有参数,spring会根据参数类型从容器中查找可用对象。
举例:如果想将jdbc连接对象放入Spring容器,我们无法修改Connection源码添加@Component,此时就需要使用将@Bean该对象放入Spring容器
1. 添加驱动依赖
<dependency>
  <groupId>mysql</groupId>
  <artifactId>mysql-connector-java</artifactId>
  <version>8.0.27</version>
</dependency>
2. 将Connection对象放入Spring容器
@Bean(name="connection")
public Connection getConnection(){
  try{
    Class.forName("com.mysql.cj.jdbc.Driver");
    return DriverManager.getConnection("jdbc:mysql:///mysql", "root", "root");
   } catch(Exceptionexception) {
    return null;
   }
}
@Import
作用:如果配置过多,会有多个配置类,该注解可以为主配置类导入其他配置类
位置:主配置类上方


 3416
3416


 被折叠的 条评论
为什么被折叠?
被折叠的 条评论
为什么被折叠?
 到【灌水乐园】发言


