


代码地址:https://github.com/MisterChegy/hibernate.git
IDE:eclipse(Java EE)
环境:JDK1.8
Hibernate:5.01
数据库:MySQL5.7
一、Hibernate 工作原理

二、Eclipse实现hibernate反向工程
转载:Eclipse实现hibernate反向工程:从数据库逆向生成实体类和hbm文件
转载:eclipse 逆向工程生成hibernate实体类(注解或配置文件)
注解方式:

逆向工程作用:
1,通过数据库表逆向生成实体
2,注解和表这间的关系也会生成
三、第一个 Hibernate 程序
1、定义持久化对象(PO)
@Entity
@Table(name = "student", catalog = "test")
public class Student implements java.io.Serializable {

	private int sid;
	private String sname;

	public Student() {
	}

	public Student(int sid) {
		this.sid = sid;
	}

	public Student(int sid, String sname) {
		this.sid = sid;
		this.sname = sname;
	}

	@Id
	@Column(name = "sid", unique = true, nullable = false)
	public int getSid() {
		return this.sid;
	}

	public void setSid(int sid) {
		this.sid = sid;
	}

	@Column(name = "sname", length = 45)
	public String getSname() {
		return this.sname;
	}

	public void setSname(String sname) {
		this.sname = sname;
	}

}
2、配置映射文件(注解方式和xml等同,这里在实体中用注解实现,不用配置)
配置映射文件,即配置两个关系:实体类与数据库中表的映射关系,属性与表中字段
的映射关系。
3、配置主配置文件(hibernate.cfg.xml)
<?xml version="1.0" encoding="UTF-8"?>
<!DOCTYPE hibernate-configuration PUBLIC
"-//Hibernate/Hibernate Configuration DTD 3.0//EN"
"http://www.hibernate.org/dtd/hibernate-configuration-3.0.dtd">
<hibernate-configuration>
<session-factory>
<property name="myeclipse.connection.profile">test</property>
<property name="dialect">org.hibernate.dialect.MySQL5Dialect</property>
<property name="connection.password">xxxx</property>
<property name="connection.username">root</property>
<property name="connection.url">
jdbc:mysql://localhost:3306/test?useSSL=true&useUnicode=true&characterEncoding=UTF8
</property>
<property name="connection.driver_class">
com.mysql.jdbc.Driver
</property>
<property name="format_sql">true</property>
<property name="show_sql">true</property>
<property name="hbm2ddl.auto">update</property>
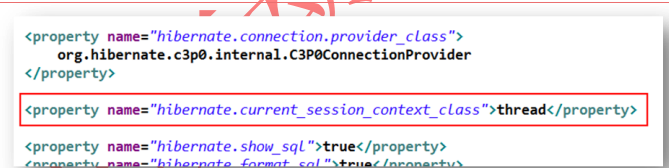
<property name="current_session_context_class">thread</property>
<mapping class="model.Student" />
</session-factory>
</hibernate-configuration>
Unicode=true&characterEncoding=UTF8是解决
4、创建数据库
5、定义测试类

6、修改测试类
通过 openSession()方式获取到的 Session 无法保证在同一个线程中使用的为同一个
Session,因为每执行一次 openSession(),都会创建一个新的 Session 对象。改变 Session 的
获取方式为 getCurrentSession(),会保证每个线程中的 Session 对象为同一个 Session。
注意,该方式获取到的 Session,必须在事务内执行,无论是增、删、改,还是查询。
且其无需再手工关闭 Session 对象,而是在事务提交或回滚后,自动将 Session 关闭了。

7、修改主配置文件
通过 getCurrentSession()获取 Session,需要在主配置文件中对 Session 所处的上下文环
境,即事务环境进行注册。这里指定其上下文件事务环境为线程,即一个线程一个事务。(上面配置完全)


 467
467


 被折叠的 条评论
为什么被折叠?
被折叠的 条评论
为什么被折叠?
 到【灌水乐园】发言


