


Netty 为了向使用者屏蔽 NIO 通信的底层细节,在和用户交互的边界做了封装,目的就是为了减少用户开发工作量,降低开发难度。Bootstrap 是 Socket客户端创建工具类,用户通过 Bootstrap 可以方便的创建 Netty 的客户端并发起异步 TCP 连接操作。
客户端代码示例:
package netty.netty5.client;

import java.io.BufferedReader;
import java.io.InputStreamReader;

import io.netty.bootstrap.Bootstrap;
import io.netty.channel.Channel;
import io.netty.channel.ChannelFuture;
import io.netty.channel.ChannelInitializer;
import io.netty.channel.EventLoopGroup;
import io.netty.channel.nio.NioEventLoopGroup;
import io.netty.channel.socket.nio.NioSocketChannel;
import io.netty.handler.codec.string.StringDecoder;
import io.netty.handler.codec.string.StringEncoder;

/**
 * netty5的客户端
 * @author -琴兽-
 *
 */
public class Client {

	public static void main(String[] args) {
		//服务类
		Bootstrap bootstrap = new Bootstrap();

		//worker
		EventLoopGroup worker = new NioEventLoopGroup();

		try {
			//设置线程池
			bootstrap.group(worker);

			//设置socket工厂、
			bootstrap.channel(NioSocketChannel.class);

			//设置管道
			bootstrap.handler(new ChannelInitializer<Channel>() {

				@Override
				protected void initChannel(Channel ch) throws Exception {
					ch.pipeline().addLast(new StringDecoder());
					ch.pipeline().addLast(new StringEncoder());
					ch.pipeline().addLast(new ClientHandler());
				}
			});

			ChannelFuture connect = bootstrap.connect("127.0.0.1", 10101);

			BufferedReader bufferedReader = new BufferedReader(new InputStreamReader(System.in));
			while(true){
				System.out.println("请输入:");
				String msg = bufferedReader.readLine();
				connect.channel().writeAndFlush(msg);
			}

		} catch (Exception e) {
			 e.printStackTrace();
		} finally{
			worker.shutdownGracefully();
		}
	}
}
package netty.netty5.client;

import io.netty.channel.ChannelHandlerContext;
import io.netty.channel.SimpleChannelInboundHandler;
/**
 * 客户端消息处理
 * @author -琴兽-
 *
 */
public class ClientHandler extends SimpleChannelInboundHandler<String> {

	@Override
	protected void messageReceived(ChannelHandlerContext ctx, String msg) throws Exception {
		System.out.println("客户端收到消息:"+msg);
	}

}
3.1 Netty客户端创建时序图
步骤 1:用户线程创建 Bootstrap实例,通过 API设置创建客户端相关的参数,异步发起客户端连接。
步 骤 2: 创 建 处 理 客 户 端 连 接、I/O 读 写 的 Reactor 线 程 组NioEventLoopGroup, 可以通过构造函数指定 I/O 线程的个数,默认为 CPU 内核数的 2 倍;
步骤 3:通过 Bootstrap 的 ChannelFactory 和用户指定的 Channel 类型创建用于客户端连接的 NioSocketChannel,它的功能类似于 JDK NIO 类库提供的SocketChannel;
步骤 4:创建默认的 Channel Handler Pipeline,用于调度和执行网络事件;
步骤 5:异步发起 TCP 连接,判断连接是否成功,如果成功,则直接将NioSocketChannel 注册到多路复用器上,监听读操作位,用于数据报读取和消息发送;如果没有立即连接成功,则注册连接监听位到多路复用器,等待连接结果;
步骤 6:注册对应的网络监听状态位到多路复用器;
步骤 7:由多路复用器在 I/O 现场中轮询各 Channel,处理连接结果;
步骤 8:如果连接成功,设置 Future 结果,发送连接成功事件,触发ChannelPipeline 执行;
步骤 9:由 ChannelPipeline 调度执行系统和用户的 ChannelHandler,执行业务逻辑。
3.2 Netty客户端创建源码分析
首 先, 创 建 Bootstrap 的 实 例, 类 似 ServerBootstrap, 客 户 端 也 使 用Builder 模式来构造。对于客户端,由于它不需要监听和处理来自客户端的连接,所以,只需要一个 Reactor 线程组即可,完成连接辅助类和 Reactor 线程组的初始化操作后,继续设置发起连接的Channel 为 NioSocketChannel
代码如下:
//服务类
Bootstrap bootstrap = new Bootstrap();

//worker
EventLoopGroup worker = new NioEventLoopGroup();

//设置线程池
bootstrap.group(worker);

//设置socket工厂、
bootstrap.channel(NioSocketChannel.class);
如 同 服 务 端 启 动 辅 助 类, 客 户 端 辅 助 类 采 用 工 厂 模 式 创 建NioSocketChannel,BootstrapChannelFactory 是 Bootstrap 的内部静态工厂类,用于根据 Channel 的类型和构造函数反射创建新的 NioSocketChannel,代码如下所示:
    public ReflectiveChannelFactory(Class<? extends T> clazz) {
        if (clazz == null) {
            throw new NullPointerException("clazz");
        }
        this.clazz = clazz;
    }

    @Override
    public T newChannel() {
        try {
            return clazz.newInstance();
        } catch (Throwable t) {
            throw new ChannelException("Unable to create Channel from class " + clazz, t);
        }
    }
Channel 工厂初始化完成后,设置 TCP 参数,然后设置 Handler,由于此时 NioSocketChannel 还没有真正创建,所以,PipeLine 也没有创建,Netty预置一个负责创建业务 Handler 的初始化 Hanlder 工厂到启动辅助类中,当initChannel 方法被执行时再创建业务 Handler,代码如下:
//设置管道
bootstrap.handler(new ChannelInitializer<Channel>() {

    @Override
    protected void initChannel(Channel ch) throws Exception {
        ch.pipeline().addLast(new StringDecoder());
        ch.pipeline().addLast(new StringEncoder());
        ch.pipeline().addLast(new ClientHandler());
    }
});
一切准备就绪后,发起连接操作,代码如下:
    /**
     * @see {@link #connect()}
     */
    private ChannelFuture doResolveAndConnect(SocketAddress remoteAddress, final SocketAddress localAddress) {
        final ChannelFuture regFuture = initAndRegister();
        if (regFuture.cause() != null) {
            return regFuture;
        }

        final Channel channel = regFuture.channel();
        final EventLoop eventLoop = channel.eventLoop();
        final NameResolver<SocketAddress> resolver = this.resolver.getResolver(eventLoop);

        if (!resolver.isSupported(remoteAddress) || resolver.isResolved(remoteAddress)) {
            // Resolver has no idea about what to do with the specified remote address or it's resolved already.
            return doConnect(remoteAddress, localAddress, regFuture, channel.newPromise());
        }

        final Future<SocketAddress> resolveFuture = resolver.resolve(remoteAddress);
        final Throwable resolveFailureCause = resolveFuture.cause();

        if (resolveFailureCause != null) {
            // Failed to resolve immediately
            channel.close();
            return channel.newFailedFuture(resolveFailureCause);
        }

        if (resolveFuture.isDone()) {
            // Succeeded to resolve immediately; cached? (or did a blocking lookup)
            return doConnect(resolveFuture.getNow(), localAddress, regFuture, channel.newPromise());
        }

        // Wait until the name resolution is finished.
        final ChannelPromise connectPromise = channel.newPromise();
        resolveFuture.addListener(new FutureListener<SocketAddress>() {
            @Override
            public void operationComplete(Future<SocketAddress> future) throws Exception {
                if (future.cause() != null) {
                    channel.close();
                    connectPromise.setFailure(future.cause());
                } else {
                    doConnect(future.getNow(), localAddress, regFuture, connectPromise);
                }
            }
        });

        return connectPromise;
    }
第一步,初始化 NioSocketChannel,设置 TCP 参数,注册 SocketChannel到 Reactor 线程的多路复用器中
final Channel channel = channelFactory().newChannel();初始化 NioSocketChannel,将预置的 Hanlder 加入到 NioSocketChannel 的PipeLine 中,设置客户端连接的 TCP 参数发起注册操作,注册操作在创建服务端的时候已经详细讲解过,这里不再重复。
第二步:判断 NioSocketChannel 是否注册成功,由于是异步注册,通常返回是 False,执行第三步操作,当 NioSocketChannel 注册成功后,发起异步连接操作
    @Override
    @SuppressWarnings("unchecked")
    void init(Channel channel) throws Exception {
        ChannelPipeline p = channel.pipeline();
        p.addLast(handler());

        final Map<ChannelOption<?>, Object> options = options();
        synchronized (options) {
            for (Entry<ChannelOption<?>, Object> e: options.entrySet()) {
                try {
                    if (!channel.config().setOption((ChannelOption<Object>) e.getKey(), e.getValue())) {
                        logger.warn("Unknown channel option: " + e);
                    }
                } catch (Throwable t) {
                    logger.warn("Failed to set a channel option: " + channel, t);
                }
            }
        }

        final Map<AttributeKey<?>, Object> attrs = attrs();
        synchronized (attrs) {
            for (Entry<AttributeKey<?>, Object> e: attrs.entrySet()) {
                channel.attr((AttributeKey<Object>) e.getKey()).set(e.getValue());
            }
        }
    }
private static void doBind0(
final ChannelFuture regFuture, final Channel channel,
final SocketAddress localAddress, final ChannelPromise promise) {
// This method is invoked before channelRegistered() is triggered. Give user handlers a chance to set up
// the pipeline in its channelRegistered() implementation.
channel.eventLoop().execute(new Runnable() {
@Override
public void run() {
if (regFuture.isSuccess()) {
channel.bind(localAddress, promise).addListener(ChannelFutureListener.CLOSE_ON_FAILURE);
} else {
promise.setFailure(regFuture.cause());
}
}
});
}根据客户端是否指定本地绑定地址执行不同的分支,下面具体分析AbstractChannel 发起的连接操作,代码如下:
    @Override
    public ChannelFuture connect(SocketAddress remoteAddress, SocketAddress localAddress, ChannelPromise promise) {
        return pipeline.connect(remoteAddress, localAddress, promise);
    }
首先调用 NioSocketChannel 的 PipeLine,执行连接操作 , 最终会调用到HeadHandler 的 connect 方法,代码如下:
        @Override
        public void connect(
                ChannelHandlerContext ctx,
                SocketAddress remoteAddress, SocketAddress localAddress,
                ChannelPromise promise) throws Exception {
            unsafe.connect(remoteAddress, localAddress, promise);
        }
@Override
public final void connect(
final SocketAddress remoteAddress, final SocketAddress localAddress, final ChannelPromise promise) {
if (!promise.setUncancellable() || !ensureOpen(promise)) {
return;
}
try {
if (connectPromise != null) {
throw new IllegalStateException("connection attempt already made");
}
boolean wasActive = isActive();
if (doConnect(remoteAddress, localAddress)) {
fulfillConnectPromise(promise, wasActive);
} else {
connectPromise = promise;
requestedRemoteAddress = remoteAddress;
// Schedule connect timeout.
int connectTimeoutMillis = config().getConnectTimeoutMillis();
if (connectTimeoutMillis > 0) {
connectTimeoutFuture = eventLoop().schedule(new OneTimeTask() {
@Override
public void run() {
ChannelPromise connectPromise = AbstractNioChannel.this.connectPromise;
ConnectTimeoutException cause =
new ConnectTimeoutException("connection timed out: " + remoteAddress);
if (connectPromise != null && connectPromise.tryFailure(cause)) {
close(voidPromise());
}
}
}, connectTimeoutMillis, TimeUnit.MILLISECONDS);
}
promise.addListener(new ChannelFutureListener() {
@Override
public void operationComplete(ChannelFuture future) throws Exception {
if (future.isCancelled()) {
if (connectTimeoutFuture != null) {
connectTimeoutFuture.cancel(false);
}
connectPromise = null;
close(voidPromise());
}
}
});
}
} catch (Throwable t) {
promise.tryFailure(annotateConnectException(t, remoteAddress));
closeIfClosed();
}
}首先获取当前的连接状态进行缓存,然后发起连接操作,代码如下:
    @Override
    protected boolean doConnect(SocketAddress remoteAddress, SocketAddress localAddress) throws Exception {
        if (localAddress != null) {
            javaChannel().socket().bind(localAddress);
        }

        boolean success = false;
        try {
            boolean connected = javaChannel().connect(remoteAddress);
            if (!connected) {
                selectionKey().interestOps(SelectionKey.OP_CONNECT);
            }
            success = true;
            return connected;
        } finally {
            if (!success) {
                doClose();
            }
        }
    }
大家需要注意的是,SocketChannel 执行 connect() 操作后有三种结果:
• 连接成功,返回True;
• 暂时没有连接上,服务端没有返回ACK应答,连接结果不确定,返回False;
• 连接失败,直接抛出I/O异常。
如果是第二种结果,需要将 NioSocketChannel 中的 selectionKey 设置为OP_CONNECT,监听连接结果。
异 步 连 接 返 回 后, 需 要 判 断 连 接 结 果, 如 果 连 接 成 功, 则触发ChannelActive 事件,代码如下:
        private void fulfillConnectPromise(ChannelPromise promise, boolean wasActive) {
            if (promise == null) {
                // Closed via cancellation and the promise has been notified already.
                return;
            }

            // trySuccess() will return false if a user cancelled the connection attempt.
            boolean promiseSet = promise.trySuccess();

            // Regardless if the connection attempt was cancelled, channelActive() event should be triggered,
            // because what happened is what happened.
            if (!wasActive && isActive()) {
                pipeline().fireChannelActive();
            }

            // If a user cancelled the connection attempt, close the channel, which is followed by channelInactive().
            if (!promiseSet) {
                close(voidPromise());
            }
        }
ChannelActive 事件处理在前面章节已经详细说明,最终会将 NioSocketChannel 中的 selectionKey 设置为 SelectionKey.OP_READ,用于监听网络读操作。
如果没有立即连接上服务端,则执行如下分支:
                } else {
                    connectPromise = promise;
                    requestedRemoteAddress = remoteAddress;

                    // Schedule connect timeout.
                    int connectTimeoutMillis = config().getConnectTimeoutMillis();
                    if (connectTimeoutMillis > 0) {
                        connectTimeoutFuture = eventLoop().schedule(new OneTimeTask() {
                            @Override
                            public void run() {
                                ChannelPromise connectPromise = AbstractNioChannel.this.connectPromise;
                                ConnectTimeoutException cause =
                                        new ConnectTimeoutException("connection timed out: " + remoteAddress);
                                if (connectPromise != null && connectPromise.tryFailure(cause)) {
                                    close(voidPromise());
                                }
                            }
                        }, connectTimeoutMillis, TimeUnit.MILLISECONDS);
                    }

                    promise.addListener(new ChannelFutureListener() {
                        @Override
                        public void operationComplete(ChannelFuture future) throws Exception {
                            if (future.isCancelled()) {
                                if (connectTimeoutFuture != null) {
                                    connectTimeoutFuture.cancel(false);
                                }
                                connectPromise = null;
                                close(voidPromise());
                            }
                        }
                    });
                }
上面的操作有两个目的:
根据连接超时事件设置定时任务,超时时间到之后触发校验,如果发现连接并没有完成,则关闭连接句柄,释放资源,设置异常堆栈并发起去注册;设置连接结果监听器,如果接收到连接完成通知则判断连接是否被取消,如果被取消则关闭连接句柄,释放资源,发起取消注册操作。
当服务端返回 ACK 应答后,触发 Selector 轮询出就绪的 SocketChannel,代码如下:
    private static void processSelectedKey(SelectionKey k, AbstractNioChannel ch) {
        final AbstractNioChannel.NioUnsafe unsafe = ch.unsafe();
        if (!k.isValid()) {
            // close the channel if the key is not valid anymore
            unsafe.close(unsafe.voidPromise());
            return;
        }

        try {
            int readyOps = k.readyOps();
            // Also check for readOps of 0 to workaround possible JDK bug which may otherwise lead
            // to a spin loop
            if ((readyOps & (SelectionKey.OP_READ | SelectionKey.OP_ACCEPT)) != 0 || readyOps == 0) {
                unsafe.read();
                if (!ch.isOpen()) {
                    // Connection already closed - no need to handle write.
                    return;
                }
            }
            if ((readyOps & SelectionKey.OP_WRITE) != 0) {
                // Call forceFlush which will also take care of clear the OP_WRITE once there is nothing left to write
                ch.unsafe().forceFlush();
            }
            if ((readyOps & SelectionKey.OP_CONNECT) != 0) {
                // remove OP_CONNECT as otherwise Selector.select(..) will always return without blocking
                // See https://github.com/netty/netty/issues/924
                int ops = k.interestOps();
                ops &= ~SelectionKey.OP_CONNECT;
                k.interestOps(ops);

                unsafe.finishConnect();
            }
        } catch (CancelledKeyException ignored) {
            unsafe.close(unsafe.voidPromise());
        }
    }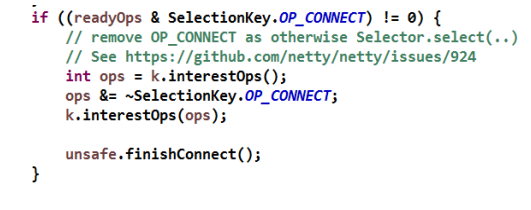
首先将 OP_CONNECT 从 selector 上摘除掉,然后调用 AbstractNioChannel的 finishConnect 方法,判断异步连接的结果,代码如下:
    @Override
    protected void doFinishConnect() throws Exception {
        if (!javaChannel().finishConnect()) {
            throw new Error();
        }
    }
通过 SocketChannel 的 finishConnect 方法判断连接结果,执行该方法返回三种结果:
• 连接成功返回True;
• 连接失败返回False;
• 发生链路被关闭、链路中断等异常,连接失败。
只要连接失败,就抛出 Error(),由调用方执行句柄关闭等资源释放操作,如果返回成功,则执行 fulfillConnectPromise 方法,该方法之前已经介绍过,它负责将 SocketChannel 修改为读操作,用来监听网络的读事件,代码如下:
        private void fulfillConnectPromise(ChannelPromise promise, boolean wasActive) {
            if (promise == null) {
                // Closed via cancellation and the promise has been notified already.
                return;
            }

            // trySuccess() will return false if a user cancelled the connection attempt.
            boolean promiseSet = promise.trySuccess();

            // Regardless if the connection attempt was cancelled, channelActive() event should be triggered,
            // because what happened is what happened.
            if (!wasActive && isActive()) {
                pipeline().fireChannelActive();
            }

            // If a user cancelled the connection attempt, close the channel, which is followed by channelInactive().
            if (!promiseSet) {
                close(voidPromise());
            }
        }
如果连接超时时仍然没有接收到服务端的 ACK 应答消息,则由定时任务关闭客户端连接,将 SocketChannel 从 Reactor 线程的多路复用器上摘除,释放资源。
备注:本文参考《深入浅出Netty》,作者:李林锋


 8421
8421


 被折叠的 条评论
为什么被折叠?
被折叠的 条评论
为什么被折叠?
 到【灌水乐园】发言


