


Introduction
Nacos is a beneficial tool for dynamic naming and configuration setting in Microservices. Developed by Alibaba in the early 2010s, Nacos was fast adopted by plenty of big web companies like Alibaba and Tencent. This tutorial will introduce the usage and function of Nacos in practical examples.
Installation
Nacos supports all main-stream platforms like Windows and Linux; It also could be deployed on docker for more straightforward usage. You can visit Nacos official GitHub website (https://github.com/alibaba/nacos) for more information. Here, I will use Windows as an example.
After unzipping the installation file, we can find many different kinds of configuration files. Firstly, we should open the application file using a text editor.
#*************** Spring Boot Related Configurations ***************#
### Default web context path:
server.servlet.contextPath=/nacos
### Default web server port:
server.port=8848
The server port is what we need to remember to log in Nacos server. 8848 is the default port which is the altitude of Mountain Everest.
Afterward, we can enter the Nacos server in the browser using http://localhost:8848/nacos.
Java Code
After starting our Nacos server, we can open serval Tomcat servers in Java.
spring:
  cloud:
    nacos:
      discovery:
        server-addr: 127.0.0.1:8848
        username: nacos
        password: nacos

spring.application.name=nacosone
First, this is the setting needed to connect to the Nacos server. We can attach this to our properties or yaml files. Then the most crucial part is that we need to give each server an application name for the Nacos to identify each one. After starting our nacosone server, we can visit Nacos index to see what happened.
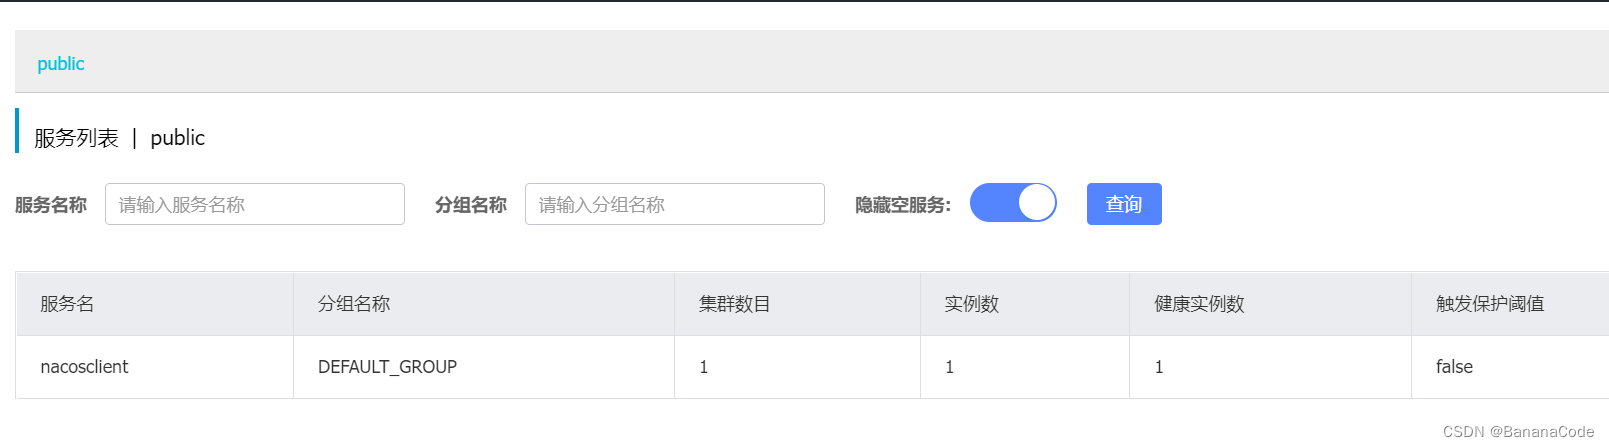
Here, we can see the server name, group name and the number of servers within the same name. The reason why we can assign the same name on different servers is that we can apply load balance using Nacos.
Load Balance
@RestController
public class NginxOneController {

    @GetMapping("three")
    public String three(){
        return  "three";
    }

}

//The code below belongs to another server with the same name


@RestController
public class NginxOneController {

    @GetMapping("three")
    public String three(){
        return  "three3";
    }

}
Here are two bare servers that contain a simple controller. One thing worth mentioning is that those two servers need to have the same application name. Finally, we can use OpenFeign as a tool to do the load-balancing job.
@RestController
public class ClientController {

    @Resource
    private IClientService clientService;

    @GetMapping("testInfo")
    public String test(){
        return clientService.three();
    }


}
There are many other features of Nacos, like exception handling and configuration management. I will talk about them in the following tutorial!


 252
252


 被折叠的 条评论
为什么被折叠?
被折叠的 条评论
为什么被折叠?
 到【灌水乐园】发言


