


WPF 界面布局必知基础
<Window x:Class="WpfApp1728.MainWindow"
        xmlns="http://schemas.microsoft.com/winfx/2006/xaml/presentation"
        xmlns:x="http://schemas.microsoft.com/winfx/2006/xaml"
        xmlns:d="http://schemas.microsoft.com/expression/blend/2008"
        xmlns:mc="http://schemas.openxmlformats.org/markup-compatibility/2006"
        xmlns:local="clr-namespace:WpfApp1728"
        mc:Ignorable="d"
        Title="MainWindow" Height="450" Width="800">

    <!--<DockPanel>
        <Button Content="top Button" DockPanel.Dock="Top" Height="135" Width="370" ></Button>
    </DockPanel>-->
    <Grid ShowGridLines="True">
        <Grid.RowDefinitions>
            <!--行定义 3行4列的定义 -->
            <RowDefinition/>
            <RowDefinition/>
            <RowDefinition/>

        </Grid.RowDefinitions>
        <Grid.ColumnDefinitions>
            <!--列定义-->
            <ColumnDefinition/>
            <ColumnDefinition/>
            <ColumnDefinition/>
            <ColumnDefinition/>
        </Grid.ColumnDefinitions>
        <Button Content="Left Top Button" />
       <!--1 指定行 Grid.Row="2" 2 指定列 Grid.Column="3" 控制按钮的位置。把附加属性用好,就基本够用了。-->
        <Button Content="Right Bottom Top Button" Grid.Row="2" Grid.Column="3" />
    </Grid>
</Window>
<Window x:Class="WpfApp1728.MainWindow"
        xmlns="http://schemas.microsoft.com/winfx/2006/xaml/presentation"
        xmlns:x="http://schemas.microsoft.com/winfx/2006/xaml"
        xmlns:d="http://schemas.microsoft.com/expression/blend/2008"
        xmlns:mc="http://schemas.openxmlformats.org/markup-compatibility/2006"
        xmlns:local="clr-namespace:WpfApp1728"
        mc:Ignorable="d"
        Title="MainWindow" Height="450" Width="800">

    <!--<DockPanel>
        <Button Content="top Button" DockPanel.Dock="Top" Height="135" Width="370" ></Button>
    </DockPanel>-->
    <Grid ShowGridLines="True">
        <Grid.RowDefinitions>
            <!--行定义 3行4列的定义 -->
            <RowDefinition/>
            <RowDefinition/>
            <RowDefinition/>

        </Grid.RowDefinitions>
        <Grid.ColumnDefinitions>
            <!--列定义-->
            <ColumnDefinition/>
            <ColumnDefinition/>
            <ColumnDefinition/>
            <ColumnDefinition/>
        </Grid.ColumnDefinitions>
        <Button Content="Left Top Button" />
       <!--1 指定行 Grid.Row="2" 2 指定列 Grid.Column="3" 控制按钮的位置。把附加属性用好,就基本够用了。-->
        <Button Content="Right Bottom Top Button" Grid.Row="2" Grid.Column="3" />
        <!--跨列设计属性 Grid.ColumnSpan-->
        <Button Content="ColumnSpan Button" Grid.Row="1" Grid.Column="2" Grid.ColumnSpan="2" />
        <!--跨行属性 Grid.RowSpan-->
        <Button Content="RowSpan Button" Grid.Row="0" Grid.Column="1" Grid.RowSpan="3"/>

    </Grid>
</Window>
效果

最小宽度设置,最小压缩设置也叫做。
<Button Content="Left Top Button" MinWidth="80" />
最小宽度
<!--列定义-->
<ColumnDefinition MinWidth="100" Width="*"/>
效果

自适应(到跟文字内容同样的高度) auto代码以及效果
<!--行定义 3行4列的定义 -->
<RowDefinition Height="auto"/>
<RowDefinition Height="auto"/>

内外边距
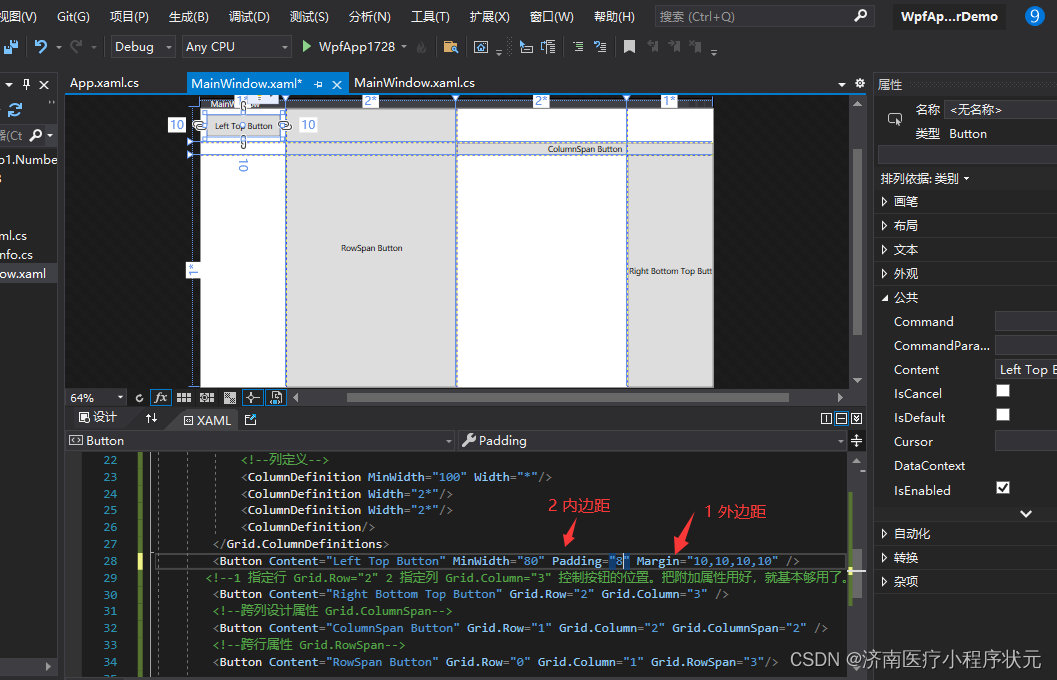
<Button Content="Right Bottom Top Button" Grid.Row="2" Margin="10,10,10,10" Grid.Column="3" />
外边距效果


 349
349


 被折叠的 条评论
为什么被折叠?
被折叠的 条评论
为什么被折叠?
 到【灌水乐园】发言


