


题记:redis在应用做缓存时,是一种良好的解决方案。它数据结构简单,数据存储在内存中,读取速度快。采用单进程单线程的模式,减少了进程and线程之间的切换损耗,避免了死锁问题,言而总之是一个高可用的缓存解决方案。
github地址:https://github.com/dayORday/springbootandredis.git
(1)、windows下安装redis。
下载后解压,如下图所示:

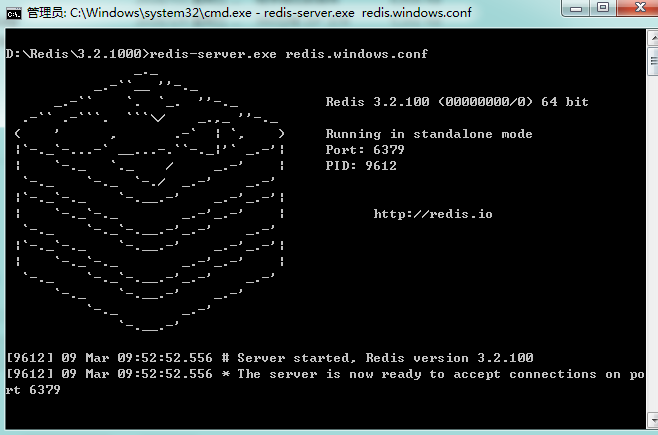
(2),启动redis-server
(3)、启动redis-client

(4)创建spring boot项目

(2)、配置配置文件,添加redis配置类
server.port= 8085

spring.cache.cache-names= cache1,cache2
spring.cache.redis.time-to-live= 600000
# Redis数据库索引(默认为0)
spring.redis.database= 0
# Redis服务器地址
spring.redis.host= 127.0.0.1
# Redis服务器连接端口
spring.redis.port= 6379
# Redis服务器连接密码(默认为空)
spring.redis.password= 123456
# 连接池最大连接数(使用负值表示没有限制)
spring.redis.jedis.pool.max-active= 8
# 连接池最大阻塞等待时间(使用负值表示没有限制)
spring.redis.jedis.pool.max-wait= -1
# 连接池中的最大空闲连接
spring.redis.jedis.pool.max-idle= 8
# 连接池中的最小空闲连接
spring.redis.jedis.pool.min-idle= 0
# 连接超时时间(毫秒)
spring.redis.timeout= 0

## mybatis
spring.datasource.name= tt
spring.datasource.url= jdbc:mysql://127.0.0.1:3306/jfinal_demo?autoReconnect=true&useServerPreparedStmts=false&rewriteBatchedStatements=true&characterEncoding=UTF-8&useSSL=false&allowMultiQueries=true
spring.datasource.username= root
spring.datasource.password= 123456
spring.datasource.type = com.alibaba.druid.pool.DruidDataSource
spring.datasource.driver-class-name= com.mysql.jdbc.Driver
spring.datasource.filters= stat
spring.datasource.maxActive= 20
spring.datasource.initialSize= 1
spring.datasource.maxWait= 60000
spring.datasource.minIdle= 1
spring.datasource.timeBetweenEvictionRunsMillis= 60000
spring.datasource.minEvictableIdleTimeMillis= 300000
spring.datasource.validationQuery= select 'x'
spring.datasource.testWhileIdle= true
spring.datasource.testOnBorrow= false
spring.datasource.testOnReturn= false
spring.datasource.poolPreparedStatements= true
spring.datasource.maxOpenPreparedStatements= 20
mybatis.mapper-locations= classpath:mapping/*.xml
mybatis.type-aliases-package= com.winner.model
配置类(spring boot 2.0不适用)
@Configuration
@EnableCaching
public class RedisConfig extends  CachingConfigurerSupport{
    @Value("${spring.redis.host}")
    private String host;
    @Value("${spring.redis.port}")
    private int port;
    @Value("${spring.redis.timeout}")
    private int timeout;
    //缓存管理器
    @Bean
    public CacheManager cacheManager(@SuppressWarnings("rawtypes") RedisTemplate redisTemplate) {
        RedisCacheManager cacheManager = new RedisCacheManager(redisTemplate);
        //设置缓存过期时间
        cacheManager.setDefaultExpiration(10000);
        return cacheManager;
    }
    @Bean
    public RedisTemplate<String, String> redisTemplate(RedisConnectionFactory factory){
        StringRedisTemplate template = new StringRedisTemplate(factory);
        setSerializer(template);//设置序列化工具
        template.afterPropertiesSet();
        return template;
    }
    @SuppressWarnings({ "rawtypes", "unchecked" })
    private void setSerializer(StringRedisTemplate template){
        Jackson2JsonRedisSerializer jackson2JsonRedisSerializer = new Jackson2JsonRedisSerializer(Object.class);
        ObjectMapper om = new ObjectMapper();
        om.setVisibility(PropertyAccessor.ALL, JsonAutoDetect.Visibility.ANY);
        om.enableDefaultTyping(ObjectMapper.DefaultTyping.NON_FINAL);
        jackson2JsonRedisSerializer.setObjectMapper(om);
        template.setValueSerializer(jackson2JsonRedisSerializer);
    }
}
@EnableCaching
(6)、使用mybatis generate工具生成mapper modle and xml文件。
<?xml version="1.0" encoding="UTF-8"?>
<!DOCTYPE generatorConfiguration
        PUBLIC "-//mybatis.org//DTD MyBatis Generator Configuration 1.0//EN"
        "http://mybatis.org/dtd/mybatis-generator-config_1_0.dtd">
<generatorConfiguration>
    <!-- 数据库驱动:选择你的本地硬盘上面的数据库驱动包-->
    <classPathEntry  location="D:\maven\mysql\mysql-connector-java\5.1.45\mysql-connector-java-5.1.45.jar"/>
    <context id="DB2Tables"  targetRuntime="MyBatis3">
        <commentGenerator>
            <property name="suppressDate" value="true"/>
            <!-- 是否去除自动生成的注释 true:是 : false:否 -->
            <property name="suppressAllComments" value="true"/>
        </commentGenerator>
        <!--数据库链接URL,用户名、密码 -->
        <jdbcConnection driverClass="com.mysql.jdbc.Driver" connectionURL="jdbc:mysql://127.0.0.1/jfinal_demo" userId="root" password="123456">
        </jdbcConnection>
        <javaTypeResolver>
            <property name="forceBigDecimals" value="false"/>
        </javaTypeResolver>
        <!-- 生成模型的包名和位置-->
        <javaModelGenerator targetPackage="com.springbootandredis.redisdemo" targetProject="src/main/java">
            <property name="enableSubPackages" value="true"/>
            <property name="trimStrings" value="true"/>
        </javaModelGenerator>
        <!-- 生成映射文件的包名和位置-->
        <sqlMapGenerator targetPackage="resources.mapping" targetProject="src/main">
            <property name="enableSubPackages" value="true"/>
        </sqlMapGenerator>
        <!-- 生成DAO的包名和位置-->
        <javaClientGenerator type="XMLMAPPER" targetPackage="com.springbootandredis.redisdemo" targetProject="src/main/java">
            <property name="enableSubPackages" value="true"/>
        </javaClientGenerator>
        <!-- 要生成的表 tableName是数据库中的表名或视图名 domainObjectName是实体类名-->
        <table tableName="t_user" domainObjectName="User" enableCountByExample="false" enableUpdateByExample="false" enableDeleteByExample="false" enableSelectByExample="false" selectByExampleQueryId="false"></table>
    </context>
</generatorConfiguration>
(8)、写controller
@Controller
public class UserController {
    //private Logger logger = LoggerFactory.getLogger(UserController.class);

    @Autowired
    private UserService userService;

    @ResponseBody
    @RequestMapping(value = "/add",consumes = MediaType.APPLICATION_JSON_UTF8_VALUE,produces = {"application/json;charset=UTF-8"},method= RequestMethod.POST)
    public int addUser(@RequestBody User user){
        System.out.println(user.toString());
        return userService.addUser(user);
    }

    @ResponseBody
    @RequestMapping("get")
    public String queryUser(Integer userId){
        System.out.println("*****userId******:"+userId);
        User user = userService.queryUser(userId);
        return  user.getUserName();
    }
(9)、添加serviceImpl中的方法。
    @Override
    @Cacheable(value="userCache1",key="'user:'+#userId",unless = "#result==null")
    public User queryUser(Integer userId) {
        User user = userMapper.selectByPrimaryKey(userId);
        System.out.println("第一次查询时,走这里,并将数据存储在redis数据库中:"+user.toString());
        return user;
    }
注:service以及mapper以及xml需要配置。
redis缓存常用注解:
@CacheEvict
移除数据的方法上,如删除方法,调用方法时会从缓存中移除相应的数据
@CachePut
写数据的方法上,如新增/修改方法,调用方法时会自动把相应的数据放入缓存:
Tip: Spring Redis默认使用JDK进行序列化和反序列化,因此被缓存对象需要实现java.io.Serializable接口,否则缓存出错。
Tip: 当被缓存对象发生改变时,可以选择更新缓存或者失效缓存,但一般而言,后者优于前者,因为执行速度更快。
Watchout! 在同一个Class内部调用带有缓存注解的方法,缓存并不会生效。
-->在执行完方法后(#result就能拿到返回值了)判断condition,如果返回true,则放入缓存
@Cacheable
应用到读取数据的方法上,即可缓存的方法,如查找方法:先从缓存中读取,如果没有再调用方法获取数据,然后把数据添加到缓存中:-->@Cacheable根据运行流程,如下@Cacheable将在执行方法之前( #result还拿不到返回值)判断condition,如果返回true,则查缓存
○ value: 缓存名称
○ key: 缓存键,一般包含被缓存对象的主键,支持Spring EL表达式
○ unless: 只有当查询结果不为空时,才放入缓存
@Caching
有时候我们可能组合多个Cache注解使用;比如用户新增成功后,我们要添加id-->user;username--->user;email--->user的缓存;此时就需要@Caching组合多个注解标签了。
如用户新增成功后,添加id-->user;username--->user;email--->user到缓存;


 8607
8607

 被折叠的 条评论
为什么被折叠?
被折叠的 条评论
为什么被折叠?
 到【灌水乐园】发言


