


本文欢迎转载,转载请注明出处:
https://my.oschina.net/227/blog/779723
前言
在iOS框架中,系统自带的UIAlertView往往不能满足我们对提示框的个性化定义的需求,因此,自定义一个AlertView就显得非常重要。
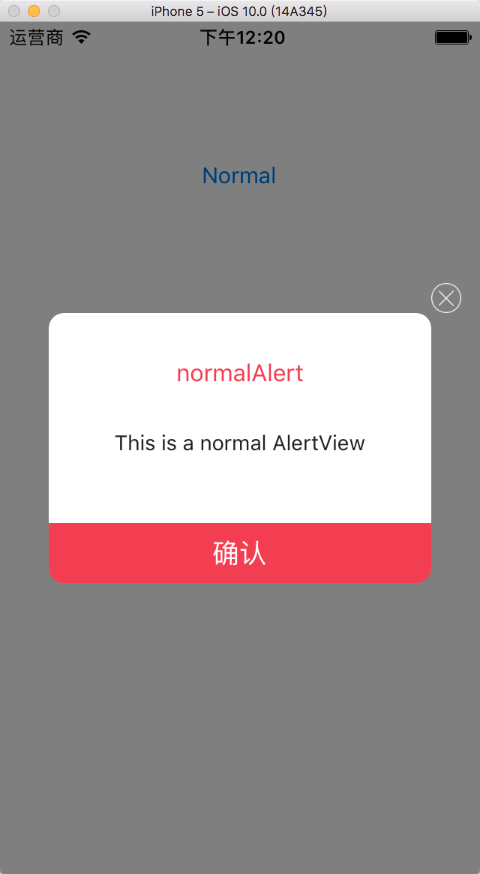
首先看一下最终效果:


具体操作
1、我们的alert需要盖在整个界面的最上方,并且接管响应的接收,所以应该创建一个UIWindow并设置层级为最高层级
- (instancetype)init{
    self=[super init];
    if (self) {
        self.windowLevel = UIWindowLevelAlert + 10000; //加10000是为了保持window在绝对的最上方
        self.frame = [UIScreen mainScreen].bounds;
    }
    return self;
}
2、随后我们应该把这层window设置成半透明,当然不能直接设置alpha值,因为通过alpha值设置的时候,window上的子控件也会变的半透明。我用的方法是用一张半透明的图片,转化成UIColor,然后当做winodw的backgroundColor。
self.backgroundColor = [UIColor colorWithPatternImage:[UIImage imageNamed:@"alert_bg.png"]];3、添加子控件(依据个人需求添加)。我在定义控件的时候用enum类型定义了三种常用的样式,分别是“普通(normal)”,“成功(successful)”和“选择(doubt)”。
//.h
/**默认类型*/
typedef NS_ENUM(int, TTAlertType) {
    TTAlertTypeNormal,     // 提示类型(普通提示 normal)
    TTAlertTypeSuccessful, // 提示类型(成功提示 successful)
    TTAlertTypeDoubt	   // 提示类型(选择提示 doubt)
};


//.m
- (void)setType:(TTAlertType)type{
    _titleTextLabel.frame = CGRectMake(_bgView.frame.origin.x,
                                       _bgView.frame.origin.y + 50,
                                       kWidth, 18);
    if (type == TTAlertTypeNormal) {
        _iconView.image = nil;
        self.haveCancelBtn = NO;
        self.titleTextLabel.center = CGPointMake(self.center.x, self.center.y - 50);
    }
    if (type == TTAlertTypeSuccessful) {
        _iconView.image = [UIImage imageNamed:@"success"];
        self.haveCancelBtn = NO;
    }
    if (type == TTAlertTypeDoubt) {
        _iconView.image = nil;
        self.haveCancelBtn = YES;
        self.titleTextLabel.center = CGPointMake(self.center.x, self.center.y - 50);
    }
}
4、添加show方法,在添加show方法的时候,把keywindow变成自定义alert的window。
- (void)show {
    self.hidden = NO;
    [self makeKeyAndVisible];
}
5、在控件的dealloc方法中,要释放alert对响应的控制权,并且移除出屏幕
- (void)dealloc{
    [self resignKeyWindow];
    [self removeFromSuperview];
}
以上就是自定义一个alertView的方法。
代码地址
本篇文章代码的例子,可以登录github搜索TTAlert查看。
或者直接登录:https://github.com/coco227/TTAlert


 792
792

 被折叠的 条评论
为什么被折叠?
被折叠的 条评论
为什么被折叠?
 到【灌水乐园】发言


