


myeclipse hadoop 开发环境搭建
- 本文档所有安装包全部为64位
1.下载 hadoop-eclipse-plugin-2.6.0.jar
链接: https://pan.baidu.com/s/1skRb5yX 密码: 9rgd2.下载 hadoop-2.6.0.tar.gz
下载地址:https://archive.apache.org/dist/hadoop/common/
下载完以后解压到e盘hadoop下
3.安装myeclipse hadoop插件
1.将hadoop-eclipse-plugin-2.6.0.jar 放到myeclipse的安装目下的dropins目录下,重启myeclipse。再次打开myeclipse
在windows->preferences下可看见hadoop Map/Reduce界面,路径选择你WINDOWS下的hadoop解压后的路径。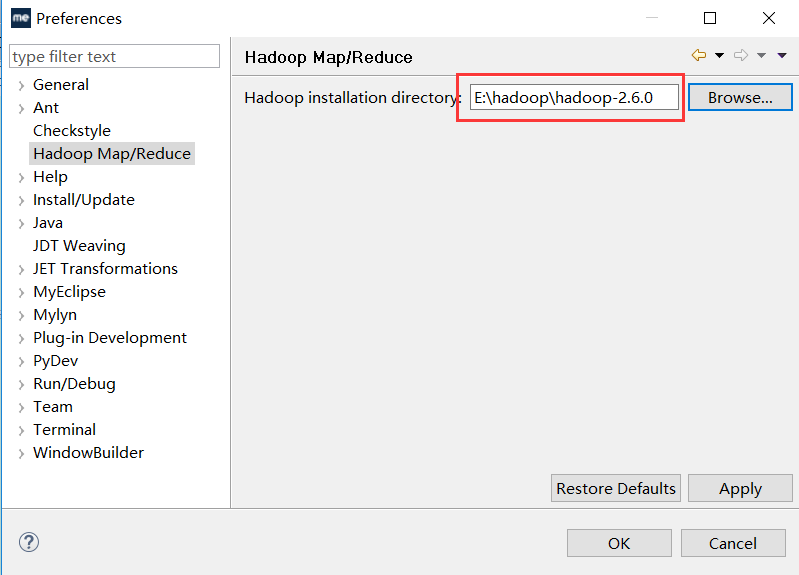
4.配置环境变量
1.右键我的电脑 -->属性 --> 高级系统设置 --> 环境变量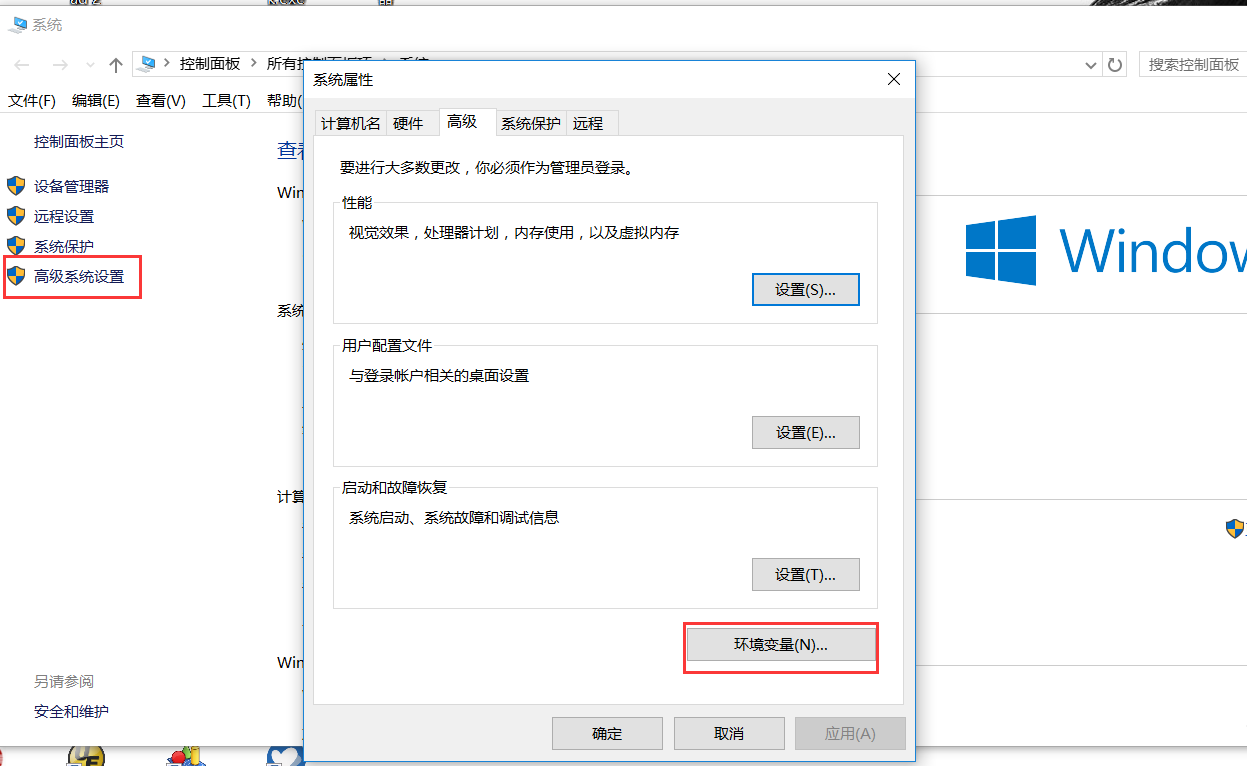
2.新增hadoop环境变量 变量名 HADOOP_HOME 变量值:hadoop的解压目录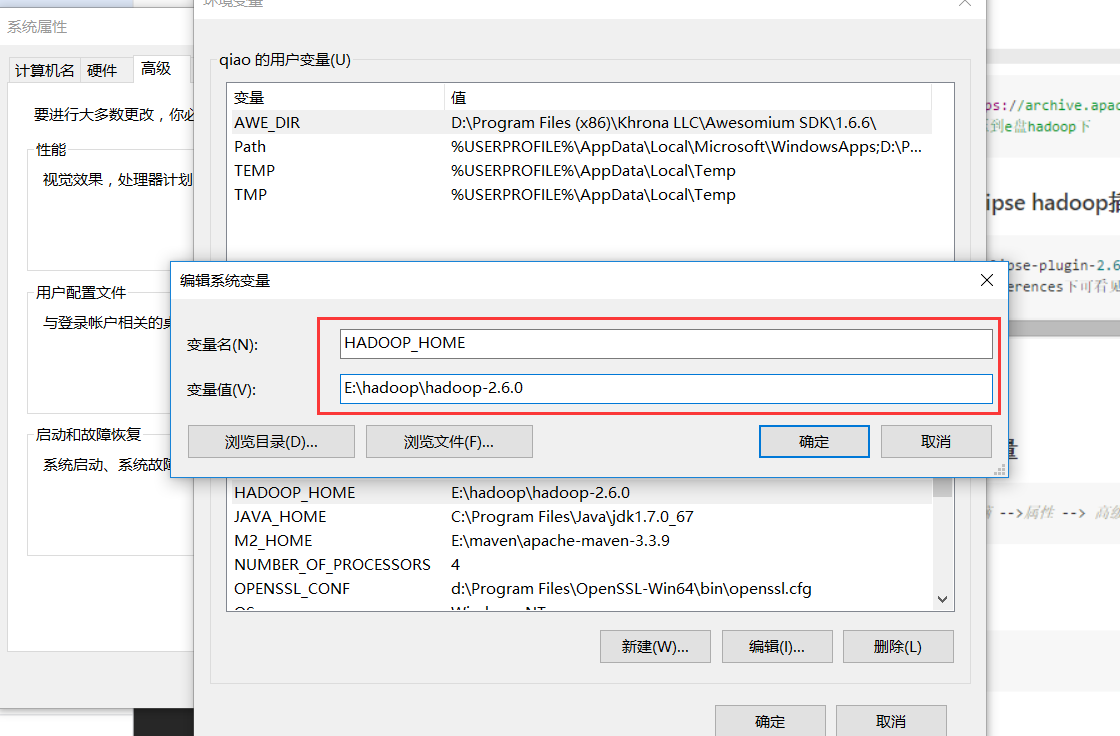
3.编辑 path
配置好环境变量以后需重启电脑(本人为win10系统需重启)。
4.显示Map/Reduce选项卡
1.点击 【open perspective 】-> 【Map/Reduce】->【OK】 将Map/Reduce 显示在工具栏中
2.Map/Reduce Locations视图 【Window】->【Show View】->【Map/Reduce Locations】->【OK】 或者
【Window】->【Show View】->【Other...】->【MapReduce Tools】->【Map/Reduce Locations】->【OK】
5.创建hadoop连接
在Map/Reduce Locations选项卡视图中右键单击 选择新建new hadoop location。
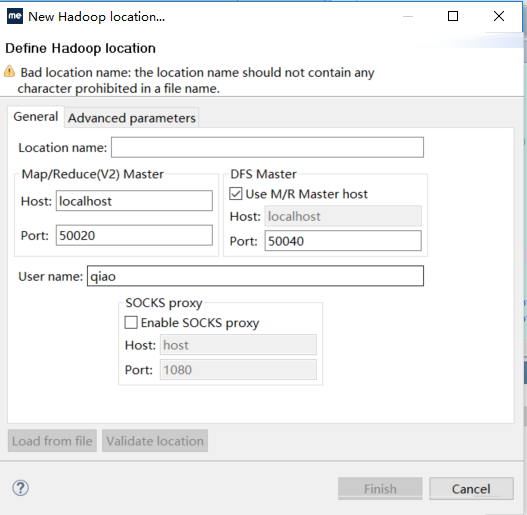
配置连接
根据我们之前的安装情况填入相关信息:
location name

我这里随便起一个名称叫 hy001 。

Map/Reduce Master
这个框里
Host:就是 hy001 所在的集群机器
port:默认 50070 这两个参数就是安装hadoop配置的mapred-site.xml里面mapred.job.tracker里面的ip和port 。

DFS Master
Host:和Map/Reduce Master中的Host 相同
Port: 就是namenode的port
这两个参数就是core-site.xml里面fs.default.name里面的ip和port。

User name :这个是连接hadoop的用户名
配置完如图:
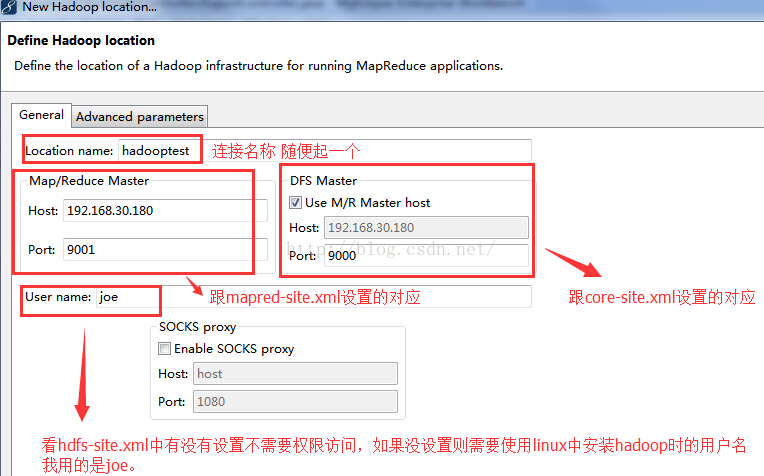
如果我们已经要启动了windows系统中的sshd服务(一般都是开启的,没有开启的话自己查下资料开启一下),而且启动了linux中的hadoop集群。
这时,我们的DFS Location就已经能连接上了,也就是在项目图中看hadoop集群上的文件。如图: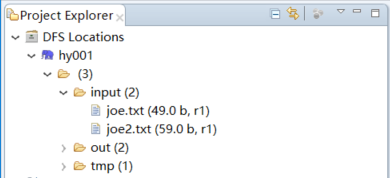
6.创建MapReduce 项目
经过前面的准备我们开始创建mapreduce项目,在过程中需要选择Hadoop的安装路径。
如果是windows系统安装的hadoop则填写本地的安装路径,如果是linux系统中安装的hadoop则需要写linux中安装的绝对路径。
我们之前在安装篇已经知道 安装目录是 /home/joe/hadoop/hadoop-1.2.1。
创建项目步骤如下:
如果前面设置了本地hadoop安装运行目录则步骤为:
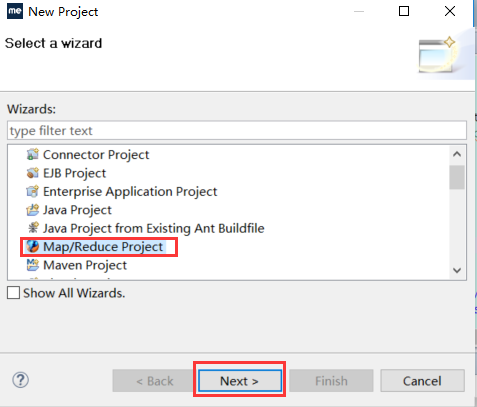
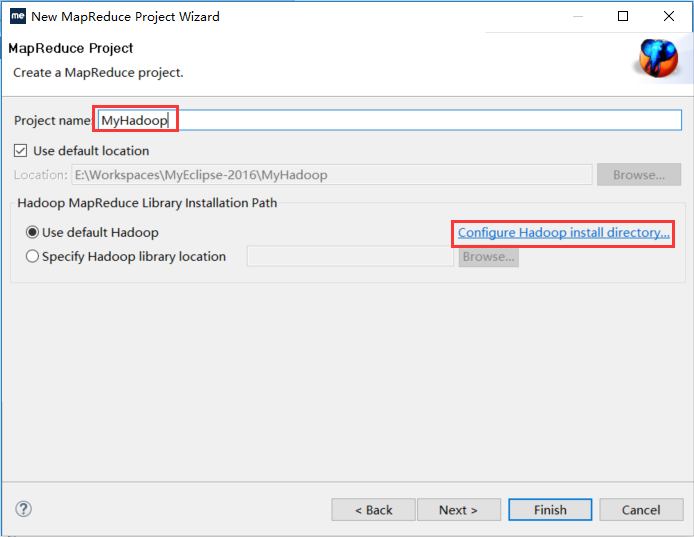
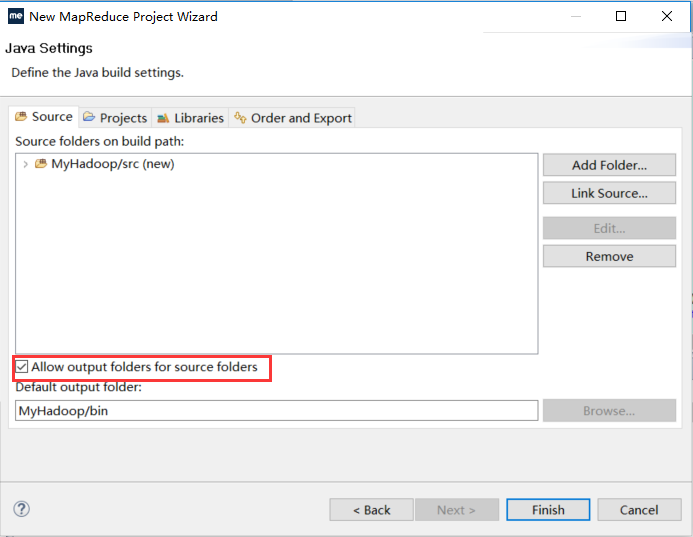
【File】->【New】->【Project...】->【Map/Reduce】->【Map/Reduce Project】->【Project name: WordCount】->【Next】->【Allow output folders for source folders】->【Finish】
否则为:
【File】->【New】->【Project...】->【Map/Reduce】->【Map/Reduce Project】->【Project name: WordCount】->【Configure Hadoop install directory...】->【Hadoop installation directory:d:/hadoop/hadoop-1.2.1】->【Apply】->【OK】->【Next】->【Allow output folders for source folders】->【Finish】 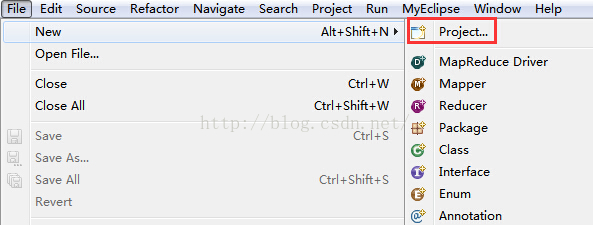
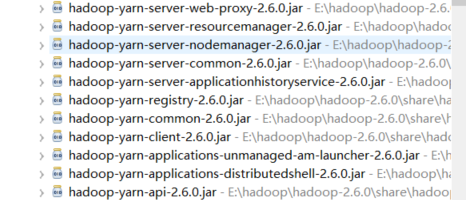
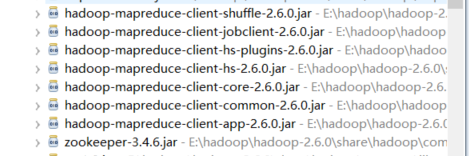
创建成功后出现了MyHadoop项目如下,已经自动引入了hadoop的一些包:
7.新建计数MapReduce的类WordCount
【MyHadoop】->【src】->【右键New】->【Class】->【Package: org.apache.hadoop.examples】->【Name: WordCount】->【Finish】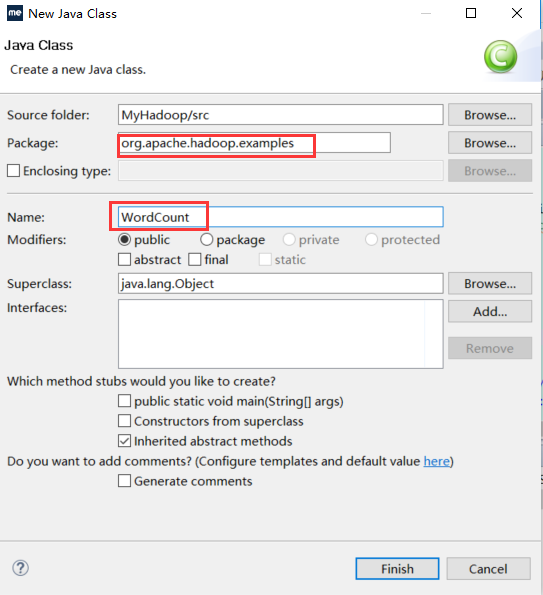
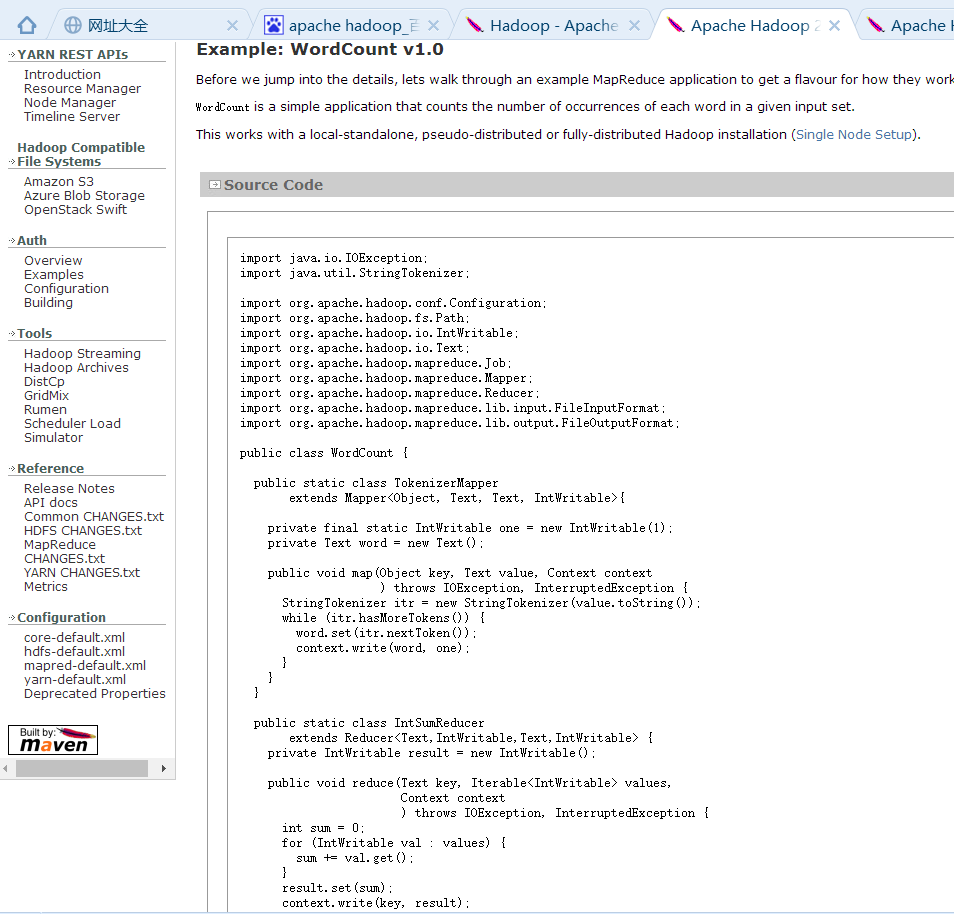
这个时候这个类就空的,如果是我们正常的开发流程的话,这里就是我们写mapreduce的地方。 但是我们是为了实现hadoop的经典例子单词计数---WordCount。 那我们可以在Apache hadoop 官网中找到WordCount的源码直接粘贴上去。
粘贴过来的完整代码为:
import java.io.IOException;
import java.util.StringTokenizer;
import org.apache.hadoop.conf.Configuration;
import org.apache.hadoop.fs.Path;
import org.apache.hadoop.io.IntWritable;
import org.apache.hadoop.io.Text;
import org.apache.hadoop.mapreduce.Job;
import org.apache.hadoop.mapreduce.Mapper;
import org.apache.hadoop.mapreduce.Reducer;
import org.apache.hadoop.mapreduce.lib.input.FileInputFormat;
import org.apache.hadoop.mapreduce.lib.output.FileOutputFormat;
public class WordCount {
public static class TokenizerMapper extends Mapper<Object, Text, Text, IntWritable> {
private final static IntWritable one = new IntWritable(1);
private Text word = new Text();
public void map(Object key, Text value, Context context) throws IOException, InterruptedException {
StringTokenizer itr = new StringTokenizer(value.toString());
while (itr.hasMoreTokens()) {
word.set(itr.nextToken());
context.write(word, one);
}
}
}
public static class IntSumReducer extends Reducer<Text, IntWritable, Text, IntWritable> {
private IntWritable result = new IntWritable();
public void reduce(Text key, Iterable<IntWritable> values, Context context)
throws IOException, InterruptedException {
int sum = 0;
for (IntWritable val : values) {
sum += val.get();
}
result.set(sum);
context.write(key, result);
}
}
public static void main(String[] args) throws Exception {
Configuration conf = new Configuration();
Job job = Job.getInstance(conf, "word count");
job.setJarByClass(WordCount.class);
job.setMapperClass(TokenizerMapper.class);
job.setCombinerClass(IntSumReducer.class);
job.setReducerClass(IntSumReducer.class);
job.setOutputKeyClass(Text.class);
job.setOutputValueClass(IntWritable.class);
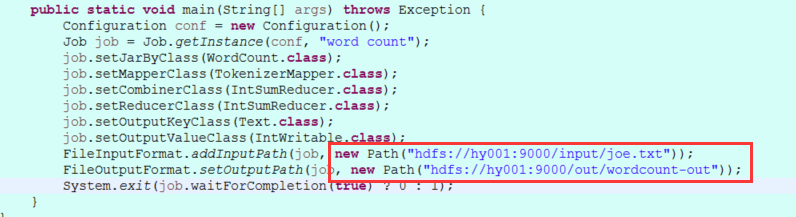
FileInputFormat.addInputPath(job, new Path(args[0]));
FileOutputFormat.setOutputPath(job, new Path(args[1]));
System.exit(job.waitForCompletion(true) ? 0 : 1);
}
}将FileInputFormat.addInputPath FileOutputFormat.setOutputPath 修改成自己的hadoop集群路径如图:
运行
修改后可以运行了,对着wordCount类 右键,run as---》run on hadoop。
有可能会出现如下错误:
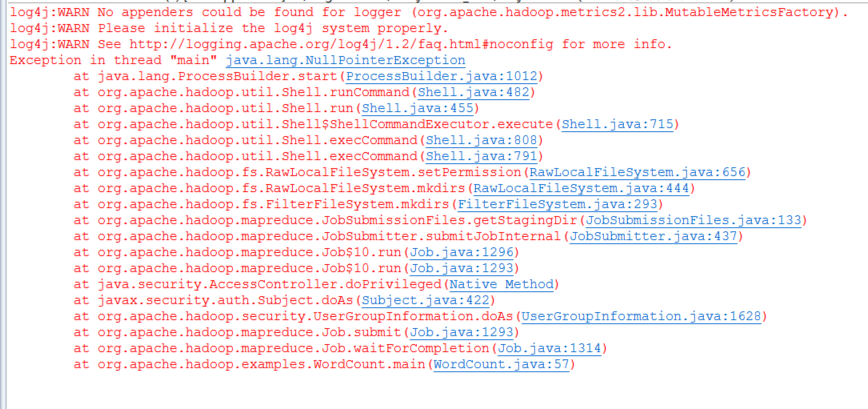
此错误是缺少对应的hadoop.dll,winutils.exe 等
下载地址: 链接: https://pan.baidu.com/s/1pL9eSFh 密码: rdma
1:将文件解压到hadoop的bin目录下
2:将hadoop.dll复制到C:\Window\System32下
3:重启myeclipse或者eclipse
再次运行OK如图:
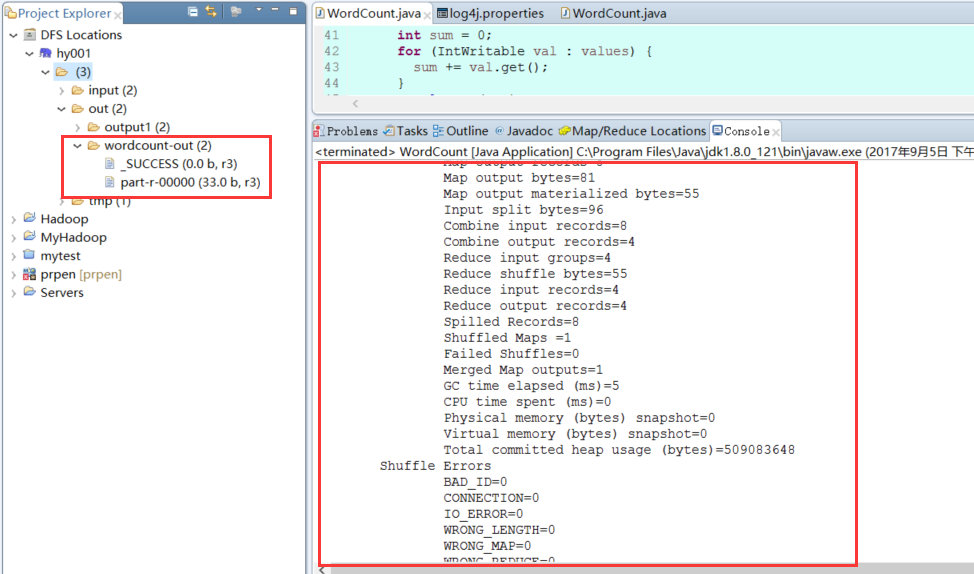
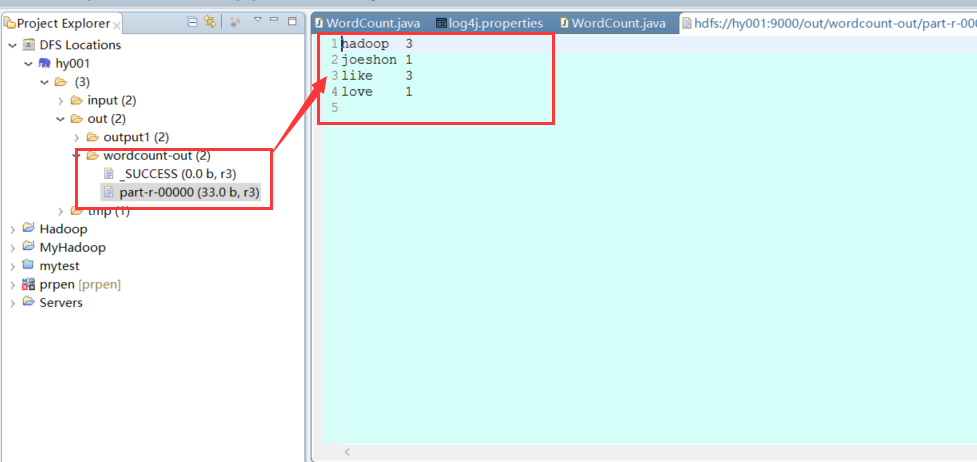
运行成功后在DFS Locations中出现了结果文件,我们可以直接左键双击查看
到此myeclipse hadoop开发环境搭建成功。


 329
329

 被折叠的 条评论
为什么被折叠?
被折叠的 条评论
为什么被折叠?
 到【灌水乐园】发言


