


VMware准备三台服务器
地址:
ha1:192.168.70.150

ha2:192.168.70.151

ha3:192.168.70.152
1、环境初始化
1.1、配置hosts
把上面信息:替换成空格写入/etc/hosts即可
ha1 192.168.70.150
ha2 192.168.70.151
ha3 192.168.70.152
1.2、设置主机名:
hostnamectl set-hotname ha1|ha2|ha3
上面都可以通过ansible cp shell模块实现,这里就三台手动加入了
1.3、配置秘钥互信
ssh-keygen -t rsa -f id_rsa -P ""  #默认root的,可以指定其他用户

ssh-copy-id -i id_rsa root[@ha2](https://my.oschina.net/ha2)  #拷贝公钥至其他节点,

ssh-copy-id -i id_rsa root[@ha3](https://my.oschina.net/Ha3)

上述操作每个节点都要执行
1.4、ansible安装配置
yum -y install ansible 其中一台安装即可

配置一个ansible 组

cat /etc/ansible/hosts

\[ha\]

192.168.70.150
192.168.70.151
192.168.70.152
1.5、关闭防火墙及selinux
ansible ha -m command -a "systemctl stop firewalld"
ansible ha -m command -a "systemctl disable firewalld"
ansible ha -m command -a "sed -i 's/SELINUX=enforcing/SELINUX=disabled/' /etc/selinux/config"
1.6、安装及配置ntp
ansible ha -m command -a "yum -y install ntp"

配置ntp(注释掉默认server开头的)

Ha1-Server:
server 127.127.1.0
fudge  127.127.1.0 stratum 10

其他两台client:
server 192.168.70.150 burst iburst
ssh ha1 “systemctl start ntpd”
ansible ha -m command -a "ntpdate 192.168.70.150"
ansible ha -m command -a "hwclock -w"
ansible ha -m command -a "systemctl start ntpd"
ansible ha -m command -a "systemctl enable ntpd"
ansible ha -m command -a "ntpq -p"
2、安装配置pacemaker、corosync
2.1、准备yum源
准备pacemaker命令管理接口crmsh接口源,也可以是pcs(每个节点都要准备)

	cat crm.repo
	\[network\_ha-clustering\_Stable\]
	name=Stable High Availability/Clustering packages (CentOS_CentOS-7)
	type=rpm-md
	baseurl=http://download.opensuse.org/repositories/network:/ha-clustering:/Stable/CentOS_CentOS-7/
	gpgcheck=1
	gpgkey=http://download.opensuse.org/repositories/network:/ha-clustering:/Stable/CentOS_CentOS-7/repodata/repomd.xml.key
	enabled=1

ansible ha -m command –a “yum clean all”
ansible ha -m command –a “yum makecache”
ansible ha -m command –a “yum repolist”
2.2、安装
ansible ha -m command -a "yum -y install pacemaker corosync crmsh"
2.3、配置
配置corosync

cd /etc/corosync/
cp corosync.conf.example corosync.conf
grep -e "Corosync Cluster Engine" -e "configuration file" /var/log/cluster/corosync.log
totem {
version: 2
crypto_cipher: aes256
crypto_hash: sha1
interface {
ringnumber: 0
bindnetaddr: 192.168.70.0
mcastaddr: 239.255.1.1
mcastport: 5405
ttl: 1
}
}
logging {
fileline: off
to_stderr: no
to_logfile: yes
logfile: /var/log/cluster/corosync.log
to_syslog: no
debug: off
timestamp: on
logger_subsys {
subsys: QUORUM
debug: off
}
}
quorum {
provider: corosync_votequorum
expected_votes:2
}
nodelist {
node {
ring0_addr: ha1
nodeid:1
}
node {
ring0_addr: ha2
nodeid:2
}
node {
ring0_addr: ha3
nodeid:3
}
}

mv /dev/random /dev/random.bak
ln -s /dev/urandom /dev/random
corosync-keygen
scp authkey  corosync.conf ha2:/etc/corosync/
scp authkey  corosync.conf ha3:/etc/corosync/
3、启动 ansible ha -m command -a "systemctl start corosync"
ansible ha -m command -a "systemctl enable corosync"
ansible ha -m command -a "systemctl start pacemaker"
ansible ha -m command -a "systemctl enable pacemaker"
4、服务状态检查
4.1、查看服务是否启动
ss -unl

4.2、查看corosync引擎是否正常启动
grep -e "Corosync Cluster Engine" -e "configuration file" /var/log/cluster/corosync.log

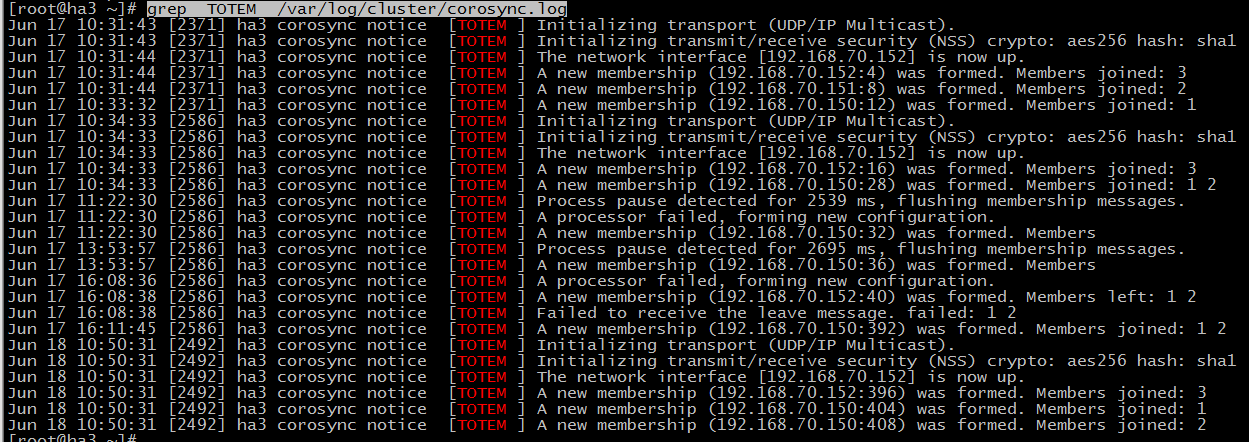
4.3、查看初始化成员节点通知是否正常发出
grep TOTEM /var/log/cluster/corosync.log
4.4 查看服务启动是否有报错
grep ERROR: /var/log/cluster/corosync.log
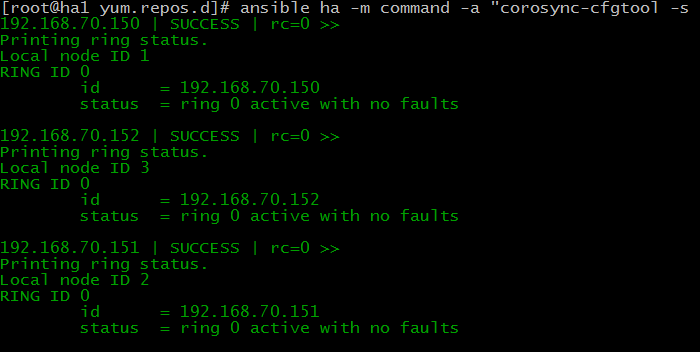
4.5、检查各节点通信状态(no faults 代表OK)
ansible ha -m command -a "corosync-cfgtool -s "
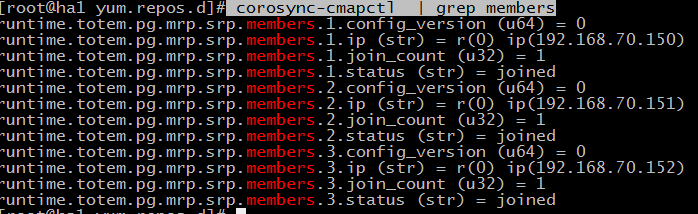
4.6、检查集群成员关系及Quorum API:
corosync-cmapctl | grep members
4.7、查看集群节点状态及DC:
crm_mon -1

5、安装需要创建资源的服务及测试
5.1、安装
ansible ha -m command -a "yum -y install httpd"
5.2、配置启动
ha1:
	echo “<h1>ceshi ha1</h1>”>/var/www/html/ha.html
ha2:
	echo “<h1>ceshi ha2</h1>”>/var/www/html/ha.html
ha3:
	echo “<h1>ceshi ha3</h1>”>/var/www/html/ha.html
ansible ha -m command –a “systemctl start httpd”
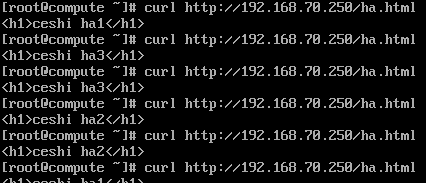
5.3、测试
每个节点测试确保能正常输出

curl [http://192.168.70.150/ha.html](http://192.168.70.150/ha.html)

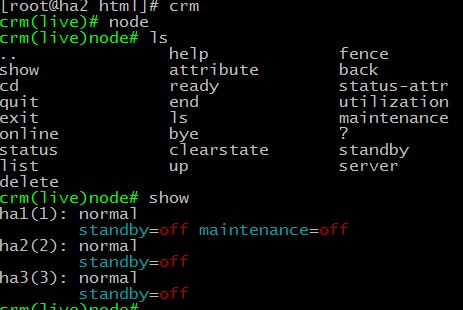
6、pacemaker命令接口crm常用模块命令介绍
6.1、node (切换上下线、隔离、删除)
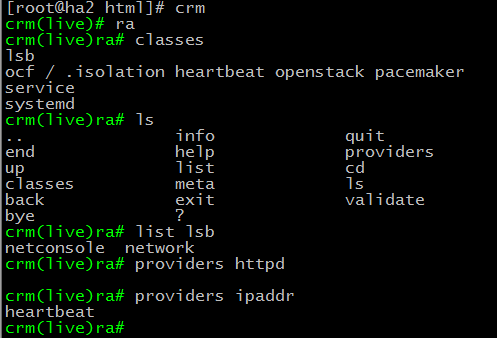
6.2、ra(查看资源代理类型)
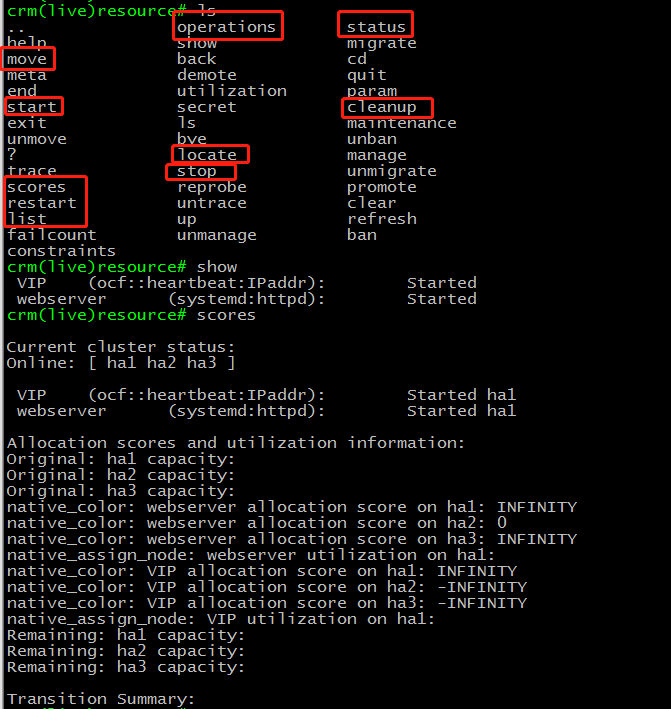
6.3、Resource(集群管理的资源列表)
Start|stop|restart 启动|停止|重启资源
Locate  定位资源当前运行于哪个节点
Status  查看集群当前所有资源的状态
Move|migrate  迁移资源至其它节点
Cleanup 清除当前资源在所有节点上的状态
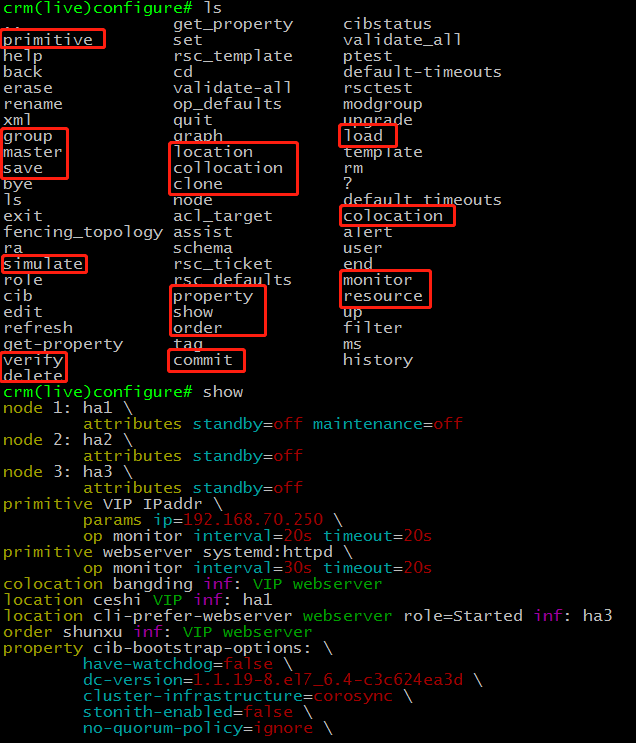
6.4、Configure(为集群配置资源、约束)
Show 展示已配置的所有资源
Edit  编辑已配置的资源,使用方法与vim编辑器一样
Primitive 定义创建资源
Monitor  给资源添加监控,比如某个资源多久检测一次,查过多长时间算失败
Group   添加组资源,捆绑,对于clone资源无效
Clone    定义克隆资源
Location  定义位置约束优先级
Property  设置集群属性
Refresh   重新从cib库读取数据
Verify    检查配置有没有语法错误
Commit  配置提交
Save     保存当前配置至其他文件相当于备份
Load     从其他文件导入配置
7、实例添加资源
property stonith-enabled=false  #没有fence设备的情况下关闭此功能
property no-quorum-policy=ignore  #当只有两节点,无法仲裁忽略
property default-resource-stickiness=infinity  #inf,资源默认分数为正无穷大
property cluster-infrastructure=corosync   #默认集群心跳是corosync
primitive vip IPaddr parms ip="192.168.70.250"
primitive webserver systemd:httpd
monitor vip 30s:20s
monitor weserver 30s:100s
group vip_webserver vip webserver
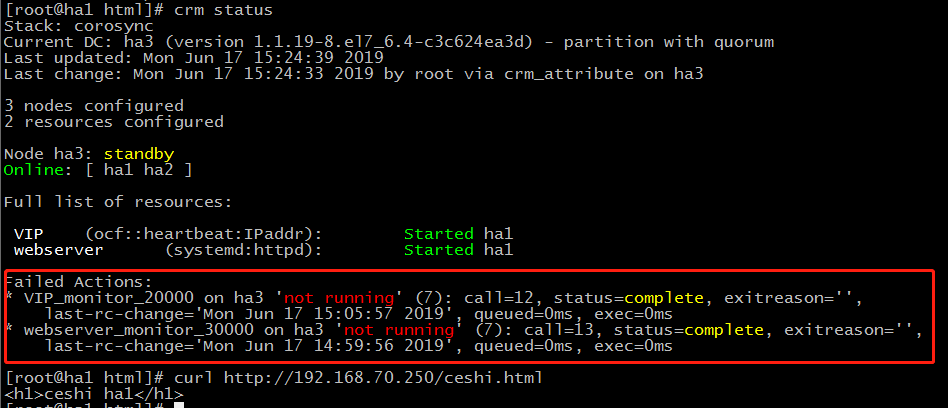
8、测试
通过结果可以看到,当我把ha1置换为备份节点的时候,VIP和web都切换至ha3
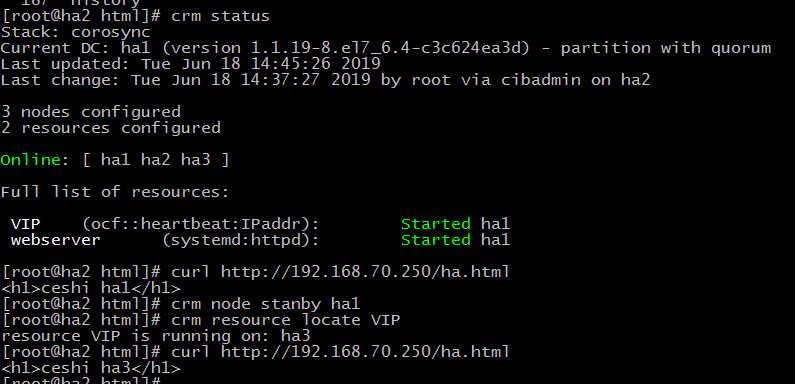
因为添加了监控monitor,当资源down之后,检测的时间内服务没有起来时,pacemaker会主动去启动对应服务
9、clone资源添加及测试
9.1 添加
clone clone_web webserver meta notify="True" globally-unique=false    interleave=true
clone clone_vip VIP meta notify="True" globally-unique=false    interleave=true
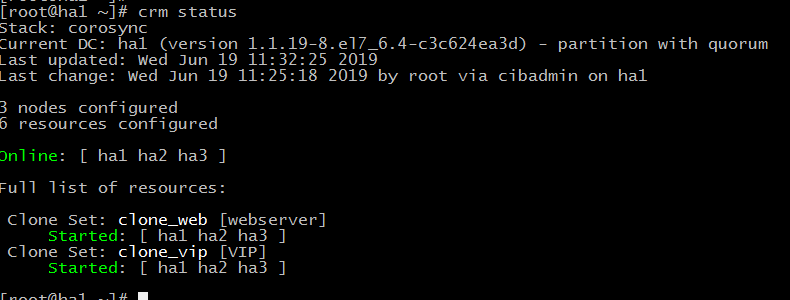
9.2 测试
10、扩展 资源创建及约束详解见:
[https://blog.51cto.com/ittony/1566945](https://blog.51cto.com/ittony/1566945)
crm_simulate –sL  查看当前资源得分
crm configure save all.xml  保存所有资源至指定文件
crm   configure save VIP vip.xml  保存某个指定资源至文件
crm   configure save type:primitive vip.xml   保存某种类型资源至文件
crm_resource –C  清除失败的记录(处理完问题之后可以使用)


 2507
2507


 被折叠的 条评论
为什么被折叠?
被折叠的 条评论
为什么被折叠?
 到【灌水乐园】发言


