


既然是入门篇,那么就从最基本的开始。一下内容全部基于 jfinal 框架 和 jfinal-weixin sdk 介绍使用。
我这里推荐使用maven项目,jfinal官方也提供现成项目下载,这里不在对创建项目做具体介绍,大家也可以直接上官方下载一个 jfinal项目 导入本地即可。
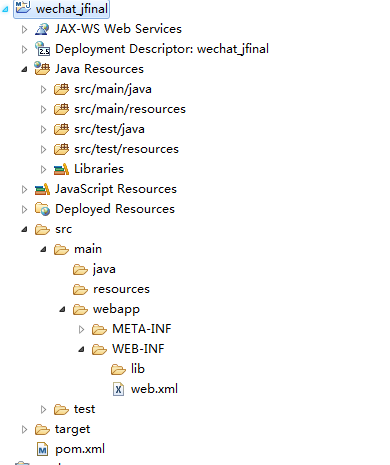
1.首先创建我们的wechat maven项目,我的项目结构如下:
既然是maven项目,那么少不了 pom文件的jar管理,我们需要导入以下jfinal相关jar
          <dependencies>
	    <dependency>
	    	<groupId>com.jfinal</groupId>
	    	<artifactId>jetty-server</artifactId>
	    	<version>8.1.8</version>
	    	<scope>provided</scope>
	    </dependency>
		<!-- jfinal 核心har -->
		<dependency>
			<groupId>com.jfinal</groupId>
			<artifactId>jfinal</artifactId>
			<version>2.0</version>
		</dependency>
		<!-- jfinal-weixin jar -->
		<dependency>
			<groupId>com.jfinal</groupId>
			<artifactId>jfinal-weixin</artifactId>
			<version>1.4</version>
		</dependency>
		<!-- 以下是必备的第三方依赖jar -->
		<dependency>
			<groupId>com.fasterxml.jackson.core</groupId>
			<artifactId>jackson-databind</artifactId>
			<version>2.4.3</version>
		</dependency>
		<dependency>
			<groupId>dom4j</groupId>
			<artifactId>dom4j</artifactId>
			<version>1.6.1</version>
		</dependency>
		<dependency>
			<groupId>jaxen</groupId>
			<artifactId>jaxen</artifactId>
			<version>1.1.6</version>
		</dependency>
		<dependency>
    		    <groupId>commons-codec</groupId>
    		    <artifactId>commons-codec</artifactId>
    		    <version>1.9</version>
	        </dependency>
		<dependency>
		    <groupId>org.freemarker</groupId>
		    <artifactId>freemarker</artifactId>
		    <version>2.3.20</version>
		</dependency>
	</dependencies>
接下来是个比较核心重要的部分,jfinal-weixin sdk源码中其实已经提供好了 继承 JFinalConfig 核心类的处理,但是我们这里并不去使用,为了自己项目的随意性和方便后期代码的维护等一系列可能发生的,我建议自己去创建一个 并集成 JFinalConfig核心类
package com.jfinal.wechat.config;

import com.jfinal.config.Constants;
import com.jfinal.config.Handlers;
import com.jfinal.config.Interceptors;
import com.jfinal.config.JFinalConfig;
import com.jfinal.config.Plugins;
import com.jfinal.config.Routes;

/**
 * JfinalWechatConfig 核心部分
 * @author xkjava
 *
 */
public class JfinalWechatConfig extends JFinalConfig {

	@Override
	public void configConstant(Constants me) {
		// TODO Auto-generated method stub

	}

	@Override
	public void configRoute(Routes me) {
		// TODO Auto-generated method stub

	}

	@Override
	public void configPlugin(Plugins me) {
		// TODO Auto-generated method stub

	}

	@Override
	public void configInterceptor(Interceptors me) {
		// TODO Auto-generated method stub

	}

	@Override
	public void configHandler(Handlers me) {
		// TODO Auto-generated method stub

	}

}
以上就是我们需要的核心类,当然只是需要这个空类是不行的,我们需要稍微加一点内容,那么具体内容如下
首先 在configConstant 方法加载我们的配置文件,这里我们需要在resources 目录下 创建我们的配置文件,jfinal官方一直是习惯使用 txt文件的,那么我们就使用txt作为配置文件,这里我来创建一个 wechatConfig.txt。
那么在这里呢,我们是不做任何与数据库项目的操作的,所以只要放入对应微信的配置即可,这里我就直接复制波老师的配置 修改 对应的值即可,一下是 wechatConfig.txt 文件内容
 # 微信服务器回调所用的 token
token=与测试号的token要一致,自定义

# 测试用的账号
appId=唯一值,对应上测试号的appId即可
appSecret=不唯一值,对应上测试号的appSecret即可

#是否对消息进行加密,是否对消息进行加密,对应于微信平台的消息加解密方式,false支持明文模式及兼容模式,true支持安全模式及兼容模式
#encryptMessage=true
#encodingAesKey=yourEncodingAesKey
那么这里我是使用了微信的测试帐号,测试帐号目前我并没找到加密处理模块,所以我们暂时先不用这个功能。
测试号登录地址:http://mp.weixin.qq.com/debug/cgi-bin/sandbox?t=sandbox/login
点击登录,只要拿自己的公众号扫描即可登录属于自己的测试帐号,方便快捷。

好了,这里我们继续回到我们 JfinalWechatConfig 类,这里需要在configConstant 方法加载我们的配置文件。
修改后的JfinalWechatConfig 类
package com.jfinal.wechat.config;

import com.jfinal.config.Constants;
import com.jfinal.config.Handlers;
import com.jfinal.config.Interceptors;
import com.jfinal.config.JFinalConfig;
import com.jfinal.config.Plugins;
import com.jfinal.config.Routes;

/**
 * JfinalWechatConfig 核心部分
 * @author xkjava
 *
 */
public class JfinalWechatConfig extends JFinalConfig {

	@Override
	public void configConstant(Constants me) {
		//加载配置文件
		PropKit.use("wechatConfig.txt");
		//控制台输出消息内容
		me.setDevMode(PropKit.getBoolean("devMode", true));
	}

	@Override
	public void configRoute(Routes me) {
		// TODO Auto-generated method stub

	}

	@Override
	public void configPlugin(Plugins me) {
		// TODO Auto-generated method stub

	}

	@Override
	public void configInterceptor(Interceptors me) {
		// TODO Auto-generated method stub

	}

	@Override
	public void configHandler(Handlers me) {
		// TODO Auto-generated method stub

	}

}
接下来需要配置一下我们的 web.xml文件了
<?xml version="1.0" encoding="UTF-8"?>
<web-app xmlns:xsi="http://www.w3.org/2001/XMLSchema-instance" xmlns="http://java.sun.com/xml/ns/javaee" xsi:schemaLocation="http://java.sun.com/xml/ns/javaee http://java.sun.com/xml/ns/javaee/web-app_3_0.xsd" id="WebApp_ID" version="3.0">
	<filter>
		<filter-name>jfinal</filter-name>
		<filter-class>com.jfinal.core.JFinalFilter</filter-class>
		<init-param>
			<param-name>configClass</param-name>
			<param-value>com.jfinal.wechat.config.JfinalWechatConfig</param-value>
		</init-param>
	</filter>

	<filter-mapping>
		<filter-name>jfinal</filter-name>
		<url-pattern>/*</url-pattern>
	</filter-mapping>
</web-app>
注意:这里的 init-param 节点下的 param-value 指向的是我们刚自己创建的JfinalWechatConfig 类
到此呢,算是搭建了把jfianl 框架整合好了,接下来才是属于微信的部分,不要怕累,好的东西慢慢迭代,仔细往下看:
微信呢,其实分两个类型的服务,一个是消息接口服务,一个是api接口服务。比如我们关注后回复消息,直接在聊天框进行消息对话,或音频,图文,文本等,这些属于消息服务; 比如我们支付,网页授权,模版消息,创建菜单等,属于api接口。
为了区分开,我们在构建代码时,建议大家将消息服务与api服务分开处理,至少区分的干净,舒服,至于更细致化的业务层面,开发者可根据自己的需求来区分处理。 这篇博文是带大家入门,在这里我们目前只创建一个消息服务类,api服务希望将在后面继续介绍使用。
package com.jfinal.wechat.config;

import com.jfinal.core.Controller;

/**
 * 微信消息服务处理
 * @author xkjava
 *
 */
public class WechatMsgController extends Controller{


	/**
	 * 消息入口
	 */
	public void index(){

	}

}
消息服务 处理 其实就一个核心的方法,就是我们微信公众号平台的 URL 所指向的路由地址。
注意:
官方源码提供在消息入口方法上加拦截器,我们照搬(至于拦截器处理的原因,后面会介绍)。jfianl-weixin sdk已经封装了各种好用的内置api,所以,这里我们直接使用波老师内置的就可以。
接下来我们创建一个拦截器,在进入 消息入口 index 方法之前执行,目的是在用户消息处理之前,先将当前公众号信息绑定到当前线程上,这样的处理是方便后期多公众号的操作(多公众号处理希望后续介绍,波老师的 MsgInterceptor 拦截器大家可以去看下源码,这里我根据自己的需求少做修改,改动不大,至于说明全部加在注释上)。
package com.jfinal.wechat.interceptor;

import com.jfinal.aop.Interceptor;
import com.jfinal.aop.Invocation;
import com.jfinal.core.Controller;
import com.jfinal.kit.StrKit;
import com.jfinal.log.Logger;
import com.jfinal.wechat.config.WechatMsgController;
import com.jfinal.weixin.sdk.api.ApiConfigKit;
import com.jfinal.weixin.sdk.kit.SignatureCheckKit;

/**
 * 消息服务 拦截器
 * @author xkjava
 *
 */
public class WechatMsgInterceptor implements Interceptor  {

	private static Logger log = Logger.getLogger(WechatMsgInterceptor.class);

	@Override
	public void intercept(Invocation inv) {
		Controller controller = inv.getController();
		if (controller instanceof WechatMsgController == false)
			throw new RuntimeException("控制器需要继承 WechatMsgController");

		try {
		// 将 ApiConfig 对象与当前线程绑定,以便在后续操作中方便获取该对象:
		ApiConfigKit.getApiConfig();
		ApiConfigKit.setThreadLocalApiConfig(((WechatMsgController )controller).getApiConfig());

		// 如果是服务器配置请求,则配置服务器并返回
		if (isConfigServerRequest(controller)) {
			configServer(controller);
			return ;
		}

		// 签名检测
		if (checkSignature(controller)) {
			inv.invoke();
		}
		else {
			controller.renderText("签名验证失败,请确定是微信服务器在发送消息过来");
		}
	}
	finally {
		ApiConfigKit.removeThreadLocalApiConfig();
	}

    }


	/**
	 * 检测签名
	 */
	private boolean checkSignature(Controller controller) {
		String signature = controller.getPara("signature");
		String timestamp = controller.getPara("timestamp");
		String nonce = controller.getPara("nonce");
		if (StrKit.isBlank(signature) || StrKit.isBlank(timestamp) || StrKit.isBlank(nonce))                {
		    controller.renderText("check signature failure");
		    return false;
		}

		if (SignatureCheckKit.me.checkSignature(signature, timestamp, nonce)) {
			return true;
		}
		else {
			log.error("check signature failure: " +
					" signature = " + controller.getPara("signature") +
					" timestamp = " + controller.getPara("timestamp") +
					" nonce = " + controller.getPara("nonce"));

			return false;
		}
	}

	/**
	 * 是否为开发者中心保存服务器配置的请求
	 */
	private boolean isConfigServerRequest(Controller controller) {
		return StrKit.notBlank(controller.getPara("echostr"));
	}

	/**
	 * 配置开发者中心微信服务器所需的 url 与 token
	 * @return true 为config server 请求,false 正式消息交互请求
	 */
	public void configServer(Controller c) {
	    // 通过 echostr 判断请求是否为配置微信服务器回调所需的 url 与 token
	    String echostr = c.getPara("echostr");
	    String signature = c.getPara("signature");
            String timestamp = c.getPara("timestamp");
            String nonce = c.getPara("nonce");
	    boolean isOk = SignatureCheckKit.me.checkSignature(signature, timestamp, nonce);
	    if (isOk)
		c.renderText(echostr);
	    else
		log.error("验证失败:configServer");
	}

}以上是我在波老师的源码中copy过来的代码,自己只在interceptor 方法中修改了 消息服务 对应的 WechatMsgController
另外三个方法大家看注释,及调用顺序即可明白。
拦截去做好了回到我们的消息服务 WechatMsgController,此时的WechatMsgController 应该是这样的,在 index 方法上添加了拦截器注解,添加了获取 apiconfig对象方法 (当然这也是波老师的神作)
package com.jfinal.wechat.config;

import com.jfinal.aop.Before;
import com.jfinal.core.Controller;
import com.jfinal.kit.PropKit;
import com.jfinal.wechat.interceptor.WechatMsgInterceptor;
import com.jfinal.weixin.sdk.api.ApiConfig;

/**
 * 微信消息服务处理
 * @author xkjava
 *
 */
public class WechatMsgController extends Controller{

	/**
	 * 消息入口
	 *
	 * 加载WechatMsgInterceptor拦截器,在处理index之前 绑定ApiConfig
	 */
	@Before(WechatMsgInterceptor.class)
	public void index(){

	}

	/**
	 * 此方法在拦截器调用,根据 wechatConfig.txt 配置文件消息 封装 ApiConfig对象,
	 * ApiConfig对象封装了 微信的token appid等信息,有兴趣的同学可以去看下源码
	 * 拦截器内调用此方法返回ApiConfig对象后将次对象绑定在当前线程,这样方便后面具体业务上的调用
	 * 关于线程部分的处理,可以去看源码。如有问题,可以留言,我会根据大家的问题再来做具体介绍。
	 * 当然大神们是不需要的
	 * @return
	 */
	public ApiConfig getApiConfig(){
		ApiConfig apiConfig = new ApiConfig();
		apiConfig.setToken(PropKit.get("token"));
		apiConfig.setAppId(PropKit.get("appId"));
		apiConfig.setAppSecret(PropKit.get("appSecret"));
		/**
		 *  是否对消息进行加密,对应于微信平台的消息加解密方式:
		 *  1:true进行加密且必须配置 encodingAesKey
		 *  2:false采用明文模式,同时也支持混合模式
		 *
		 *  这里暂时不对消息加解密做处理
		 */
		/*apiConfig.setEncryptMessage(PropKit.getBoolean("encryptMessage", false));
		apiConfig.setEncodingAesKey(PropKit.get("encodingAesKey", "setting it in config file"));*/
		return apiConfig;
	}


}
好了,接下来就是对 index 的处理了
首先我们处理消息接收响应转换处理部分(还是直接copy源码):
package com.jfinal.wechat.config;

import com.jfinal.aop.Before;
import com.jfinal.core.Controller;
import com.jfinal.kit.HttpKit;
import com.jfinal.kit.PropKit;
import com.jfinal.log.Logger;
import com.jfinal.wechat.interceptor.WechatMsgInterceptor;
import com.jfinal.weixin.sdk.api.ApiConfig;
import com.jfinal.weixin.sdk.api.ApiConfigKit;
import com.jfinal.weixin.sdk.jfinal.MsgController;
import com.jfinal.weixin.sdk.kit.MsgEncryptKit;
import com.jfinal.weixin.sdk.msg.InMsgParser;
import com.jfinal.weixin.sdk.msg.OutMsgXmlBuilder;
import com.jfinal.weixin.sdk.msg.in.InMsg;
import com.jfinal.weixin.sdk.msg.in.InTextMsg;
import com.jfinal.weixin.sdk.msg.in.event.InFollowEvent;
import com.jfinal.weixin.sdk.msg.out.OutMsg;
import com.jfinal.weixin.sdk.msg.out.OutTextMsg;

/**
 * 微信消息服务处理
 * @author xkjava
 *
 */
public class WechatMsgController extends Controller{


	private static final Logger log =  Logger.getLogger(WechatMsgController.class);

	private static InMsg inMsg = null;
	private static String inMsgXml = null;

	/**
	 * 消息入口
	 *
	 * 加载WechatMsgInterceptor拦截器,在处理index之前 绑定ApiConfig
	 */
	@Before(WechatMsgInterceptor.class)
	public void index(){


	}


	/**
	 * 此方法在拦截器调用,根据 wechatConfig.txt 配置文件消息 封装 ApiConfig对象,
	 * ApiConfig对象封装了 微信的token appid等信息,有兴趣的同学可以去看下源码
	 * 拦截器内调用此方法返回ApiConfig对象后将次对象绑定在当前线程,这样方便后面具体业务上的调用
	 * 关于线程部分的处理,可以去看源码。如有问题,可以留言,我会根据大家的问题再来做具体介绍。
	 * 当然大神们是不需要的
	 * @return
	 */
	public ApiConfig getApiConfig(){
		ApiConfig apiConfig = new ApiConfig();
		apiConfig.setToken(PropKit.get("token"));
		apiConfig.setAppId(PropKit.get("appId"));
		apiConfig.setAppSecret(PropKit.get("appSecret"));
		/**
		 *  是否对消息进行加密,对应于微信平台的消息加解密方式:
		 *  1:true进行加密且必须配置 encodingAesKey
		 *  2:false采用明文模式,同时也支持混合模式
		 *
		 *  这里暂时不对消息加解密做处理
		 */
		/*apiConfig.setEncryptMessage(PropKit.getBoolean("encryptMessage", false));
		apiConfig.setEncodingAesKey(PropKit.get("encodingAesKey", "setting it in config file"));*/
		return apiConfig;
	}


	/**
	 * ******************************************消息接收响应转换处理******************************************
	 */

	@Before(NotAction.class)
	public InMsg getInMsg() {
		if (inMsg == null)
			inMsg = InMsgParser.parse(getInMsgXml());
		return inMsg;
	}


	/**
	 * 解析接收xml
	 * @return
	 */
	public String getInMsgXml() {
		if(inMsgXml == null)
			inMsgXml = HttpKit.readIncommingRequestData(getRequest());

		// 是否需要解密消息
		if (ApiConfigKit.getApiConfig().isEncryptMessage()) {
			inMsgXml = MsgEncryptKit.decrypt(inMsgXml, getRequest().getParameter("timestamp"), getRequest().getParameter("nonce"), getRequest().getParameter("msg_signature"));
		}

		log.info("接收消息:\n"+inMsgXml);
		return inMsgXml;
	}

	/**
	 * 在接收到微信服务器的 InMsg 消息后后响应 OutMsg 消息
	 */
	public void render(OutMsg outMsg) {
		String outMsgXml = OutMsgXmlBuilder.build(outMsg);
		// 开发模式向控制台输出即将发送的 OutMsg 消息的 xml 内容
		if (ApiConfigKit.isDevMode()) {
			log.info("发送消息:");
			log.info(outMsgXml);
			log.info("--------------------------------------------------------------------------------\n");
		}
		// 是否需要加密消息
		if (ApiConfigKit.getApiConfig().isEncryptMessage()) {
			outMsgXml = MsgEncryptKit.encrypt(outMsgXml, getRequest().getParameter("timestamp"), getRequest().getParameter("nonce"));
		}
		renderText(outMsgXml, "text/xml");
	}
仔细看 getInMsgXml 方法 是用于 解析接收的xml,至于解析的过程 sdk中已经封装好,无需关系,喜欢的可以看看波老师的源码。 render 方法是用户消息的响应。同理,部分内容sdk中已经封装完毕。大家可根据源码看处理过程。
接下来做用户关注 响应,及文本消息处理,在controller中添加以下代码:
/**
	 * 普通关注
	 * InFollowEvent 属于jfianl-weixin 内置对象,需要了解的即可看源码
	 * @param inFollowEvent
	 * @return
	 */
	public void processInFollowEvent(InFollowEvent inFollowEvent){
		if (InFollowEvent.EVENT_INFOLLOW_SUBSCRIBE.equals(inFollowEvent.getEvent())){
			log.info("无参数二维码 关注:openId:{" + inFollowEvent.getFromUserName() + ",原始ID:"+inFollowEvent.getToUserName()+ "}");
			//默认回复
			String resultMsg = "你好,感谢您的关注!";
			OutTextMsg outMsg = new OutTextMsg(inFollowEvent);
			outMsg.setContent(resultMsg);
			render(outMsg);
		}

		// 如果为取消关注事件,将无法接收到传回的信息
		if (InFollowEvent.EVENT_INFOLLOW_UNSUBSCRIBE.equals(inFollowEvent.getEvent())){
		}
		return null;
	}

	/**
	 * 接收文本消息
	 * @param inTextMsg
	 * @return
	 */
	public void processInTextMsg(InTextMsg inTextMsg)
	{

		log.info("接收文本内容:" + inTextMsg.getContent());
		//转发给多客服PC客户端  此处为了客服定位微信用户openid,可以将 用户openId信息重新封装到OutCustomMsg对象转发到客服
		/*OutCustomMsg outCustomMsg = new OutCustomMsg(inTextMsg);
		render(outCustomMsg);*/
		/**
		 * 这里根据用户所发的文本消息做对应业务处理  这里暂时先统一返回文本处理消息
		 */
		OutTextMsg msg = new OutTextMsg(inTextMsg);
		msg.setContent("你好,请问有什么可以帮您。");
		render(msg);
	}
这里的关注 和 文本消息所传入的 对象 也是基于sdk之中的,不同的消息类型都有对应的对象处理,大家还是需要去看看源码,哈哈是不是很sou ez 啊,波老师不愧是波老师啊,至于对应的消息具体怎么处理,大家可根据需求自己更改。(音频,视频,地理位置等消息处理在源码中都可以都有哦!!!)
好了,这个时候我们需要改下我们index 方法了,也就是我们入口啦
/**
	 * 消息入口
	 *
	 * 加载WechatMsgInterceptor拦截器,在处理index之前 绑定ApiConfig
	 */
	@Before(WechatMsgInterceptor.class)
	public void index(){
		String inMsgXml = null;
		System.out.println("接收消息:");
		System.out.println(getInMsgXml(inMsgXml));

		// 解析消息并根据消息类型分发到相应的处理方法
		InMsg msg = InMsgParser.parse(inMsgXml);
		if (msg instanceof InFollowEvent)
			processInFollowEvent((InFollowEvent) msg); //普通关注
		else if(msg instanceof InTextMsg)
			processInTextMsg((InTextMsg) msg); //文本消息

	}
这里解释下,根据传入消息的类型,去做对应的处理,我这里只做了关注和文本消息的处理,需要更多方案的大神们可以继续添加,还是那句话,源码中都有。
基本上就完毕了,现在整个消息服务的类是这样的
package com.jfinal.wechat.config;

import com.jfinal.aop.Before;
import com.jfinal.core.Controller;
import com.jfinal.ext.interceptor.NotAction;
import com.jfinal.kit.HttpKit;
import com.jfinal.kit.PropKit;
import com.jfinal.log.Logger;
import com.jfinal.wechat.interceptor.WechatMsgInterceptor;
import com.jfinal.weixin.sdk.api.ApiConfig;
import com.jfinal.weixin.sdk.api.ApiConfigKit;
import com.jfinal.weixin.sdk.jfinal.MsgController;
import com.jfinal.weixin.sdk.kit.MsgEncryptKit;
import com.jfinal.weixin.sdk.msg.InMsgParser;
import com.jfinal.weixin.sdk.msg.OutMsgXmlBuilder;
import com.jfinal.weixin.sdk.msg.in.InMsg;
import com.jfinal.weixin.sdk.msg.in.InTextMsg;
import com.jfinal.weixin.sdk.msg.in.event.InFollowEvent;
import com.jfinal.weixin.sdk.msg.out.OutMsg;
import com.jfinal.weixin.sdk.msg.out.OutTextMsg;

/**
 * 微信消息服务处理
 * @author xkjava
 *
 */
public class WechatMsgController extends Controller{


	private static final Logger log =  Logger.getLogger(WechatMsgController.class);
	private static InMsg inMsg = null;
	private static String inMsgXml = null;

	/**
	 * 消息入口
	 *
	 * 加载WechatMsgInterceptor拦截器,在处理index之前 绑定ApiConfig
	 */
	@Before(WechatMsgInterceptor.class)
	public void index(){

		// 解析消息并根据消息类型分发到相应的处理方法
		InMsg msg = getInMsg();
		if (msg instanceof InFollowEvent)
			processInFollowEvent((InFollowEvent) msg); //普通关注
		else if(msg instanceof InTextMsg)
			processInTextMsg((InTextMsg) msg); //文本消息
		else
			log.error("未能识别的消息类型。 消息 xml 内容为:\n" +  getInMsgXml());

	}


	/**
	 * 此方法在拦截器调用,根据 wechatConfig.txt 配置文件消息 封装 ApiConfig对象,
	 * ApiConfig对象封装了 微信的token appid等信息,有兴趣的同学可以去看下源码
	 * 拦截器内调用此方法返回ApiConfig对象后将次对象绑定在当前线程,这样方便后面具体业务上的调用
	 * 关于线程部分的处理,可以去看源码。如有问题,可以留言,我会根据大家的问题再来做具体介绍。
	 * 当然大神们是不需要的
	 * @return
	 */
	public ApiConfig getApiConfig(){
		ApiConfig apiConfig = new ApiConfig();
		apiConfig.setToken(PropKit.get("token"));
		apiConfig.setAppId(PropKit.get("appId"));
		apiConfig.setAppSecret(PropKit.get("appSecret"));
		/**
		 *  是否对消息进行加密,对应于微信平台的消息加解密方式:
		 *  1:true进行加密且必须配置 encodingAesKey
		 *  2:false采用明文模式,同时也支持混合模式
		 *
		 *  这里暂时不对消息加解密做处理
		 */
		/*apiConfig.setEncryptMessage(PropKit.getBoolean("encryptMessage", false));
		apiConfig.setEncodingAesKey(PropKit.get("encodingAesKey", "setting it in config file"));*/
		return apiConfig;
	}


	/**
	 * 普通关注
	 * InFollowEvent 属于jfianl-weixin 内置对象,需要了解的即可看源码
	 * @param inFollowEvent
	 * @return
	 */
	public void processInFollowEvent(InFollowEvent inFollowEvent){
		if (InFollowEvent.EVENT_INFOLLOW_SUBSCRIBE.equals(inFollowEvent.getEvent())){
			log.info("无参数二维码 关注:openId:{" + inFollowEvent.getFromUserName() + ",原始ID:"+inFollowEvent.getToUserName()+ "}");
			//默认回复
			String resultMsg = "你好,感谢您的关注!";
			OutTextMsg outMsg = new OutTextMsg(inFollowEvent);
			outMsg.setContent(resultMsg);
			render(outMsg);
		}

		// 如果为取消关注事件,将无法接收到传回的信息
		if (InFollowEvent.EVENT_INFOLLOW_UNSUBSCRIBE.equals(inFollowEvent.getEvent())){
		}

	}

	/**
	 * 接收文本消息
	 * @param inTextMsg
	 * @return
	 */
	public void processInTextMsg(InTextMsg inTextMsg)
	{

		log.info("接收文本内容:" + inTextMsg.getContent());
		//转发给多客服PC客户端  此处为了客服定位微信用户openid,可以将 用户openId信息重新封装到OutCustomMsg对象转发到客服
		/*OutCustomMsg outCustomMsg = new OutCustomMsg(inTextMsg);
		render(outCustomMsg);*/
		/**
		 * 这里根据用户所发的文本消息做对应业务处理  这里暂时先统一返回文本处理消息
		 */
		OutTextMsg msg = new OutTextMsg(inTextMsg);
		msg.setContent("你好,请问有什么可以帮您。");
		render(msg);
	}


	/**
	 * ******************************************消息接收响应转换处理******************************************
	 */

	@Before(NotAction.class)
	public InMsg getInMsg() {
		if (inMsg == null)
			inMsg = InMsgParser.parse(getInMsgXml());
		return inMsg;
	}


	/**
	 * 解析接收xml
	 * @return
	 */
	public String getInMsgXml() {
		if(inMsgXml == null)
			inMsgXml = HttpKit.readIncommingRequestData(getRequest());

		// 是否需要解密消息
		if (ApiConfigKit.getApiConfig().isEncryptMessage()) {
			inMsgXml = MsgEncryptKit.decrypt(inMsgXml, getRequest().getParameter("timestamp"), getRequest().getParameter("nonce"), getRequest().getParameter("msg_signature"));
		}

		log.info("接收消息:\n"+inMsgXml);
		return inMsgXml;
	}

	/**
	 * 在接收到微信服务器的 InMsg 消息后后响应 OutMsg 消息
	 */
	public void render(OutMsg outMsg) {
		String outMsgXml = OutMsgXmlBuilder.build(outMsg);
		// 开发模式向控制台输出即将发送的 OutMsg 消息的 xml 内容
		if (ApiConfigKit.isDevMode()) {
			log.info("发送消息:");
			log.info(outMsgXml);
			log.info("--------------------------------------------------------------------------------\n");
		}
		// 是否需要加密消息
		if (ApiConfigKit.getApiConfig().isEncryptMessage()) {
			outMsgXml = MsgEncryptKit.encrypt(outMsgXml, getRequest().getParameter("timestamp"), getRequest().getParameter("nonce"));
		}
		renderText(outMsgXml, "text/xml");
	}


}
还有很重要的一点,在JfinalWechatConfig类中添加路由
    public void configRoute(Routes me) {
		// TODO Auto-generated method stub
		me.add("/msg", WechatMsgController.class);

    }
ok。这样就好了,我这里是使用的jetty服务,关于jfianl使用tomcat总是出现各种问题,所以选择jetty,启动服务。本地调试输入 http://localhost:端口/项目名/msg
出现 签名验证失败,请确定是微信服务器在发送消息过来即可成功。
接下来我们需要发布到服务器上,然后通过关注对应的公众号测试即可。
这里我使用的百度云 应用引擎 创建一个java-jetty服务 做的测试,价格便宜,做一些测试很划算。如果大家对线上测试这一块还不太了解的话,可以留言,我可以通过一篇博客和大家说明。
(以上全部基于 jfianl-weixin sdk 源码讲解,新手第一次发博客,哪里写的不好或者乱写了,希望大家批评指出。也希望大家仔细看文字说明。)


 6398
6398

 被折叠的 条评论
为什么被折叠?
被折叠的 条评论
为什么被折叠?
 到【灌水乐园】发言


