


一、部署1.5.2
1、解压缩 tar -xvf apache-seata-***-incubating-bin.tar.gz
2、修改conf下的application.yml 只需要修改seata下的此配置,然后再nacos中添加其它配置,下面是application.yml的配置:
server:
  port: 7091

spring:
  application:
    name: seata-server

logging:
  config: classpath:logback-spring.xml
  file:
    path: /usr/local/seata/logs

console:
  user:
    username: seata
    password: *******

seata:
  config:
    # support: nacos 、 consul 、 apollo 、 zk  、 etcd3
    type: nacos
    nacos:
      # nacos ip地址
      server-addr: 127.0.0.1:8848
      group: SEATA_GROUP
      namespace: mes
      username: nacos
      password: *******
      ##if use MSE Nacos with auth, mutex with username/password attribute
      #access-key: ""
      #secret-key: ""
      # 读取nacos上的配置文件
      data-id: seataServer.yml
  registry:
    # support: nacos 、 eureka 、 redis 、 zk  、 consul 、 etcd3 、 sofa
    type: nacos
    nacos:
      application: seata-server
      # nacos ip地址
      server-addr: 127.0.0.1:8848
      group: SEATA_GROUP
      namespace: mes
      cluster: default
      username: nacos
      password: ********
      ##if use MSE Nacos with auth, mutex with username/password attribute
      #access-key: ""
      #secret-key: ""
#  store:   //可以在此配置也可以在nacos的seata配置文件yml中配置
    # support: file 、 db 、 redis
#    mode: file
#  server:
#    service-port: 8091 #If not configured, the default is '${server.port} + 1000'
  security:
    secretKey: SeataSecretKey0c382ef121d778043159209298fd40bf3850a017
    tokenValidityInMilliseconds: 1800000
    ignore:
      urls: /,/**/*.css,/**/*.js,/**/*.html,/**/*.map,/**/*.svg,/**/*.png,/**/*.ico,/console-fe/public/**,/api/v1/auth/login
3、在nacos配置seata的服务端配置
-
建立一个SEATA_GROUP的分组,专门放置seata客户端和服务端的配置
- 建seataServer.yml配置,如图示:
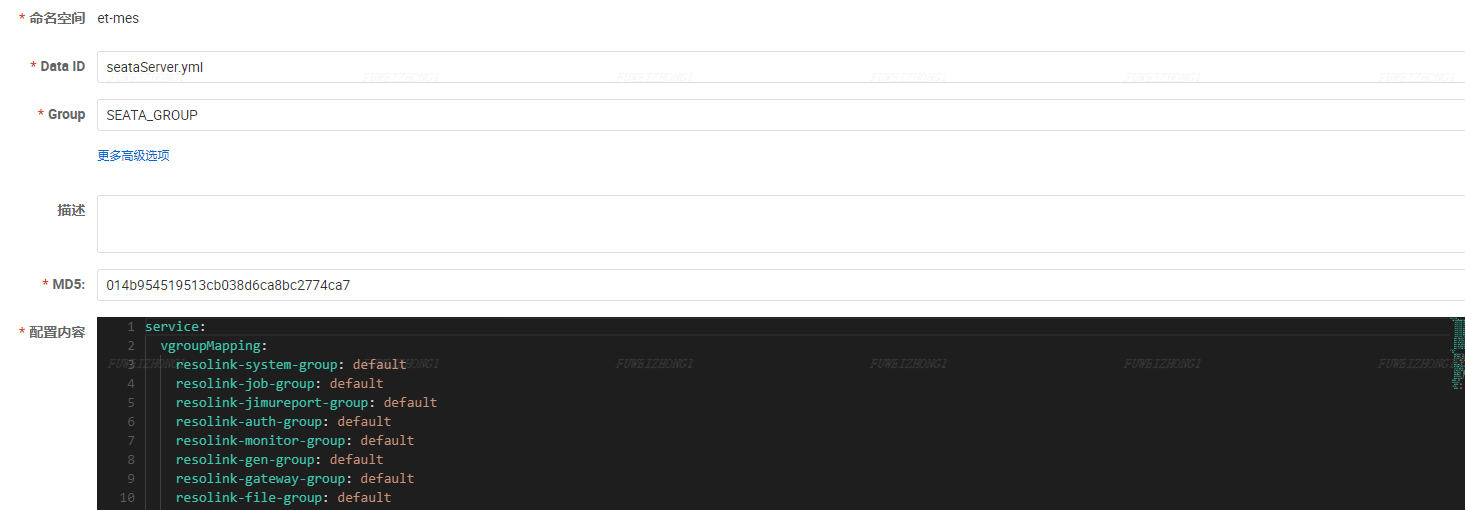
- 具体服务端配置如下:
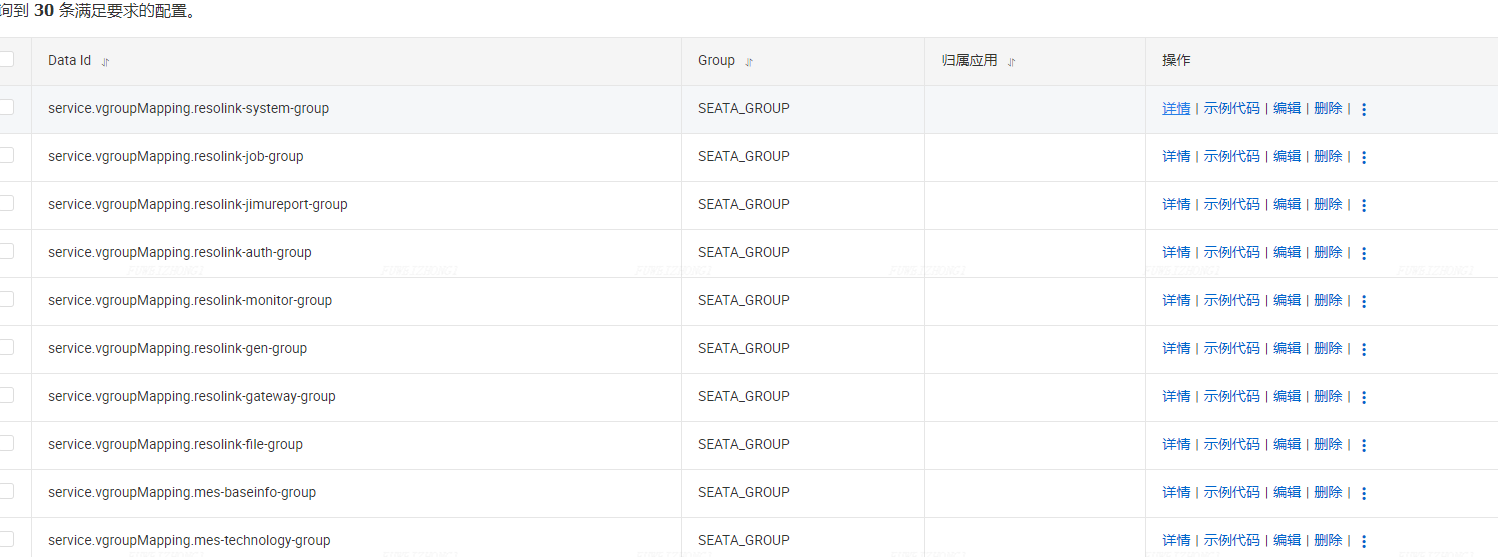
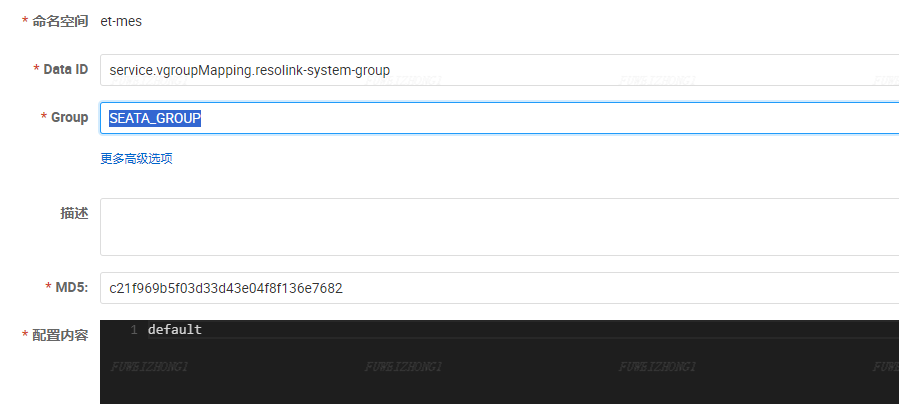
service:
  vgroupMapping:
    system-group: default
    job-group: default
    jimureport-group: default
    auth-group: default
    monitor-group: default
    gen-group: default
    gateway-group: default
    file-group: default
    mes-baseinfo-group: default
    mes-technology-group: default
    mes-planning-group: default
    mes-warehouse-group: default
    mes-produce-group: default
    mes-integrate-group: default
store:
  db:
    datasource: druid
    dbType: mysql
    driverClassName: com.mysql.cj.jdbc.Driver
    url: jdbc:mysql://*****:3306/seata?useUnicode=true
    user: root
    password: *******
    globalTable: global_table
    lockTable: lock_table
    branchTable: branch_table
    maxConn: 30
    maxWait: 5000
    minConn: 5
    queryLimit: 100
  mode: db
  session:
    mode: db
  lock:
    mode: db
其中store下的配置也可以直接放到seata的conf下的application.yml中,其实conf下的application.yml+nacos下的seataServer.yml总体构成了总的配置文件。
4、在nacos配置seata的客户端配置
所有的微服务加seata配置
- 在SEATA_GROUP组中加配置
- 在 微服务配置中加seata配置
# seata配置
seata:
  # 默认关闭,如需启用spring.datasource.dynami.seata需要同时开启
  enabled: true
  # Seata 应用编号,默认为 ${spring.application.name}
  application-id: ${spring.application.name}
  # Seata 事务组编号,用于 TC 集群名
  tx-service-group: ${spring.application.name}-group
  # 关闭自动代理
  enable-auto-data-source-proxy: false
  # 服务配置项
  service:
    # 虚拟组和分组的映射
    vgroup-mapping:
      mes-baseinfo-group: default
  config:
    type: nacos
    nacos:
      server-addr: ****:8848
      group: SEATA_GROUP
      namespace: et-mes
      username: nacos
      password: *****
  registry:
    type: nacos
    nacos:
      application: seata-server
      server-addr: ****:8848
      namespace: et-mes
      group: SEATA_GROUP
      username: nacos
      password: ****
      cluster: default
5、启动seata
-
在bin下执行sh seata-server.sh 启动命令,成功后可以在nacos的注册中心看到seata服务

二、升级seata1.5.2到2.1.0
1、经过比对,数据库脚本没变
2、把1.5.2的application.yml拷过来覆盖默认配置
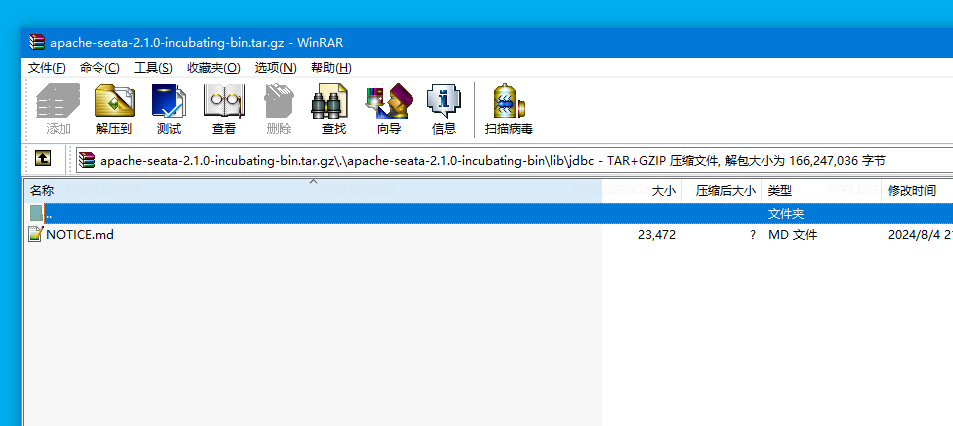
3、关键到了,2.1.0中lib下jdbc文件夹下没有jar,需要我们从其它地方复制一个jdbc的jar过来,才能启动成功。
 4、启动,完美成功。


 2311
2311

 被折叠的 条评论
为什么被折叠?
被折叠的 条评论
为什么被折叠?
 到【灌水乐园】发言


