(翻译说明:http://my.oschina.net/ywlaker/blog/468911)
Preparing Eclipse
In this section, you will verify that Eclipse is properly set up for Java development.
The following is assumed:
You are starting with a new Eclipse installation with default settings.
You are familiar with the basic Eclipse workbench mechanisms, such as views and perspectives.
If you're not familiar with the basic workbench mechanisms, please see the Getting Started chapter of the Workbench User Guide.
准备Eclipse
本小节,你将检查Eclipse是否被正确的设置为Java开发环境。
我们假定:
你使用的是带有默认设置的Eclipse全新安装版本
你熟悉Eclipse工作台的基本机制,比如视图和透视图
如果你不熟悉Eclipse工作台的基本机制,请参考Workbench User Guide(工作台用户指南)的Getting Started(新手入门)章节。
Verifying JRE installation and classpath variables
If you still see the Eclipse Welcome page, click the arrow icon to begin using Eclipse.
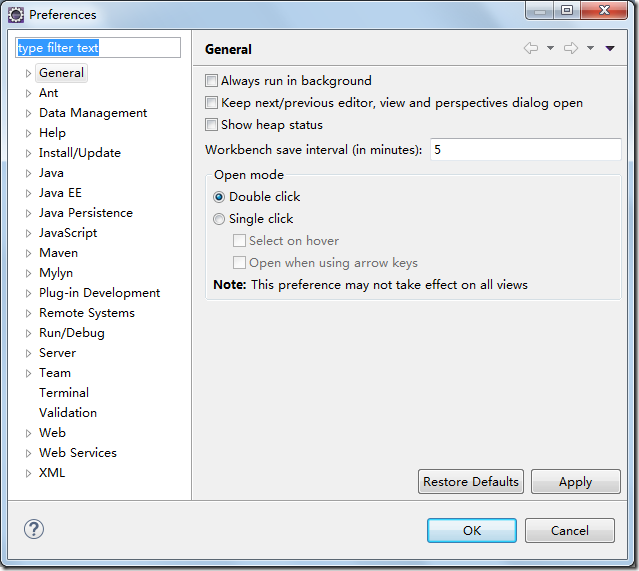
Select the menu item Window > Preferences... to open the workbench preferences. 
Select the Java > Installed JREs preference page to display the installed Java Runtime Environments. Confirm that a JRE has been detected. By default, the JRE used to run the workbench will be used to build and run Java programs. It should appear with a checkmark in the list of installed JREs. We recommend that you use a Java SDK instead of a JRE. An SDK is designed for development and contains the source code for the Java library, easing debugging. Additional SDKs can be added by searching the hard drive for installed SDKs. To do so, simply click the Search... button and specify a root folder for the search.
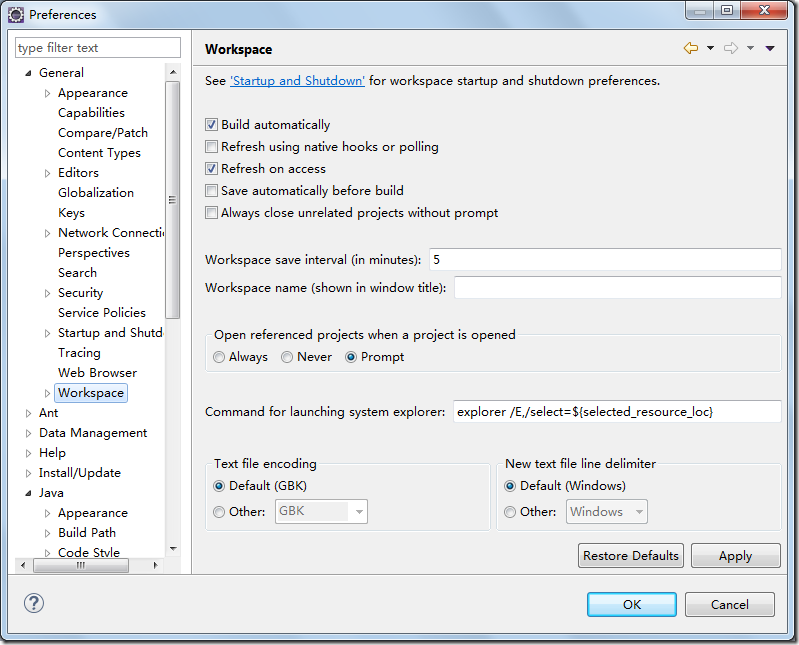
If you work with code that does not yet use generics (as we do in this tutorial), we recommend that you install a Java SDK 1.4 as well, but leave the most recent version checked as default.Select the General > Workspace preference page. Confirm that the Build automatically option is checked.
Select the Java > Build Path preference page. Confirm that Source and output folder is set to Folders.
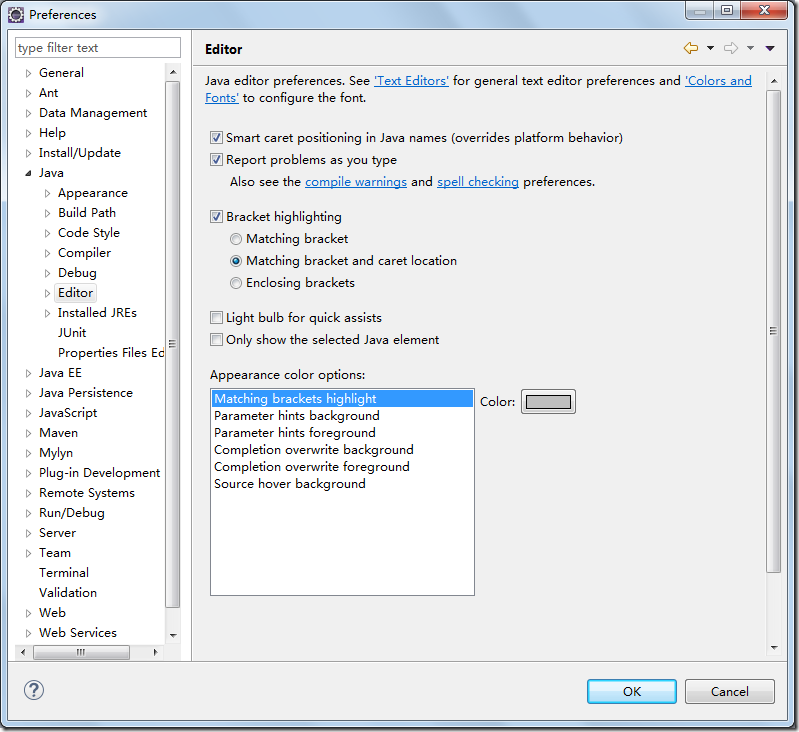
Select the Java > Editor preference page. Confirm that option Report problems as you type is checked.
Select the Java > Compiler preference page. Confirm that option Compiler compliance level matches your default JRE version (usually 1.6).
Click on OK to save the preferences.
检查JRE和环境变量
如果你看到的仍然是Eclipse的欢迎界面,请点击箭头图标开始使用Eclipse。
选择 Java > Installed JREs打开已安装JRE显示界面。确保列表中至少有一个JRE。默认情况下,Eclipse工作台依赖和编译运行Java程序的JRE是同一个,它就是列表中勾选的JRE。我们推荐使用JDK来代替JRE,因为JDK包含了众多源码和类库,便于调试。要添加额外的JDK只需要点击Search…按钮,在本地硬盘上找到已安装的JDK目录即可。假如你在代码中没有使用泛型特性,那么…(这里就是长期没有更新了,现在都Java 8了,还Java SDK 1.4呢,略过)。

选择 Java > Build Path 首选页,确保 Source and output folder 被设置成指定文件夹。

选择 Java > Compiler 首选页,确保 Compiler compliance level 和JRE版本对应

点击 OK 按钮保存设置。
(END)


 5万+
5万+

 被折叠的 条评论
为什么被折叠?


