(翻译说明:http://my.oschina.net/ywlaker/blog/468911)
创建第一个Java工程
在本小节中,你将使用JUnit作为范例创建一个全新的Java工程。JUnit是一个开源的Java单元测试框架。
获取JUnit源码
首先你需要下载JUnit源码:
点击这里下载JUnit源代码(源码版本3.8.1,有兴趣可以去 http://junit.org/ 下载最新版)。
保存文件(不要解压)到<下载>路径。
创建工程
在Eclipse中选择菜单 File > New > Project.... 打开 New Project(新建工程) 向导。
选择 Java Project 然后点击 Next 进入 New Java Project(新建Java工程) 向导界面:

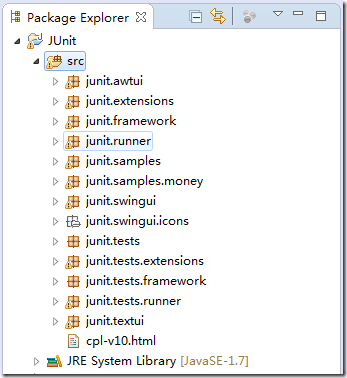
在Project Name框输入JUnit工程名,选择JDK版本(1.7),点击 Finish 后成功创建Java工程。在包管理器中展开 JUnit 工程,并选择src文件夹。
选择菜单项 File > Import....(也可以在src文件夹上右键 Import…)
展开 General ,选择 Archive File(存档文件),点击 Next。
点击 Archive File框右边的 Browse…按钮,选择 <下载>/junit3.8.1src.zip。
注意:该步骤假设你遵循了步骤1和2,即把JUnit的源码存放在了正确的路径(<下载>)。(只要能找到文件,放在哪里没有关系)在 Import 向导中,展开根节点,点击 Deselect All 按钮,然后只选择 junit 节点。你可以在左侧的面板中展开节点、点击元素来查看将要导入到右边面板中的节点或元素下的资源情况,注意:请选择所有资源,后续教程将会用到。

确保 Import 向导中 Into folder 显示的是 JUnit 工程的src文件夹(JUnit/src),然后点击 Finish。在导入进度指示条中可以看到资源被导入的同时就被编译了,这是由于首选项中的 Build automatically 被勾选的缘故。
(原文)
Creating your first Java project
In this section, you will create a new Java project. You will be using JUnit as your example project. JUnit is an open source unit testing framework for Java.
Getting the Sample Code (JUnit)
First you need to download the JUnit source code.
Click here to download the JUnit source code.
Save the archive (do not extract) to a directory from now on referenced as <Downloads>.
Creating the project
Inside Eclipse select the menu item File > New > Project.... to open the New Project wizard
Select Java Project then click Next to start the New Java Project wizard:

On this page,
Then click Finish.
type "JUnit" in the Project name field, and
select "J2SE-1.4" in the Use an execution environment JRE field.
In the Package Explorer, expand the JUnit project and select the source folder src.
Select the menu item File > Import....
Expand General, select Archive file, and click Next.
Click the Browse button next to the Archive file field and browse to select
<Downloads>/junit381src.jar
Note: This step assumes that you followed steps 1 and 2 in the Getting the Sample Code section above.
In the Import wizard, expand the root node, press Deselect All and select only the junit node. You can expand and select elements within the junitdirectory on the left pane to view the individual resources that you are importing on the right pane. Note: Do not deselect any of the resources in the junit directory at this time. You will need all of these resources in the tutorial.

Make sure that the JUnit project's source folder appears in the destination Into folder field. Then click Finish. In the import progress indicator, notice that the imported resources are compiled as they are imported into the workbench. This is because the Build automatically option is checked on the Workbench preferences page.
In the Package Explorer view, expand the JUnit project and the src folder to view the JUnit packages.

(END)


 772
772

 被折叠的 条评论
为什么被折叠?


