概述
SpringBoot应用对监控要求不是高,可以采用 SpringBootAdmin就可以搞定,但是如果需要长期,并且希望后期能优化应用,提高平台抗风险性时,可以使用InfluxDB保存应用的性能度量数据。
InfluxDB可以支持海量数据存储
Grafana可以显示不同维度的数据
操作步骤
SpringBoot Sample用例
生成 SpringBoot Sample 项目地址 https://start.spring.io/
添加依赖包与配置
依赖包配置
<!---收集各种性能指标插件-->
<dependency>
	<groupId>org.springframework.boot</groupId>
	<artifactId>spring-boot-starter-actuator</artifactId>
</dependency>
<!---通过此插件直接写数据到Influx DB-->
<dependency>
	<groupId>io.micrometer</groupId>
	<artifactId>micrometer-registry-influx</artifactId>
</dependency>
Influx DB配置
management:
    metrics:
        export:
            influx:
                enabled: true
                db: coursemetrics
                uri: http://localhost:8086
                user-name: admin
                password: admin
                connect-timeout: 1s
                read-timeout: 10s
                auto-create-db: true
                step: 1m
                num-threads: 2
                consistency: one
                compressed: true
                batch-size: 10000
## 地址 uri: http://localhost:8086
## InFluxDB 用户 user-name: admin (是不是需要配置具有管理角色的用户未测试)
## InFluxDB 密码 password: admin
## 配置参考 https://micrometer.io/docs/registry/influx
搭建InfluxDB数据库
下载地址
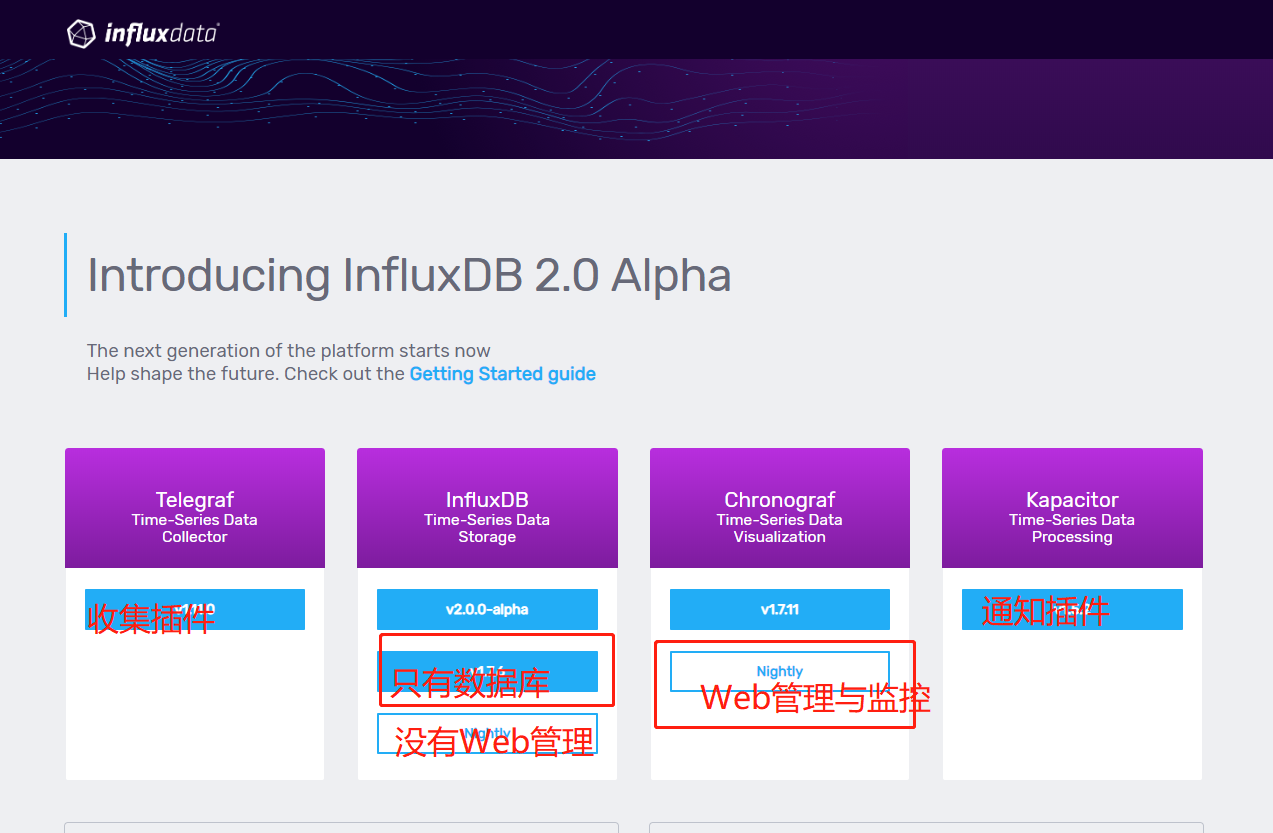
Telegraf插件是收集各个中间件性能指标插件 支持监控的产品有好多。
本人没有搞懂怎么使用呢,不好意思!
安装与配置
- 解压压缩包 And Runing
influxd.ext
- 配置文件influxdb.conf
## 通过搜索修改
[meta]
  # Where the metadata/raft database is stored
  dir = "D:/Program Files/influxdb-1.7.6-1/meta"

[data]
  # The directory where the TSM storage engine stores TSM files.
  dir = "D:/Program Files/influxdb-1.7.6-1/data"
  # The directory where the TSM storage engine stores WAL files.
  wal-dir = "D:/Program Files/influxdb-1.7.6-1/wal"
  # log any sensitive data contained within a query.
  query-log-enabled = true

[coordinator]
  # can help prevent run away queries.  Setting the value to 0 disables the limit.
  query-timeout = "0s"

[retention]
  # The interval of time when retention policy enforcement checks run.
  check-interval = "30m"

[shard-precreation]
  # Determines whether shard pre-creation service is enabled.
  enabled = true
  # The interval of time when the check to pre-create new shards runs.
  check-interval = "10m"
  # The default period ahead of the endtime of a shard group that its successor
  # group is created.
  advance-period = "30m"

[monitor]
  # Whether to record statistics internally.
  store-enabled = true
  # The destination database for recorded statistics
  store-database = "_internal"
  # The interval at which to record statistics
  store-interval = "10s"

[http]
  # Determines whether HTTP endpoint is enabled.
  enabled = true
  # The bind address used by the HTTP service.
  bind-address = ":8086"
要说有什么特别的,倒没注意,就是搬运工
重启 InfluxDB 服务器
通过命令操作用户、数据库等信息
通过influx命令进行管理,可以使用如下命令创建数据库:
    > CREATE DATABASE "testDB"
    > show databases   //查询当前的所有数据库
    > show databases
    name: databases
    ---------------
    name
    _internal
    testDB
    > use testDB   //使用某个数据库
建库的操作可以发现非常类似于mysql下的操作。而在influxdb下没有细分的表的概念,influxdb下的表在插入数据库的时候自动会创建。可以通过SHOW measurements命令查看所有的表,这个类似于mysql下的show tables; 。
    > INSERT cpu,host=serverA,region=us_west value=0.64  //在cpu表中插入相关的数据
    > SELECT * FROM cpu ORDER BY time DESC LIMIT 3  //查询最近的三条数据
    > SELECT * FROM /.*/ LIMIT 1  //正则表达式查询
    > delete from cpu where time=1480235366557373922  //删除某条数据
    > DROP MEASUREMENT "measurementName"  //删除表
update更新语句没有,不过有alter命令,在influxdb中,删除操作用和更新基本不用到 。在针对数据保存策略方面,有一个特殊的删除方式,这个后面再提。
关于用户的操作如下:
    #显示用户
    SHOW USERS
    #创建用户
    CREATE USER "username" WITH PASSWORD 'password'
    #创建管理员权限的用户
    CREATE USER "username" WITH PASSWORD 'password' WITH ALL PRIVILEGES
    #删除用户
    DROP USER "username"
简单的列一下,够用就行。具体请参考官网 InfluxDB官方文档
简单的联系一下
> show databases
name: databases
name
----
_internal
courselog
mydb
coursemetrics
>
搭建Grafana
下载地址
安装与配置
Win 平台直接点击下一步,就OK。登陆账号 admin/admin,若不对去看看官方文档
访问地址:http://localhost:3000 若不对看启动日志
展示 InfluxDB数据
配置好数据源: 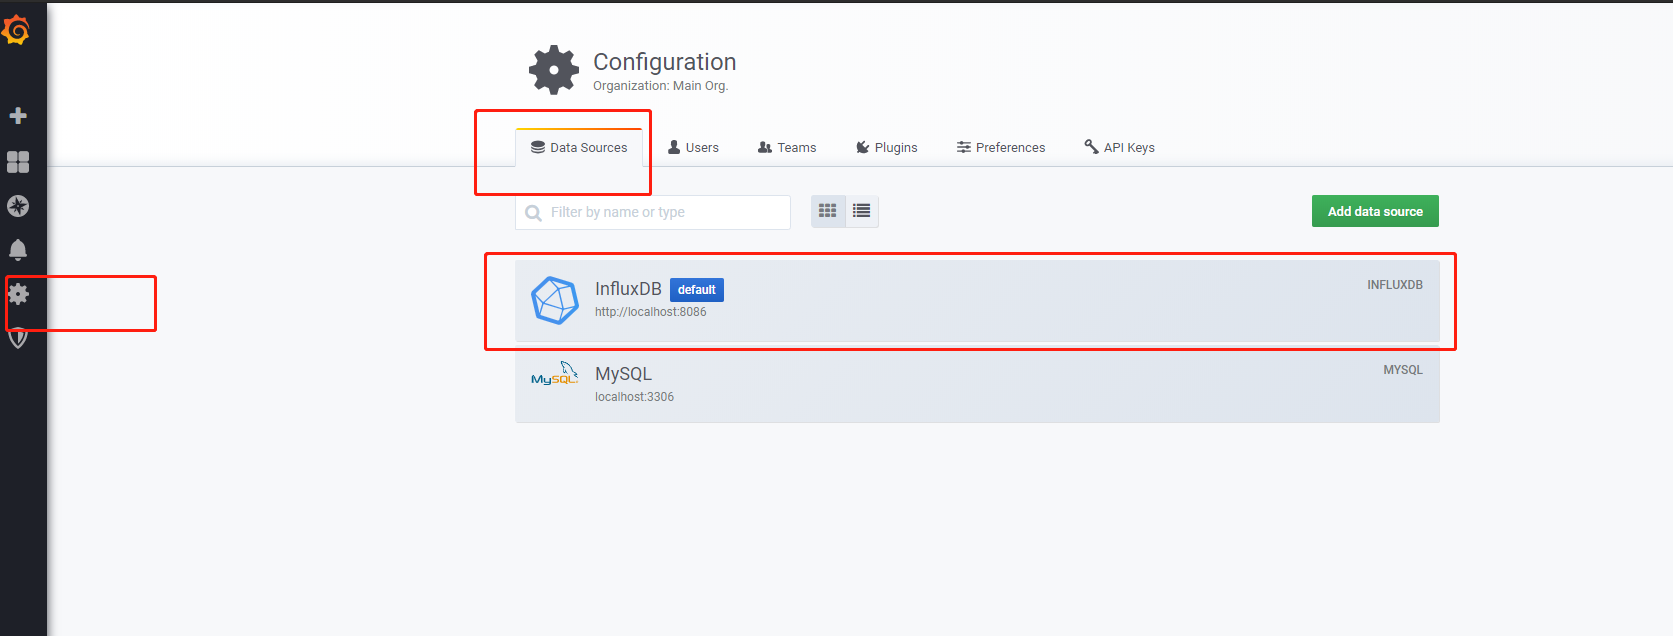
绘制图表 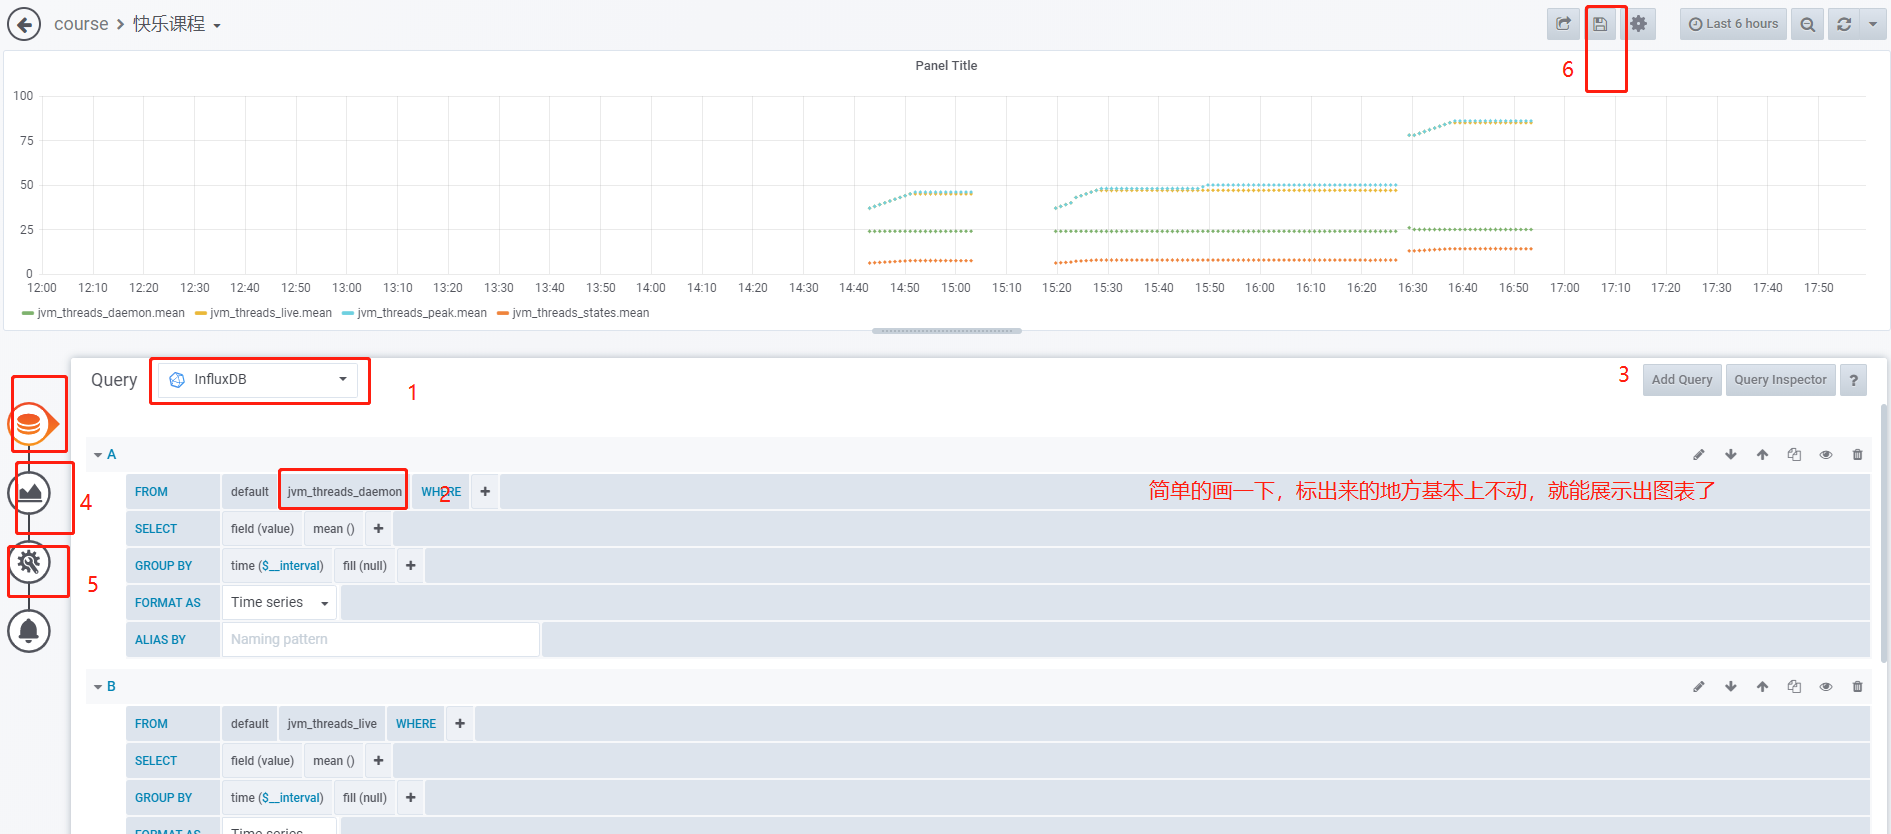
预览所有图表 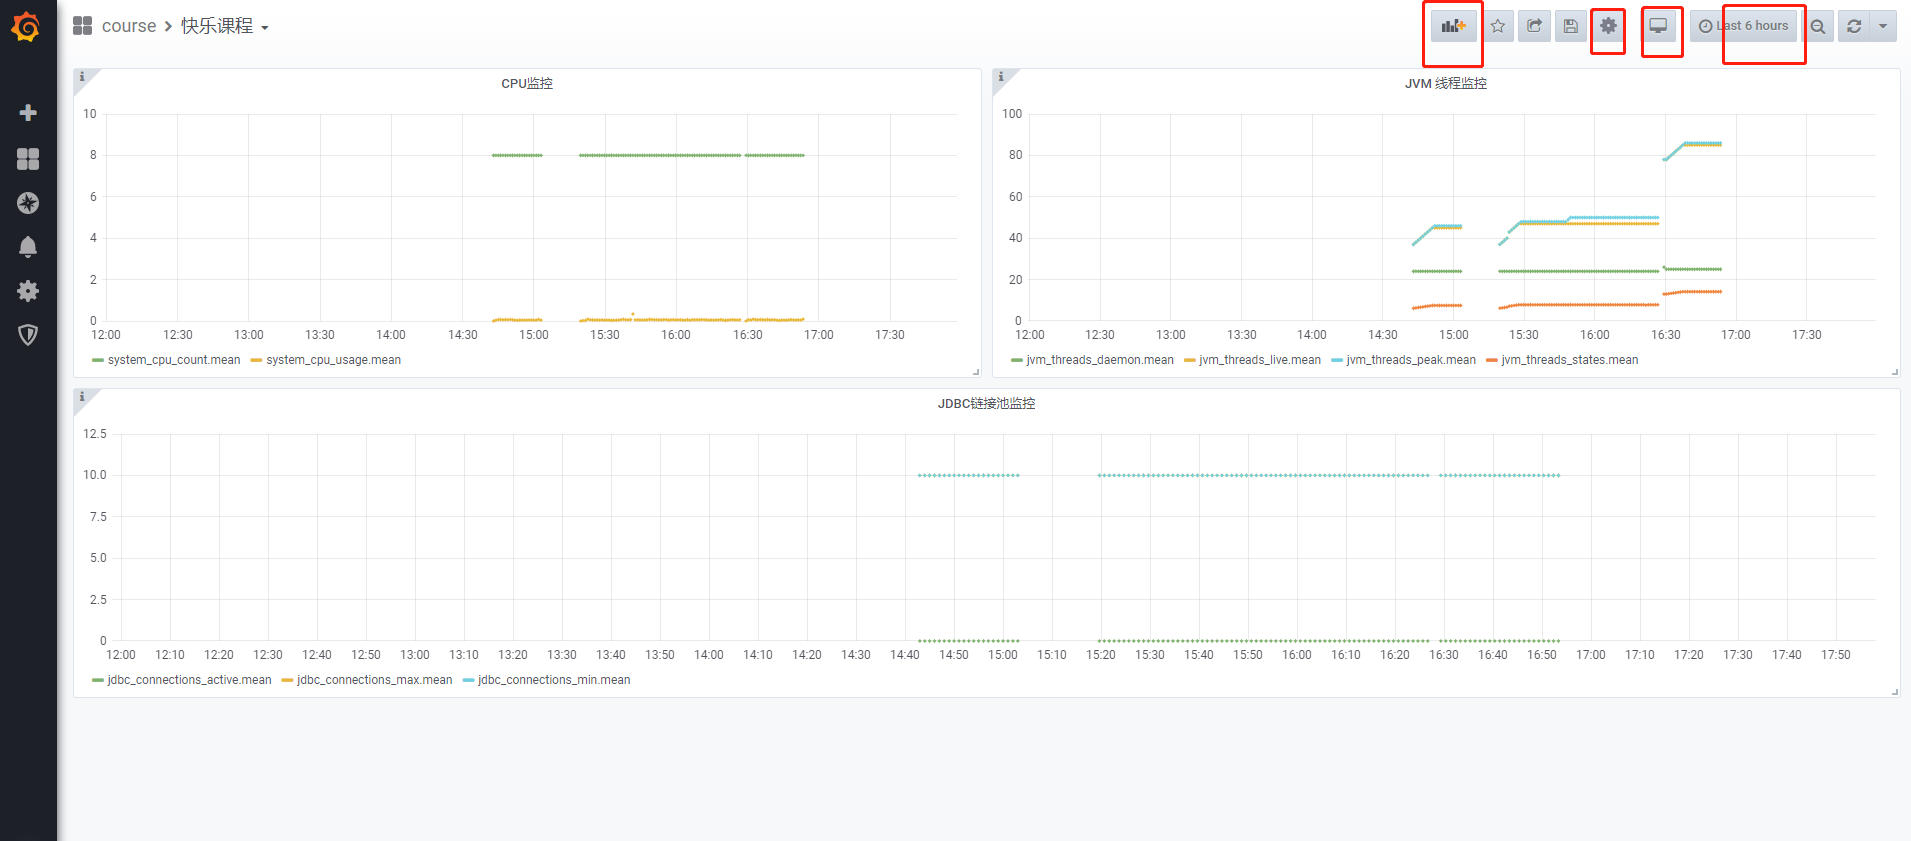
总结
整个过程也很简单,也耗了不少时间。在此做个笔记。




 728
728


 被折叠的 条评论
为什么被折叠?


