


1、新建spring boot 项目
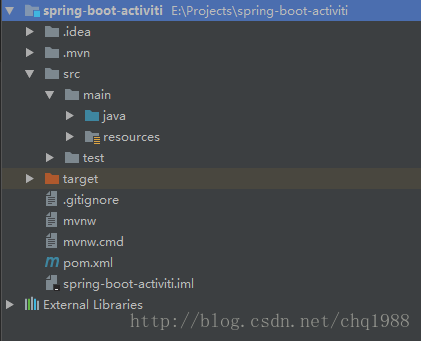
使用IDEA新建一个spring boot 项目,项目结构如下:
2、增加activiti、jpa、mysql等依赖
<dependencies>
        <dependency>
            <groupId>org.activiti</groupId>
            <artifactId>activiti-spring-boot-starter-basic</artifactId>
            <version>5.21.0</version>
        </dependency>
        <dependency>
            <groupId>org.springframework.boot</groupId>
            <artifactId>spring-boot-starter-data-jpa</artifactId>
        </dependency>
        <dependency>
            <groupId>org.springframework.boot</groupId>
            <artifactId>spring-boot-starter-thymeleaf</artifactId>
        </dependency>
        <dependency>
            <groupId>org.springframework.boot</groupId>
            <artifactId>spring-boot-starter-web</artifactId>
        </dependency>

        <dependency>
            <groupId>mysql</groupId>
            <artifactId>mysql-connector-java</artifactId>
            <scope>runtime</scope>
        </dependency>
        <dependency>
            <groupId>org.springframework.boot</groupId>
            <artifactId>spring-boot-starter-tomcat</artifactId>
        </dependency>
        <dependency>
            <groupId>org.springframework.boot</groupId>
            <artifactId>spring-boot-starter-test</artifactId>
            <scope>test</scope>
        </dependency>
    </dependencies>
3、配置数据库连接信息
新建一个名为spring-boot-activiti的数据库并且在application.properties中添加如下配置信息:
##############################################################################
#########datasource
##############################################################################
spring.datasource.url=jdbc:mysql://localhost:3306/spring-boot-activiti?characterEncoding=utf8&useSSL=true
spring.datasource.username=root
spring.datasource.password=root
spring.datasource.driver-class-name=com.mysql.jdbc.Driver
#自动创建、更新、验证数据库表结构
spring.jpa.properties.hibernate.hbm2ddl.auto=update
spring.jpa.show-sql=true项目启动后会自动创建activiti相关的数据库表数据库表的含义请参考:http://blog.csdn.net/hj7jay/article/details/51302829
4、新建activiti流程图
这里是通过Eclipse的activiti插件绘制的流程图,在图中红框部分添加如下代码:${resumeService.storeResume()}

流程图的代码如下:
<?xml version="1.0" encoding="UTF-8"?>
<definitions xmlns="http://www.omg.org/spec/BPMN/20100524/MODEL" xmlns:xsi="http://www.w3.org/2001/XMLSchema-instance" xmlns:activiti="http://activiti.org/bpmn" xmlns:bpmndi="http://www.omg.org/spec/BPMN/20100524/DI" xmlns:omgdc="http://www.omg.org/spec/DD/20100524/DC" xmlns:omgdi="http://www.omg.org/spec/DD/20100524/DI" typeLanguage="http://www.w3.org/2001/XMLSchema" expressionLanguage="http://www.w3.org/1999/XPath" targetNamespace="http://www.activiti.org/test">
  <process id="myProcess" name="My process" isExecutable="true">
    <startEvent id="startevent1" name="Start"></startEvent>
    <sequenceFlow id="flow1" sourceRef="startevent1" targetRef="servicetask1"></sequenceFlow>
    <endEvent id="endevent1" name="End"></endEvent>
    <sequenceFlow id="flow2" sourceRef="servicetask1" targetRef="endevent1"></sequenceFlow>
    <serviceTask id="servicetask1" name="User Task" activiti:expression="${resumeService.storeResume()}"></serviceTask>
  </process>
  <bpmndi:BPMNDiagram id="BPMNDiagram_myProcess">
    <bpmndi:BPMNPlane bpmnElement="myProcess" id="BPMNPlane_myProcess">
      <bpmndi:BPMNShape bpmnElement="startevent1" id="BPMNShape_startevent1">
        <omgdc:Bounds height="35.0" width="35.0" x="130.0" y="270.0"></omgdc:Bounds>
      </bpmndi:BPMNShape>
      <bpmndi:BPMNShape bpmnElement="endevent1" id="BPMNShape_endevent1">
        <omgdc:Bounds height="35.0" width="35.0" x="360.0" y="270.0"></omgdc:Bounds>
      </bpmndi:BPMNShape>
      <bpmndi:BPMNShape bpmnElement="servicetask1" id="BPMNShape_servicetask1">
        <omgdc:Bounds height="55.0" width="105.0" x="210.0" y="260.0"></omgdc:Bounds>
      </bpmndi:BPMNShape>
      <bpmndi:BPMNEdge bpmnElement="flow1" id="BPMNEdge_flow1">
        <omgdi:waypoint x="165.0" y="287.0"></omgdi:waypoint>
        <omgdi:waypoint x="210.0" y="287.0"></omgdi:waypoint>
      </bpmndi:BPMNEdge>
      <bpmndi:BPMNEdge bpmnElement="flow2" id="BPMNEdge_flow2">
        <omgdi:waypoint x="315.0" y="287.0"></omgdi:waypoint>
        <omgdi:waypoint x="360.0" y="287.0"></omgdi:waypoint>
      </bpmndi:BPMNEdge>
    </bpmndi:BPMNPlane>
  </bpmndi:BPMNDiagram>
</definitions>
图中的任务为系统任务,当执行到该任务时系统会根据配置信息自动执行该任务
5、新建Service接口和实现类
public interface ResumeService {
    void storeResume();
}@Service("resumeService")
public class ResumeServiceImpl implements ResumeService {
@Override
public void storeResume() {
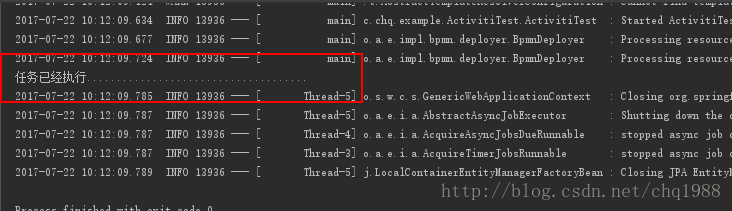
System.out.println("任务已经执行.....................................");
}
}6、新建一个测试类来启动这个流程
@RunWith(SpringJUnit4ClassRunner.class)
@SpringBootTest(classes = SpringBootActivitiApplication.class)
public class ActivitiTest {

    @Autowired
    RuntimeService runtimeService;

    @Test
    public void TestStartProcess() {
        Map<String, Object> variables = new HashMap<>();
        variables.put("applicantName", "John Doe");
        variables.put("email", "john.doe@activiti.com");
        variables.put("phoneNumber", "123456789");
        runtimeService.startProcessInstanceByKey("myProcess", variables);
    }
}
startProcessInstanceByKey()为根据流程ID启动该流程的方法


 4037
4037

 被折叠的 条评论
为什么被折叠?
被折叠的 条评论
为什么被折叠?
 到【灌水乐园】发言


