


TableView重用机制实现原理
对于 TableView的重用机制想必大家都不陌生,闲来无事,再回顾一下TableView的重用机制,为了做到显示和数据分离。iOS tableView 的实现并不是为了每个数据项创建一个tableCell。而是只创建屏幕可显示最大个数的cell,然后重复这些cell。对cell做单独的显示配置,来达到既不影响效果显示,又能充分节约内存的目的。
现在主流的重用机制是:通过每个cell置顶不同的reuseIdentifer(重用标识符)。根据reuseIdentifer创建相关的重用池,需要使用时就根据reuseIdentifer获取相关的cell。
查看tableview头文件,会找到 NSMutableArray *visiableCells,和NSMutableDictionary *reuseTableCells两个结构。visiableCell内保存当前显示的cells,reusableTablecells保存可重用的cells。
Tableview刚创建时候时 reusableTableCells为空,那么tableview dequeueReusableCellWithIdentifer:cellIdentifer则返回nil。开始的cell通过 initWithStyle:(UITableViewCellStyle)style reuseIdentifer:(NSString *)reuseIdentidentifer方法创建cell和对应的reuseIdentifer。而且cellForRowAtIndexPath只是调用最大显示cell数的次数。
例如当有20条数据的时候,屏幕最多显示10个cell。开始显示Tableview的情况是:
- 用
[[UITableViewCell alloc] initWithStyle:UITableviewCellStyleDefault resuseIdentifer:CellIdentifer]创建10次cell,并给同种cell相同的重用标识(当然,可以为不同显示类型的cell指定不同的标识)。并且10个cell全部都加入到visiableCells数组,reuseableTableCells为空。 - 向上拖动tableview,当
cell1完全移出屏幕,会创建第11个cell。cell11加入到visiableCells,cell1移出visiableCells,cell1加入到reuseableTableCells。 - 接着向上拖动
tableView,因为reuseTableCells中已经有值,所以需要显示新的cell,cellForRowAtIndexPath再次被调用的时候,[tableview dequeueReuseableCellWithIdertifer: ]进行cell重用,返回cell1。cell1加入到visableCells,cell1移出reuseableTableCells,cell2移出visiableCells,cell2加入到reuseableTableCells.自后在需要显示的cell就可以正常重用了。
当cell不够用的时候创建新的cell:
- (UITableViewCell *)tableView:(UITableView *)tableView cellForRowAtIndexPath:(NSIndexPath *)indexPath {
  static NSString *identifer = @'cell';
  UITableViewCell *cell = [tableView dequeueReusableCellWithIdeentifer:identifer];
  if(!cell){
    cell = [[UITableViewCell alloc] initWithStyle: UITableViewCellStyleSubtitle reuseIdentifer:identifer];
    return cell;
  }
}
也可以使用registerClass: forCellReuseIdentifer:[NSStringFormClass('customerCell')] 或者 registerNib: forCellReuseIdentifer:'nibcell'注册cell,可以不用:
if(!cell) {
  [[UITableViewCell alloc] initWithStyle:UITableViewCellStyleSubtitleReuseIdentiger:identifer];
}
直接走 dequeueReusableCellWithIdentifer 方法。
需要注意的一些情况,在使用过程中,并不是只有拖动超出屏幕的时候才会更新reuseTableCells表,还有以下情况:
reloadData:这种情况比较特殊,一般是局部数据发生变化,需要重新刷新cell显示的内容时调用。在cellForRowAtIndexPath调用中,所有cell都是重用的。所以猜测reloadData调用后,把visiableCells中所有cell移入reuseableTableCells,visiableCells清空。cellForRowAtIndexPath调用后,再把reuse的cell从resuableTableCell取出来,放入到visiableCells。relaodRowAtIndex,:指定刷新indexPath。如果调用reusableTableCells为空,那么cellForRowAtIndexPath调用后,是新创建cell,新的cell加入到visableCells.于是,之后的刷新就有cell做resuse了。
此外需要注意的是:
- 重取出来的
cell是有可能已经捆绑过数据或者加过子视图的,所以,如果有必要,要清除数据(比如textlabel的text)和remove掉add过的子视图(可以使用tag); - 这样设计的目的是为了避免频繁的
alloc和delloc cell对象而已。 - 设计的关键是实现
cell和数据的完全分离。
特殊情况下,如何避免重用机制出错:
对于多变的自定义cell,有时这种重用机制会出错。比如,当一个cell含有一个UITextField的子类并被放在重用queue中以待重用,这时如果一个未包含任何子视图的cell要显示在屏幕上,就会取出并使用这个重用的cell显示在无任何子视图的cell中,这时候就会出错。
可以通过一下3个方案解决:
-
方案一:取消cell重用机制,通过
indexPath来创建cell将可以解决重复显示问题,不过这样做对大数据来说内存就比较吃紧。// 通过不让他重用cell来解决重复显示 - (UITableViewCell *)tableview:(UITableView *)tableview cellForRowAtIndexPath:(NSIndexPath *)indexPath { //定义唯一标识 static NSString *cellIdentifer = @"cell"; // 通过indexPath创建cell实例,每一个cell都是单独的 UITableViewCell *cell = [tableView cellForRowAtIndexPath:indexPath]; /// 判断为空进行初始化,当拉动页面显示超过主页面内容的时候就会重用之前的cell,而不会再次初始化 if(!=cell){ cell = [UITableView alloc] initWithStyle:UITableViewCellStyleSubtitle reuseIdentifer:cellIdentifer]; } //对cell进行简单配置 cell.textLable.text = @'text'; cell.detailTextLabel.text = @"text"; cell.imageView.image = [UIImage imageNamed:@"test.png"]; return cell; } -
方案二:让每个cell都拥有一个对应的标识,这样做也会让cell无法重用,所以也不会出现是重复显示了,显示内容比较多的时候,内存占用也比较多,和方案一类似,同样是不让它重用cell来解决重复显示,不同的每个cell对应一个标识。
- (UITableViewCell *)tableView:(UITableView *)tableView cellForRowAtIndexPath:(NSIndexPath *)indexPath { /// 定义cell标识,每个cell对应一个自己的标识 NSString *cellIdentifer = [NSString StringWithFormat:"cell%d%d",indexPath.section,indexPath.row]; UITableViewCell *cell = [tableView dequeueResuableCellWithIdentifer:cellIdentifer]; // 判断为空进行初始化-当拉动页面显示超过主页面内容的时候就会重用之前的cell,而不会再次初始化 if(!cell){ cell = [UITableViewCell alloc] initWithStyle:UITableViewCellStyleSubtitle reuseIdentifer: cellIdentifer]; } //对cell进行简单配置 cell.textLable.text = @'text'; cell.detailTextLabel.text = @"text"; cell.imageView.image = [UIImage imageNamed:@"test.png"]; return cell; } -
方案三:只要最后一个cell内容不为空,然后把他的子视图全部删掉,等于把cell单独出来,然后跟新数据就可以解决重复显示;当页面拉动需要显示新数据的时候,把最后一个cell进行删除,就可以自定义cell。此方案既可以避免重复显示,又重用了cell相对内存管理者来说是最好的方案。
- (UITableViewCell *)tableView:(UITableView *)tableView cellForRowAtIndexPaht:(NSIndexPath *)indexPaht {
  /// 定义唯一标识
  static NSString *cellIdentifer = @"cell";
  // 通过唯一标识创建cell实例
  UITableViewCell *cell = [tableView dequeueReusableCellWithIdentifer:cellIdentifer];
  // 判断为进行初始化
  if(!cell){
    cell = [UITableViewCell alloc] initWithStyle:UITableViewCellStyleSubtitle reuseIdentifer:cellIdentifer];
  } else {
    /// 当页面拉动的时候,当cell存在并且最后一个存在,把他进行删除,就出来一个独特的cell,我们在进行数据配置时即可避免
    while ([cell.contenView.subviews lastObject] != nil){
      [(UIView *)[cell.contenView.subviews lastObject] removeFromSuperView];
    }

  }
   //对cell进行简单配置
  cell.textLable.text = @'text';
  cell.detailTextLabel.text = @"text";
  cell.imageView.image = [UIImage imageNamed:@"test.png"];
  return cell;
}
自定义一个控件来更深入理解UITableView的重用机制
- 首先我们创建一个类
CunstomerViewReusePool实现重用机制的基本原理:
// h文件
#import <Foundation/Foundation.h>
#import <UIKit/UIKit.h>

NS_ASSUME_NONNULL_BEGIN

@interface CunstomerViewReusePool : NSObject

// 从重用池中中取出一个可重用的view
- (UIView *)dequueReusableView;
// 向重用次中添加一个view
- (void)addUsingView:(UIView *)view;
// 重置方法,将当前使用中的视图移除到可重用队列中
- (void)reset;

@end

NS_ASSUME_NONNULL_END
// m文件实现 #import "CunstomerViewReusePool.h" @interface CunstomerViewReusePool () // 等待使用的队列 @property (nonatomic, strong) NSMutableSet *waitingUseQueue; // 使用中队列 @property (nonatomic, strong) NSMutableSet *usingQueue; @end @implementation CunstomerViewReusePool # pragma ---Cyclelife - (instancetype)init { self = [super init]; if (self) { _waitingUseQueue = [NSMutableSet set]; _usingQueue = [NSMutableSet set]; } return self; } # pragma Setting,Getting //从重用池中中取出一个可重用的view -(UIView *)dequueReusableView { UIView *view = [_waitingUseQueue anyObject]; if(!view){ return nil; } //进行队列移动 [_waitingUseQueue removeObject:view]; [_usingQueue addObject:view]; return view; } -(void)addUsingView:(UIView *)view { if (!view) { return; } //添加视图到使用的队列中 [_usingQueue addObject:view]; } -(void)reset { UIView *view = nil; while ((view = [_usingQueue anyObject])) { //从队列中移除 [_usingQueue removeObject:view]; // 加入等待队列 [_waitingUseQueue addObject:view]; } } @end- 接下来定义一个使用了
CunstomerViewReusePool重用机制的IndexTableView,实现类似索引的功能。
// h文件
#import <UIKit/UIKit.h>

@protocol IndexedTableViewDataSource <NSObject>
// 获取一个tableview的字母索引条数据的方法
- (NSArray<NSString *> * _Nullable )indexTitlesForIndexTableView:(UITableView *_Nullable)tableView;

@end

NS_ASSUME_NONNULL_BEGIN

@interface IndexedTableView : UITableView

@property (nonatomic, weak) id<IndexedTableViewDataSource> indexDataSource;

@end

NS_ASSUME_NONNULL_END
// m文件 #import "IndexedTableView.h" #import "CunstomerViewReusePool.h" @interface IndexedTableView () { UIView *containerView; CunstomerViewReusePool *reusePool; } @end @implementation IndexedTableView -(void)reloadData { [super reloadData]; if(!containerView) { containerView = [[UIView alloc] initWithFrame:CGRectZero]; containerView.backgroundColor = UIColor.whiteColor; // 避免索引条随着tableview滚动 [self.superview insertSubview:containerView aboveSubview:self]; } if(!reusePool){ reusePool = [[CunstomerViewReusePool alloc] init]; } //标记所有视图为可重用状态 [reusePool reset]; //reload字母索引条 [self reloadSideIndexBar]; } -(void)reloadSideIndexBar { NSArray<NSString *> *arrayTitles = nil; if([self.indexDataSource respondsToSelector:@selector(indexTitlesForIndexTableView:)]){ arrayTitles = [self.indexDataSource indexTitlesForIndexTableView:self]; } //判断字母索引条是否为空 if(!arrayTitles || arrayTitles.count <= 0) { containerView.hidden = YES; return; } NSInteger count = arrayTitles.count; CGFloat buttonWidth = 50; CGFloat buttonHeight = self.frame.size.height /count; for (int i = 0; i < count; i ++) { NSString *title = arrayTitles[i]; // 从重用池中取出一个button UIButton *button = (UIButton *)[reusePool dequueReusableView]; // 如果没有可重用的button就重新创建一个 if(!button) { button = [[UIButton alloc] initWithFrame:CGRectZero]; button.backgroundColor = UIColor.whiteColor; //注册button到重用池中 [reusePool addUsingView:button]; } // 添加button到父视图控件 [containerView addSubview:button]; [button setTitle:title forState:UIControlStateNormal]; [button setTitleColor:UIColor.purpleColor forState:UIControlStateNormal]; //设置button的坐标 [button setFrame:CGRectMake(0, i * buttonHeight, buttonWidth, buttonHeight)]; } containerView.hidden = NO; containerView.frame = CGRectMake(self.frame.origin.x + self.frame.size.width - buttonWidth, self.frame.origin.y, buttonWidth, self.frame.size.height); } @end-
最后再
ViewController中添加IndexTableView并实现重用功能,代码如下:#import "ViewController.h" #import "IndexedTableView.h" @interface ViewController ()<UITableViewDelegate,UITableViewDataSource,IndexedTableViewDataSource> { IndexedTableView *indexTableView;//带索引条的TableView NSMutableArray *dataSource; UIButton *button; } @end @implementation ViewController - (void)viewDidLoad { [super viewDidLoad]; //创建一个tableview indexTableView = [[IndexedTableView alloc]initWithFrame:CGRectMake(0, 60, self.view.frame.size.width, self.view.frame.size.height - 60) style:UITableViewStylePlain]; indexTableView.delegate = self; indexTableView.dataSource = self; //设置tableview索引数据源 indexTableView.indexDataSource = self; [self.view addSubview:indexTableView]; //创建一个button button = [UIButton buttonWithType:UIButtonTypeSystem]; button.frame = CGRectMake(0, 20, 100, 40); button.center = self.view.center; button.backgroundColor = [UIColor blackColor]; [button setTitle:@"reloadTable" forState:UIControlStateNormal]; [button addTarget:self action:@selector(doAction) forControlEvents:UIControlEventTouchUpInside]; [self.view addSubview:button]; //数据源 dataSource = [NSMutableArray array]; for (int i = 0; i < 100; i++) { [dataSource addObject:@(i*123456789)]; } } #pragma IndexedTableViewDataSource - (NSArray<NSString *> * _Nullable )indexTitlesForIndexTableView:(UITableView *_Nullable)tableView { static BOOL relaod = NO; if (relaod) { relaod = NO; return @[@"A",@"B",@"C",@"D",@"E",@"F",@"G",@"H",@"I",@"J",@"K"]; }else{ relaod = YES; return @[@"A",@"B",@"C",@"O",@"P",@"Q"]; } } #pragma UITableViewDataSource -(NSInteger)tableView:(UITableView *)tableView numberOfRowsInSection:(NSInteger)section { return dataSource.count; } -(UITableViewCell *)tableView:(UITableView *)tableView cellForRowAtIndexPath:(NSIndexPath *)indexPath { static NSString *identifier = @"cell"; UITableViewCell *cell = [tableView dequeueReusableCellWithIdentifier:identifier]; // 如果重用池当中没有可重用的cell,那么创建一个cell if (!cell) { cell = [[UITableViewCell alloc]initWithStyle:UITableViewCellStyleDefault reuseIdentifier:identifier]; } // 文案设置 cell.textLabel.text = [[dataSource objectAtIndex:indexPath.row]stringValue]; return cell; } -(void)doAction{ [indexTableView reloadData]; } @end结果如下:
- 首先我们创建一个类
table刷新重用视图
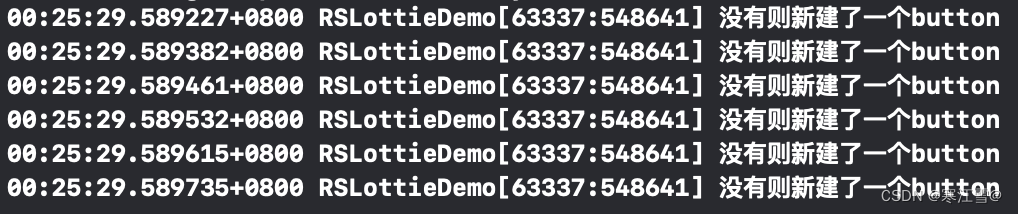
刚进去的时候,因为重用池中没有button所以会创建6个button,并添加到重用池中.如下图所示.
点击reloadTable按钮会复用之前的6个button,并创建5个新的button添加到重用池中.如下图所示
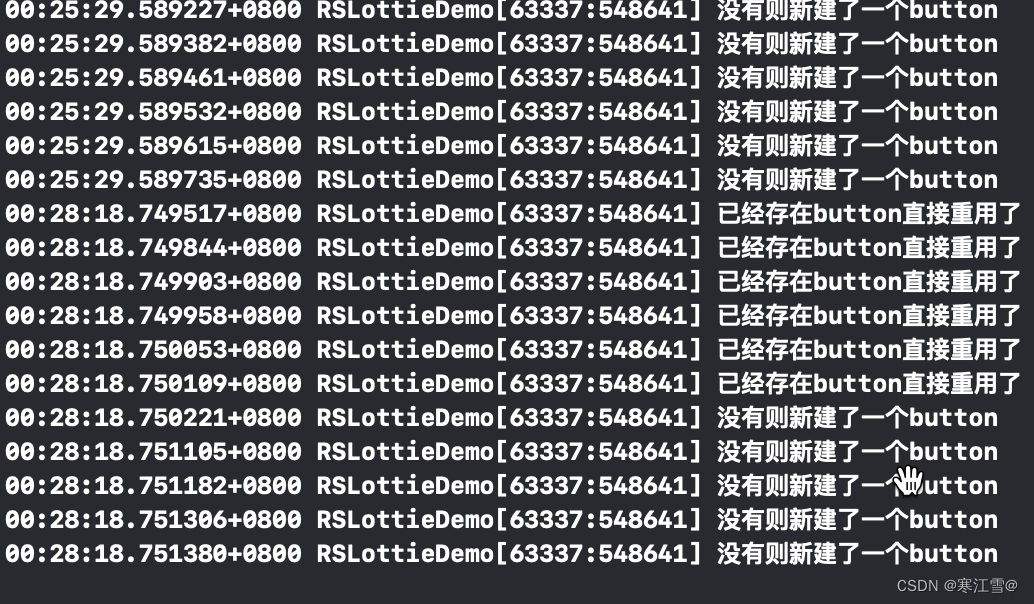
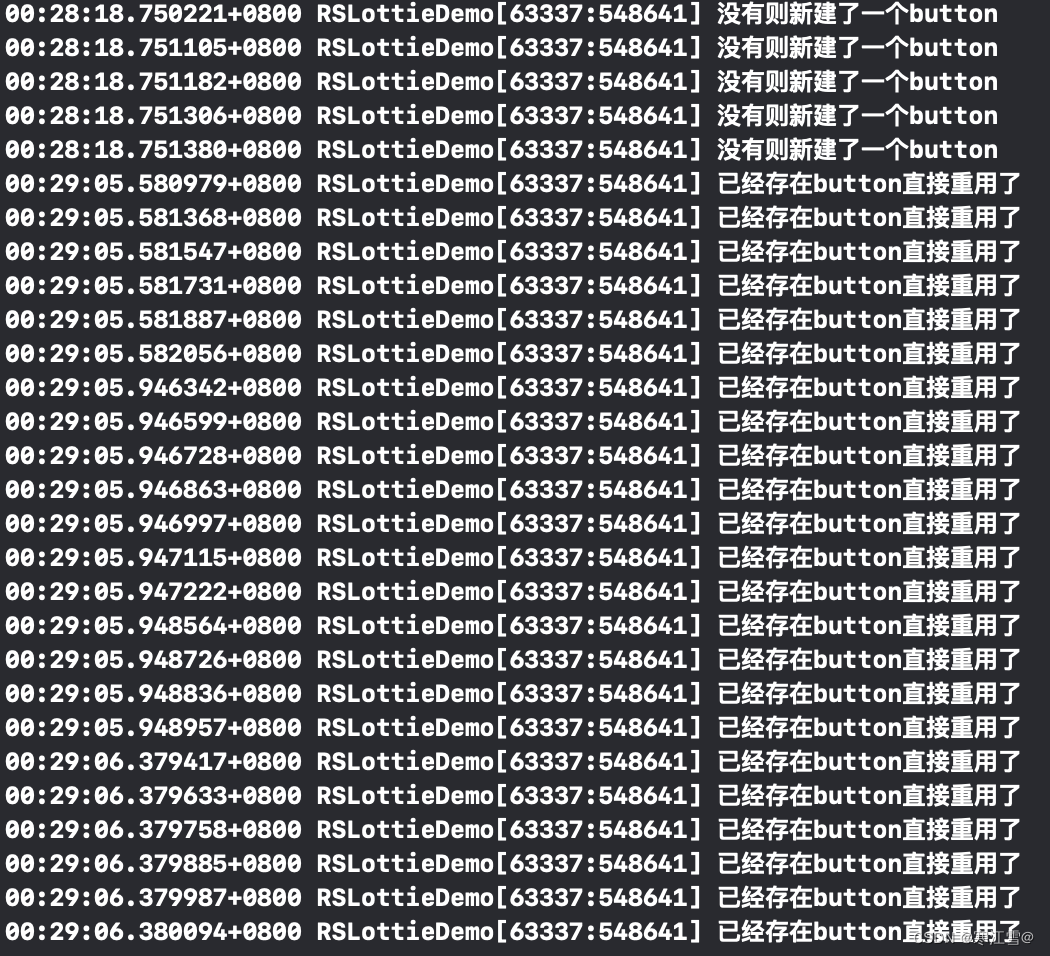
这个时候,重用池中已经有11个button了,如果当前屏幕的button数不超过这个数的话,就会一直复用重用池中的button不会再创建新的button,这样减少了内存的开销


 8295
8295


 被折叠的 条评论
为什么被折叠?
被折叠的 条评论
为什么被折叠?
 到【灌水乐园】发言


