


之前在Coursera上学习python课程的时候写的一个memory的小游戏。属于记忆类的小游戏。
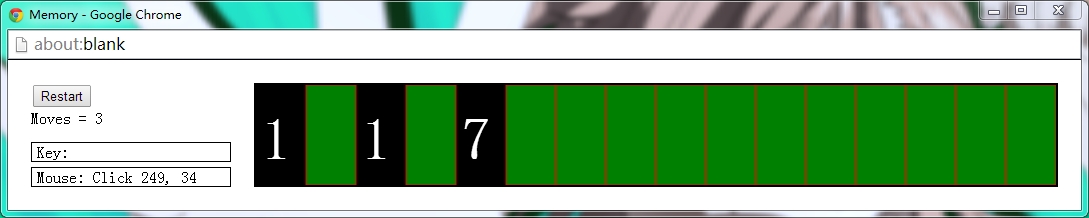
原来的memory是所有的纸牌都排成一列的,通过点击来翻牌,如果最近的两次翻的牌都一样那么就成功了,牌会保持翻开的状态。如下图所示:
实现代码:
# implementation of card game - Memory
# by Sean

import simplegui
import random

# helper function to initialize globals
def init():
    global deck, exposed, card_list, moves
    deck = [(i // 2) for i in range(0, 16)]
    random.shuffle(deck)
    exposed = []
    for i in range(0, 16):
        exposed.append(False)
    card_list = []
    moves = 0
    l.set_text("Moves = 0")

# define event handlers
def mouseclick(pos):
    global exposed, state, moves
    card_checked = int(pos[0]) * 2 // 100
    if exposed[card_checked] == True:
        return
    moves += 1
    l.set_text("Moves = " + str((moves + 1) // 2))
    exposed[card_checked] = True
    if len(card_list) == 0:
        card_list.append(card_checked)
    elif len(card_list) == 1:
        card_list.append(card_checked)
    else:
        card1, card2 = card_list.pop(), card_list.pop()
        if deck[card1] != deck[card2]:
            exposed[card1], exposed[card2] = False, False
        card_list.append(card_checked)

# cards are logically 50x100 pixels in size
def draw(canvas):
    SIDE_LEN = 50
    for i in range(0, 16):
        canvas.draw_text(str(deck[i]), [5 + SIDE_LEN * i, 75], 60, "White")
        if not exposed[i]:
            canvas.draw_polygon(([SIDE_LEN * i, 0], [SIDE_LEN * (i + 1), 0], [SIDE_LEN * (i + 1), 100], [SIDE_LEN * i, 100]), 1, "Red", "Green")

# create frame and add a button and labels
frame = simplegui.create_frame("Memory", 800, 100)
frame.add_button("Restart", init)
l = frame.add_label("Moves = 0")

# initialize global variables
init()

# register event handlers
frame.set_mouseclick_handler(mouseclick)
frame.set_draw_handler(draw)

# get things rolling
frame.start()
现做出如下改动:
将牌面放在一个二维的平面上。
将原来的牌的正面数字以及牌的背面均用图片代替。
使用pygame.
# memory-Hayao edition
# By Seandor
import pygame, sys, random
from pygame.locals import *

FPS = 30 # frames per second setting
WINDOWWIDTH = 800
WINDOWHEIGHT = 600
CARDWIDTH = 100
CARDHEIGHT = 87
CARDNUM = 36

# colors   R    G    B
BLACK = (  0,   0,   0)
WHITE = (255, 255, 255)
RED   = (255,   0,   0)
GREEN = (  0, 255,   0)
BLUE  = (  0,   0, 255)

# loading image source
MASTERPIECE_SURF = pygame.image.load('masterpiece.png')
CARDBACK_SURF = pygame.image.load('back.png')
BACKGROUND_SURF = pygame.image.load('totoro.png')

class GameState():
    def __init__(self, exposed, state, card_list, moves):
        self.exposed = exposed
        self.state = state
        self.card_list = card_list
        self.moves = moves

def createDeck(source):
    ''' Return a list of Surface Object.
       Use the image source to create a deck.
    '''
    deck = []
    for i in range(CARDNUM // 2):
        card = source.subsurface((CARDWIDTH * i, 0, CARDWIDTH, CARDHEIGHT))
        deck.extend([card] * 2)
    return deck

def main():
    global FPSCLOCK, DISPLAYSURF, BASICFONT, DECK
    pygame.init()
    FPSCLOCK = pygame.time.Clock()
    DISPLAYSURF = pygame.display.set_mode((WINDOWWIDTH, WINDOWHEIGHT))
    BASICFONT = pygame.font.Font('freesansbold.ttf', 18)
    pygame.display.set_caption('Memory-Hayao edition')

    DECK = createDeck(MASTERPIECE_SURF)
    random.shuffle(DECK)
    exposed = [False] * CARDNUM
    state = 0
    card_list = []
    moves = 0
    gameState = GameState(exposed, state, card_list, moves)

    showStartScreen()

    # add background music
##    pygame.mixer.music.load('totoro.mp3')
##    pygame.mixer.music.play(-1, 0.0)
    # draw background
    DISPLAYSURF.blit(BACKGROUND_SURF, (0, 0))

    while True:
        gameStart(gameState)
        gameOver()

def showStartScreen():
    pass

def gameStart(gameState):
    mouseClicked = False
    for event in pygame.event.get():
        if event.type == QUIT:
            pygame.quit()
            sys.exit()
        elif event.type == MOUSEMOTION:
            mousepos = event.pos
        elif event.type == MOUSEBUTTONUP:
            mousepos = event.pos
            mouseClicked = True
    if mouseClicked:
        onClick(gameState, mousepos)

    drawCards(gameState)
    pygame.display.update()
    FPSCLOCK.tick(FPS)

def onClick(gameState, mousepos):
    if mousepos[0] < 150 or mousepos[0] > 750 or mousepos[1] < 39 or mousepos[1] > 561:
        return
    card_checked = (int(mousepos[0] - 150) // CARDWIDTH) + (int(mousepos[1] - 39) // CARDHEIGHT) * 6
    if gameState.exposed[card_checked] == True:
        return
    gameState.moves += 1
    gameState.exposed[card_checked] = True
    if gameState.state == 0:
        gameState.card_list.append(card_checked)
        gameState.state = 1
    elif gameState.state == 1:
        gameState.card_list.append(card_checked)
        gameState.state = 2
    else:
        card1, card2 = gameState.card_list.pop(), gameState.card_list.pop()
        if DECK[card1] != DECK[card2]:
            gameState.exposed[card1], gameState.exposed[card2] = False, False
        gameState.card_list.append(card_checked)
        gameState.state = 1

def drawCards(gameState):
    startDrawX = 150
    startDrawY = 39
    # draw a 6 * 6 board
    for i in range(6):
        for j in range(6):
            DISPLAYSURF.blit(DECK[i * 6 + j], (startDrawX + CARDWIDTH * j, startDrawY + CARDHEIGHT *i))
            if not gameState.exposed[i * 6 + j]:
                DISPLAYSURF.blit(CARDBACK_SURF, (startDrawX + CARDWIDTH * j, startDrawY + CARDHEIGHT *i))

def gameOver():
    pass

if __name__ == '__main__':
    main()
可以看到里面的一些函数还是空的。因为没有太多时间和精力去完善它,尽管是很小的东西,但是要做的精致还是很困难的。
下面是游戏运行的截图:

当所有牌都是正面的时候就gameover了。
体会感悟:
虽然做的东西很简单,但全都是自己一点一点做的,每张图片,每个图片的处理,每行代码都认真的考虑过,修改过,所以完成的时候还是挺开心的。功能方面还是有很多可以添加和改进的,可以很容易想到的就有,对于点击次数的计数,还可以添加关卡设置不同难度,玩家排名数据统计等等,但要全部实现实在精力有限。或许有闲暇时间会来再次改进。(剪图片挺有意思的^-^)


 2万+
2万+


 被折叠的 条评论
为什么被折叠?
被折叠的 条评论
为什么被折叠?
 到【灌水乐园】发言


