


一、安装sonar5.5
1.在mysql中创建sonar数据库
2.官网下载地址
http://www.sonarqube.org/downloads/
下载
cd /home/kangxzh
wget https://akamai.bintray.com/f6/f61d342cc266d188007c59f6e7bd34d4f4ac4eec455759d71be73df35e5b6e84?__gda__=exp=1463035157~hmac=ffac1cf9d5d3f5a51e20f1efa51de0ad1b6af24e25f2a60ba128c96410bc1176&response-content-disposition=attachment%3Bfilename%3D%22sonarqube-5.5.zip%22&response-content-type=application%2Fzip
下载文件重命名为sonar.zip
在命令行中解压
unzip sonar.zip
编辑~/.bashrc_profile
SONAR_HOME=/home/kangxzh/sonarqube-5.5
export $PATH $SONAR_HOME
修改$SONAR_HOME/conf/sonar.properties
sonar.jdbc.username=root
sonar.jdbc.password=onceas
sonar.jdbc.url=jdbc:mysql://192.168.1.216:3306/sonar?useUnicode=true&characterEncoding=utf8&rewriteBatchedStatements=true&useConfigs=maxPerformance
执行启动命令
/home/kangxzh/sonarqube-5.5/bin/linux-x86-64/sonar.sh start
默认访问地址为:
二、配置jenkins2.3
安装插件
Jenkins--》系统管理--》管理插件--》过滤SonarQube Plugin

直接进行安装
1.配置sonar server
Jenkins--》系统设置--》SonarQube servers
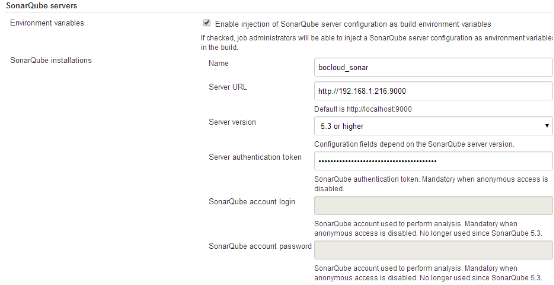
注:Server URL切记加上http://,不能只输入IP地址加端口,否则会提示不能连接(这个问题让我纠结了一个小时)
Server authentication token项需要在sonar server端生成
访问sonar server端
菜单--》配置--》权限--》用户--》TOKENS--》Generate 生成token,将生成的复制到Server authentication token
2.配置sonar scnner
系统管理--》Global Tool Configuration

使用自动安装,选择版本
配置项目
选择自己的project--》配置--》add pre-build step
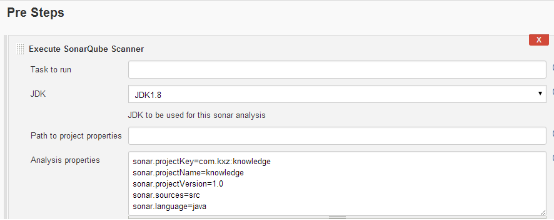
Properties可以是项目根目录中创建一个文件或者在下面Analysis Properties中书写


 7896
7896


 被折叠的 条评论
为什么被折叠?
被折叠的 条评论
为什么被折叠?
 到【灌水乐园】发言


