


由于定时任务需要工程实施人员进行配置,写在Java代码里面不利于维护,故采用SpringBoot集成Spring XML文件进行配置,属于新瓶装旧酒。
1 新建定时任务类
package com.duhongming.springbootscheduled.scheduled;

import lombok.extern.slf4j.Slf4j;
import org.springframework.stereotype.Component;

@Component
@Slf4j
public class DataScheduledTask {

    private Integer i;
    private Double d;
    private String s;
    private Boolean b;

    public DataScheduledTask(Integer i,Double d,String s,Boolean b){
        super();
        this.i = i;
        this.d = d;
        this.b = b;
        this.s = s;
    }

    /**
     * xml方式
     */
    public void springContextXmlexecute(){
        log.info("i:{},d:{},b:{},s:{}",i,d,b,s);
    }

    /**
     * 注解方式
     */
    @Scheduled(cron = "${config.cron}" )
    public void scheduled() {
        log.info("scheduled");
    }

}
2 在resources下面配置spring-context.xml
<?xml version="1.0" encoding="UTF-8"?>
<beans xmlns="http://www.springframework.org/schema/beans"
	   xmlns:xsi="http://www.w3.org/2001/XMLSchema-instance" xmlns:task="http://www.springframework.org/schema/task"
	   xsi:schemaLocation="http://www.springframework.org/schema/beans
        http://www.springframework.org/schema/beans/spring-beans.xsd http://www.springframework.org/schema/task http://www.springframework.org/schema/task/spring-task.xsd"
	   default-lazy-init="true">

	<bean id="taskExecutor" class="org.springframework.scheduling.concurrent.ThreadPoolTaskExecutor">
	    <!-- 核心线程数,默认为1 -->
	    <property name="corePoolSize" value="10" />
	    <!-- 最大线程数,默认为Integer.MAX_VALUE -->
	    <property name="maxPoolSize" value="50" />
	    <!-- 队列最大长度,一般需要设置值>=notifyScheduledMainExecutor.maxNum;默认为Integer.MAX_VALUE -->
	    <property name="queueCapacity" value="1000" />
	    <!-- 线程池维护线程所允许的空闲时间,默认为60s -->
	    <property name="keepAliveSeconds" value="300" />
	    <!-- 线程池对拒绝任务(无线程可用)的处理策略,目前只支持AbortPolicy、CallerRunsPolicy;默认为后者 -->
	    <property name="rejectedExecutionHandler">
	        <!-- AbortPolicy:直接抛出java.util.concurrent.RejectedExecutionException异常 -->
	        <!-- CallerRunsPolicy:主线程直接执行该任务,执行完之后尝试添加下一个任务到线程池中,可以有效降低向线程池内添加任务的速度 -->
	        <!-- DiscardOldestPolicy:抛弃旧的任务、暂不支持;会导致被丢弃的任务无法再次被执行 -->
	        <!-- DiscardPolicy:抛弃当前任务、暂不支持;会导致被丢弃的任务无法再次被执行 -->
	        <bean class="java.util.concurrent.ThreadPoolExecutor$CallerRunsPolicy" />
	    </property>
	</bean>

	<!-- 计划任务配置,用 @Service @Lazy(false)标注类,用@Scheduled(cron = "0 0 2 * * ?")标注方法 -->
    <task:scheduler id="scheduler" pool-size="24" />

    <task:annotation-driven scheduler="scheduler" executor="taskExecutor" proxy-target-class="true"/>

    <!-- * * * * * ? 测试专用:一秒一次-->
    <task:scheduled-tasks>
		<task:scheduled ref="dataScheduledTask" method="springContextXmlexecute" cron="0/1 * * * * ?" /> <!-- 一秒钟一次 -->
    </task:scheduled-tasks>

	<!-- DataScheduledTask注入 -->
	<bean id="dataScheduledTask" class="com.duhongming.springbootscheduled.scheduled.DataScheduledTask">
		<constructor-arg name="i" value="1" /><!-- Integer -->
		<constructor-arg name="d" value="1.01" /><!-- Double -->
		<constructor-arg name="s" value="字符串"/><!-- String -->
		<constructor-arg name="b" value="true" /><!-- Boolean -->
	</bean>
</beans>
3 在resources下面配置application.properties
#在jar内
spring.context.xml.path=classpath:spring-context.xml
#在jar外
#spring.context.xml.path=file:spring-context.xml

#注解方式配置参数
config.cron=0/5 * * * * ?
4 新建一个包config,以及一个类ConfigClass
package com.duhongming.springbootscheduled.config;

import org.springframework.context.annotation.Configuration;
import org.springframework.context.annotation.ImportResource;

@Configuration
@ImportResource(locations={"${spring.context.xml.path}"})
public class ConfigClass {}
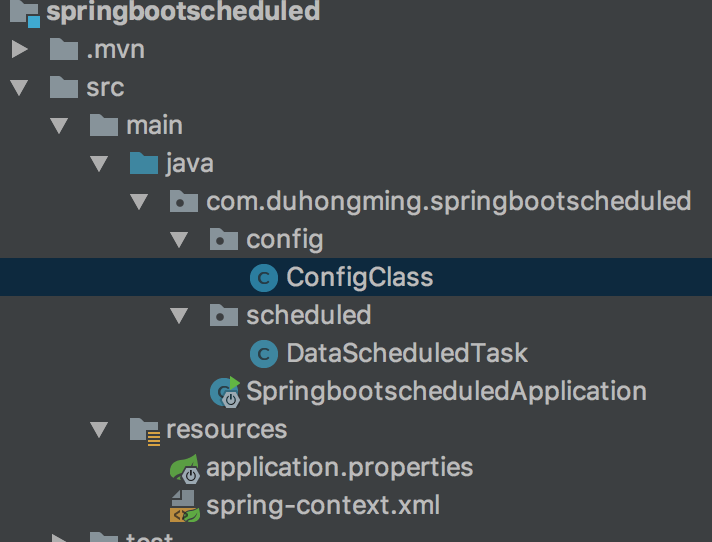
5 整体结构如下


 2864
2864

 被折叠的 条评论
为什么被折叠?
被折叠的 条评论
为什么被折叠?
 到【灌水乐园】发言


