


现在mac上有个新需求,需要tomcat使用80端口而不是8080端口。
mac上使用80端口需要root权限,所以不能直接使用。而是需要使用nginx,启动nginx后它可以使用80端口,然后映射到tomcat的8080端口上。
下载并安装nginx。
从Nginx.org网站上下载tar.gz格式的源码包。
 cd ~/Downloads
 tar xvzf nginx-1.9.5.tar.gz
 cd nginx-1.9.5
 sudo ./configure --prefix=/usr/local/nginx --with-http_ssl_module --with-openssl=/usr/local/openssl

 sudo make
在make这一步发生了一个错误,提示:make: *** No rule to make target `build', needed by `default'. Stop. 这说明在上一步configure有错误。
查看configure,发现没有配置prec。
checking for PCRE library ... not found
checking for PCRE library in /usr/local/ ... not found
checking for PCRE library in /usr/include/pcre/ ... not found
checking for PCRE library in /usr/pkg/ ... not found
checking for PCRE library in /opt/local/ ... not found
所以需要提前安装 PCRE库。
PCRE的链接ftp://ftp.csx.cam.ac.uk/pub/software/programming/pcre
  sudo tar xvfz pcre-8.36.tar.gz
  cd pcre-8.36
  sudo ./configure --prefix=/usr/local --enable-utf8
  sodu make
  sudo make
  sudo make install
安装完之后再返回nginx的安装过程中。
重新执行configure命令,结果发现又有错误:
./configure: error: SSL modules require the OpenSSL library.
You can either do not enable the modules, or install the OpenSSL library
into the system, or build the OpenSSL library statically from the source
with nginx by using --with-openssl=<path> option.还要安装openssl。
   tar xvzf openssl-1.0.2a.tar.gz
   cd openssl-1.0.2a
  ./config --prefix=/usr/local/openssl

  在make之前,在openssl-1.0.2a目录下找到Makefile这个文件,用编辑器打开查找,将darwin-i386-cc替换成darwin64-x86_64-cc,保存。

  sudo make
  sudo make install
  sudo ln -s /usr/local/openssl/bin/openssl /usr/local/openssl
  openssl version
openssl安装完毕。
接着返回nginx的configure,结果发现还报错!
原来编译命令也就是 with-openssl=/______这个路径指向你的源码安装包路径而不是你安装后的路径!
wtf!
  sudo ./configure --prefix=/usr/local/nginx --with-openssl=/Users/lizhengdong/Downloads/openssl-1.0.2a
  make
  sudo make
  sudo make install

  加入环境变量
  ~/.bash_profile  (一般在这个文件中添加用户级环境变量)
  添加下面环境变量:
  export PATH=${PATH}:/usr/local/nginx/sbin

  nginx -V
nginx version: nginx/1.9.5
built by clang 7.0.0 (clang-700.1.76)
configure arguments: --prefix=/usr/local/nginx --with-openssl=/Users/lizhengdong/Downloads/openssl-1.0.2a
安装完毕,启动nginx试一下,sudo nginx,在浏览器里输入localhost,如下图:

说明nginx没问题,sudo nginx -s stop 关闭nginx。
进入nginx目录/usr/local/nginx,打开nginx.conf。

改成下图这样。proxy_pass,它表示代理路径,相当于转发。
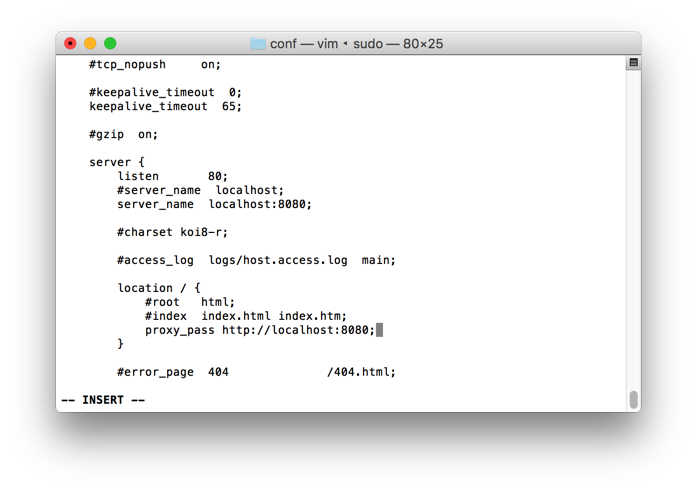
修改完成后运行了nginx -s reload进行重新加载配置文件。
重启nginx,欧克了!
localhost:8080换成其他url的时候,前面再加一些配置。
   proxy_redirect     off;
        proxy_set_header   Host             $host;
        proxy_set_header   X-Real-IP        $remote_addr;
        proxy_set_header   X-Forwarded-For  $proxy_add_x_forwarded_for;
        autoindex off;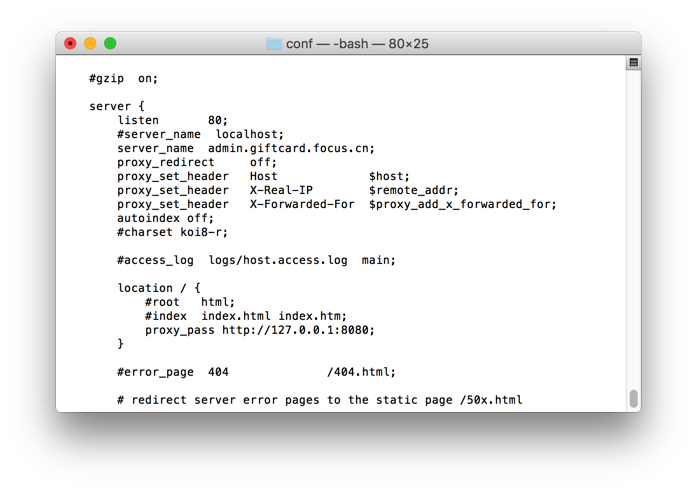


 3万+
3万+

 被折叠的 条评论
为什么被折叠?
被折叠的 条评论
为什么被折叠?
 到【灌水乐园】发言


