


 本文介绍了如何在应用中调用手机相机拍照或从图库选择图片来设置头像。重点讨论了数据存储过程,包括加载存储图片资源、显示Bitmap以及将图片持久化到本地。详细步骤包括布局设计、点击事件处理、权限添加、onActivityResult方法的重写以及其他辅助方法。源代码已上传供参考。
上一篇中,我们讲到了如何将头像设置为圆形,虽然简单但却实用。一个好看的头像确实可以吸睛不少,那么今天就让我们来看看如何设置头像吧。这里我们也是走常规路线:调起手机相机进行拍照 抑或 从手机图库中来选择。
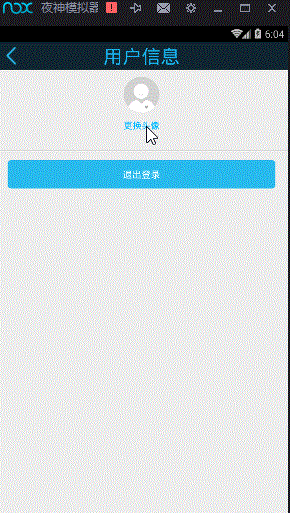
先来预览一下效果:
先来简要的分析一下:
调起相机和图库显然是没有任何难度的,只要获取到隐式意图所需要的action就可以了。那么本次的重点我觉得应该放在数据存储这一块,即:如何加载存储空间中的图片资源并显示 以及 如何将得到的图片资源(Bitmap对象)持久化到本地存储中。
下面正式开始:
1.主activity的布局
<?xml version="1.0" encoding="utf-8"?>
<LinearLayout xmlns:android="http://schemas.android.com/apk/res/android"
    android:layout_width="match_parent"
    android:layout_height="match_parent"
    android:orientation="vertical">

    <LinearLayout
        android:layout_width="match_parent"
        android:layout_height="44dp"
        android:orientation="horizontal"
        android:gravity="center_vertical"
        android:background="@drawable/lock_title_bg"
        >

        <TextView
            android:layout_width="match_parent"
            android:layout_height="match_parent"
            android:text="首页"
            android:textColor="@color/home_back_selected"
            android:textSize="30sp"
            android:gravity="center"
            android:id="@+id/tv_top_title"/>
    </LinearLayout>


    <LinearLayout
        android:layout_width="match_parent"
        android:layout_height="match_parent"
        android:background="#EDEDED"
        android:orientation="vertical">

        <RelativeLayout
            android:layout_width="match_parent"
            android:layout_height="wrap_content"
            android:paddingBottom="15dp">

            <ImageView
                android:id="@+id/imageView1"
                android:layout_width="wrap_content"
                android:layout_height="wrap_content"
                android:layout_alignParentTop="true"
                android:layout_centerHorizontal="true"
                android:layout_marginTop="10dp"
                android:src="@drawable/my_user_default" />

            <TextView
                android:id="@+id/textView1"
                android:layout_width="wrap_content"
                android:layout_height="wrap_content"
                android:layout_below="@id/imageView1"
                android:layout_centerHorizontal="true"
                android:layout_centerVertical="true"
                android:layout_marginBottom="15dp"
                android:layout_marginTop="10dp"
                android:text="更换头像"
                android:textColor="#00baff"
                android:textSize="14sp" />
        </RelativeLayout>

        <View
            android:layout_width="match_parent"
            android:layout_height="1dp"
            android:background="?android:listDivider" />

        <Button
            android:id="@+id/loginout"
            android:layout_width="match_parent"
            android:layout_height="wrap_content"
            android:layout_marginLeft="20dp"
            android:layout_marginRight="20dp"
            android:layout_marginTop="15dp"
            android:background="@drawable/btn_01"
            android:gravity="center"
            android:text="退出登录"
            android:textColor="#ffffff"
            android:textSize="15sp" />
    </LinearLayout>

</LinearLayout>
2.给“更换头像”的文本设置点击事件
需要注意的是:
①因为是启动系统中的的相机和图库,所以这里使用的是隐式意图,那么就要想办法获得对应的ACTION。
(ps:再下一篇博客中我略微总结了一下,感兴趣的可以看看~)
②由于从相册选取图片后还要回到主界面,同时还要返回所获取到的相关图片数据给主Activity处理,因为涉及到数据交流所以这里要使用带回调的启动。
 //使用butterknife 给“设置头像“的文本设置点击事件
    @OnClick(R.id.textView1)
    public void exchangeTx(View view){
        //显示AlertDialog
        new AlertDialog.Builder(this)
                .setTitle("选择来源")
                .setItems(new String[]{"拍照", "图库"}, new DialogInterface.OnClickListener() {
                    @Override
                    public void onClick(DialogInterface dialog, int which) {
                        switch (which) {
                            case 0://拍照
                                //打开系统拍照程序,选择拍照图片
                                Intent camera = new Intent(MediaStore.ACTION_IMAGE_CAPTURE);
                                startActivityForResult(camera, CAMERA);
                                break;
                            case 1://图库
                                //打开系统图库程序,选择图片
                                Intent picture = new Intent(Intent.ACTION_PICK, MediaStore.Images.Media.EXTERNAL_CONTENT_URI);
                                startActivityForResult(picture, PICTURE);
                                break;
                        }
                    }
                })
                .show();
    }
3.添加相应的权限
这一点千万不能忘。如果忘记加权限,好的结果是日志中有提醒你要加权限,但有时候它会直接崩溃,并提示你空指针异常,这就比较恶心了。
 <uses-permission android:name="android.permission.WRITE_EXTERNAL_STORAGE" />
    <uses-permission android:name="android.permission.READ_EXTERNAL_STORAGE" />
4.重写onActivityResult()方法
获取相关数据并做相关处理
在该方法中实现:
①加载存储空间中的图片资源并显示
②将一个bitmap对象存储到data/data/应用包名/files/tx.png
  @Override
    protected void onActivityResult(int requestCode, int resultCode, Intent data) {
        super.onActivityResult(requestCode, resultCode, data);
        if (requestCode==CAMERA&&resultCode==RESULT_OK&&data!=null){
//            说明是拍照
            Bundle bundle=data.getExtras();
//            获取相机返回的数据,并转换为图片格式
            Bitmap bitmap= (Bitmap) bundle.get("data");
            //bitmap圆形裁剪
            bitmap = BitmapUtils.zoom(bitmap, dp2px(62), dp2px(62));
            Bitmap circleImage = BitmapUtils.circleBitmap(bitmap);

            //注意在真实项目当中,这是需要上传到服务器的
            imageView1.setImageBitmap(circleImage);

            //将图片保存在本地
            saveImage(circleImage);

        }else if(requestCode==PICTURE&&resultCode==RESULT_OK&&data!=null){
            //图库
            Uri selectedImage = data.getData();
            String pathResult = getPath(selectedImage);

            //①加载存储空间中的图片资源并显示
            Bitmap decodeFile = BitmapFactory.decodeFile(pathResult);
            Bitmap zoomBitmap = BitmapUtils.zoom(decodeFile, dp2px(62), dp2px(62));
            //bitmap圆形裁剪p
            Bitmap circleImage = BitmapUtils.circleBitmap(zoomBitmap);
            //真是项目当中,是需要上传到服务器的..这步我们就不做了。
            imageView1.setImageBitmap(circleImage);

            //保存图片到本地
            saveImage(circleImage);
        }
    }


    private void saveImage(Bitmap bitmap) {
        String path = this.getCacheDir() + "/tx.png";
        Log.e("TAG", "path = " + path);
        try {
            FileOutputStream fos = new FileOutputStream(path);

            //②将一个bitmap对象存储到data/data/应用包名/files/tx.png
            //bitmap压缩(压缩格式、质量、压缩文件保存的位置)
            bitmap.compress(Bitmap.CompressFormat.PNG, 100, fos);

        } catch (FileNotFoundException e) {
            e.printStackTrace();
        }
    }
5.其他所涉及的方法
从此开始的代码大家只要大概了解一下是做什么的就可以了, 暂时没有必要深究。
 //将dp-->px的方法
    public  int dp2px(int dp){
        //先获取手机的密度
        float desity=getApplicationContext().getResources().getDisplayMetrics().density;
        //通过+0.5来实现四舍五入
        return (int) (dp*desity+0.5);
    }


    /**
     * 根据系统相册选择的文件获取路径
     * @param uri
     */
    @SuppressLint("NewApi")
    private String getPath(Uri uri) {
        int sdkVersion = Build.VERSION.SDK_INT;
        //高于4.4.2的版本
        if (sdkVersion >= 19) {
            Log.e("TAG", "uri auth: " + uri.getAuthority());
            if (isExternalStorageDocument(uri)) {
                String docId = DocumentsContract.getDocumentId(uri);
                String[] split = docId.split(":");
                String type = split[0];
                if ("primary".equalsIgnoreCase(type)) {
                    return Environment.getExternalStorageDirectory() + "/" + split[1];
                }
            } else if (isDownloadsDocument(uri)) {
                final String id = DocumentsContract.getDocumentId(uri);
                final Uri contentUri = ContentUris.withAppendedId(Uri.parse("content://downloads/public_downloads"),
                        Long.valueOf(id));
                return getDataColumn(this, contentUri, null, null);
            } else if (isMediaDocument(uri)) {
                final String docId = DocumentsContract.getDocumentId(uri);
                final String[] split = docId.split(":");
                final String type = split[0];

                Uri contentUri = null;
                if ("image".equals(type)) {
                    contentUri = MediaStore.Images.Media.EXTERNAL_CONTENT_URI;
                } else if ("video".equals(type)) {
                    contentUri = MediaStore.Video.Media.EXTERNAL_CONTENT_URI;
                } else if ("audio".equals(type)) {
                    contentUri = MediaStore.Audio.Media.EXTERNAL_CONTENT_URI;
                }
                final String selection = "_id=?";
                final String[] selectionArgs = new String[]{split[1]};
                return getDataColumn(this, contentUri, selection, selectionArgs);
            } else if (isMedia(uri)) {
                String[] proj = {MediaStore.Images.Media.DATA};
                Cursor actualimagecursor = this.managedQuery(uri, proj, null, null, null);
                int actual_image_column_index = actualimagecursor.getColumnIndexOrThrow(MediaStore.Images.Media.DATA);
                actualimagecursor.moveToFirst();
                return actualimagecursor.getString(actual_image_column_index);
            }
        } else if ("content".equalsIgnoreCase(uri.getScheme())) {
            // Return the remote address
            if (isGooglePhotosUri(uri))
                return uri.getLastPathSegment();
            return getDataColumn(this, uri, null, null);
        }
        // File
        else if ("file".equalsIgnoreCase(uri.getScheme())) {
            return uri.getPath();
        }
        return null;
    }

    /**
     * uri路径查询字段
     *
     * @param context
     * @param uri
     * @param selection
     * @param selectionArgs
     * @return
     */
    public static String getDataColumn(Context context, Uri uri, String selection, String[] selectionArgs) {
        Cursor cursor = null;
        final String column = "_data";
        final String[] projection = {column};
        try {
            cursor = context.getContentResolver().query(uri, projection, selection, selectionArgs, null);
            if (cursor != null && cursor.moveToFirst()) {
                final int index = cursor.getColumnIndexOrThrow(column);
                return cursor.getString(index);
            }
        } finally {
            if (cursor != null)
                cursor.close();
        }
        return null;
    }


    private boolean isExternalStorageDocument(Uri uri) {
        return "com.android.externalstorage.documents".equals(uri.getAuthority());
    }

    public static boolean isDownloadsDocument(Uri uri) {
        return "com.android.providers.downloads.documents".equals(uri.getAuthority());
    }

    public static boolean isMediaDocument(Uri uri) {
        return "com.android.providers.media.documents".equals(uri.getAuthority());
    }

    public static boolean isMedia(Uri uri) {
        return "media".equals(uri.getAuthority());
    }

    /**
     * @param uri The Uri to check.
     * @return Whether the Uri authority is Google Photos.
     */
    public static boolean isGooglePhotosUri(Uri uri) {
        return "com.google.android.apps.photos.content".equals(uri.getAuthority());
    }
源代码已上传至我的资源:即 调起相机和图库来设置头像.rar


 2万+
2万+


 被折叠的 条评论
为什么被折叠?
被折叠的 条评论
为什么被折叠?
 到【灌水乐园】发言


