


我是傲夫靠斯,欢迎关注我的公众号【前端工程师的自我修养】,搜索
f2ef2e,每天更新。
我们使用AWS AppSync服务可以让我们快速创建出可用的GraphQL服务,不用我们自己去搭建GraphQL服务。
前置要求
我们需要一个美国区的AWS账号(中国区的我没试过)
什么是GraphQL
官网:https://graphql.org/
GraphQL是一种API查询语言和运行时,我们可以自己定义想要查询的数据。
为什么要用GraphQL?
- 解决前端和后端的沟通成本问题
- 前端可以自己去定义想要的数据字段
- 减少网络请求
- 有类型的数据
安装AWS AppSync Cli 工具
官方文档:https://docs.amplify.aws/start/getting-started/installation/q/integration/react/
npm install -g @aws-amplify/cli
创建React项目
npx create-react-app graphql-demo
cd graphql-demo
amplify init
初始化过程,可能需要跳转到aws网站去登陆,然后生成key的操作
? Enter a name for the project graphqldemo
The following configuration will be applied:

Project information
| Name: graphqldemo
| Environment: dev
| Default editor: Visual Studio Code
| App type: javascript
| Javascript framework: react
| Source Directory Path: src
| Distribution Directory Path: build
| Build Command: npm run-script build
| Start Command: npm run-script start

? Initialize the project with the above configuration? Yes
Using default provider  awscloudformation
? Select the authentication method you want to use: AWS profile

For more information on AWS Profiles, see:
https://docs.aws.amazon.com/cli/latest/userguide/cli-configure-profiles.html

? Please choose the profile you want to use default
Adding backend environment dev to AWS Amplify Console app: d27dte43jflp3w
⠧ Initializing project in the cloud...

Pro tip:
Try "amplify add api" to create a backend API and then "amplify publish" to deploy everything
创建GraphQL API和数据库
amplify add api
选择GraphQL,一路回车,模板选择One-to-many relationship (e.g., “Blogs” with “Posts” and “Comments”)
? Please select from one of the below mentioned services: GraphQL
? Provide API name: graphqldemo
? Choose the default authorization type for the API API key
? Enter a description for the API key:
? After how many days from now the API key should expire (1-365): 7
? Do you want to configure advanced settings for the GraphQL API No, I am done.
? Do you have an annotated GraphQL schema? No
? Choose a schema template: One-to-many relationship (e.g., “Blogs” with “Posts” and “Comments”)

The following types do not have '@auth' enabled. Consider using @auth with @model
         - Blog
         - Post
         - Comment
Learn more about @auth here: https://docs.amplify.aws/cli/graphql-transformer/auth


GraphQL schema compiled successfully.

Edit your schema at /Users/sunny/Desktop/hs/graphql-demo/amplify/backend/api/graphqldemo/schema.graphql or place .graphql files in a directory at /Users/sunny/Desktop/hs/graphql-demo/amplify/backend/api/graphqldemo/schema
? Do you want to edit the schema now? Yes
? Choose your default editor: Visual Studio Code
Edit the file in your editor: /Users/sunny/Desktop/hs/graphql-demo/amplify/backend/api/graphqldemo/schema.graphql
Successfully added resource graphqldemo locally

Some next steps:
"amplify push" will build all your local backend resources and provision it in the cloud
"amplify publish" will build all your local backend and frontend resources (if you have hosting category added) and provision it in the cloud
创建成功后,可以看到生成好的amplify/backend/api/graphqldemo/schema.graphql 文件
type Blog @model {
  id: ID!
  name: String!
  posts: [Post] @connection(keyName: "byBlog", fields: ["id"])
}

type Post @model @key(name: "byBlog", fields: ["blogID"]) {
  id: ID!
  title: String!
  blogID: ID!
  blog: Blog @connection(fields: ["blogID"])
  comments: [Comment] @connection(keyName: "byPost", fields: ["id"])
}

type Comment @model @key(name: "byPost", fields: ["postID", "content"]) {
  id: ID!
  postID: ID!
  post: Post @connection(fields: ["postID"])
  content: String!
}
部署到AWS
amplify push -y
部署成功后会生成aws-exports.js文件和graphql文件夹
src/
	graphql/
		mutations.js
		queries.js
		schema.json
		subscriptions.js
	aws-exports.js
接下里我们在React中调用GraphQL服务,打开App.js
import config from './aws-exports'

function App() {
  // 创建数据
  const createData = async () => {
    const blogName = prompt('请输入博客名称')
    let data = await fetch(config.aws_appsync_graphqlEndpoint, {
      method: 'POST',
      headers: {
        'X-Api-Key': config.aws_appsync_apiKey
      },
      body: JSON.stringify({
        query: `mutation CreateBlog {
          createBlog(input: {name: "${blogName}"}) {
            id
            name
          }
        }`,
      })
    })
    data = await data.json()
    console.log(data)
  }

  // 获取数据列表
  const pullData = async () => {
    let data = await fetch(config.aws_appsync_graphqlEndpoint, {
      method: 'POST',
      headers: {
        'X-Api-Key': config.aws_appsync_apiKey
      },
      body: JSON.stringify({
        query: `query MyQuery {
          listBlogs {
            items {
              name
              posts {
                items {
                  id
                  title
                }
              }
            }
          }
        }`
      })
    })
    data = await data.json()
    console.log(data)
  }

  return (
    <div className="App">
      <button onClick={createData}>创建博客</button>
      <button onClick={pullData}>博客列表</button>
    </div>
  );
}

export default App;
创建博客

博客列表
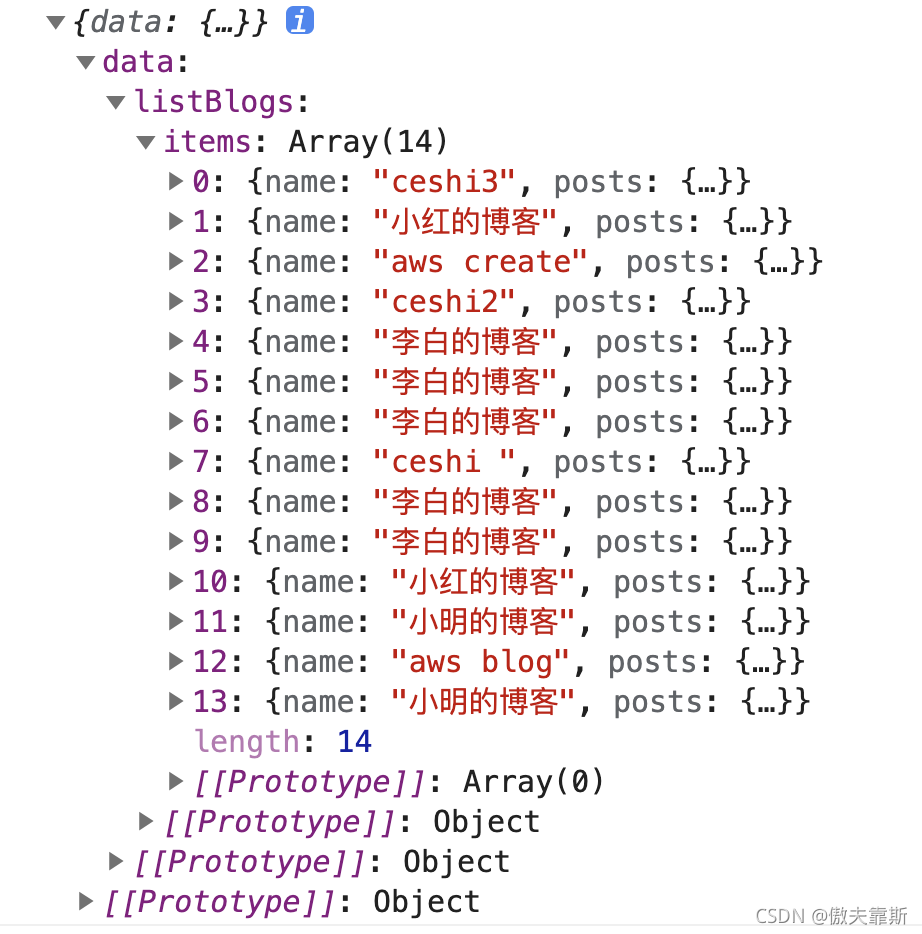
使用aws提供的aws-amplify工具调用aws-amplify调用GraphQL服务
npm install aws-amplify
修改index.js,增加如下代码
import { Amplify } from 'aws-amplify'
import config from './aws-exports'

Amplify.configure(config)
修改App.js
import config from './aws-exports'

import { API } from 'aws-amplify'
import { listBlogs } from './graphql/queries'
import { createBlog } from './graphql/mutations'
import { onCreateBlog } from './graphql/subscriptions'
import { useEffect } from 'react'

function App() {
  // 创建数据
  const createData = async () => {
    const blogName = prompt('请输入博客名称')
    let data = await fetch(config.aws_appsync_graphqlEndpoint, {
      method: 'POST',
      headers: {
        'X-Api-Key': config.aws_appsync_apiKey
      },
      body: JSON.stringify({
        query: `mutation CreateBlog {
          createBlog(input: {name: "${blogName}"}) {
            id
            name
          }
        }`,
      })
    })
    data = await data.json()
    console.log(data)
  }

  // 获取数据列表
  const pullData = async () => {
    let data = await fetch(config.aws_appsync_graphqlEndpoint, {
      method: 'POST',
      headers: {
        'X-Api-Key': config.aws_appsync_apiKey
      },
      body: JSON.stringify({
        query: `query MyQuery {
          listBlogs {
            items {
              name
              posts {
                items {
                  id
                  title
                }
              }
            }
          }
        }`
      })
    })
    data = await data.json()
    console.log(data)
  }

  // aws 创建博客
  const awsCreateBlog = async () => {
    const blogName = prompt('请输入博客名称')
    const data = await API.graphql({ query: createBlog, variables: { input: { name: blogName }} })
    console.log(data)
  }

  // aws 获取博客列表
  const awsListBlog = async () => {
    const data = await API.graphql({ query: listBlogs })
    console.log(data)
  }

  useEffect(() => {
    // 监听博客创建事件
    const subscription = API.graphql({
      query: onCreateBlog
    }).subscribe({
      next: data => {
        awsListBlog()
      },
      error: err => {
        console.log(err)
      }
    })

    return () => subscription.unsubscribe()
  }, [])


  return (
    <div className="App">
      <button onClick={createData}>创建博客</button>
      <button onClick={pullData}>博客列表</button>
      <br/><br/>
      <button onClick={awsCreateBlog}>AWS 创建博客</button>
    </div>
  );
}

export default App;
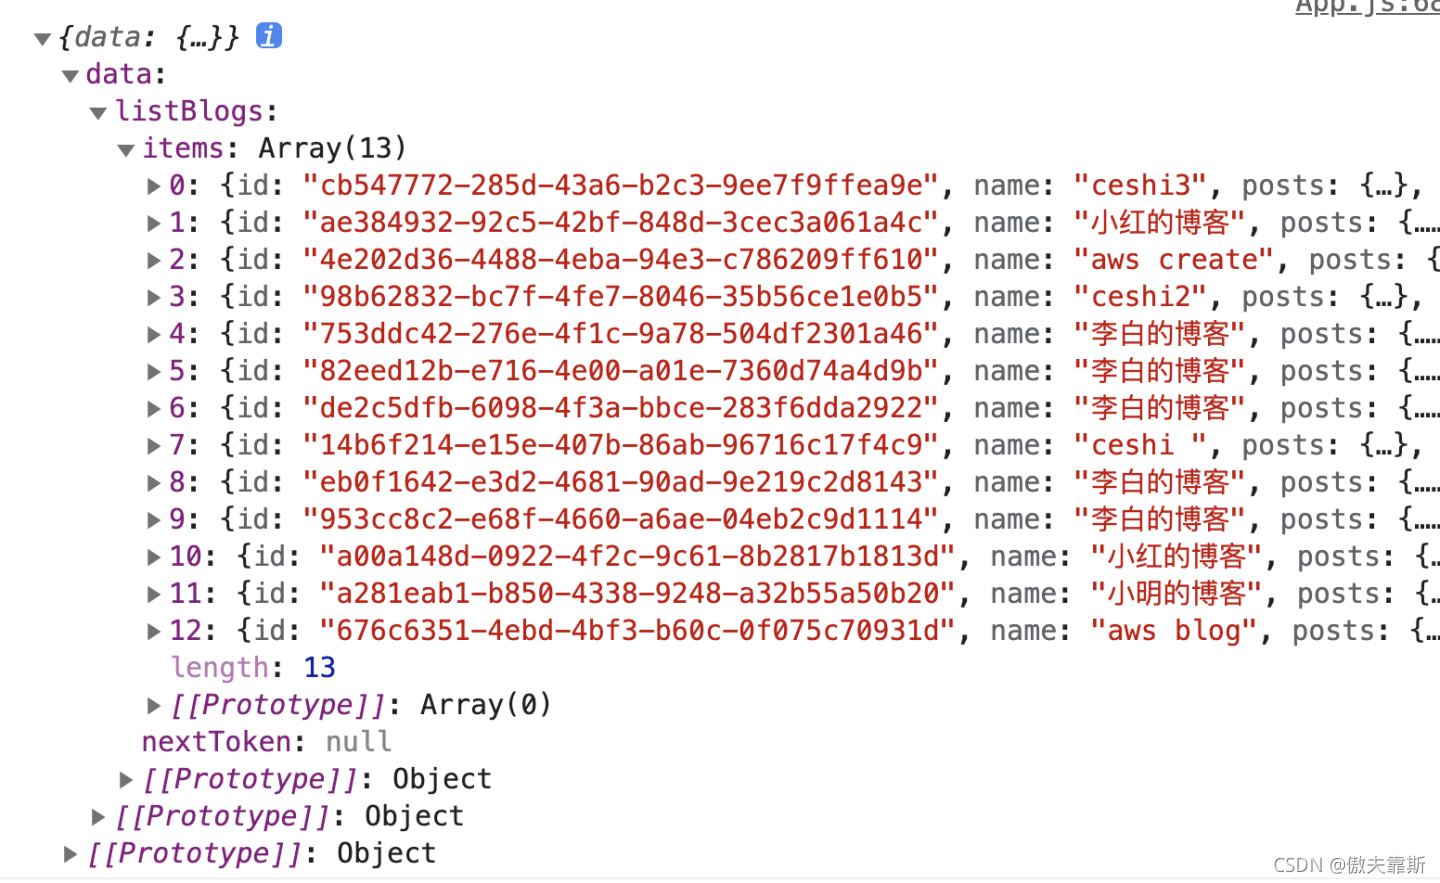
创建博客
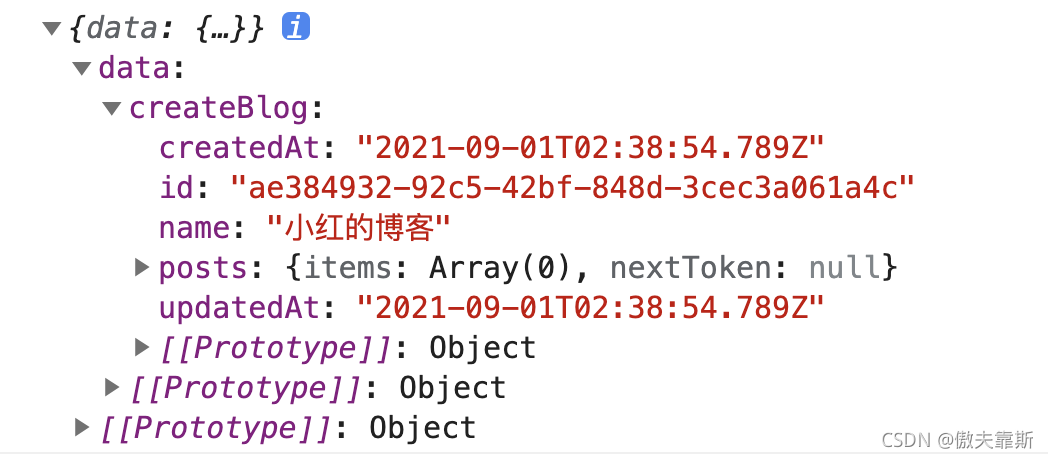
博客列表
到这里,我们的demo基本就结束了。如果大家对GraphQL感兴趣,后面我在深入通过项目的方式给大家介绍。
项目源代码:https://github.com/cmdfas/react-graphql-aws
欢迎关注我的公众号【前端工程师的自我修养】,搜索
f2ef2e,每天更新。


 257
257


 被折叠的 条评论
为什么被折叠?
被折叠的 条评论
为什么被折叠?
 到【灌水乐园】发言


