


好了,最开始是在freebuf上看到的一个附录上有这个sulley的安装过程,我欣喜若狂。之后才知道这个就是人家的官方文档。
废话不多说。来贴上google安装源路劲:https://github.com/OpenRCE/sulley/wiki/Windows-Installation#
自己在贴出来看看说明:
These instructions are for Windows XP => Windows 7 using Python 2.7 (though other versions should work too)
Thanks to louppen for the great starting point!
- Download and install MinGW Compilier v20101030
- Make sure to use pre-packaged repo catalogs and the old version! PyDasm barfs when compiling because MinGW32 removed support for -mno-cygwin! Bug Report
- On the "Select Components" dialog check C++ Compiler and ObjC Compiler in addition to selected by default set
- Download and install Python 2.7 (x64)
- Download and install Git for windows
- Make sure it adds git to your path variable!
- Update $PATH to include C:\Python27 and C:\MinGW\bin KB article
-
Checkout pydbg
C:\sulley_build>git clone https://Fitblip@github.com/Fitblip/pydbg.git Cloning into 'pydbg'... remote: Counting objects: 17, done. remote: Compressing objects: 100% (12/12), done. remote: Total 17 (delta 4), reused 17 (delta 4) Unpacking objects: 100% (17/17), done. -
Build pydbg
C:\sulley_build\pydbg>python setup.py install running install running build running build_py creating build creating build\lib creating build\lib\pydbg ...snip... running install_egg_info Removing C:\python27\Lib\site-packages\pydbg-0.0.0-py2.7.egg-info Writing C:\python27\Lib\site-packages\pydbg-0.0.0-py2.7.egg-info -
Download and extract libdasm
-
Build the extention and install it (beware of gcc version 4.7.x removed support for -mno-cygwin, see http://stackoverflow.com/q/6034390/333353 and https://gist.github.com/4466320for a fix)
C:\sulley_build\libdisasm\pydasm>python setup.py build_ext -c mingw32 running build_ext building 'pydasm' extension ...snip... C:\sulley_build\libdisasm\pydasm>python setup.py install running install running build running build_ext running install_lib copying build\lib.win32-2.7\pydasm.pyd -> C:\python27\Lib\site-packages running install_egg_info Writing C:\python27\Lib\site-packages\pydasm-1.5-py2.7.egg-info -
Checkout Sulley
C:\sulley_build>git clone https://github.com/OpenRCE/sulley.git Cloning into 'sulley'... remote: Counting objects: 148, done. remote: Compressing objects: 100% (91/91), done. remote: Total 148 (delta 53), reused 146 (delta 51) Receiving objects: 100% (148/148), 267.03 KiB, done. Resolving deltas: 100% (53/53), done. -
Make sure process_monitor.py works (no import errors)
C:\sulley_build\sulley>python process_monitor.py ERR> USAGE: process_monitor.py <-c|--crash_bin FILENAME> filename to serialize crash bin class to [-p|--proc_name NAME] process name to search for and attach to [-i|--ignore_pid PID] ignore this PID when searching for the target process [-l|--log_level LEVEL] log level (default 1), increase for more verbosity [--port PORT] TCP port to bind this agent to -
Download and extract PCapy
- Download and extract WinPcap Dev Kit (I put mine in C:\sulley_build\WpdPack)
-
Build PCapy (pointing to WinPcap's include and lib directories) and install it
C:\sulley_build\pcapy-0.10.5>python setup.py build_ext -c mingw32 -I "C:\sulley_build\WpdPack\Include" -L "C:\sulley_build\WpdPack\Lib" running build_ext building 'pcapy' extension creating build creating build\temp.win32-2.7 creating build\temp.win32-2.7\Release creating build\temp.win32-2.7\Release\win32 ...snip... C:\sulley_build\pcapy-0.10.5>python setup.py install running install running build running build_ext running install_lib copying build\lib.win32-2.7\pcapy.pyd -> C:\python27\Lib\site-packages running install_data creating C:\python27\share creating C:\python27\share\doc creating C:\python27\share\doc\pcapy copying README -> C:\python27\share\doc\pcapy copying LICENSE -> C:\python27\share\doc\pcapy copying pcapy.html -> C:\python27\share\doc\pcapy running install_egg_info Writing C:\python27\Lib\site-packages\pcapy-0.10.5-py2.7.egg-info -
Download and install WinPcap
- Download and extract Impacket
-
Install Impacket
C:\sulley_build\Impacket-0.9.6.0>python setup.py install running install running build running build_py creating build creating build\lib creating build\lib\impacket copying impacket\ImpactDecoder.py -> build\lib\impacket copying impacket\ImpactPacket.py -> build\lib\impacket copying impacket\nmb.py -> build\lib\impacket copying impacket\ntlm.py -> build\lib\impacket copying impacket\smb.py -> build\lib\impacket copying impacket\structure.py -> build\lib\impacket copying impacket\uuid.py -> build\lib\impacket copying impacket\__init__.py -> build\lib\impacket creating build\lib\impacket\dcerpc ...snip... -
Check to make sure network_monitor.py works
C:\sulley_build\sulley>python network_monitor.py ERR> USAGE: network_monitor.py <-d|--device DEVICE #> device to sniff on (see list below) [-f|--filter PCAP FILTER] BPF filter string [-P|--log_path PATH] log directory to store pcaps to [-l|--log_level LEVEL] log level (default 1), increase for more verbosity [--port PORT] TCP port to bind this agent to Network Device List: [0] \Device\NPF_GenericDialupAdapter [1] {CF0B388B-8DF5-4BC4-8ECF-404F2A1B489C} 10.0.2.64 -
Start fuzzing! :)
他的步骤一个接着一个是非常详细了。可是我为此却出现了一些问题。最后也没有怎么解决。
所用到的工具:

首先是我在本机win8.1下开工。
前面均没有问题。到了libdisasm这里出问题了。说没有找到zlib1.dll文件。
我网上下载了搜罗了一大片,可是没有一个用得上的,我看创建时间都是2005年的,那个时候win7都没出来吧。zlib1.dll最后是只能在xp下进行。我以为win7可以,所以我在虚拟机装上了win7,因为安装说明上也写了win7 is ok,但是结果跟win8 一样,问其他同学系统里面去找zlib1.dll。发现根本就没有这个dll。我还真不知道原因了。
这个不成,只好转向xp了。
按照上面的步骤,xp进行到了最后一步。
sulley官网:https://github.com/OpenRCE/sulley
我在这个网址下载的sulley。在进行python network.py的时候,出问题了。一是一些变量没有定义就使用了,我去源代码看了一下,的确是没有定义,或许是在另外文件定义了也有可能,但是事实就是这个变量device没有定义。我不可能去质疑人家这个开源项目吧。只能质疑自己。可是我实在找不到办法解决这个问题。
我下载了另外一个https://github.com/OpenRCE/sulley/tree/Sulley1.1
这个貌似更加稳定。
最后是挑出来一个错误:
ERR = lambda msg: sys.stderr.write("ERR> " + msg + "\n") or sys.exit(1)
UnicodeEncodeError: 'gbk' codec can't encode character u'\u445c' in position 379
: illegal multibyte sequence
这个错误网上看了,可能就是在cmd输出的时候一个转码出错了。解决办法貌似也没有找到。暂且不管不顾。
试试可不可以用这个module
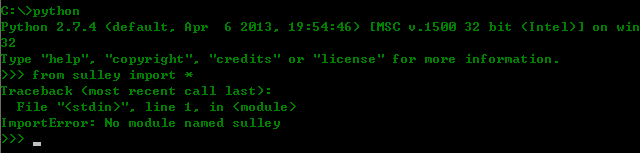
发现错误了。换到sulley这个目录在python进去。
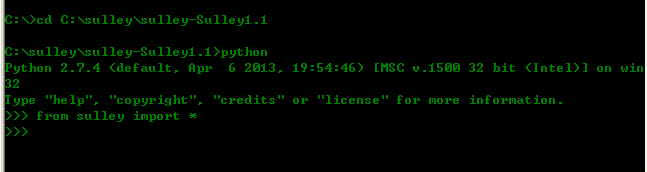
没有错误。
目前就做到这里了。看到后面一些sulley的语法也可以使用了,我是不是已经安装成功了呢?应该是吧,后续使用到的时候再看看吧。不过win7下安装失败真是不知,zlib1.dll可真是害苦了咱啊。
我后面测试发现还是错误,原来是找不到网卡。总是出错,可是为什么呢??
最终的解决办法是:
版本问题。找网卡pcapy,这个版本,我之前用的是10.2版本。换一个10.5的版本,就OK了。严格按照上面的步骤来。
总结一下:
首先,版本影响很大。其次一定要注意环境变量设置。最终我安装所有的版本如下:
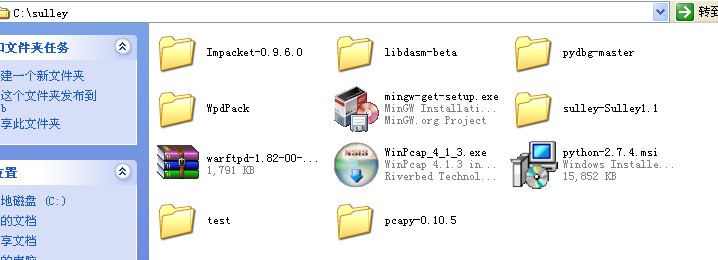
同时附上另外2个人的windows 安装过程,我没有测试过。
第一个:
Windows下安装Sulley
一、安装程序准备
1. python-2.5.4.msi—— http://www.python.org/
2. OpenRCE-sulley-506678f.zip,4.0.1-WinPcap.exe,pcapy-0.10.8.win32-py2.5. exe,impacket-0.9.9.9.zip, OpenRCE-pydbg-292fff0.zip,libdasm-1.5. tar.gz
二、安装步骤
(1)安装Python 2.5到系统中,并且将安装后的文件夹设置为系统环境路径
(2)安装sulley:
a.安装WinPcap,执行4.0.1-WinPcap.exe,默认安装即可;
b.安装pcapy,运行pcapy-0.10.8.win32-py2.5.exe即可;
c.安装impacket,将impacket-0.9.9.9.zip解压到c盘根目录,运行cmd,切换到impacket目录,执行setup.py install即可;
d.安装pydbg,将OpenRCE-pydbg-292fff0.zip解压,将解压后的文件夹改名为pydbg,拷贝到C:\Python25\Lib\site-packages下
e.安装pydasm,将libdasm-1.5. tar.gz解压到c盘根目录,运行cmd,切换到\libdasm-1.5\pydasm目录,执行setup.py build_ext –c mingw32,将\libdasm-1.5\pydasm\build\ lib.win32-2.5目录下生成的pydasm.pyd拷贝到上一步中的pydbg文件夹下,替换即可。

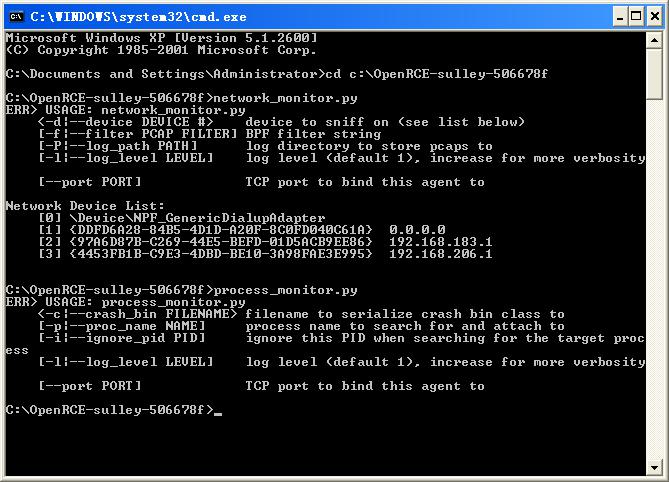
f.安装sulley,将OpenRCE-sulley-506678f.zip解压到c盘根目录,运行cmd,切换到该目录下,执行network_monitor.py和process_monitor.py,如能如下图所示正常执行不报错,即表示sulley安装成功。
第二个:原文地址:http://blog.chinaunix.net/uid-25979788-id-1747694.html
在我们深入探索Sulley之前,先得找一头,栓起来。大家可以从http://www.nostarch.com/ghpython.htm下载zip打包的Sulley源代码。(我估计是眼花,愣是没找到,http://sulley.googlecode.com此地有货)。
下载完成后,解压Sulley,在目录下找到sulley,utils和requests
文件夹,然后复制到C:\Python25\Lib\site-packages\目录下。这些就是Sulley的核心。接下来安装其他依赖的文件。
第一个WinPcap,一款开源的轻便简洁的网络库,用于windows平台下的包捕捉。有搞过嗅探的同学,对这东西应该是非常熟悉了,建议搞渗透的都去看看它的手册,大饼级别的黑客利器。Winpcap被广泛的应用与各种网络工具,入侵检测系统。Sulley使用它捕捉网络数据。下载地址:http://www.winpcap.org/install/bin/WinPcap_4_0_2.exe。
接下来安装两个python库:pcapy 和 impacket,,和上面的WinPcap库配合。它们都由CORE Security提供。Pcapy是WinPcap的Python接口,impacket则负责包的解码和创建。pcap的下载地址http://oss.coresecurity.com/repo/pcapy-0.10.5.win32-py2.5.exe.
mpacket的下载地址http://oss.coresecurity.com/repo/Impacket-stable.zip。下载完后解压到 C:\ directory,进入目录执行以下命令:
C:\Impacket-stable\Impacket-0.9.6.0>C:\Python25\python.exe setup.py install


 259
259

 被折叠的 条评论
为什么被折叠?
被折叠的 条评论
为什么被折叠?
 到【灌水乐园】发言


