先配置windows下的objective-c的开发环境
去http://ftpmain.gnustep.org/pub/gnustep/binaries/windows/下载下面几个包,注意版本,我现在试了一下这几个包结合在一起可以用,全用最新的话,可能会导致.dll缺失,运行时会有报错
gnustep-system-0.22.0-setup.exe
gnustep-core-0.22.0-setup.exe
gnustep-devel-1.0.0-setup.exe
gorm-1.2.8-setup.exe
ProjectCenter-0.5.0-setup.exe
从上到下依次安装
看见下图就说明linux模拟环境OK啦

然后试一下,当然先helloworld啦
1 | #import <Foundation/Foundation.h> |
2 | int main (int argc,char *argv[]) |
4 | NSAutoreleasePool *pool=[[NSAutoreleasePool alloc] init]; |
5 | NSLog(@"Hello World!"); |
makefile,不懂的查资料,文件命名为GNUmakefile木有后缀
1 | include $(GNUSTEP_MAKEFILES)/common.make |
4 | HelloWorld_OBJC_FILES=HelloWorld.m |
6 | include $(GNUSTEP_MAKEFILES)/tool.make |
好了,之后就是这样的:
有的朋友就要惊了,说我骗人,木有图形界面,急吼吼神马呀,要急孙子都有了。。。。下面是动真格的了:
main.m
01 | #include "AppController.h" |
02 | #include <AppKit/AppKit.h> |
04 | int main(int argc, const char*argv[]) |
06 | NSAutoreleasePool *pool; |
07 | AppController *delegate; |
09 | pool = [[NSAutoreleasePool alloc] init]; |
10 | delegate = [[AppController alloc] init]; |
12 | [NSApplication sharedApplication]; |
13 | [NSApp setDelegate: delegate]; |
16 | return NSApplicationMain (argc, argv); |
AppController.h
01 | #ifndef _AppController_H_ |
02 | #define _AppController_H_ |
04 | #include <Foundation/NSObject.h> |
08 | @class NSNotification; |
10 | @interface AppController : NSObject |
16 | - (void)applicationWillFinishLaunching:(NSNotification *) not; |
17 | - (void)applicationDidFinishLaunching:(NSNotification *) not; |
21 | #endif /* _AppController_H_ */ |
AppController.m
01 | #include "AppController.h" |
02 | #include <AppKit/AppKit.h> |
04 | @implementation AppController |
05 | - (void) applicationWillFinishLaunching: (NSNotification *) not |
12 | [menu addItemWithTitle: @"Info" |
15 | [menu addItemWithTitle: @"Hide" |
16 | action: @selector(hide:) |
18 | [menu addItemWithTitle: @"Quit" |
19 | action: @selector(terminate:) |
23 | [info addItemWithTitle: @"Info Panel..." |
24 | action: @selector(orderFrontStandardInfoPanel:) |
26 | [info addItemWithTitle: @"Preferences" |
29 | [info addItemWithTitle: @"Help" |
30 | action: @selector (orderFrontHelpPanel:) |
33 | [menu setSubmenu: info |
34 | forItem: [menu itemWithTitle:@"Info"]]; |
37 | [NSApp setMainMenu:menu]; |
41 | window = [[NSWindow alloc] initWithContentRect: NSMakeRect(300, 300, 200, 100) |
42 | styleMask: (NSTitledWindowMask | |
43 | NSMiniaturizableWindowMask | |
44 | NSResizableWindowMask) |
45 | backing: NSBackingStoreBuffered |
47 | [window setTitle: @"Hello World"]; |
50 | label = [[NSTextField alloc] initWithFrame: NSMakeRect(30, 30, 80, 30)]; |
51 | [label setSelectable: NO]; |
52 | [label setBezeled: NO]; |
53 | [label setDrawsBackground: NO]; |
54 | [label setStringValue: @"Hello World"]; |
56 | [[window contentView] addSubview: label]; |
60 | - (void) applicationDidFinishLaunching: (NSNotification *) not |
62 | [window makeKeyAndOrderFront: self]; |
helloworldInfo.plist
02 | ApplicationDescription = "Hello World Tutorial"; |
04 | ApplicationName = HelloWorld; |
05 | ApplicationRelease = 0.1; |
07 | Copyright = "Copyright (C) 200x by ..."; |
08 | CopyrightDescription = "Released under..."; |
GNUmakefile
01 | GNUSTEP_MAKEFILES=/GNUstep/System/Library/Makefiles |
03 | include $(GNUSTEP_MAKEFILES)/common.make |
06 | HelloWorld_HEADERS = AppController.h |
07 | HelloWorld_OBJC_FILES = main.m AppController.m |
08 | HelloWorld_RESOURCE_FILES = HelloWorldInfo.plist |
10 | include $(GNUSTEP_MAKEFILES)/application.make |
然后在shell里make一下,你应该懂的
效果,有图有真相: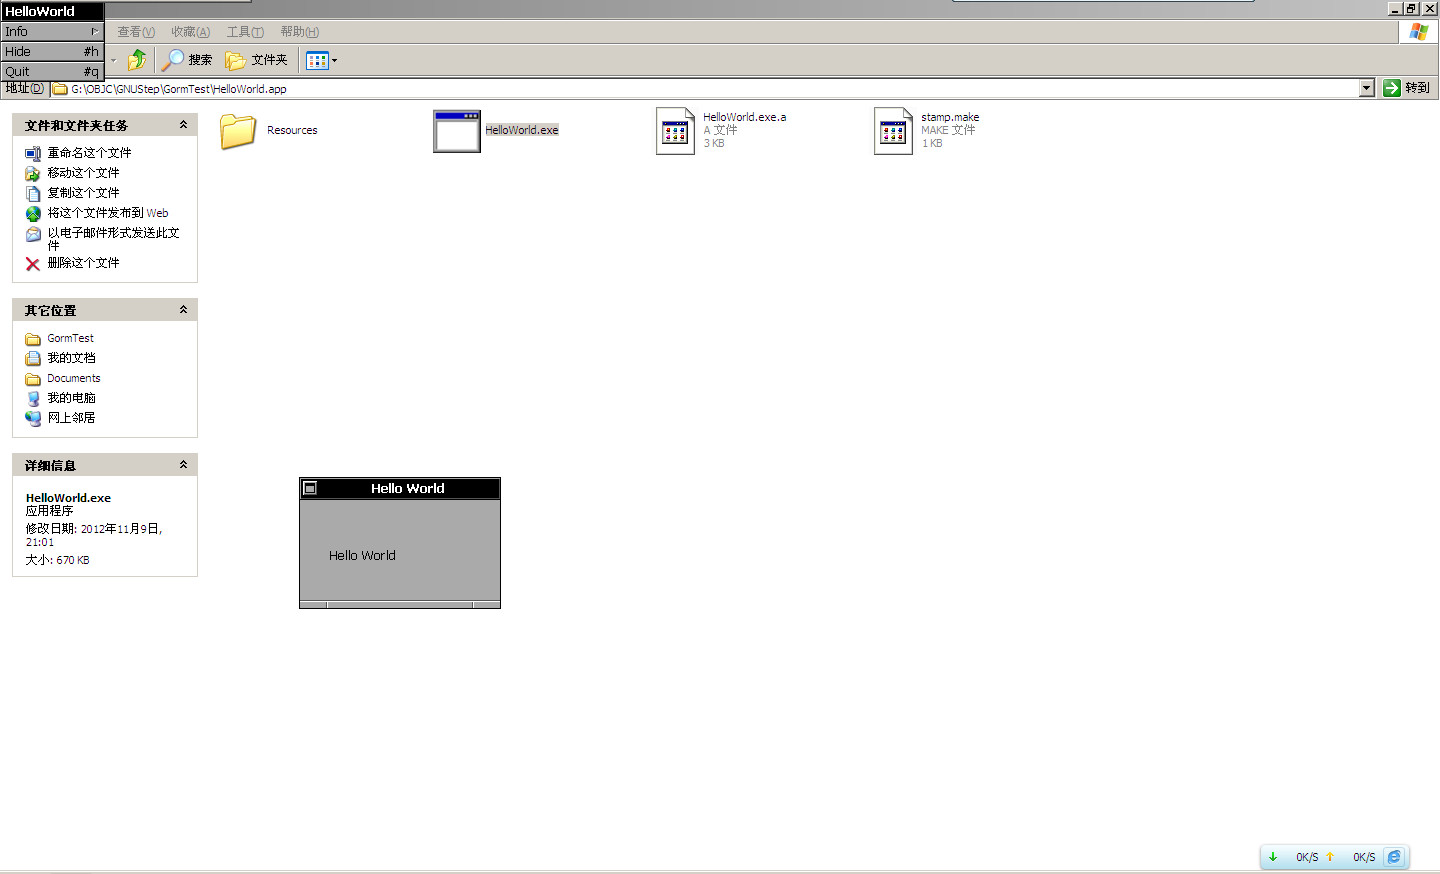
当然你也可以选择直接用grom来可视化编程,这个要看英文文档啦,不要紧的,英文跟狗叫区别真的差不多,我家的狗只要我老婆喊它英文名,摇着尾巴就过去了,英文文档如下http://www.gnustep.org/experience/PierresDevTutorial/index.html
当然uikit类库在windows下还是不能用,就是说ios开发不了,各位有钱的买mac没钱的黑苹果


 95
95


 被折叠的 条评论
为什么被折叠?
被折叠的 条评论
为什么被折叠?
 到【灌水乐园】发言


