


场景
项目使用swagger提供接口文档功能, 下面演示下多module的springboot 项目是怎么配置
效果
分析
- 通过为每个module设置独立的分组,完成分组切换功能, 下面举个例子
@EnableSwagger2
public class SwaggerConfig {

    @Bean
    public Docket group1Api() {
        return new Docket(DocumentationType.SWAGGER_2)
            .groupName("Group1")
            .apiInfo(apiInfo())
            .select()
            .apis(RequestHandlerSelectors.basePackage("com.example.group1"))
            .paths(PathSelectors.any())
            .build();
    }

    @Bean
    public Docket group2Api() {
        return new Docket(DocumentationType.SWAGGER_2)
            .groupName("Group2")
            .apiInfo(apiInfo())
            .select()
            .apis(RequestHandlerSelectors.basePackage("com.example.group2"))
            .paths(PathSelectors.any())
            .build();
    }

    private ApiInfo apiInfo() {
        return new ApiInfoBuilder()
            .title("Your API Title")
            .description("Your API Description")
            .version("1.0.0")
            .build();
    }
}
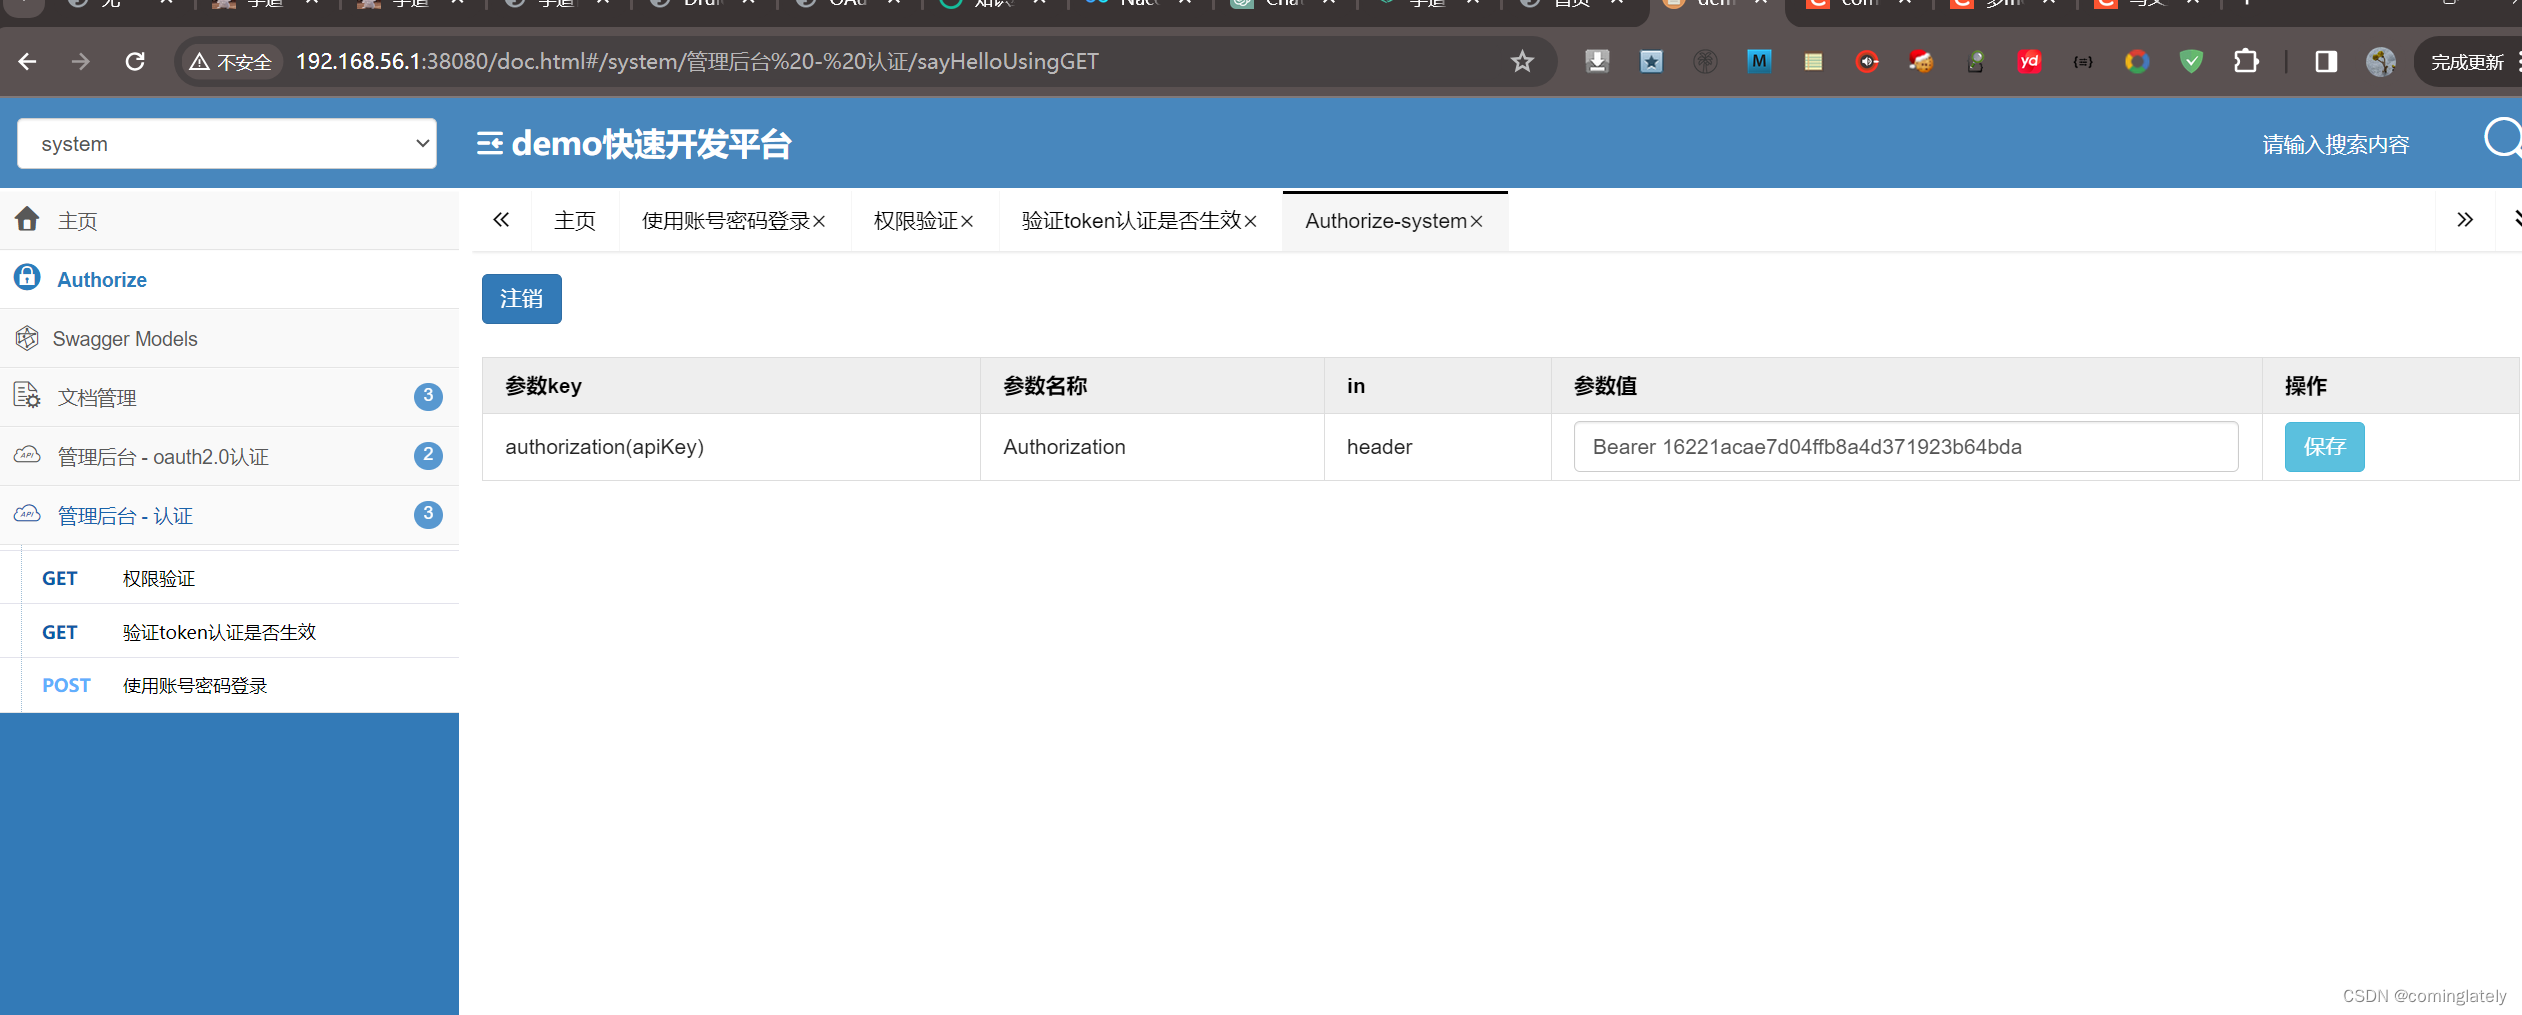
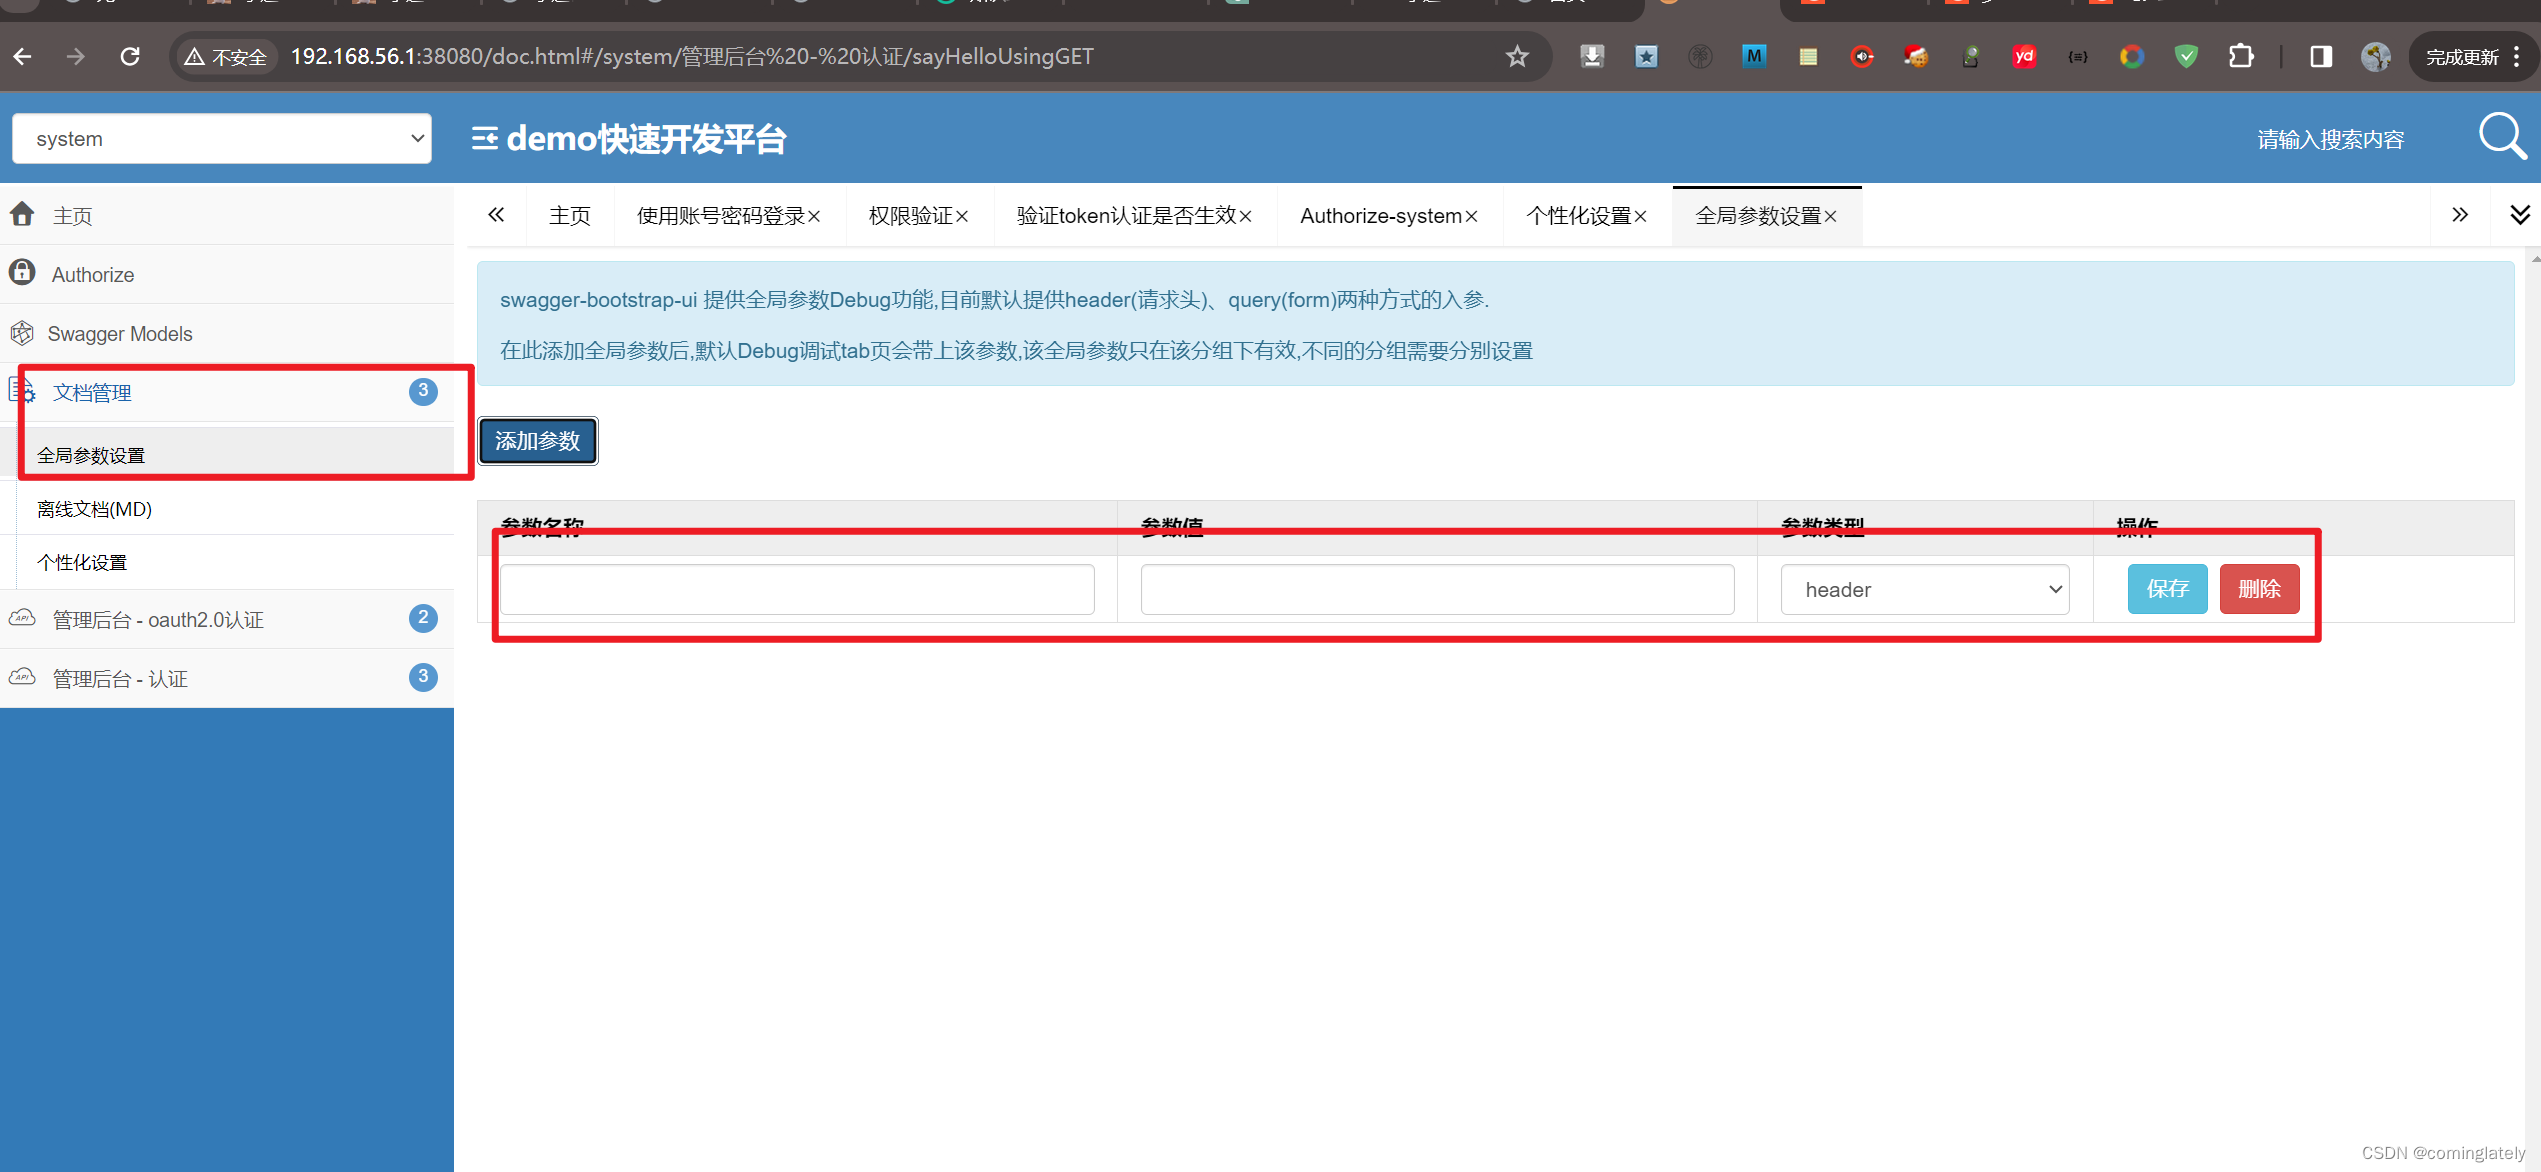
- 项目使用了spring security 所以需要有设置Authorization Header的位置,这可以通过2种方式实现
2.1 Docket.securitySchemes方法,入参是ApiKey列表
2.2 通过编辑"文档管理 -> 全局参数设置完成"
实现
- 引入依赖
        <!-- 1. swagger-bootstrap-ui 目前改名为 knife4j -->
        <!-- 2. 实现 swagger-bootstrap-ui 的自动化配置  -->
        <!-- 3. 因为 knife4j-spring 已经引入 Swagger 依赖,所以无需重复引入 -->
        <dependency>
            <groupId>com.github.xiaoymin</groupId>
            <artifactId>knife4j-spring</artifactId>
        </dependency>
        <dependency>
            <groupId>com.github.xiaoymin</groupId>
            <artifactId>knife4j-spring-ui</artifactId>
        </dependency>
- swagger配置
/**
 * @version V1.0
 * @author: carsonlius
 * @date: 2023/12/28 10:07
 * @company
 * @description swagger配置
 */
@AutoConfiguration
@ConditionalOnProperty(prefix = "springdoc.api-docs", name = "enabled", havingValue = "true", matchIfMissing = true)
@EnableConfigurationProperties(SwaggerProperties.class)
@EnableSwagger2
public class DemoSwaggerAutoConfiguration {

    /**
     * 设置system分组
     * */
    @Bean
    public Docket createSystemApi(SwaggerProperties properties) {
        return new Docket(DocumentationType.SWAGGER_2)
                .groupName("system")
                // 设置api信息
                .apiInfo(apiInfo(properties))
                // 扫描;controller包路径, 获取api接口
                .select()
                .apis(RequestHandlerSelectors.basePackage("com.carsonlius.module.system"))
                .paths(PathSelectors.any())
                // 构建Docket对象
                .build()
                .securitySchemes(Collections.singletonList(apiKey()));
    }

    /**
     * 设置system分组
     * */
    @Bean
    public Docket createWebApi(SwaggerProperties properties) {
        return new Docket(DocumentationType.SWAGGER_2)
                .groupName("web")
                // 设置api信息
                .apiInfo(apiInfo(properties))
                // 扫描;controller包路径, 获取api接口
                .select()
                .apis(RequestHandlerSelectors.basePackage("com.carsonlius.framework.web"))
                .paths(PathSelectors.any())
                // 构建Docket对象
                .build()
                .securitySchemes(Collections.singletonList(apiKey()));
    }


    /**
     * 设置请求头
     * */
    private springfox.documentation.service.ApiKey apiKey() {
        return new springfox.documentation.service.ApiKey("authorization", "Authorization", "header");
    }

    /**
     * 创建API信息
     * */
    public ApiInfo apiInfo(SwaggerProperties swaggerProperties) {
        return new ApiInfoBuilder().title(swaggerProperties.getTitle())
                .description(swaggerProperties.getDescription())
                .version(swaggerProperties.getVersion())
                .contact(new Contact(swaggerProperties.getAuthor(), swaggerProperties.getUrl(), swaggerProperties.getEmail()))
                .build();
    }
}
- security配置
对swagger请求放行
.antMatchers("/swagger-ui.html", "/webjars/**", "/v2/api-docs", "/swagger-resources/**").permitAll()
        // 设置具体请求的权限
        httpSecurity.authorizeRequests()
                .antMatchers(HttpMethod.GET, "/*.html", "/**/*.html", "/**/*.css", "/**/*.js").permitAll() // 静态资源无需认证
                .antMatchers("/websocket/message").permitAll() // websocket无需认证
                .antMatchers("/swagger-ui.html", "/webjars/**", "/v2/api-docs", "/swagger-resources/**").permitAll()
                // 放行 Druid 监控的相关 URI
                .antMatchers("/druid/**").permitAll()
                .antMatchers(HttpMethod.GET, permitAllUrlMap.get(RequestMethod.GET).toArray(new String[0])).permitAll()
                .antMatchers(HttpMethod.POST, permitAllUrlMap.get(RequestMethod.POST).toArray(new String[0])).permitAll()
                .antMatchers(HttpMethod.PUT, permitAllUrlMap.get(RequestMethod.PUT).toArray(new String[0])).permitAll()
                .antMatchers(HttpMethod.DELETE, permitAllUrlMap.get(RequestMethod.DELETE).toArray(new String[0])).permitAll()
                .and().authorizeRequests().anyRequest().authenticated(); // 其他请求必须认证
@ConfigurationProperties 注解
SwaggerProperties 通过@ConfigurationProperties将配置属性影射到ConfigurationProperties对象。 这个注解一般配合@EnableConfigurationProperties使用,或者直接在ConfigurationProperties上加上@Component


 1983
1983


 被折叠的 条评论
为什么被折叠?
被折叠的 条评论
为什么被折叠?
 到【灌水乐园】发言


