


Android HTTP协议请求网络(二)之HttpClient方式
githup练习demo地址:https://github.com/aiyangtianci/NetworkRequestDemo
一、介绍
在Android API Level 9(Android 2.2)之前只能使用DefaultHttpClient类发送http请求。DefaultHttpClient是Apache用于发送http请求的客户端,其提供了强大的API支持,而且基本没有什么bug,但是由于其太过复杂,Android团队在保持向后兼容的情况下,很难对DefaultHttpClient进行增强。为此,Android团队从Android API Level 9开始自己实现了一个发送http请求的客户端类——–HttpURLConnection。
相比于DefaultHttpClient,HttpURLConnection比较轻量级,虽然功能没有DefaultHttpClient那么强大,但是能够满足大部分的需求,所以Android推荐使用HttpURLConnection代替DefaultHttpClient,并不强制使用HttpURLConnection。
但从Android API Level 23(Android 6.0)开始,不能再在Android中使用DefaultHttpClient,强制使用HttpURLConnection。
二、Get方式:
实现流程步骤:
第一步:实例化URL对象。
第二步:实例化HttpUrlConnection对象。
第三步:设置请求连接属性,传递参数等。
第四步:获取返回码判断是否链接成功。
第五步:读取输入流。
第六步:关闭链接。
 public void run() {
            HttpURLConnection connection = null;
            try {
                URL url = new URL("http://192.168.23.1:8080/TestProject/GetTest");
                connection = (HttpURLConnection) url.openConnection();。
                // 设置请求方法,默认是GET
                connection.setRequestMethod("GET");
                // 设置字符集
                connection.setRequestProperty("Charset", "UTF-8");
                // 设置文件类型
                connection.setRequestProperty("Content-Type", "text/xml; charset=UTF-8");
                // 设置请求参数,可通过Servlet的getHeader()获取
                connection.setRequestProperty("Cookie", "AppName=" + URLEncoder.encode("你好", "UTF-8"));
                // 设置自定义参数
                connection.setRequestProperty("MyProperty", "this is me!");

                if(connection.getResponseCode() == 200){
                    InputStream is = connection.getInputStream();
                    result = StringStreamUtil.inputStreamToString(is);
                }
            } catch (IOException e) {
                e.printStackTrace();
            } finally {
                if(connection != null){
                    connection.disconnect();
                }
            }
三、Post方式:
 public void run() {
            HttpURLConnection connection = null;
            try {
                URL url = new URL("http://192.168.23.1:8080/TestProject/PostTest");
                connection = (HttpURLConnection) url.openConnection();
                // 设置请求方式
                connection.setRequestMethod("POST");
                // 设置编码格式
                connection.setRequestProperty("Charset", "UTF-8");
                // 传递自定义参数
                connection.setRequestProperty("MyProperty", "this is me!");
                // 设置容许输出
                connection.setDoOutput(true);

                // 上传一张图片|上传参数: byte[] requestBody = new String("name=孙群&age=27").getBytes("UTF-8");
                FileInputStream file = new FileInputStream(Environment.getExternalStorageDirectory().getPath()
                        + "/Pictures/Screenshots/Screenshot_2015-12-19-08-40-18.png");
                OutputStream os = connection.getOutputStream();
                int count = 0;
                while((count=file.read()) != -1){
                    os.write(count);
                }
                os.flush();
                os.close();

                // 获取返回数据
                if(connection.getResponseCode() == 200){
                    InputStream is = connection.getInputStream();
                    result = StringStreamUtil.inputStreamToString(is);
                }
            } catch (MalformedURLException e) {
                e.printStackTrace();
            } catch (IOException e) {
                e.printStackTrace();
            } finally {
                if(connection!=null){
                    connection.disconnect();
                }
            }
        };
四、上传APK包大文件:
 public void run() {
            HttpURLConnection connection = null;
            try {
                URL url = new URL("http://192.168.23.1:8080/TestProject/FileTest");
                connection = (HttpURLConnection) url.openConnection();
                // 设置每次传输的流大小,可以有效防止手机因为内存不足崩溃
                // 此方法用于在预先不知道内容长度时启用没有进行内部缓冲的 HTTP请求正文的流。
                connection.setChunkedStreamingMode(51200); // 128K
                // 不使用缓存
                connection.setUseCaches(false);
                // 设置请求方式
                connection.setRequestMethod("POST");
                // 设置编码格式
                connection.setRequestProperty("Charset", "UTF-8");
                // 设置容许输出
                connection.setDoOutput(true);

                // 上传文件
                FileInputStream file = new FileInputStream(Environment.getExternalStorageDirectory().getPath()
                        + "/aaaaa/baidu_map.apk");
                OutputStream os = connection.getOutputStream();
                byte[] b = new byte[1024];
                int count = 0;
                while((count = file.read(b)) != -1){
                    os.write(b, 0, count);
                }
                os.flush();
                os.close();

                // 获取返回数据
                if(connection.getResponseCode() == 200){
                    InputStream is = connection.getInputStream();
                    result = StringStreamUtil.inputStreamToString(is);
                }
            } catch (MalformedURLException e) {
                e.printStackTrace();
            } catch (Exception e) {
                e.printStackTrace();
            } finally {
                if(connection != null){
                    connection.disconnect();
                }
            }
        };
五、文件断点上传:
public class MoreUploadActivity extends Activity {
    private TextView mTvMsg;

    private String result = "";

    private long start = 0;           // 开始读取的位置
    private long stop = 1024 * 1024;  // 结束读取的位置
    private int times = 0;            //读取次数

    private long fileSize = 0;  //文件大小

    @Override
    protected void onCreate(Bundle savedInstanceState) {
        super.onCreate(savedInstanceState);
        requestWindowFeature(Window.FEATURE_NO_TITLE);
        setContentView(R.layout.activity_times_upload);

        initView();
    }

    private void initView(){
        mTvMsg = (TextView) findViewById(R.id.tv_upload);

        try {
            FileInputStream file = new FileInputStream(Environment.getExternalStorageDirectory().getPath() + "/aaaaa/baidu_map.apk");
            fileSize = file.available();
        } catch (IOException e) {
            // TODO Auto-generated catch block
            e.printStackTrace();
        }

        new Thread(uploadThread).start();
    }

    private Thread uploadThread = new Thread(){
        public void run() {
            HttpURLConnection connection = null;
            try {
                URL url = new URL("http://192.168.23.1:8080/TestProject/MoreUploadTest");
                connection = (HttpURLConnection) url.openConnection();
                connection.setRequestMethod("POST");
                connection.setChunkedStreamingMode(51200);
                connection.setUseCaches(false);
                // 设置允许输出
                connection.setDoOutput(true);
                // 设置断点开始,结束位置
                connection.setRequestProperty("Range", "bytes=" + start + "-" + stop);

                String path = Environment.getExternalStorageDirectory().getPath() + "/aaaaa/baidu_map.apk";
                RandomAccessFile file = new RandomAccessFile(path, "rw");
                file.seek(start);
                byte[] buffer = new byte[1024];
                int count = 0;
                OutputStream os = connection.getOutputStream();
                if(fileSize > 1024*1024){
                    for(int i=0; i<1024 && count!=-1; i++){
                        count = file.read(buffer);
                        os.write(buffer, 0, count);
                    }
                }else{
                    for(int i=0; i<(fileSize/1024)+1 && count!=-1; i++){
                        count = file.read(buffer);
                        os.write(buffer, 0, count);
                    }
                }
                os.flush();
                os.close();

                Log.e("ABC", connection.getResponseCode() + "");
                if(connection.getResponseCode() == 200){
                    result += StringStreamUtil.inputStreamToString(connection.getInputStream()) + "\n";
                }

                start = stop + 1;
                stop += 1024*1024;
                fileSize -= 1024*1024;

                Message msg = Message.obtain();
                msg.what = 0;
                uploadHandler.sendMessage(msg);
            } catch (MalformedURLException e) {
                e.printStackTrace();
            } catch (IOException e) {
                e.printStackTrace();
            } finally {
                if(connection != null){
                    connection.disconnect();
                }
            }
        };
    };

    private Handler uploadHandler = new Handler(){
        public void handleMessage(android.os.Message msg) {
            if(msg.what == 0){
                if(times >= 8){
                    mTvMsg.setText(result);
                }else{
                    times += 1;
                    new Thread(uploadThread).start();
                    mTvMsg.setText(result);
                }
            }
        };
    };
}
六、文件断点下载:
1、下载重要的是实现技巧: 一:设置断点请求setRequestProperty("Range", "bytes=0-1024");
二:通过RandomAccessFile来将下载的字节插入到指定的位置。
2、对于输出流的三个方法的对比:
os.write(byte[] buffer); 可能错误,因为你每次读取的数据小于等于1024,但你每次写入的数据仍然是1024, 对图片有一定影响,对安装包绝对是致命的影响。
os.write(int oneByte); 效率低
os.write(byte[] buffer, int byteOffset, int byteCount); 效率高,和第二个方法相比有一个数量级的差别(主观上看,有兴趣的可以测几下)。
/**
 * 断点下载
 */
public class MoreTimesActivity extends Activity {
    private TextView mTvMsg;

    private String result = "";

    private long start = 0;
    private long stop = 1024 * 1024;

    private int times = 0;  // 根据文件大小自己设的,

    @Override
    protected void onCreate(Bundle savedInstanceState) {
        // TODO Auto-generated method stub
        super.onCreate(savedInstanceState);
        requestWindowFeature(Window.FEATURE_NO_TITLE);
        setContentView(R.layout.activity_times_download);

        initView();
    }

    private void initView(){
        mTvMsg = (TextView) findViewById(R.id.tv_msg);

        new Thread(moreThread).start();
    }

    private Thread moreThread = new Thread(){
        public void run() {
            HttpURLConnection connection = null;
            try {
                URL url = new URL("http://ftp-apk.pconline.com.cn/ef19af4e28462271af1117efaf868bc2/pub/download/201010/renshengrili_v4.0.04.05.apk");
                connection = (HttpURLConnection) url.openConnection();
                connection.setRequestMethod("GET");
                connection.setDoInput(true);
                // 设置开始下载的位置和结束下载的位置,单位为字节
                connection.setRequestProperty("Range", "bytes=" + start + "-" + stop);

                String path = Environment.getExternalStorageDirectory().getPath()  + "/aaaaa/baidu_map.apk";
                // 断点下载使用的文件对象RandomAccessFile
                RandomAccessFile access = new RandomAccessFile(path, "rw");
                // 移动指针到开始位置
                access.seek(start);
                InputStream is = null;
                Log.e("ADB----", connection.getResponseCode() + "");
                if(connection.getResponseCode() == 206){
                    is = connection.getInputStream();
                    int count = 0;
                    byte[] buffer = new byte[1024];
                    while((count = is.read(buffer)) != -1){
                        access.write(buffer, 0, count);
                    }
                }

                if(access != null){
                    access.close();
                }
                if(is != null){
                    is.close();
                }

                start = stop + 1;
                stop += 1024*1024;   // 每次下载1M

                Message msg = Message.obtain();
                msg.what = 0;
                result += "文件" + times + "下载成功" + ":" + start + "---" + stop + "\n";
                moreHandler.sendMessage(msg);
            } catch (MalformedURLException e) {
                e.printStackTrace();
            } catch (IOException e) {
                e.printStackTrace();
            } finally {
                if(connection != null){
                    connection.disconnect();
                }
            }
        };
    };

    private Handler moreHandler = new Handler(){
        public void handleMessage(android.os.Message msg) {
            if(msg.what == 0 && result!=null){
                if(times >= 10){
                    Message msg1 = Message.obtain();
                    msg1.what = 1;
                    moreHandler.sendMessage(msg1);
                }else{
                    new Thread(moreThread).start();
                    times += 1;
                }

                mTvMsg.setText(result);
            }else if(msg.what == 1){
                mTvMsg.setText(result);
            }
        };
    };
}
三、Demo讲解
为了演示HttpURLConnection的常见用法,我做了一个App,界面如下所示:
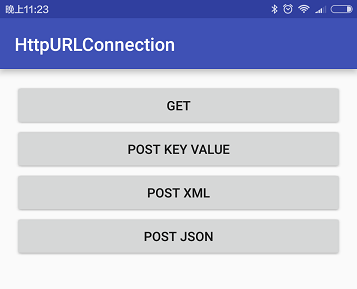
主界面MainActivity有四个按钮,分别表示用GET发送请求、用POST发送键值对数据、用POST发送XML数据以及用POST发送JSON数据,点击对应的按钮会启动NetworkActivity并执行相应的操作。
NetworkActivity的源码如下所示,此处先贴出代码,后面会详细说明。
package com.ispring.httpurlconnection;

import android.content.Intent;
import android.content.res.AssetManager;
import android.os.AsyncTask;
import android.support.v7.app.AppCompatActivity;
import android.os.Bundle;
import android.widget.TextView;

import java.io.BufferedInputStream;
import java.io.BufferedOutputStream;
import java.io.ByteArrayInputStream;
import java.io.ByteArrayOutputStream;
import java.io.IOException;
import java.io.InputStream;
import java.io.OutputStream;
import java.io.UnsupportedEncodingException;
import java.net.HttpURLConnection;
import java.net.MalformedURLException;
import java.net.URL;
import java.util.HashMap;
import java.util.Iterator;
import java.util.List;
import java.util.Map;

public class NetworkActivity extends AppCompatActivity {


    private NetworkAsyncTask networkAsyncTask = new NetworkAsyncTask();

    private TextView tvUrl = null;
    private TextView tvRequestHeader = null;
    private TextView tvRequestBody = null;
    private TextView tvResponseHeader = null;
    private TextView tvResponseBody = null;

    @Override
    protected void onCreate(Bundle savedInstanceState) {
        super.onCreate(savedInstanceState);
        setContentView(R.layout.activity_network);
        tvUrl = (TextView) findViewById(R.id.tvUrl);
        tvRequestHeader = (TextView) findViewById(R.id.tvRequestHeader);
        tvRequestBody = (TextView) findViewById(R.id.tvRequestBody);
        tvResponseHeader = (TextView) findViewById(R.id.tvResponseHeader);
        tvResponseBody = (TextView) findViewById(R.id.tvResponseBody);
        Intent intent = getIntent();
        if (intent != null && intent.getExtras() != null) {
            String networkAction = intent.getStringExtra("action");
            networkAsyncTask.execute(networkAction);
        }
    }

    //用于进行网络请求的AsyncTask
    class NetworkAsyncTask extends AsyncTask<String, Integer, Map<String, Object>> {
        //NETWORK_GET表示发送GET请求
        public static final String NETWORK_GET = "NETWORK_GET";
        //NETWORK_POST_KEY_VALUE表示用POST发送键值对数据
        public static final String NETWORK_POST_KEY_VALUE = "NETWORK_POST_KEY_VALUE";
        //NETWORK_POST_XML表示用POST发送XML数据
        public static final String NETWORK_POST_XML = "NETWORK_POST_XML";
        //NETWORK_POST_JSON表示用POST发送JSON数据
        public static final String NETWORK_POST_JSON = "NETWORK_POST_JSON";

        @Override
        protected Map<String, Object> doInBackground(String... params) {
            Map<String,Object> result = new HashMap<>();
            URL url = null;//请求的URL地址
            HttpURLConnection conn = null;
            String requestHeader = null;//请求头
            byte[] requestBody = null;//请求体
            String responseHeader = null;//响应头
            byte[] responseBody = null;//响应体
            String action = params[0];//http请求的操作类型

            try {
                if (NETWORK_GET.equals(action)) {
                    //发送GET请求
                    url = new URL("http://192.168.31.200:8080/HttpServer/MyServlet?name=孙群&age=27");
                    conn = (HttpURLConnection) url.openConnection();
                    //HttpURLConnection默认就是用GET发送请求,所以下面的setRequestMethod可以省略
                    conn.setRequestMethod("GET");
                    //HttpURLConnection默认也支持从服务端读取结果流,所以下面的setDoInput也可以省略
                    conn.setDoInput(true);
                    //用setRequestProperty方法设置一个自定义的请求头:action,由于后端判断
                    conn.setRequestProperty("action", NETWORK_GET);
                    //禁用网络缓存
                    conn.setUseCaches(false);
                    //获取请求头
                    requestHeader = getReqeustHeader(conn);
                    //在对各种参数配置完成后,通过调用connect方法建立TCP连接,但是并未真正获取数据
                    //conn.connect()方法不必显式调用,当调用conn.getInputStream()方法时内部也会自动调用connect方法
                    conn.connect();
                    //调用getInputStream方法后,服务端才会收到请求,并阻塞式地接收服务端返回的数据
                    InputStream is = conn.getInputStream();
                    //将InputStream转换成byte数组,getBytesByInputStream会关闭输入流
                    responseBody = getBytesByInputStream(is);
                    //获取响应头
                    responseHeader = getResponseHeader(conn);
                } else if (NETWORK_POST_KEY_VALUE.equals(action)) {
                    //用POST发送键值对数据
                    url = new URL("http://192.168.31.200:8080/HttpServer/MyServlet");
                    conn = (HttpURLConnection) url.openConnection();
                    //通过setRequestMethod将conn设置成POST方法
                    conn.setRequestMethod("POST");
                    //调用conn.setDoOutput()方法以显式开启请求体
                    conn.setDoOutput(true);
                    //用setRequestProperty方法设置一个自定义的请求头:action,由于后端判断
                    conn.setRequestProperty("action", NETWORK_POST_KEY_VALUE);
                    //获取请求头
                    requestHeader = getReqeustHeader(conn);
                    //获取conn的输出流
                    OutputStream os = conn.getOutputStream();
                    //获取两个键值对name=孙群和age=27的字节数组,将该字节数组作为请求体
                    requestBody = new String("name=孙群&age=27").getBytes("UTF-8");
                    //将请求体写入到conn的输出流中
                    os.write(requestBody);
                    //记得调用输出流的flush方法
                    os.flush();
                    //关闭输出流
                    os.close();
                    //当调用getInputStream方法时才真正将请求体数据上传至服务器
                    InputStream is = conn.getInputStream();
                    //获得响应体的字节数组
                    responseBody = getBytesByInputStream(is);
                    //获得响应头
                    responseHeader = getResponseHeader(conn);
                } else if (NETWORK_POST_XML.equals(action)) {
                    //用POST发送XML数据
                    url = new URL("http://192.168.31.200:8080/HttpServer/MyServlet");
                    conn = (HttpURLConnection) url.openConnection();
                    //通过setRequestMethod将conn设置成POST方法
                    conn.setRequestMethod("POST");
                    //调用conn.setDoOutput()方法以显式开启请求体
                    conn.setDoOutput(true);
                    //用setRequestProperty方法设置一个自定义的请求头:action,由于后端判断
                    conn.setRequestProperty("action", NETWORK_POST_XML);
                    //获取请求头
                    requestHeader = getReqeustHeader(conn);
                    //获取conn的输出流
                    OutputStream os = conn.getOutputStream();
                    //读取assets目录下的person.xml文件,将其字节数组作为请求体
                    requestBody = getBytesFromAssets("person.xml");
                    //将请求体写入到conn的输出流中
                    os.write(requestBody);
                    //记得调用输出流的flush方法
                    os.flush();
                    //关闭输出流
                    os.close();
                    //当调用getInputStream方法时才真正将请求体数据上传至服务器
                    InputStream is = conn.getInputStream();
                    //获得响应体的字节数组
                    responseBody = getBytesByInputStream(is);
                    //获得响应头
                    responseHeader = getResponseHeader(conn);
                } else if (NETWORK_POST_JSON.equals(action)) {
                    //用POST发送JSON数据
                    url = new URL("http://192.168.31.200:8080/HttpServer/MyServlet");
                    conn = (HttpURLConnection) url.openConnection();
                    //通过setRequestMethod将conn设置成POST方法
                    conn.setRequestMethod("POST");
最低0.47元/天 解锁文章


 883
883

 被折叠的 条评论
为什么被折叠?
被折叠的 条评论
为什么被折叠?
 到【灌水乐园】发言


