


 本文介绍了Android NDK的基础概念,包括NDK的作用、交叉编译原理及x86与ARM平台的区别。通过详细步骤指导如何从官网下载NDK、配置环境、导入示例项目直至完成首个NDK程序。
学习NDK开发需要知道的几个概念:
什么是NDK(Native Development Kit)?
Android官网上这样介绍:
The NDK is a toolset that allows you to implement parts of your app using native-code languages such as C and C++. For certain types of apps, this can be helpful so you can reuse existing code libraries written in these languages, but most apps do not need the Android NDK.交叉编译
简单地说,就是在一个平台上生成另一个平台上的可执行代码。x86和arm平台
X86和ARM都是指CPU的内核。X86类型的处理器是典型的CISC,指令集丰富,性能强。我们目前在桌面电脑,笔记本电脑中使用的Intel、AMD处理器,就是X86处理器。ARM是一家英国的处理器设计公司,其设计的处理器采用了ARM内核。ARM处理器是典型的RISC,指令集较X86要精简很多,串行性能要远远弱于X86。但ARM指令集少,电路规模小,功耗低,发热低,非常适合于嵌入式、便携式电子产品,如手机、平板,以及工业嵌入式等什么是链接库
静态连接库就是把(lib)文件中用到的函数代码直接链接进目标程序,程序运行的时候不再需要其它的库文件;动态链接就是把调用的函数所在文件模块(DLL)和调用函数在文件中的位置等信息链接进目标程序,程序运行的时候再从DLL中寻找相应函数代码,因此需要相应DLL文件的支持。
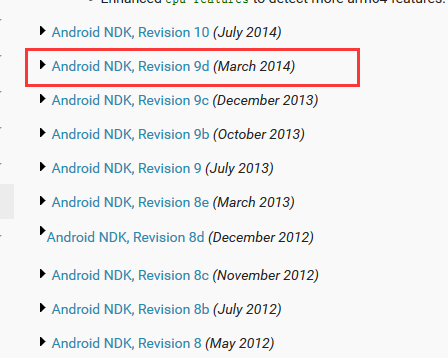
(一)官网下载
Android官网在中国被屏蔽了,下面是
http://wear.techbrood.com/tools/sdk/ndk/
推荐使用R9d版本,比较稳定,虽然新版本功能多点但是错误也多,大概500多M.
下载之后是一个压缩文件,建议放在一个不经常动的盘里,下载之后直接解压
(二)环境配置
在环境变量classpath添加一项,你解压文件里的ndk-build.cmd命令所在路径,我解压在C:\ndk中,所以添加”;C:\ndk\android-ndk-r9d”
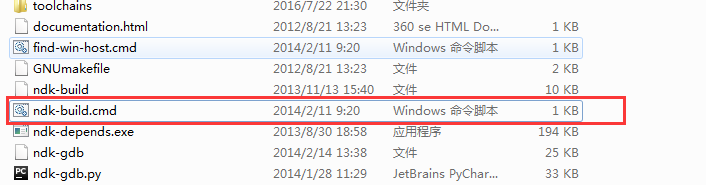
之后在命令行输入ndk-build出现下面情况说明配置正确:

(三)导入NDK自带的例子
在上面解压后的文件夹中samples里面包含许多NDk实例项目,帮助我们学习NDK,在后面的文章中我会一个个介绍。
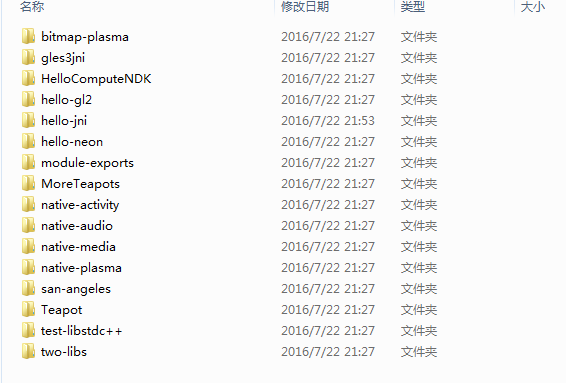
这里都是Android项目,直接导入即可。
(四)开发第一个Android NDK程序
- 在Eclipse里新建一个Android项目,命名NDKTest
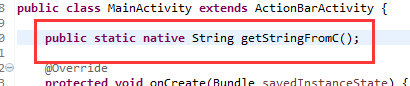
- 在主目录中添加一个jni文件夹,MainActivity里添加一个native函数,如:
- 在命令行中用javah命令生成头文件
之后刷新项目,你会发现在jni文件夹里会多一个头文件,
- 把ndk自带例子中hello-jni里的Android.mk 拷贝一份到我们的jni目录下,并新建一个hello.c文件,hello.c代码:


#include<stdio.h>
#include<stdlib.h>
#include"com_example_ndktest_MainActivity.h"

JNIEXPORT jstring JNICALL Java_com_example_ndktest_MainActivity_getStringFromC
  (JNIEnv *env, jclass jcla){
    return (*env)->NewStringUTF(env, "Hello from NDK !");
}
其中的JNIEXPORT jstring JNICALL Java_com_example_ndktest_MainActivity_getStringFromC()从头文件中得到
Android.mk文件修改成如下:
# Copyright (C) 2009 The Android Open Source Project
#
# Licensed under the Apache License, Version 2.0 (the "License");
# you may not use this file except in compliance with the License.
# You may obtain a copy of the License at
#
#      http://www.apache.org/licenses/LICENSE-2.0
#
# Unless required by applicable law or agreed to in writing, software
# distributed under the License is distributed on an "AS IS" BASIS,
# WITHOUT WARRANTIES OR CONDITIONS OF ANY KIND, either express or implied.
# See the License for the specific language governing permissions and
# limitations under the License.
#
LOCAL_PATH := $(call my-dir)

include $(CLEAR_VARS)
#.so文件的名字
LOCAL_MODULE    := hello
#c文件
LOCAL_SRC_FILES := hello.c
# for logging
LOCAL_LDLIBS    += -llog

include $(BUILD_SHARED_LIBRARY)
在命令行中运行ndk-build目录,生成链接库文件,即.so文件
之后再MainActivity中添加一个静态块:


package com.example.ndktest;

import android.support.v7.app.ActionBarActivity;
import android.util.Log;
import android.os.Bundle;
import android.view.Menu;
import android.view.MenuItem;

public class MainActivity extends ActionBarActivity {

    static{
        System.loadLibrary("hello");
    }

    public static native String getStringFromC();

    @Override
    protected void onCreate(Bundle savedInstanceState) {
        super.onCreate(savedInstanceState);
        setContentView(R.layout.activity_main);
        Log.d("从native返回的字符串", getStringFromC());
    }


}
注意:System.loadLibrary(“hello”);中hello是指.so文件(链接库),我们不写libhello,以Android.mk文件的.so文件名为准。
- 运行Android项目,至此我们第一个NDK项目就开发完了。


 被折叠的 条评论
为什么被折叠?
被折叠的 条评论
为什么被折叠?
 到【灌水乐园】发言


