


 本文介绍了一种基于Spring Boot和Swagger的自动化接口分组方法,通过解析映射路径实现动态分组,避免了手动配置Docket带来的不便。该方案适用于具有一定路径规律的应用场景。
前言:网上查的接口分组,都是手动配置多个Docket来实现分组,但是这样每加一个业务还要改这里代码,太麻烦所以自己改造了一下,代码效果如下
注意:这种方式要保证接口要有一定的规则,比如(有如下三个接口1.aaa/xxx/xxx, 2.aaa/bbb/bbb,3.ccc/xx/bb)那么就会有aaa和ccc两个分组
代码:
import org.springframework.beans.factory.support.DefaultListableBeanFactory;
import org.springframework.context.annotation.Configuration;
import org.springframework.web.method.HandlerMethod;
import org.springframework.web.servlet.mvc.condition.PatternsRequestCondition;
import org.springframework.web.servlet.mvc.method.RequestMappingInfo;
import org.springframework.web.servlet.mvc.method.annotation.RequestMappingHandlerMapping;
import springfox.documentation.builders.ApiInfoBuilder;
import springfox.documentation.builders.ParameterBuilder;
import springfox.documentation.builders.PathSelectors;
import springfox.documentation.builders.RequestHandlerSelectors;
import springfox.documentation.schema.ModelRef;
import springfox.documentation.service.ApiInfo;
import springfox.documentation.service.Parameter;
import springfox.documentation.spi.DocumentationType;
import springfox.documentation.spring.web.plugins.Docket;
import springfox.documentation.swagger2.annotations.EnableSwagger2;

import java.util.*;

@Configuration
@EnableSwagger2
public class Swagger2Config {
    private DefaultListableBeanFactory context;
    private RequestMappingHandlerMapping mapping;


    public Swagger2Config(DefaultListableBeanFactory context, RequestMappingHandlerMapping mapping) {
        this.context = context;
        this.mapping = mapping;
        cofig();
    }

    /**
     * 执行配置
     */
    private void cofig(){
        //添加head参数配置start
        ParameterBuilder tokenPar = new ParameterBuilder();
        List<Parameter> pars = new ArrayList<Parameter>();
        tokenPar.name("Authorization").description("令牌").modelRef(new ModelRef("string")).parameterType("header").required(false).build();
        pars.add(tokenPar.build());

        Set<String> pathGroup = null;
        try {
            // 分组
            pathGroup = getPathGroup();
        } catch (ClassNotFoundException e) {
            e.printStackTrace();
        }
        // 根据分好的组,循环创建配置类并添加到容器中
        pathGroup.forEach(item -> {
            Docket enable = new Docket(DocumentationType.SWAGGER_2)
                    .apiInfo(apiInfo())
                    //是否启动swagger 如果是false则不能在浏览器中使用
                    .enable(true)
                    // 分组名称
                    .groupName(item)
                    .select()
                    // 在指定的包下,扫描注解
                    .apis(RequestHandlerSelectors.basePackage("com.hn.gege"))
                    // 过滤路劲过滤(只要指定地址开头的接口)
                    .paths(PathSelectors.ant(item + "/**"))
                    .build()
                    .globalOperationParameters(pars);//添加请求头参数;
            // 手动将配置类注入到spring bean容器中
            context.registerSingleton("enable" + item , enable);
        });

    }

    /**
     * 对接口进行分组
     * 这里就是通过spring提供的RequestMappingHandlerMapping 类拿到所有接口,然后根据最前面的接口地址进行分组
     * @return
     */
    private Set<String> getPathGroup() throws ClassNotFoundException {
        HashSet<String> set = new HashSet<>();

        Map<RequestMappingInfo, HandlerMethod> mappingHandlerMethods = mapping.getHandlerMethods();
        for (Map.Entry<RequestMappingInfo, HandlerMethod> map : mappingHandlerMethods.entrySet()) {
            HashMap<String, Object> pmap = new HashMap<>();
            RequestMappingInfo info = map.getKey();
            HandlerMethod method = map.getValue();
            PatternsRequestCondition patternsCondition = info.getPatternsCondition();
            String className = method.getMethod().getDeclaringClass().getName();
            /**
             * 匹配包路径 根据自己的路径替换
             */
            if (className.contains("com.hn.gege")) {
                for(String url : patternsCondition.getPatterns()) {
                    int i = url.indexOf("/", 1);
                    if (i<0){
                        set.add(url);
                    }else {
                        set.add(url.substring(0, i));
                    }
                }
            }
        }
        return set;
    }

private ApiInfo apiInfo() {
        return new ApiInfoBuilder()
                .title("接口文档")
                .description("项目地址:http://localhost:5200/gege")
                .version("1.0")
                .build();
    }
}
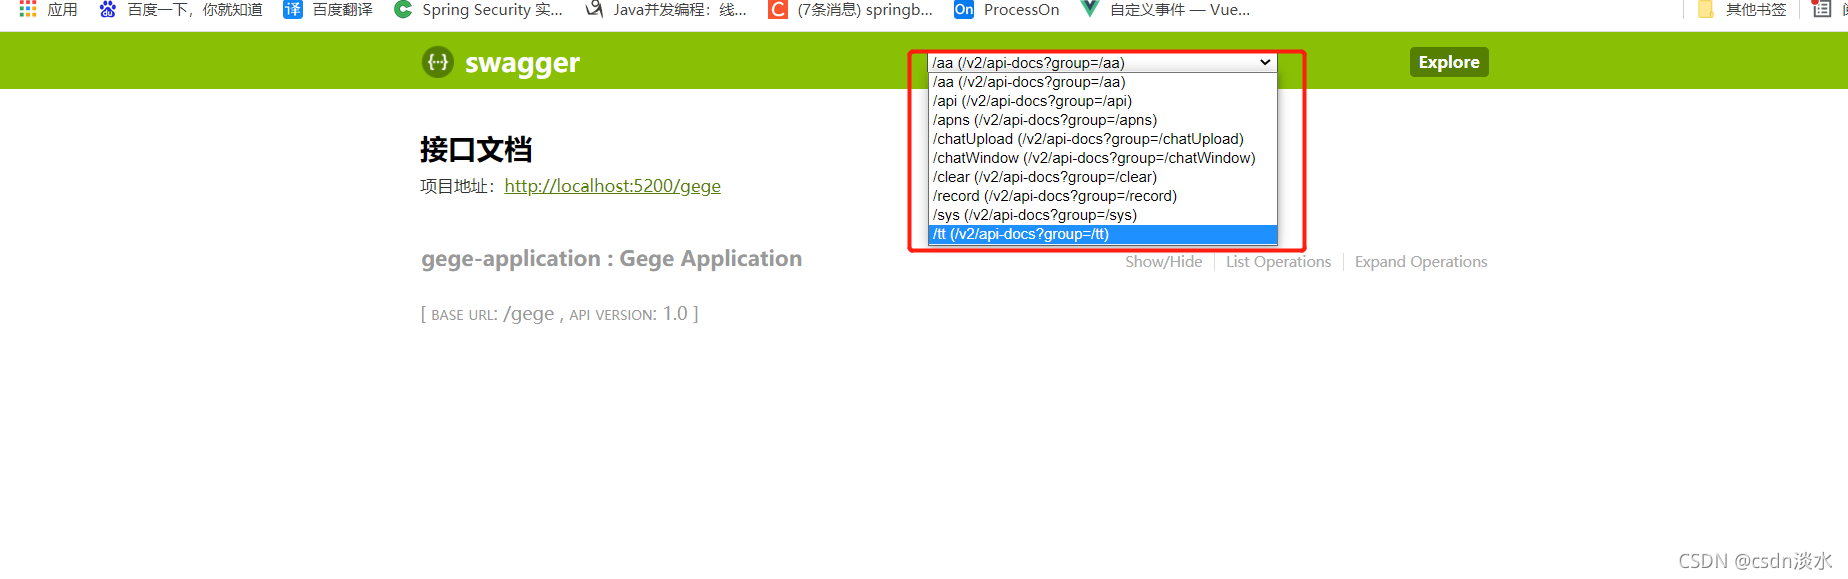
效果:在这里就可以切换不同的分组,来显示不同的接口


 3274
3274

 被折叠的 条评论
为什么被折叠?
被折叠的 条评论
为什么被折叠?
 到【灌水乐园】发言


