


Three.js三维引擎,先介绍渲染器(Renderer)、场景(Scene)、照相机(Camera),其实这些概念确实需要了解,如果不给你立体模型,你始终是无法理解的。,接下来我们通过这篇文章,从造物主的视角开始创建一个房子。我们先看下最终效果。

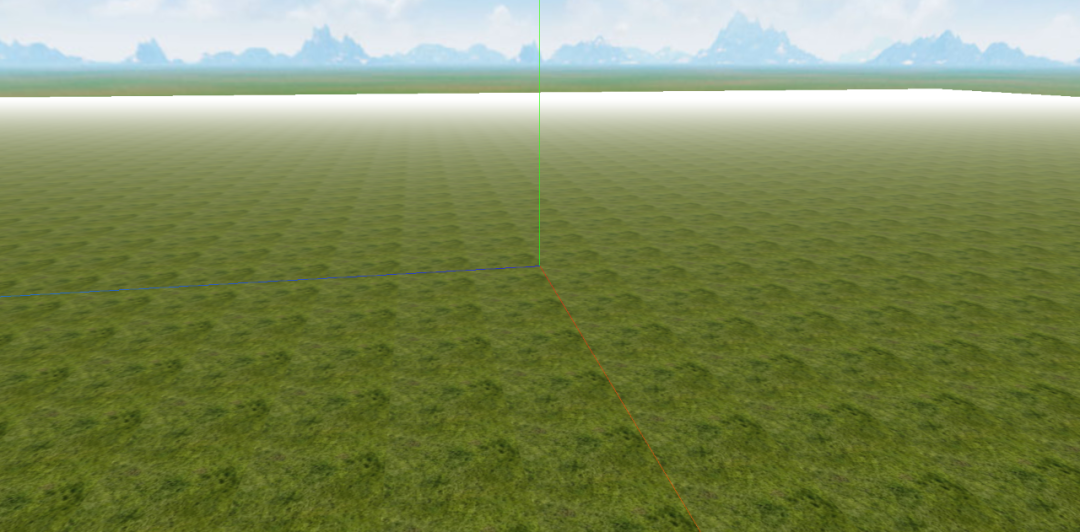
一、创造世界
很好理解,就是我们现在看到的世界,用Three.js做出来。效果如下

首先对Three.js还是要了解其一些概念的,这样才能看的更明白。新建一个项目,引入Three.js,网上不好js找没关系,我会在最后提供本篇文章的完整demo。
创建场景
const scene = new THREE.Scene();
创建透视相机
// 获取窗口文档区域的宽度
const width = window.innerWidth;
// 获取窗口文档区域的高度
const height = window.innerHeight;
// 创建透视相机
const camera = new THREE.PerspectiveCamera(45, window.innerWidth / window.innerHeight, 0.1, 10000);
// 相机位置
camera.position.set(500, 60, 0)
// 相机焦点方向
camera.lookAt(scene.position);
创建渲染器
// 创建WebGL渲染
const renderer = new THREE.WebGLRenderer();
// 设置canvas的大小
renderer.setSize(width, height);
//设置背景颜色
renderer.setClearColor(0xcce0ff, 1);
// 添加到body
document.body.appendChild(renderer.domElement);
渲染相机和场景
 renderer.render(scene, camera);
 requestAnimationFrame(render)
场景贴图
let urls = [
     './img/skyBox6/posx.jpg',
     './img/skyBox6/negx.jpg',
    './img/skyBox6/posy.jpg',
    './img/skyBox6/negy.jpg',
    './img/skyBox6/posz.jpg',
    './img/skyBox6/negz.jpg'
];
let cubeTexture = new THREE.CubeTextureLoader().load(urls);
scene.background = cubeTexture;
最终我们会看到上面的一个旋转的世界。
二、创建一个地面
上面的步骤只是创建了全景的世界,但是我们需要有个地面来放置我们之后要创建的房子,因此,这个地面要比较大。
创建
为了方便,我们新建一个方法来创建,后面只需要调用这个方法即可
function createGrass() {
  // 创建一个平面缓冲几何体
  const geometry = new THREE.PlaneGeometry(10000, 10000);
  // 加载草地图片
  const texture = new THREE.TextureLoader().load("img/grass.jpg");
  texture.wrapS = THREE.RepeatWrapping;
  texture.wrapT = THREE.RepeatWrapping;
  // 纹理对象阵列
  texture.repeat.set(100, 100);
  // 基础网格材质
  const grassMaterial = new THREE.MeshBasicMaterial({ map: texture });
  // 网格
  const grass = new THREE.Mesh(geometry, grassMaterial);
  // 旋转
  grass.rotation.x = -0.5 * Math.PI;
  // 添加到场景
  scene.add(grass);
}
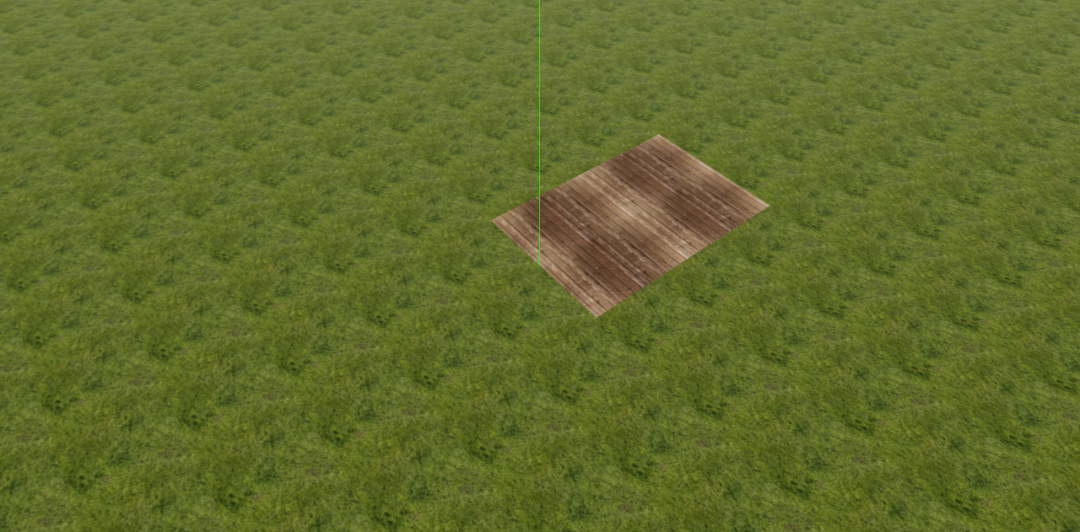
效果
三、建房子
我们先说说现实中如何新建房子
1 选一个地方当作地基
2 垒墙(墙面)
3 封顶(房顶)
其实用Threejs也是一样
创建地基(地板)
// 创建地板方法
function createFloor() {
    // 创建一个平面缓冲几何体
    const geometry = new THREE.PlaneGeometry(200, 300);
    // 加载地板图片
    const texture = new THREE.TextureLoader().load('img/wood.jpg');
    texture.wrapS = THREE.RepeatWrapping;
    texture.wrapT = THREE.RepeatWrapping;
    // 纹理对象阵列
    texture.repeat.set(2, 2);
    // 基础网格材质
    const material = new THREE.MeshBasicMaterial({ map: texture });
    // 网格
    const floor = new THREE.Mesh(geometry, material);

    floor.rotation.x = -0.5 * Math.PI;
    floor.position.y = 1;
    floor.position.z = 150;
    // 地板添加到房间
    house.add(floor);
}
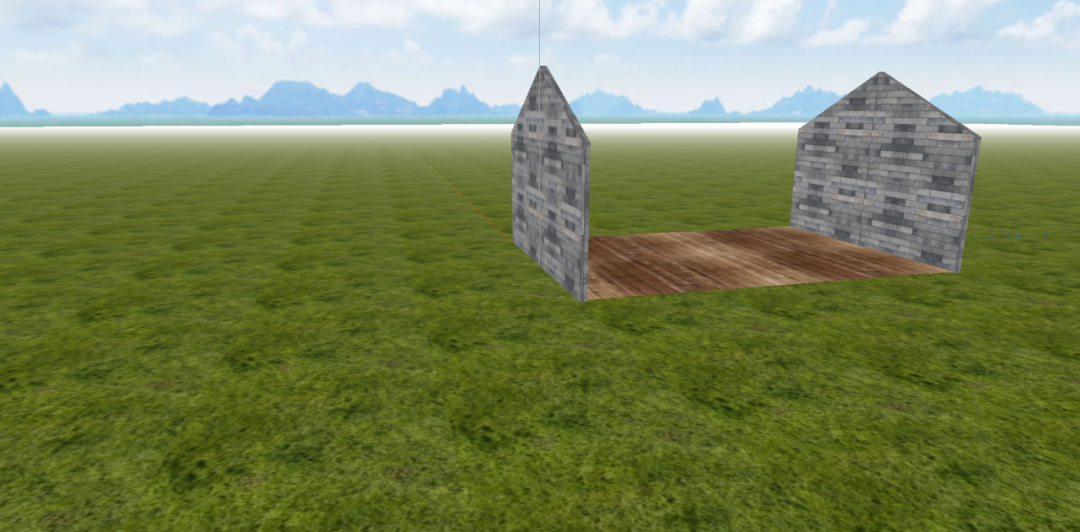
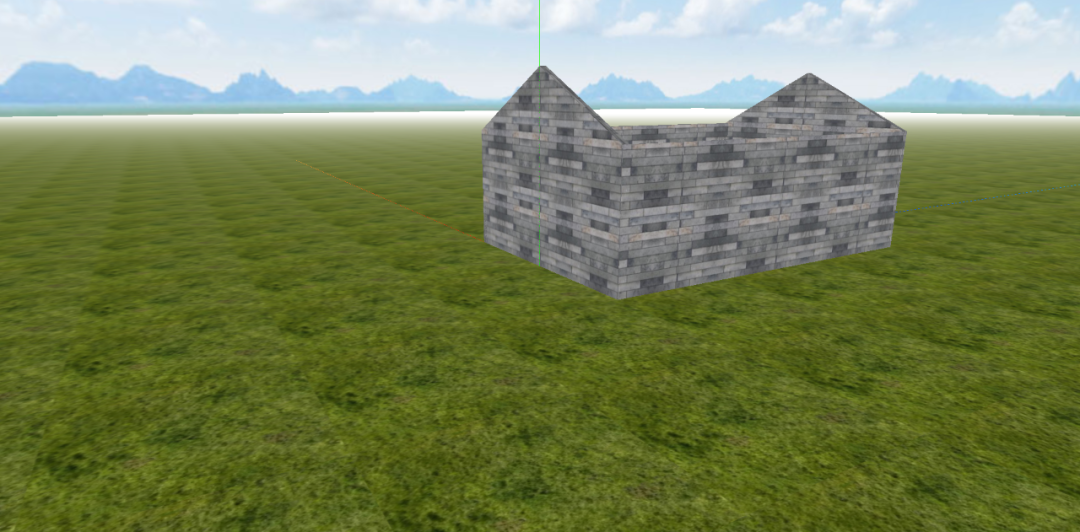
创建侧墙
// 创建测墙方法
function createSideWall() {
    // 创建形状
    const shape = new THREE.Shape();
    shape.moveTo(-100, 0);
    shape.lineTo(100, 0);
    shape.lineTo(100, 100);
    shape.lineTo(0, 150);
    shape.lineTo(-100, 100);
    shape.lineTo(-100, 0);
    // 挤压缓冲几何体
    const extrudeGeometry = new THREE.ExtrudeGeometry(shape, {
        depth: 5
    });
    // 加载墙面图片
    const texture = new THREE.TextureLoader().load('./img/wall.jpg');
    texture.wrapS = texture.wrapT = THREE.RepeatWrapping;
    texture.repeat.set(0.01, 0.005);
    // 基础网格材质
    var material = new THREE.MeshBasicMaterial({ map: texture });
    // 网格
    const sideWall = new THREE.Mesh(extrudeGeometry, material);
    // 增加墙面
    house.add(sideWall);

    return sideWall;
}
侧墙有两个是一样的,只不过是位置(坐标)不一样,我们只需要挪下位置即可。
// 创建侧墙
const sideWall2 = createSideWall();
// 侧墙向z轴移动
sideWall2.position.z = 295;
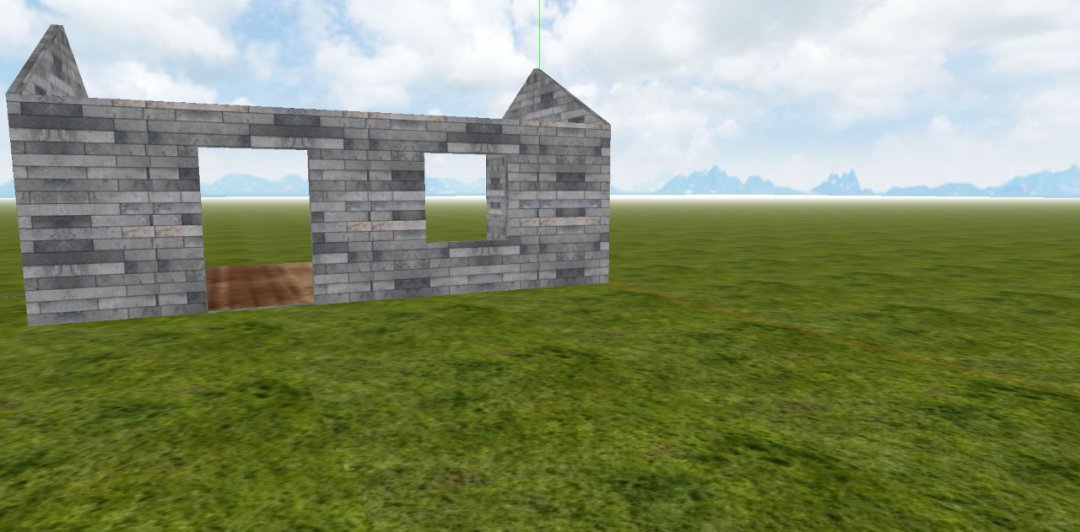
创建前面的墙
因为前面的墙上有门和窗户,因此我们单独创建
// 前面墙的方法
function createFrontWall() {
    // 创建形状
    const shape = new THREE.Shape();
    shape.moveTo(-150, 0);
    shape.lineTo(150, 0);
    shape.lineTo(150, 100);
    shape.lineTo(-150, 100);
    shape.lineTo(-150, 0);
    // 创建窗户
    const window = new THREE.Path();
    window.moveTo(30, 30)
    window.lineTo(80, 30)
    window.lineTo(80, 80)
    window.lineTo(30, 80);
    window.lineTo(30, 30);
    // 形状上的孔洞
    shape.holes.push(window);

    // 创建门
    const door = new THREE.Path();
    door.moveTo(-30, 0)
    door.lineTo(-30, 80)
    door.lineTo(-80, 80)
    door.lineTo(-80, 0);
    door.lineTo(-30, 0);
    // 形状上的孔洞
    shape.holes.push(door);
    // 挤压缓冲几何体
    const extrudeGeometry = new THREE.ExtrudeGeometry(shape, {
        depth: 5
    })
    // 贴图
    const texture = new THREE.TextureLoader().load('./img/wall.jpg');
    texture.wrapS = texture.wrapT = THREE.RepeatWrapping;
    texture.repeat.set(0.01, 0.005);
    // 基础网格材质
    const material = new THREE.MeshBasicMaterial({ map: texture });
    // 网格
    const frontWall = new THREE.Mesh(extrudeGeometry, material);

    frontWall.position.z = 150;
    frontWall.position.x = 95;
    frontWall.rotation.y = Math.PI * 0.5;
    // 前墙添加到房间
    house.add(frontWall);
}
这样门和窗户就有了,我们还需要加点装饰
// 窗户修饰
function createWindow() {
    const shape = new THREE.Shape();
    shape.moveTo(0, 0);
    shape.lineTo(0, 50)
    shape.lineTo(50, 50)
    shape.lineTo(50, 0);
    shape.lineTo(0, 0);

    const hole = new THREE.Path();
    hole.moveTo(5, 5)
    hole.lineTo(5, 45)
    hole.lineTo(45, 45)
    hole.lineTo(45, 5);
    hole.lineTo(5, 5);
    shape.holes.push(hole);
    // 挤压缓冲几何体
    const extrudeGeometry = new THREE.ExtrudeGeometry(shape, {
        depth: 5
    });
    // 基础网格材质
    var extrudeMaterial = new THREE.MeshBasicMaterial({ color: 'silver' });

    var window = new THREE.Mesh(extrudeGeometry, extrudeMaterial);
    window.rotation.y = Math.PI / 2;
    window.position.y = 30;
    window.position.x = 95;
    window.position.z = 120;

    house.add(window);

    return window;
}
// 门修饰
function createDoor() {
    const shape = new THREE.Shape();
    shape.moveTo(0, 0);
    shape.lineTo(0, 80);
    shape.lineTo(50, 80);
    shape.lineTo(50, 0);
    shape.lineTo(0, 0);

    const hole = new THREE.Path();
    hole.moveTo(5, 5);
    hole.lineTo(5, 75);
    hole.lineTo(45, 75);
    hole.lineTo(45, 5);
    hole.lineTo(5, 5);
    shape.holes.push(hole);
    // 挤压缓冲几何体
    const extrudeGeometry = new THREE.ExtrudeGeometry(shape, {
        depth: 5
    });
    // 基础网格材质
    const material = new THREE.MeshBasicMaterial({ color: 'silver' });

    const door = new THREE.Mesh(extrudeGeometry, material);

    door.rotation.y = Math.PI / 2;
    door.position.y = 0;
    door.position.x = 95;
    door.position.z = 230;

    house.add(door);
}

创建后墙
// 创建后墙方法
function createBackWall() {
    // 创建形状
    const shape = new THREE.Shape();
    shape.moveTo(-150, 0)
    shape.lineTo(150, 0)
    shape.lineTo(150, 100)
    shape.lineTo(-150, 100);
    // 挤压缓冲几何体
    const extrudeGeometry = new THREE.ExtrudeGeometry(shape)
    // 贴图
    const texture = new THREE.TextureLoader().load('./img/wall.jpg');
    texture.wrapS = texture.wrapT = THREE.RepeatWrapping;
    texture.repeat.set(0.01, 0.005);
    // 基础网格材质
    const material = new THREE.MeshBasicMaterial({ map: texture });
    // 网格
    const backWall = new THREE.Mesh(extrudeGeometry, material);

    backWall.position.z = 150;
    backWall.position.x = -100;
    backWall.rotation.y = Math.PI * 0.5;
    // 后墙添加到房间中
    house.add(backWall);
}
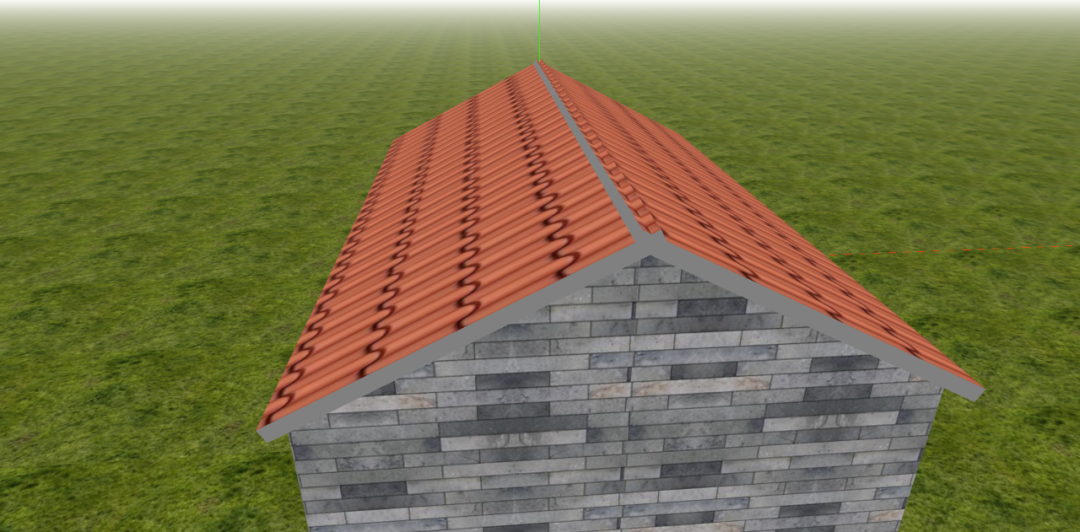
屋顶
// 创建屋顶方法
function createRoof() {
    // 立方缓冲几何体
    const geometry = new THREE.BoxGeometry(120, 320, 5);

    const texture = new THREE.TextureLoader().load('./img/tile.jpg');
    texture.wrapS = texture.wrapT = THREE.RepeatWrapping;
    texture.repeat.set(5, 1);
    texture.rotation = Math.PI / 2;
    // 基础网格材质 - 瓦片
    const textureMaterial = new THREE.MeshBasicMaterial({ map: texture });
    // 基础网格材质 - 其他
    const colorMaterial = new THREE.MeshBasicMaterial({ color: 'grey' });

    const materials = [
        colorMaterial,
        colorMaterial,
        colorMaterial,
        colorMaterial,
        colorMaterial,
        textureMaterial
    ];

    const roof = new THREE.Mesh(geometry, materials);

    house.add(roof);

    roof.rotation.x = Math.PI / 2;
    roof.rotation.y = - Math.PI / 4 * 0.6;
    roof.position.y = 125;
    roof.position.x = 50;
    roof.position.z = 150;

    return roof;
}
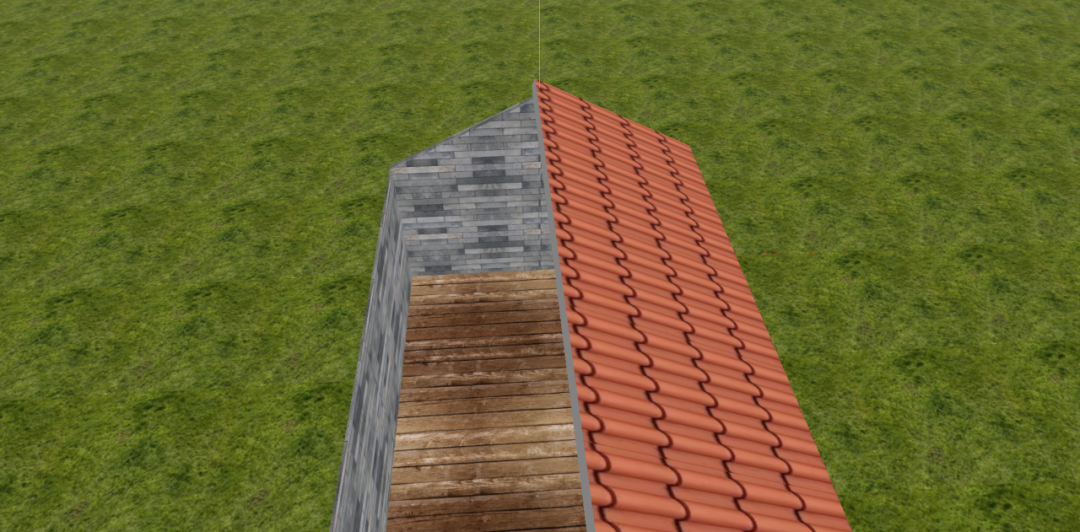
屋顶也是有两个,只不过是空间上不一样,我们稍微调整下位置
const roof2 = createRoof();
roof2.rotation.x = Math.PI / 2;
roof2.rotation.y = (Math.PI / 4) * 0.6;
roof2.position.y = 125;
roof2.position.x = -50;
roof2.position.z = 150;
克隆
一个房子太单调,我们克隆几个
// clone
const house1 = house.clone();
house1.position.set(300, 0, 0);
scene.add(house1);
// clone2
const house2 = house.clone();
house2.position.set(-300, 0, 0);
scene.add(house2);
// clone3
const house3 = house.clone();
house3.position.set(0, 0, -350);
scene.add(house3);

// clone4
const house4 = house.clone();
house4.position.set(300, 0, -350);
scene.add(house4);

// clone5
const house5 = house.clone();
house5.position.set(-300, 0, -350);
scene.add(house5);


 9519
9519

 被折叠的 条评论
为什么被折叠?
被折叠的 条评论
为什么被折叠?
 到【灌水乐园】发言


