简单的新闻发布网站设计模板


How to create simple and effective design template Today we are going to use jQuery mobile library again. Today I’m going to show you how to create simple, but very effective webdesign template for your website. Our template consists of header (with small logo), navigation menu, main content area (2-column grid layout with custom design boxes) and footer. More, we can say that this is a fluid layout, which means that it looks great with any resolution of your monitor. Welcome to try it.
如何创建简单有效的设计模板今天,我们将再次使用jQuery移动库。 今天,我将向您展示如何为您的网站创建简单但非常有效的网页设计模板。 我们的模板包括页眉(带有小徽标),导航菜单,主要内容区域(带有自定义设计框的2列网格布局)和页脚。 更进一步,我们可以说这是一个流畅的布局,这意味着它在任何显示器分辨率下都看起来不错。 欢迎尝试。
Now please download the source files and let’s start coding !
现在,请下载源文件,然后开始编码!
现场演示
[sociallocker]
[社交储物柜]
打包下载
[/sociallocker]
[/ sociallocker]
步骤1. HTML (Step 1. HTML)
For our demonstration I prepared 3-pages layout (multi-page), look at it’s anatomy:
在我们的演示中,我准备了3页布局(多页),看一下它的结构:
<!-- Define page 1 -->
<div data-role="page" id="page1" data-title="First page">
    <!-- Define header block (with logo) -->
    <div data-role="header">
        ..........
    </div>
    <!-- Define navigation menu -->
    <div data-role="navbar">
        ..........
    </div>
    <!-- Define main content block -->
    <div data-role="content">
        ..........
    </div><!-- /content -->
    <!-- Define footer block -->
    <div data-role="footer" class="ui-bar" data-position="fixed">
        ..........
    </div>
</div>
<!-- Define page 2 -->
<div data-role="page" id="page2"  data-title="Info page">
    ..........
</div>
<!-- Define page 3 -->
<div data-role="page" id="page3"  data-title="About page">
    ..........
</div>
I hope that everything is clean. Please pay attention, that on multi-page documents in order to define a title to each page, we can use ‘data-title’ attribute. Now, I put header and navigation menu (buttons) at each page:
我希望一切都干净。 请注意,在多页文档上,为了定义每个页面的标题,我们可以使用'data-title'属性。 现在,我在每个页面上放置标题和导航菜单(按钮):
<!-- Define header block (with logo) -->
<div data-role="header">
    <img border="0" src="logo.png" alt="logo" style="float:left;display:inline"/>
    <h1>My website</h1>
</div>
<!-- Define navigation menu -->
<div data-role="navbar">
    <ul>
        <li><a href="#page1" class="ui-btn-active ui-state-persist">Main</a></li>
        <li><a href="#page2" data-transition="fade">Info</a></li>
        <li><a href="#page3" data-transition="fade">About</a></li>
    </ul>
</div>
In order to make header element – I set data-role="header" for our header’s DIV element. Next is – navigation menu. If you need to set active status – you can apply custom class="ui-btn-active ui-state-persist". Now – is it a very interesting moment. As you can see – by default – all the pages except first one – invisible by default. jQuery mobile let us switch between pages very easy, we even can use different transition effects, this is very easy, look at <a href="#page2" data-transition="fade"> – this link switch to page2 using ‘fade’ CSS3 transition effect. But you always can use different effects: fade, pop, flip, turn, flow, slidefade, slide, slideup, slidedown and none.
为了制作标题元素–我为标题的DIV元素设置了data-role =“ header”。 接下来是–导航菜单。 如果需要设置活动状态,则可以应用自定义类=“ ui-btn-active ui-state-persist”。 现在-这是一个非常有趣的时刻。 如您所见-默认情况下-除第一个页面外的所有页面-默认情况下不可见。 jQuery mobile让我们在页面之间切换非常容易,我们甚至可以使用不同的过渡效果,这非常容易,请查看<a href="#page2" data-transition="fade"> –此链接使用'fade切换到page2 CSS3过渡效果。 但是,您始终可以使用不同的效果:淡入淡出,弹出,翻转,转向,流动,淡入淡出,滑动,向上滑动,向下滑动和无。
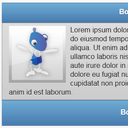
Finally – custom design boxes. I prepared an own custom design box layout:
最后–自定义设计框。 我准备了自己的自定义设计框布局:
<!-- Define Design box element with own header, content, footer -->
<div class="design_box">
    <div data-role="header" data-theme="b">
        <h1>Box header</h1>
        <a href="#" data-icon="gear" class="ui-btn-right">Options</a>
    </div>
    <div class="ui-body ui-body-b">
        <div><img src="article.png" style="float: left; margin: 0px 10px 10px 0px;">Lorem ipsum dolor sit amet, consectetur adipisicing elit, sed do eiusmod tempor incididunt ut labore et dolore magna aliqua. Ut enim ad minim veniam, quis nostrud exercitation ullamco laboris nisi ut aliquip ex ea commodo consequat. Duis aute irure dolor in reprehenderit in voluptate velit esse cillum dolore eu fugiat nulla pariatur. Excepteur sint occaecat cupidatat non proident, sunt in culpa qui officia deserunt mollit anim id est laborum.</div>
    </div>
    <div data-role="footer" class="ui-bar" data-theme="b">
        <h3>Box footer</h3>
    </div>
</div>
You can see here own header, body, and even footer.
您可以在此处看到自己的页眉,正文甚至页脚。
现场演示
结论 (Conclusion)
Today we have created really great and simple web page layout using jQuery mobile. I think that this is very interesting addition to usual jQuery, and, it seems that it is much more better than usual jQuery UI? :-) Anyway – good luck in your work!
今天,我们已经使用jQuery mobile创建了非常出色和简单的网页布局。 我认为这是对普通jQuery的非常有趣的补充,而且它似乎比普通jQuery UI好得多? :-)无论如何–祝您工作顺利!
翻译自: https://www.script-tutorials.com/how-to-create-simple-and-effective-design-template/
简单的新闻发布网站设计模板


 1126
1126

 被折叠的 条评论
为什么被折叠?


