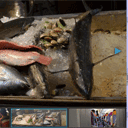
jquery 相册


Creating photo album with jQuery Fotorama Today I have prepared tutorial about using new impressive jQuery gallery – Fotorama. This is a nice looking javascript gallery with intuitive controls, and great browser compatibility. You can use this plugin at iPhones and any other mobile devices (you can slide photos with touch).
使用jQuery Fotorama创建相册今天,我已经准备了有关使用令人印象深刻的新jQuery画廊– Fotorama的教程。 这是一个外观漂亮的javascript画廊,具有直观的控件和出色的浏览器兼容性。 您可以在iPhone和其他任何移动设备上使用此插件(可以通过触摸滑动照片)。
Here are links to demo and downloadable package:
以下是演示和可下载软件包的链接:
现场演示
打包下载
Ok, lets download the example files and goto coding !
好,让我们下载示例文件并进行编码!
步骤1. HTML (Step 1. HTML)
index.html (index.html)
This is markup of our result page with Fotorama gallery. Here it is.
这是我们与Fotorama画廊的结果页的标记。 这里是。
<!DOCTYPE html>
<html lang="en" >
    <head>
        <meta charset="utf-8" />
        <title>Creating photo album with jQuery Fotorama | Script Tutorials</title>
        <link href="css/layout.css" rel="stylesheet" type="text/css" />
        <link href="css/fotorama.css" rel="stylesheet" type="text/css" />
        <script src="http://code.jquery.com/jquery-latest.min.js"></script>
        <script src="js/fotorama.js"></script>
        <script src="js/main.js"></script>
    </head>
    <body>
        <header>
            <h2>Creating photo album with jQuery Fotorama</h2>
            <a href="https://www.script-tutorials.com/photo-album-with-jquery-fotorama/" class="stuts">Back to original tutorial on <span>Script Tutorials</span></a>
        </header>
        <div class="container">
            <div id="fotorama">
                <img src="images/pic1.jpg" alt="photo #1" />
                <img src="images/pic2.jpg" alt="photo #2" />
                <img src="images/pic3.jpg" alt="photo #3" />
                <img src="images/pic4.jpg" alt="photo #4" />
                <img src="images/pic5.jpg" alt="photo #5" />
                <img src="images/pic6.jpg" alt="photo #6" />
                <img src="images/pic7.jpg" alt="photo #7" />
                <img src="images/pic8.jpg" alt="photo #8" />
                <img src="images/pic9.jpg" alt="photo #9" />
                <img src="images/pic10.jpg" alt="photo #10" />
                <img src="images/pic11.jpg" alt="photo #11" />
                <img src="images/pic12.jpg" alt="photo #12" />
            </div>
        </div>
    </body>
</html>
Very easy – right?
很容易–对吗?
步骤2. CSS (Step 2. CSS)
css / layout.css和css / fotorama.css (css/layout.css and css/fotorama.css)
First stylesheet is page layout of our page. Second one is default stylesheet file of fotorama gallery. You can customize it (if need). Both files available in our package.
第一个样式表是我们页面的页面布局。 第二个是fotorama画廊的默认样式表文件。 您可以自定义它(如果需要)。 这两个文件都在我们的软件包中。
步骤3. JS (Step 3. JS)
js / fotorama.js (js/fotorama.js)
This is main gallery javascript file. It uses jQuery, so we have to include both (fotorama.js and jquery) files. This file available in package.
这是主图库javascript文件。 它使用jQuery,因此我们必须同时包含(fotorama.js和jquery)文件。 该文件位于软件包中。
js / main.js (js/main.js)
jQuery(function(){
    $('#fotorama').fotorama({
        // width: 1000, // Width of container
        // height: 600, // Height of container
        startImg: 10, // Initial image
        transitionDuration: 400, // Duration of transition
        touchStyle: true, // Enable dragging
        // pseudoClick: true, // Slide between images by click (if touchStyle = true)
        // loop: false, // Loop for images (if touchStyle = false)
        // backgroundColor: null, // Custom background color
        margin: 10, // Margin between images
        // minPadding: 10, // Min padding
        // alwaysPadding: false, // Apply padding for images
        // preload: 3, // Amount of pre-loaded images from each end of the active image
        // resize: false, // Resize images
        // zoomToFit: true, // Zoom to fit
        // cropToFit: false, // Crop to fit
        // vertical: false, // Vertical thumbs
        // verticalThumbsRight: false, // Vertical thumbs at right
        // arrows: true, // Draw arrows
        arrowsColor: '#3399cc', // Arrows color
        // thumbs: true, // Draw thumbs
        // thumbsBackgroundColor: null, // Thumbs Background Color
        // thumbColor: null, // Thumb Color
        // thumbsPreview: true, // Thumb Preview
        thumbSize: 50, // Thumb size (height)
        // thumbMargin: 5, // Thumb margins
        thumbBorderWidth: 1, // Thumb border width
        // thumbBorderColor: null, // Thumb Border Color
        caption: true, // Display captions
        // html: null, // You can full html code of gallery here
        // onShowImg: null, // Custom function when we select image
        // shadows: true // Display shadows
    });
});
This is main initialization of fotorama gallery. Several styles was customized, another – no. I have added descriptions of all possible parameters of this gallery.
这是fotorama画廊的主要初始化。 定制了几种样式,另一种-不。 我已添加了此库的所有可能参数的描述。
Here you can find official documentation of this gallery.
在这里您可以找到该画廊的官方文档。
步骤4.图片 (Step 4. Images)
All gallery images is in ‘images’ folder.
所有图库图像都在“图像”文件夹中。
现场演示
打包下载
结论 (Conclusion)
I hope that today we made new nice photo gallery. Good luck in your projects!
我希望今天我们有了新的漂亮的照相馆。 在您的项目中祝您好运!
翻译自: https://www.script-tutorials.com/photo-album-with-jquery-fotorama/
jquery 相册


 5865
5865

 被折叠的 条评论
为什么被折叠?


