


 本文介绍了一种在Laravel应用中实现无密码登录的方法,通过发送包含登录链接的电子邮件,用户点击链接后直接登录,无需输入密码,为忘记密码的用户提供便利。
1到31的猜数字小魔术
This article was peer reviewed by Younes Rafie and Wern Ancheta. Thanks to all of SitePoint’s peer reviewers for making SitePoint content the best it can be!
这篇文章由Younes Rafie和Wern Ancheta进行了同行评审。 感谢所有SitePoint的同行评审人员使SitePoint内容达到最佳状态!
Authentication is something that has evolved over the years. We have seen it change from email – password combination to social authentication, and finally password-less authentication. Actually, more like an “email only” authentication. In the case of a password-less login, the app assumes that you will get the login link from your inbox if the email provided is indeed yours.
身份验证是多年来发展起来的事情。 我们已经看到它从电子邮件-密码组合更改为社交身份验证,最后是无密码身份验证。 实际上,更像是“仅电子邮件”身份验证。 对于无密码登录,如果提供的电子邮件确实是您的,则应用程序假定您将从收件箱中获取登录链接。
The general flow in a password-less login system is as follows:
无密码登录系统的一般流程如下:
- Users visit the login page 用户访问登录页面
- They type in their email address and confirm 他们输入电子邮件地址并确认
- A link is sent to their email 链接已发送至他们的电子邮件
- Upon clicking the link, they are redirected back to the app and logged in 单击链接后,它们将重定向回应用程序并登录
- The link is disabled 链接被禁用
This comes in handy when you can’t remember your password for an app, but you do remember the email you signed up with. Even Slack employs this technique.
当您不记得某个应用的密码,但是您确实记得注册时所使用的电子邮件时,这非常方便。 甚至Slack也采用这种技术。
In this tutorial, we are going to implement such a system in a Laravel app. The complete code can be found here.
在本教程中,我们将在Laravel应用中实现这样的系统。 完整的代码可以在这里找到。
创建应用 (Creating the App)
Let’s start by generating a new Laravel app. I am using Laravel 5.2 in this tutorial:
让我们从生成一个新的Laravel应用开始。 我在本教程中使用Laravel 5.2:
composer create-project laravel/laravel passwordless-laravel 5.2.*If you have an existing Laravel project with users and passwords, worry not – we won’t be interfering with the normal auth flow, just creating a layer on top of what is already there. Users will still have the option of logging in with passwords.
如果您已有一个带有用户名和密码的Laravel项目,请不必担心–我们将不会干扰正常的身份验证流程,只需在已存在的内容之上创建一个层即可。 用户仍然可以选择使用密码登录。
数据库设置 (Database Setup)
Next, we have to set up our MySQL database before running any migrations.
接下来,我们必须在运行任何迁移之前设置MySQL数据库。
Open your .env file in the root directory and pass in the hostname, username, and database name:
在根目录中打开.env文件,并输入主机名,用户名和数据库名:
[...]
DB_CONNECTION=mysql
DB_HOST=localhost
DB_DATABASE=passwordless-app
DB_USERNAME=username
DB_PASSWORD=
[...]
If you’re using our Homestead Improved box, the database / username / password combination is homestead, homestead, secret.
如果您使用的是Homestead Improvement框,则数据库/用户名/密码组合为homestead , homestead , secret 。
脚手架认证 (Scaffolding Auth)
One great thing that Laravel introduced in version 5.2 is the ability to add a pre-made authentication layer with just a single command. Let’s do that:
Laravel在5.2版中引入的一项很棒的功能是仅需一个命令即可添加预制身份验证层的功能。 让我们这样做:
php artisan make:authThis command scaffolds everything we need for authentication i.e the Views, Controllers, and Routes.
该命令支持我们进行身份验证所需的所有内容,即视图,控制器和路由。
移居 (Migrations)
If we look inside database/migrations, we notice that the generated Laravel app came with migrations for creating the users table and password_resets table.
如果查看database/migrations内部,我们会注意到生成的Laravel应用附带了用于创建users表和password_resets表的迁移。
We won’t alter anything since we still want our app to have the normal auth flow.
我们不会更改任何内容,因为我们仍然希望我们的应用具有正常的身份验证流程。
To create the tables, run:
要创建表,请运行:
php artisan migrateWe can now serve the app and users should be able to sign up and log in using the links in the nav.
我们现在可以为该应用提供服务,用户应该可以使用导航中的链接进行注册和登录。
更改登录链接 (Changing the Login Link)
Next, we want to change the login link to redirect users to a custom login view where users will be submitting their email addresses without a password.
接下来,我们要更改登录链接以将用户重定向到自定义登录视图,在该视图中,用户无需密码即可提交其电子邮件地址。
Navigate to resources/views/layouts/app.blade.php. That’s where we find the nav partial. Change the line with the login link (right below the conditional to check if the user is logged out) to this:
导航到resources/views/layouts/app.blade.php 。 那就是我们找到导航部分的地方。 将带有登录链接的行(在条件检查的右下方,以检查用户是否注销)更改为此:
resources/views/layouts/app.blade.php
资源/视图/布局/app.blade.php
[...]
@if (Auth::guest())
<li><a href="{{ url('/login/magiclink') }}">Login</a></li>
<li><a href="{{ url('/register') }}">Register</a></li>
[...]
When a user tries to access a protected route when not logged in, they should be taken to our new custom login view instead of the normal one. This behavior is specified in the authenticate middleware. We’ll have to tweak that:
当用户未登录时尝试访问受保护的路由时,应将其带到我们的新自定义登录视图,而不是常规视图。 此行为在身份验证中间件中指定。 我们必须调整一下:
app/Http/Middleware/Authenticate.php
app / Http /中间件/Authenticate.php
class Authenticate
{
[...]
public function handle($request, Closure $next, $guard = null)
{
    if (Auth::guard($guard)->guest()) {
        if ($request->ajax() || $request->wantsJson()) {
            return response('Unauthorized.', 401);
        } else {
            return redirect()->guest('login/magiclink');
        }
    }

    return $next($request);
}
[...]
Notice inside the else block we’ve changed the redirect to point to login/magiclink instead of the normal login.
请注意,在else block我们已将重定向更改为指向login/magiclink而不是普通的login 。
创建魔术登录控制器,视图和路由 (Creating the Magic Login Controller, View, and Routes)
Our next step is to create the MagicLoginController inside our Auth folder:
下一步是在Auth文件夹中创建MagicLoginController :
php artisan make:controller Auth\\MagicLoginControllerThen the route to display our custom login page:
然后显示我们的自定义登录页面的路线:
app/Http/routes.php
app / Http / routes.php
[...]
Route::get('/login/magiclink', 'Auth\MagicLoginController@show');
Let’s update our MagicLoginController to include a show action:
让我们更新MagicLoginController使其包含show动作:
app/Http/Controllers/Auth/MagicLoginController.php
app / Http / Controllers / Auth / MagicLoginController.php
class MagicLoginController extends Controller
{
    [...]
    public function show()
    {
        return view('auth.magic.login');
    }
    [...]
}
For the new login view, we are going to borrow the normal login view but remove the password field. We’ll also change the form’s post URL to point to \login\magiclink.
对于新的登录视图,我们将借用正常的登录视图,但删除密码字段。 我们还将更改表单的发布URL指向\login\magiclink 。
Let’s create a magic folder inside the views/auth folder to hold this new view:
让我们在views/auth文件夹中创建一个magic文件夹来保存这个新视图:
mkdir resources/views/auth/magic
touch resources/views/auth/magic/login.blade.php
Let’s update our newly created view to this:
让我们将新创建的视图更新为:
resources/views/auth/magic/login.blade.php
资源/视图/auth/magic/login.blade.php
@extends('layouts.app')
@section('content')
<div class="container">
<div class="row">
<div class="col-md-8 col-md-offset-2">
<div class="panel panel-default">
<div class="panel-heading">Login</div>
<div class="panel-body">
<form class="form-horizontal" role="form" method="POST" action="{{ url('/login/magiclink') }}">
{{ csrf_field() }}
<div class="form-group{{ $errors->has('email') ? ' has-error' : '' }}">
<label for="email" class="col-md-4 control-label">E-Mail Address</label>
<div class="col-md-6">
<input id="email" type="email" class="form-control" name="email" value="{{ old('email') }}" required autofocus>
@if ($errors->has('email'))
<span class="help-block">
<strong>{{ $errors->first('email') }}</strong>
</span>
@endif
</div>
</div>
<div class="form-group">
<div class="col-md-6 col-md-offset-4">
<div class="checkbox">
<label>
<input type="checkbox" name="remember"> Remember Me
</label>
</div>
</div>
</div>
<div class="form-group">
<div class="col-md-8 col-md-offset-4">
<button type="submit" class="btn btn-primary">
Send magic link
</button>
<a href="{{ url('/login') }}" class="btn btn-link">Login with password instead</a>
</div>
</div>
</form>
</div>
</div>
</div>
</div>
</div>
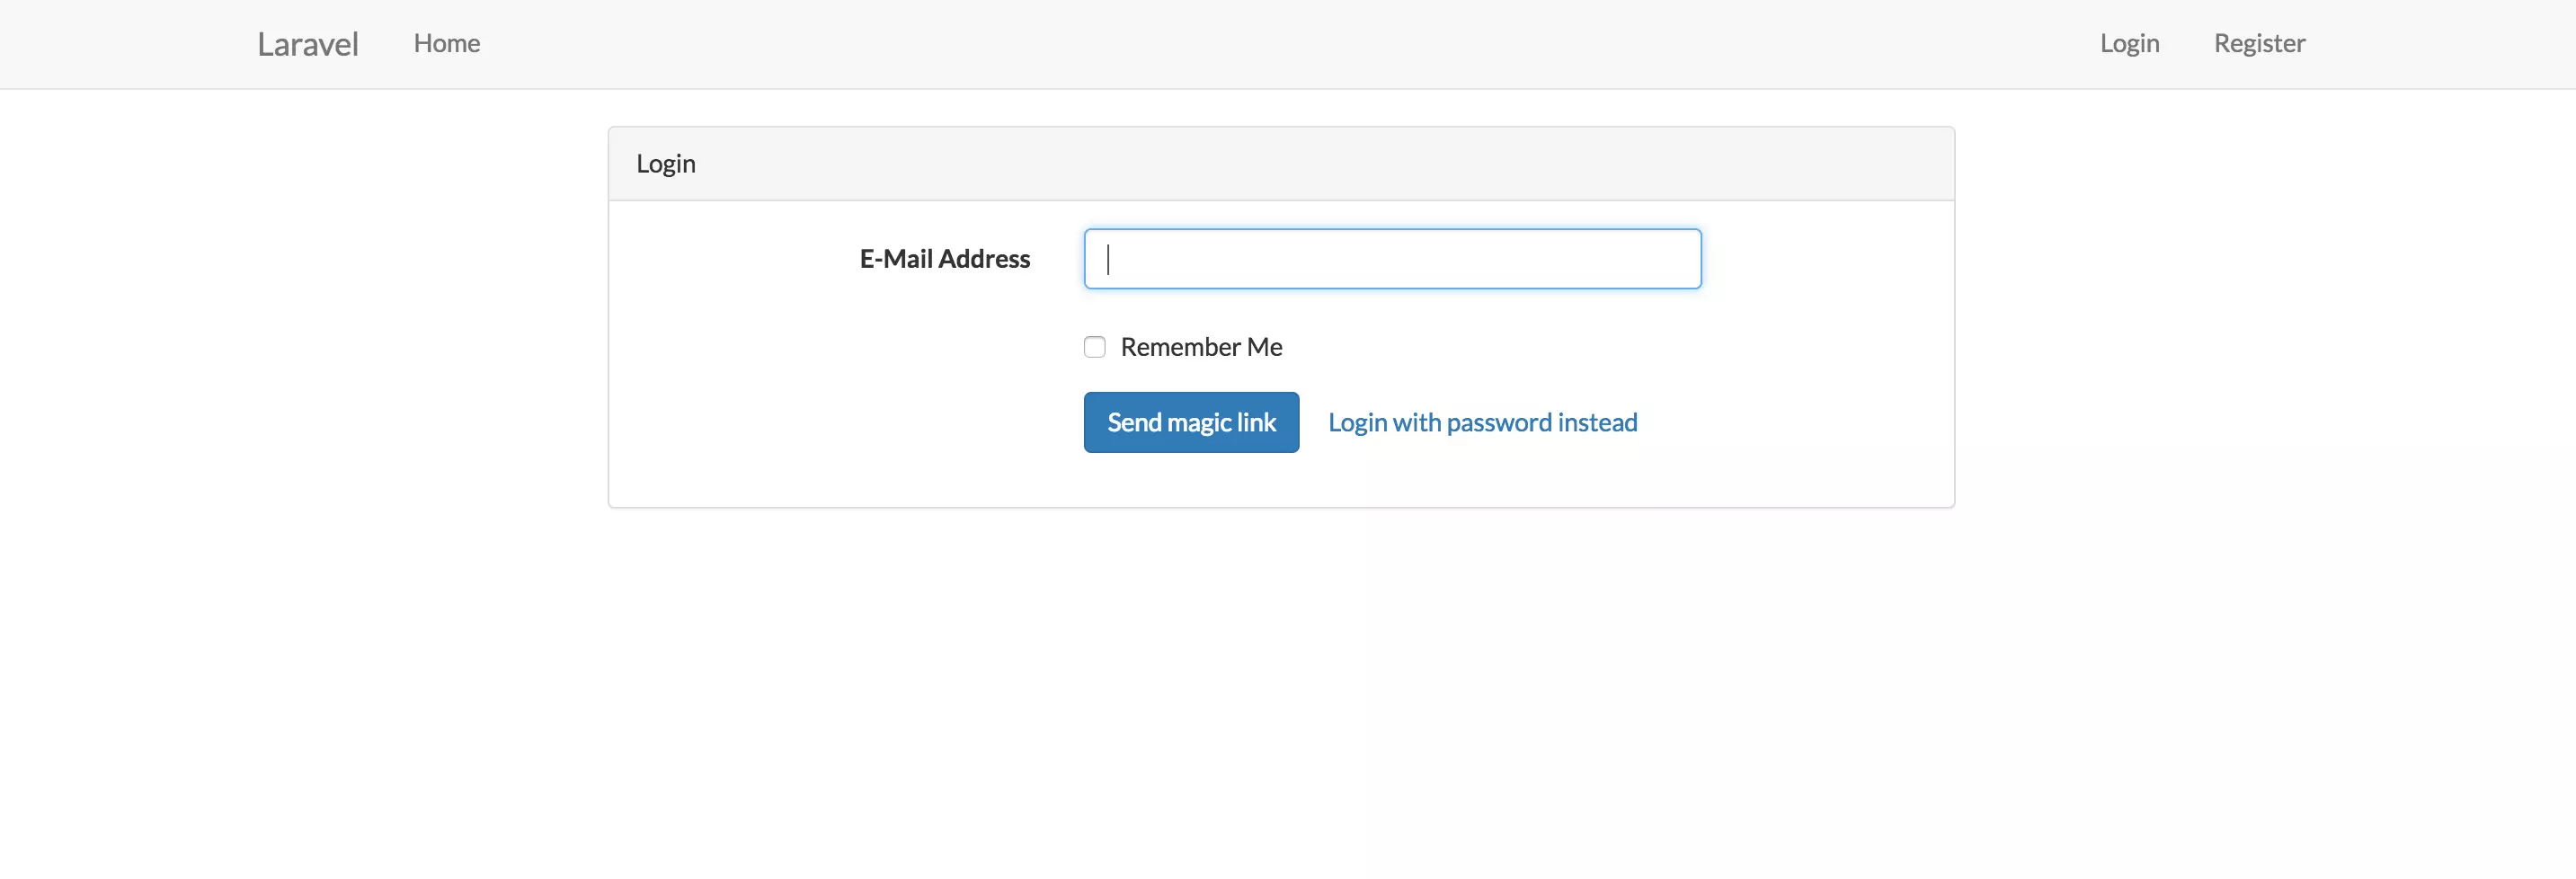
@endsectionWe will leave an option to log in with a password since users may still opt for the password login. So if users click on login from the nav, they’ll be taken to a login view that looks like this:
由于用户仍然可以选择密码登录,因此我们将保留使用密码登录的选项。 因此,如果用户从导航中单击登录名,那么他们将被带到如下所示的登录视图:
生成令牌并将其与用户关联 (Generating Tokens and Associating Them with Users)
Our next step is to generate tokens and associate them with users. This happens when one submits their email in order to log in.
我们的下一步是生成令牌并将其与用户关联。 当有人提交电子邮件以登录时,就会发生这种情况。
Let’s start by creating a route to handle the posting action of the login form:
让我们从创建一条路径来处理登录表单的发布动作开始:
app/Http/routes.php
app / Http / routes.php
[...]
Route::post('/login/magiclink', 'Auth\MagicLoginController@sendToken');
Then, we add a controller method called sendToken inside the MagicLoginController. This method will validate the email address, associate a token with a user, send off a login email and flash a message notifying the user to check their email:
然后,我们添加一个名为控制器的方法sendToken里面MagicLoginController 。 此方法将验证电子邮件地址,将令牌与用户相关联,发送登录电子邮件并闪显一条消息,通知用户检查其电子邮件:
app/Http/Controllers/Auth/MagicLoginController.php
app / Http / Controllers / Auth / MagicLoginController.php
class MagicLoginController extends Controller
{
    [...]
    /**
     * Validate that the email has a valid format and exists in the users table
     * in the email column
     */
    public function sendToken(Request $request)
    {
        $this->validate($request, [
            'email' => 'required|email|max:255|exists:users,email'
        ]);
    //will add methods to send off a login email and a flash message later
    }
    [...]
}
Now that we have a valid email address, we can send off a login email to the user. But before the email is sent, we have to generate a token for the user trying to log in. I don’t want to have all my method’s in the MagicLoginController and thus we’ll create a users-token model to handle some of these methods.
现在我们有了一个有效的电子邮件地址,我们可以向用户发送登录电子邮件了。 但是在发送电子邮件之前,我们必须为尝试登录的用户生成一个令牌。我不想将所有方法都放在MagicLoginController ,因此我们将创建一个users-token模型来处理其中一些问题方法。
php artisan make:model UserToken -mThis command will make us both the model and the migration. We need to tweak the migration a bit and add user_id and token columns. Open the newly generated migration file and change the up method to this:
此命令将使我们既成为模型又是迁移。 我们需要对迁移进行一些调整,并添加user_id和token列。 打开新生成的迁移文件,并将up方法更改为此:
database/migrations/{timestamp}_create_user_tokens_table.php
数据库/迁移/{timestamp}_create_user_tokens_table.php
[...]
public function up()
    {
        Schema::create('user_tokens', function (Blueprint $table) {
            $table->increments('id');
            $table->integer('user_id');
            $table->string('token');
            $table->timestamps();
        });
    }
[...]
Then run the migrate Artisan command:
然后运行migrate Artisan命令:
php artisan migrateIn the UserToken model, we need to add the user_id and token as part of the mass assignable attributes. We should also define the relationship this model has with the User model and vice-versa:
在UserToken模型中,我们需要添加user_id和token作为大量可分配属性的一部分。 我们还应该定义该模型与User模型之间的关系,反之亦然:
App/UserToken.php
App / UserToken.php
[...]
class UserToken extends Model
{
    protected $fillable = ['user_id', 'token'];

    /**
     * A token belongs to a registered user.
     *
     * @return \Illuminate\Database\Eloquent\Relations\BelongsTo
     */
    public function user()
    {
        return $this->belongsTo(User::class);
    }
}
Then inside App/User.php specify that a User can only have one token associated with them:
然后在App/User.php指定一个User只能拥有一个与之关联的令牌:
App/User.php
App / User.php
class User extends Model
{
    [...]
    /**
     * A user has only one token.
     *
     * @return \Illuminate\Database\Eloquent\Relations\BelongsTo
     */
    public function token()
    {
        return $this->hasOne(UserToken::class);
    }
}
Let’s now generate the token. First, we need to retrieve a user object by their email before creating the token. Create a method in the User model called getUserByEmail to handle this functionality:
现在让我们生成令牌。 首先,我们需要在创建令牌之前通过其电子邮件检索用户对象。 在User模型中创建一个名为getUserByEmail来处理此功能:
App/User.php
App / User.php
class User extends Model
{
    [...]
    protected static function getUserByEmail($value)
    {
        $user = self::where('email', $value)->first();
        return $user;
    }
    [...]
}
We have to pull in the namespaces forUser and UserToken classes into our MagicLoginController in order to be able to call the methods in these classes from our controller:
我们必须将User和UserToken类的名称空间放入我们的MagicLoginController中,以便能够从控制器中调用这些类中的方法:
app/Http/Controllers/Auth/MagicLoginController.php
app / Http / Controllers / Auth / MagicLoginController.php
[...]
use App\User;
use App\UserToken;
[...]
class MagicLoginController extends Controller
{
    [...]
    public function sendToken(Request $request)
    {
        //after validation
        [...]
        $user = User::getUserByEmail($request->get('email'));

        if (!user) {
            return redirect('/login/magiclink')->with('error', 'User not foud. PLease sign up');
        }

        UserToken::create([
            'user_id' => $user->id,
            'token'   => str_random(50)
        ]);
    }
    [...]
}
In the code block above, we are retrieving a user object based on the submitted email. Before getting to this point note we had to validate the presence of the submitted email address in the users table. But in the case where someone bypassed the validation and submitted an email that didn’t exist within our records, we will flash a message asking them to sign up.
在上面的代码块中,我们基于提交的电子邮件检索用户对象。 在注意这一点之前,我们必须验证users表中是否存在已提交的电子邮件地址。 但是,如果有人绕过验证并提交了我们记录中不存在的电子邮件,我们将闪现一条消息,要求他们进行注册。
Once we have the user object, we generate a token for them.
一旦有了用户对象,便会为它们生成一个令牌。
通过电子邮件发送令牌 (Emailing the Token)
We can now email the generated token to the user in the form of a URL. First, we’ll have to require the Mail Facade in our model to help us with the email sending functionality.
现在,我们可以将生成的令牌以URL的形式通过电子邮件发送给用户。 首先,我们必须在模型中需要Mail Facade来帮助我们进行电子邮件发送功能。
In this tutorial, however, we won’t be sending any real emails. Just confirming that the app can send an email in the logs. To do this, navigate to your .env file and under the mail section set MAIL_DRIVER=log. Also, we won’t be creating email views; just sending a raw email from our UserToken class.
但是,在本教程中,我们将不会发送任何真实的电子邮件。 只需确认该应用程序可以在日志中发送电子邮件即可。 为此,请导航到您的.env文件,并在邮件部分下设置MAIL_DRIVER=log 。 另外,我们将不会创建电子邮件视图。 只是从我们的UserToken类发送原始电子邮件。
Let’s create a method in our UserToken model called sendEmail to handle this functionality. The URL which is a combination of the token, email address and remember me value will be generated inside this method:
让我们在UserToken模型中创建一个名为sendEmail来处理此功能。 URL是token , email address和“ remember me值的组合,它将在此方法内部生成:
app/UserToken.php
app / UserToken.php
[...]
use Illuminate\Support\Facades\Mail;
[...]
class UserToken extends Model
{
[...]
    public static function sendMail($request)
    {
        //grab user by the submitted email
        $user = User::getUserByEmail($request->get('email'));

        if(!$user) {
            return redirect('/login/magiclink')->with('error', 'User not foud. PLease sign up');
        }

        $url = url('/login/magiclink/' . $user->token->token . '?' . http_build_query([
            'remember' => $request->get('remember'),
            'email' => $request->get('email'),
        ]));

        Mail::raw(
            "<a href='{$url}'>{$url}</a>",
            function ($message) use ($user) {
                $message->to($user->email)
                        ->subject('Click the magic link to login');
            }
        );
    }
[...]
}
While generating the URL, we’ll use PHP’s http_build_query function to help us make a query from the array of options passed. In our case it’s email and remember me value. After generating URL, we then mail it to the user.
在生成URL时,我们将使用PHP的http_build_query函数来帮助我们从传递的选项数组中进行查询。 就我们而言,这是电子邮件,请记住我的价值。 生成URL后,我们将其邮寄给用户。
Time to update our MagicLoginController and call the sendEmail method:
是时候更新我们的MagicLoginController并调用sendEmail方法:
app/Http/Controllers/Auth/MagicLoginController.php
app / Http / Controllers / Auth / MagicLoginController.php
class MagicLoginController extends Controller
{
    [...]
    public function sendToken(Request $request)
    {
        $this->validate($request, [
            'email' => 'required|email|max:255|exists:users,email'
        ]);
        UserToken::storeToken($request);

        UserToken::sendMail($request);

        return back()->with('success', 'We\'ve sent you a magic link! The link expires in 5 minutes');
    }
    [...]
}
We are also going to implement some basic flash messaging for notifications. In your resources/views/layouts/app.blade.php insert this block right above your content since flash messages show up at the top before any other content:
我们还将为通知实现一些基本的Flash消息传递。 在您的resources/views/layouts/app.blade.php在您的content上方插入此块,因为Flash消息在任何其他内容之前都显示在顶部:
resources/views/layouts/app.blade.php
资源/视图/布局/app.blade.php
[...]
<div class="container">
    <div class="row">
        <div class="col-md-8 col-md-offset-2">
            @include ('layouts.partials._notifications')
        </div>
    </div>
</div>
@yield('content')
[...]
Then create the notifications partial:
然后创建部分通知:
resources/views/layouts/partials/_notifications.blade.php
资源/视图/布局/部分/_notifications.blade.php
@if (session('success'))
    <div class="alert alert-success">
        {{ session('success') }}
    </div>
@endif

@if (session('error'))
    <div class="alert alert-danger">
        {{ session('error') }}
    </div>
@endif
In the partial, we have used the session helper to help us with different notification colors based on the session status i.e. success or error.
在部分内容中,我们已使用session帮助器根据会话状态(即success或error为我们提供不同的通知颜色。
At this point, we are able to send emails. We can try it out by logging in with a valid email address, then navigating to the laravel.log file. We should be able to see the email containing the URL at the bottom of the logs.
至此,我们可以发送电子邮件了。 我们可以通过使用有效的电子邮件地址登录来尝试,然后导航至laravel.log文件。 我们应该能够在日志底部看到包含URL的电子邮件。
Next, we want to validate the token and log the user in. We don’t want cases where a token that was sent out 3 days ago can still be used to log in.
接下来,我们要验证令牌并登录用户。我们不希望将三天前发出的令牌仍可用于登录的情况。
令牌验证和认证 (Token Validation and Authentication)
Now that we have the URL, let’s create a route and controller action to handle what happens when one clicks on the URL from their email:
现在有了URL,让我们创建一个路由和控制器操作来处理当人们单击其电子邮件中的URL时发生的情况:
app/Http/routes.php
app / Http / routes.php
[...]
Route::get('/login/magiclink/{token}', 'Auth\MagicLoginController@authenticate');
Let’s create the authenticate action in the MagicLoginController. It’s inside this method that we will authenticate the user. We are going to pull in the token into the authenticate method through Route Model Binding. We will then grab the user from the token. Note that we have to pull in the Auth facade in the controller to make it possible to use Auth methods:
让我们在MagicLoginController创建authenticate操作。 我们将在此方法内对用户进行身份验证。 我们将通过Route Model Binding将令牌引入authenticate方法中。 然后,我们将从令牌中获取用户。 请注意,我们必须在控制器中加入Auth facade ,才能使用Auth方法:
app/Http/Controllers/Auth/MagicLoginController.php
app / Http / Controllers / Auth / MagicLoginController.php
[...]
use Auth;
[...]
class MagicLoginController extends Controller
{
    [...]
    public function authenticate(Request $request, UserToken $token)
        {
            Auth::login($token->user, $request->remember);
            $token->delete();
            return redirect('home');
        }
    [...]
}
Then in the UserToken class set the route key name that we expect. In our case, it’s the token:
然后在UserToken class设置我们期望的路由密钥名称。 在我们的例子中,这是令牌:
App/UserToken.php
App / UserToken.php
[...]
public function getRouteKeyName()
{
    return 'token';
}
[...]
And there we have it. Users can now log in. Note that after logging the user in, we delete the token since we don’t want to fill the user_tokens table with used tokens.
我们终于得到它了。 用户现在可以登录。请注意,在用户登录后,我们将删除令牌,因为我们不想用已使用的令牌填充user_tokens表。
Our next step is checking if the token is still valid. For this app, we are going to make the magic link expire after 5 minutes. We will require the Carbon library to help us check the time difference between the token creation time and the current time.
我们的下一步是检查令牌是否仍然有效。 对于此应用,我们将使魔术链接在5分钟后失效。 我们将需要Carbon库来帮助我们检查令牌创建时间和当前时间之间的时间差。
In ourUserToken model, we are going to create two methods: isExpired and belongsToEmail to check the validity of the token. Note, the belongsToEmail validation is just an extra precaution making sure the token indeed belongs to that email address:
在我们的UserToken模型中,我们将创建两个方法: isExpired和belongsToEmail以检查令牌的有效性。 请注意, belongsToEmail验证只是一种额外的预防措施,可确保令牌确实属于该电子邮件地址:
App/UserToken.php
App / UserToken.php
[...]
use Carbon\Carbon;
[...]
class UserToken extends Model
{
    [...]
    //Make sure that 5 minutes have not elapsed since the token was created
    public function isExpired()
    {
        return $this->created_at->diffInMinutes(Carbon::now()) > 5;
    }

    //Make sure the token indeed belongs to the user with that email address
    public function belongsToUser($email)
    {
        $user = User::getUserByEmail($email);

        if(!$user || $user->token == null) {
            //if no record was found or record found does not have a token
            return false;
        }

        //if record found has a token that matches what was sent in the email
        return ($this->token === $user->token->token);
    }
    [...]
}
Let’s call the methods on the token instance in the authenticate method in the MagicLoginController:
让我们在MagicLoginController的authenticate方法中调用令牌实例上的方法:
app/Http/Controllers/Auth/MagicLoginController.php
app / Http / Controllers / Auth / MagicLoginController.php
class MagicLoginController extends Controller
{
    [...]
    public function authenticate(Request $request, UserToken $token)
        {
            if ($token->isExpired()) {
                $token->delete();
                return redirect('/login/magiclink')->with('error', 'That magic link has expired.');
            }

            if (!$token->belongsToUser($request->email)) {
                $token->delete();
                return redirect('/login/magiclink')->with('error', 'Invalid magic link.');
            }

            Auth::login($token->user, $request->get('remember'));
            $token->delete();
            return redirect('home');

        }
    [...]
}
结论 (Conclusion)
We have successfully added password-less login on top of the normal auth flow. Some may argue this takes longer than the normal password login, but so does using a password manager.
我们已在常规身份验证流程之上成功添加了无密码登录。 有人可能会说这比正常的密码登录需要更长的时间,但是使用密码管理器也是如此。
Passwordless systems wouldn’t work everywhere though, if you have short session timeout periods or expect users to log in frequently it could become frustrating. Fortunately, that affects very few sites.
但是,如果您的会话超时时间很短或希望用户频繁登录,那么无密码系统将无法在任何地方工作,这可能会令人沮丧。 幸运的是,这影响很少的站点。
Don’t you think it’s time you gave users an alternative way to log in your next project?
您是否不该考虑给用户提供另一种登录下一个项目的方式?
Please leave your comments and questions below, and remember to share this post with your friends and colleagues if you liked it!
请在下面留下您的评论和问题,如果喜欢,请记住与您的朋友和同事分享!
翻译自: https://www.sitepoint.com/lets-kill-the-password-magic-login-links-to-the-rescue/
1到31的猜数字小魔术


 被折叠的 条评论
为什么被折叠?
被折叠的 条评论
为什么被折叠?
 到【灌水乐园】发言


