fuel
When you hear the abbreviation CMS, you probably think about Drupal, Joomla, and even WordPress. However, there are alternatives to those heavy hitters if you want something more lightweight or flexible. If you’re look a simple administration interface, or integrate custom application code into the site, then I suggest exploring Fuel CMS. In this two-part series I’ll discuss some concepts of Fuel CMS. In this part I’ll talk about its installation and how to set up views. In the second part I’ll talk about writing a Fuel CMS module.
当您听到CMS的缩写时,您可能会想到Drupal,Joomla甚至WordPress。 但是,如果您想要更轻便或更灵活的东西,则可以使用其他方法来代替那些沉重的击球手。 如果您是一个简单的管理界面,或者将自定义应用程序代码集成到站点中,那么我建议您探索Fuel CMS。 在这个由两部分组成的系列文章中,我将讨论Fuel CMS的一些概念。 在这一部分中,我将讨论其安装以及如何设置视图。 在第二部分中,我将讨论编写Fuel CMS模块。
Fuel CMS快速概述 (A Quick Overview of Fuel CMS)
Fuel CMS is a content management system (obviously) built upon the CodeIgniter Framework. A good description of the project can be found on its website:
Fuel CMS是(显然)基于CodeIgniter框架构建的内容管理系统。 您可以在其网站上找到该项目的详细说明:
FUEL CMS is a modular-based hybrid of a framework and a content management system. It’s developed on the popular CodeIgniter PHP web framework and allows you to create your models, views and controllers like normal and only use the CMS part when and if you need it.
FUEL CMS是框架和内容管理系统的基于模块的混合体。 它是在流行的CodeIgniter PHP Web框架上开发的,可让您像平常一样创建模型,视图和控制器,并且仅在需要时使用CMS部件。
The administration dashboard is indeed simple and easy to understand, which is good if you’re handing the project off to a less tech-saavy customer after development. However, where in other CMS you can build a complete website without writing any code, with Fuel CMS this is not the case. You’ll have to do things yourself following the way of CodeIgniter. If you don’t like writing code, then this may not be the right CMS for you.
管理仪表盘确实非常简单易懂,如果您在开发后将项目移交给技术欠佳的客户,则非常有用。 但是,在其他CMS中您可以构建完整的网站而无需编写任何代码的情况下,使用Fuel CMS并非如此。 您必须按照CodeIgniter的方式自己做事。 如果您不喜欢编写代码,那么这可能不是适合您的CMS。
The documentation suggests that you should have some basic knowledge of CodeIgniter before starting, but this was my first experience with CodeIgnither and I was able to build a working site with relative ease, so experience with any MVC framework may be sufficient depending on your goals.
该文档建议您在开始之前应该具有CodeIgniter的一些基础知识,但这是我第一次使用CodeIgnither,并且我能够相对轻松地构建工作站点,因此根据您的目标,使用任何MVC框架可能就足够了。
Development of Fuel CMS started around November 2010 and the current stable version is 0.92. Version 1.0 is currently beta.
Fuel CMS的开发工作于2010年11月前后开始,当前的稳定版本为0.92。 1.0版目前是beta。
安装和配置Fuel CMS (Installing and Configuring Fuel CMS)
The installation process for Fuel CMS isn’t like the other content management systems; there’s no fancy installer, only an introduction page with an explanation of various settings you need to specify in your configuration. You have to execute the database installation scripts yourself. But we are developers after all, so this isn’t something that’s insurmountable.
Fuel CMS的安装过程与其他内容管理系统不同。 没有精美的安装程序,只有介绍页面,其中包含您需要在配置中指定的各种设置的说明。 您必须自己执行数据库安装脚本。 但是我们毕竟是开发人员,所以这不是无法克服的。
You can either use Git to clone the latest version of the code or you can download a copy as a ZIP archive. Regardless, place the code in the root of your htdocs directory. When you visit http://localhost (or whatever your development address may be) you should see a page listing the steps you need to perform before you can start developing your site.
您可以使用Git克隆最新版本的代码 ,也可以将副本下载为ZIP存档。 无论如何,将代码放在htdocs目录的根目录中。 当您访问http:// localhost (或任何开发地址)时,您应该会看到一个页面,列出了开始开发站点之前需要执行的步骤。
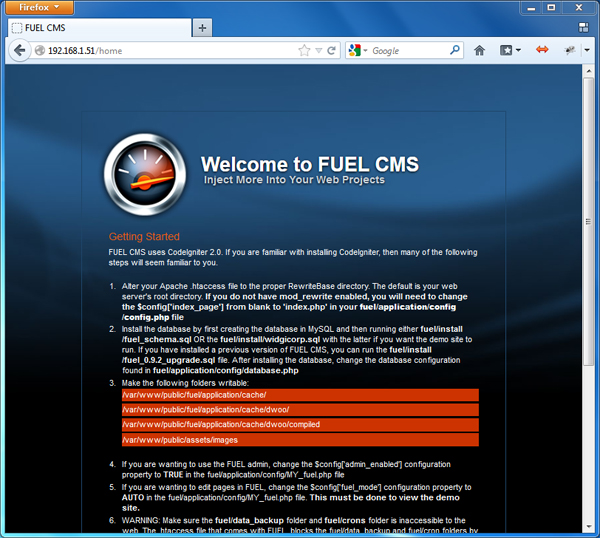
Follow the instructions to configure Apache, create the database, and change directory permissions.
按照说明配置Apache,创建数据库和更改目录权限。
Fuel CMS provides some .htaccess files to help you set up the rewrite rules and get everything running smoothly. This is where I ran into some problems though because I’m using Nginx.
Fuel CMS提供了一些.htaccess文件,以帮助您设置重写规则并确保一切正常运行。 这是我遇到问题的地方,因为我正在使用Nginx。
The configuration files can be found under fuel/application/config. Fuel CMS can be thoroughly customized, but I’ll stick to the most important settings for right now.
可以在fuel/application/config下找到配置文件。 Fuel CMS可以进行完全自定义,但是我现在将坚持最重要的设置。
Set the following in the MY_FUEL.php file:
在MY_FUEL.php文件中设置以下内容:
site_name: the name of your websitesite_name:您的网站名称fuel_mode: whether to look for page data in the database, view files, or both. (For this article, set it to “auto” which means both.)fuel_mode:是在数据库中查找页面数据,查看文件还是同时查找两者。 (对于本文,将其设置为“ auto”,这意味着两者都适用。)
In the database.php file, enter your database information in the corresponding fields.
在database.php文件的相应字段中输入数据库信息。
If your server doesn’t support mod_rewrite, in the config.php file change the index_page option to “index.php”.
如果您的服务器不支持mod_rewrite,请在config.php文件中将index_page选项更改为“ index.php”。
Now you’re ready to log into the admin panel at http://localhost/fuel.
现在,您可以在http:// localhost / fuel登录到管理面板。
创建首页 (Creating Your First Page)
Log in into the dashboard with the default username and password, both “admin”. Once you’re logged logged in, you’ll be prompted to change that password. You should do this now or else you’ll get an annoying reminder popup with every action you do.
使用默认用户名和密码(均为“ admin”)登录到仪表板。 登录后,将提示您更改该密码。 您应该立即执行此操作,否则每次执行操作时都会弹出一个烦人的提醒弹出窗口。
So here you are: in the middle you see some information, the latest news and a link to the documentation. The menu is located to the left. In Fuel CMS, everything is divided in modules: the site module, the blog module, several tool modules, and the user modules.
因此,您在这里:在中间,您会看到一些信息,最新新闻和文档链接。 菜单位于左侧。 在Fuel CMS中,所有内容都分为模块:站点模块,博客模块,几个工具模块和用户模块。
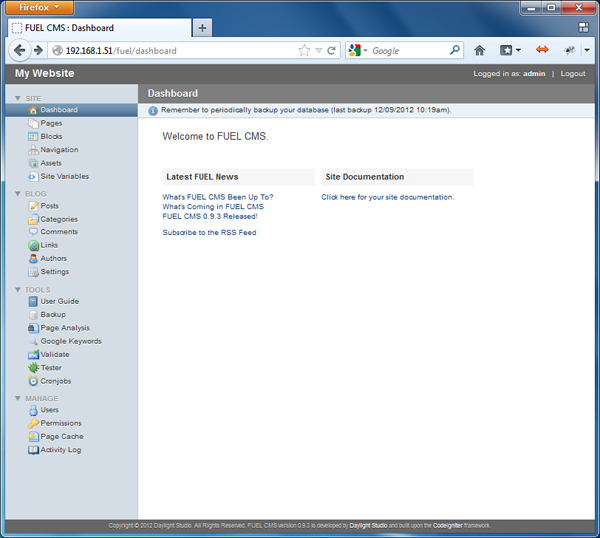
The first thing you might want to do is create a page. This is a straightforward process similar to most other content management systems. In the left menu, click on Pages and then click the Create button.
您可能要做的第一件事是创建一个页面。 这是一个简单的过程,类似于大多数其他内容管理系统。 在左侧菜单中,单击“页面”,然后单击“创建”按钮。
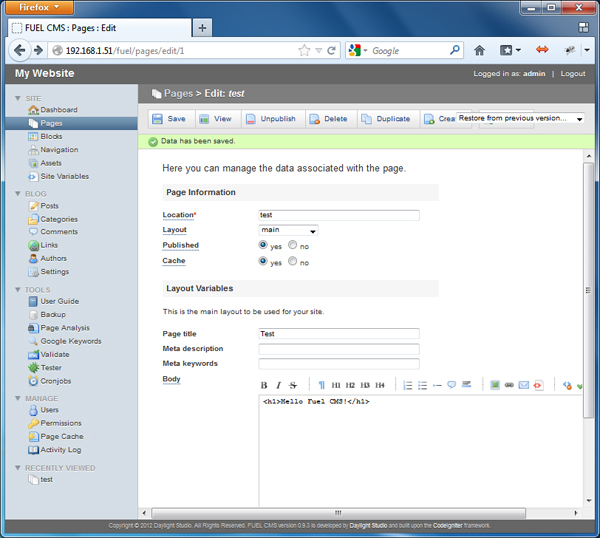
Enter a location (this is the URL fragment, so no spaces!), page title, and your content, then click Save.
输入位置(这是URL片段,所以不能有空格!),页面标题和内容,然后单击“保存”。
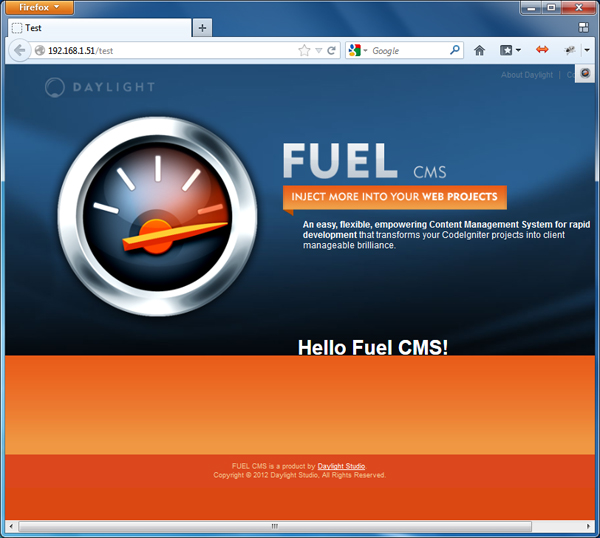
You can visit the page by going to http://localhost/index.php/test. You’ll see the text you entered, but with the same design of the installation page.
您可以通过访问http://localhost/index.php/test访问该页面。 您将看到输入的文本,但安装页面的设计相同。
创建自定义视图 (Creating A Custom View)
The page you just created uses the layout of the installation page, so go back to editing your page (go to Pages in the menu and then click the page title). Note the Layout setting which is currently set “main”. Change that to “none”, save, and then check the page again. You will now see a blank page with your text.
您刚刚创建的页面使用安装页面的布局,因此请返回编辑页面(转到菜单中的“页面”,然后单击页面标题)。 注意当前设置为“ main”的布局设置。 将其更改为“ none”,保存,然后再次检查页面。 现在,您将看到一个空白页面,其中包含您的文本。
Layouts are located in the views folder: fuel/application/views/_layouts. As we look at the default layout (main.php) we see the following:
布局位于views文件夹中: fuel/application/views/_layouts 。 在查看默认布局( main.php )时,我们看到以下内容:
<?php $this->load->view('_blocks/header')?>

<div id="main_inner">
<?php echo fuel_var('body', ''); ?>
</div>

<?php $this->load->view('_blocks/footer')?>
The first and the last lines include blocks: design elements which can be reused in various sections of the website. In this case the header and footer are blocks because they’ll presumably be the same on many pages throughout your site. You can also create blocks for navigation, JavaScript includes, or anything else you need.
第一行和最后一行包括块:可在网站的各个部分重复使用的设计元素。 在这种情况下,页眉和页脚是块,因为在整个站点的许多页面上,页眉和页脚都是相同的。 您还可以创建导航块,JavaScript包含的块或其他所需的块。
The echo fuel_var('body') line retrieves the content you specified for the page from the database and displays it.
echo fuel_var('body')行从数据库中检索您为页面指定的内容并显示它。
The example above uses layouts to put together basic editable pages. But as I spoke about earlier, you can also create custom view files. For example, if you have a page that functions differently from the the rest of them on your site, then you’ll need to write a custom view. This part of the process actually has more to do with CodeIgniter than with Fuel CMS itself.
上面的示例使用布局将基本的可编辑页面放在一起。 但是正如我之前提到的,您还可以创建自定义视图文件。 例如,如果您的页面功能与站点上其他页面的功能不同,则需要编写一个自定义视图。 实际上,该过程的这一部分与CodeIgniter的关系要大于与Fuel CMS本身的关系。
Here we’ll follow the opt-in controller method: the URL calls an action of a controller which renders our view. Save the following as fuel/application/controllers/hello.php:
在这里,我们将采用“选择加入”控制器方法:URL调用呈现视图的控制器的操作。 将以下内容另存为fuel/application/controllers/hello.php :
<?php
class Hello extends CI_Controller {

public function __construct()
{
parent::__construct();
}

public function index()
{
// load the fuel_page library class and pass
// it the view file you want to load
$this->load->module_library(
FUEL_FOLDER,
'fuel_page',
array('location' => 'hello')
);
$this->fuel_page->render();
}
}
We’ve defined a controller class Hello with the method index() which is called when you request the page. We load the fuel_page named “hello” which refers to hello.php in the views directory.
我们使用方法index()定义了一个控制器类Hello ,该方法在您请求页面时被调用。 我们将名为“ hello”的fuel_page加载到views目录中的hello.php 。
Now let’s add some variables which are used by the page. Variables are most commonly used to create and map input fields in the Dashboard to variables in the template. The global variables are in fuel/application/views/_variables/global.php, and we can override them by creating the file hello.php.
现在,让我们添加一些页面使用的变量。 变量最常用于创建仪表板中的输入字段并将其映射到模板中的变量。 全局变量位于fuel/application/views/_variables/global.php ,我们可以通过创建文件hello.php覆盖它们。
The content of the _variables/hello.php file is:
_variables/hello.php文件的内容为:
<?php
$vars['layout'] = 'none';
This overrides the layout variable to use the “none” layout, just as we did before with the test page.
就像我们之前对测试页所做的那样,这将覆盖layout变量以使用“无”布局。
Then over in the views folder, as hello.php we have:
然后在views文件夹中,作为hello.php我们有:
<?php
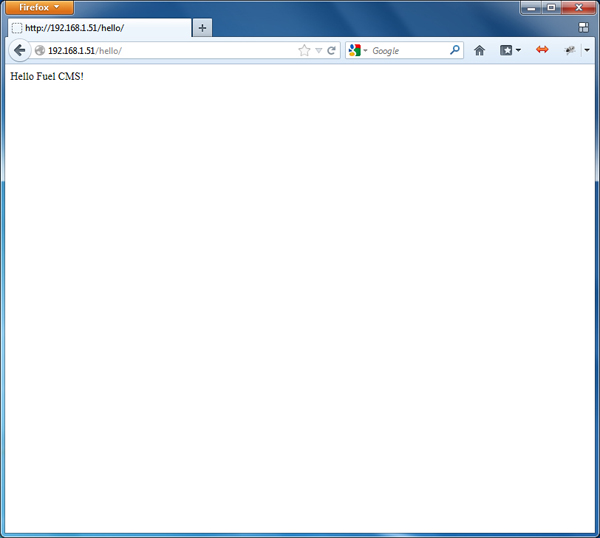
echo 'Hello Fuel CMS!';
Go to http://localhost/hello and you should see the ‘Hello Fuel CMS!’ message.
转到http:// localhost / hello ,您应该会看到“ Hello Fuel CMS!”。 信息。
When writing your views, there are some custom tags available to help keep your code clean. Fuel CMS provides uses the Dwoo templating system to turn these tags into proper PHP code. For example, you can use:
编写视图时,可以使用一些自定义标签来帮助保持代码干净。 Fuel CMS提供了使用Dwoo模板系统将这些标签转换为正确PHP代码的功能。 例如,您可以使用:
{foreach $data soldier}
{$soldier->rank} - {$soldier->name}
{/foreach}
instead of writing a native foreach loop with output statements.
而不是使用输出语句编写本机的foreach循环。
结论 (Conclusion)
We’ve discussed installing Fuel CMS and creating pages and views. With this basic knowledge, if we wanted to make a site with multiple pages and a custom layout, it shouldn’t be difficult to do.
我们已经讨论了安装Fuel CMS以及创建页面和视图。 有了这些基础知识,如果我们想创建一个包含多个页面和自定义布局的网站,那么做起来就不难了。
In the next article I’ll explain how set up your own modules. Stay tuned!
在下一篇文章中,我将解释如何设置自己的模块。 敬请关注!
Image via Fotolia
图片来自Fotolia
翻译自: https://www.sitepoint.com/getting-started-with-fuel-cms-1/
fuel


 313
313

 被折叠的 条评论
为什么被折叠?


