


If you’ve ever done a Zend Framework quick start, you’ve probably never worked in Zend Framework. The quick start has historically been anything but quick, and it’s easy to lose interest and move on to the next thing.
如果您曾经做过Zend Framework快速入门,那么您可能从未在Zend Framework中工作过。 从历史上看,快速的开始几乎没有什么快的,而且很容易失去兴趣并继续下一步。
Zend Expressive greatly improves upon this experience with the wizard driven composer create-project command. However, it can still be daunting to set up because there are so many choices to make up front. This tutorial guides you through my recommended setup for rapid development which will yield an enterprise level, robust application.
Zend Expressive通过向导驱动的composer create-project命令大大改善了这种体验。 但是,设置仍然是艰巨的,因为有很多选择要准备。 本教程将指导您完成我建议的快速开发设置,这将产生一个企业级的,强大的应用程序。

This tutorial is not about setting up your environment, so I am going to assume that you have a good working environment like Homestead Improved.
本教程不是关于设置您的环境的,因此我将假设您拥有一个良好的工作环境,例如Homestead Improvement 。
If you’re not familiar with Vagrant or isolated virtual environments, we’ve got an amazing book to guide you through the concepts available in our shop here.
如果你不熟悉流浪或相互隔离的虚拟环境中,我们已经得到了一个惊人的书来指导你通过在我们的商店提供的概念在这里 。
项目设置 (Project Setup)
Start your project by running the following command your the folder where you keep your projects (Code on Homestead Improved):
通过在保存项目的文件夹中运行以下命令来启动项目( Homestead改进 Code ):
composer create-project zendframework/zend-expressive-skeleton expressiveYou will be prompted to make a few decisions along the way. Use these answers:
系统会提示您做出一些决定。 使用以下答案:
What type of installation would you like?
您想要哪种类型的安装?
- Modular 模块化的
Which container do you want to use for dependency injection?
您要使用哪个容器进行依赖项注入?
- Zend ServiceManager Zend ServiceManager
Which router do you want to use?
您要使用哪个路由器?
- Zend Router Zend路由器
Which template engine do you want to use?
您要使用哪个模板引擎?
- Twig 枝条
Which error handler do you want to use during development?
您要在开发期间使用哪个错误处理程序?
- Whoops 哎呀
Please select which config file you wish to inject ‘Zend\Validator\ConfigProvider’ into?
请选择要将“ Zend \ Validator \ ConfigProvider”注入哪个配置文件?
- config/config.php config / config.php
Remember this option for other packages of the same type?
还记得其他相同类型的软件包的此选项吗?
- y ÿ
Then, run these commands:
然后,运行以下命令:
cd expressive &&
git init &&
git config color.ui true &&
git add . &&
git commit -m "Initial commit" &&
chmod -R +w data;
This initializes a repository in the newly created folder and makes the data folder writable.
这将初始化新创建的文件夹中的存储库,并使data文件夹可写。
Then, start up a php server for testing with
然后,启动php服务器进行测试
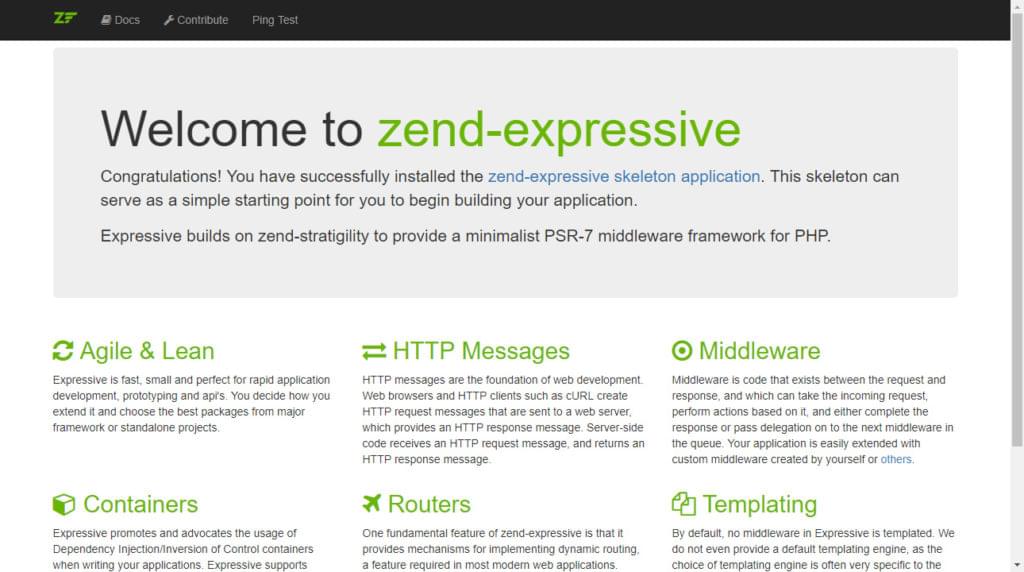
composer serve… and browse to http://localhost:8080 or just visit the VM’s IP or virtual host if you’re using Homestead Improved.
…并浏览到http:// localhost:8080,或者,如果您正在使用Homestead Improvement,则只需访问VM的IP或虚拟主机。
了解表现力 (Understanding Expressive)
Expressive’s folder structure looks like this:
Expressive的文件夹结构如下所示:
bin/
config/
data/
  cache/
public/
  index.php
src/
  App
test/
  AppTest
vendor/
Most of it is self explanatory. Expressive provides an App module by default. You can put all your code in here, or build separate modules as you build larger features.
大部分是自我解释。 Expressive默认情况下提供一个App模块。 您可以将所有代码放在此处,也可以在构建较大的功能时构建单独的模块。
Expressive comes with some handy commands:
Expressive附带一些方便的命令:
./vendor/bin/expressive– Create, register, and deregister modules. Create a middleware class, etc../vendor/bin/expressive–创建,注册和注销模块。 创建一个中间件类,等等。composer serve– Alias to run a php-fpm servercomposer serve–别名以运行php-fpm服务器composer cs-check– Perform a coding standards check on your code.composer cs-check–对您的代码执行编码标准检查。composer cs-fix– Perform a coding standards check on your code and fix issues, where possible.composer cs-fix–对您的代码执行编码标准检查,并在可能的情况下解决问题。composer test– Run PHPUnit tests on your code.composer test–在您的代码上运行PHPUnit测试。composer check– Alias for runningcs-check, then test.composer check–运行cs-check别名,然后进行测试。
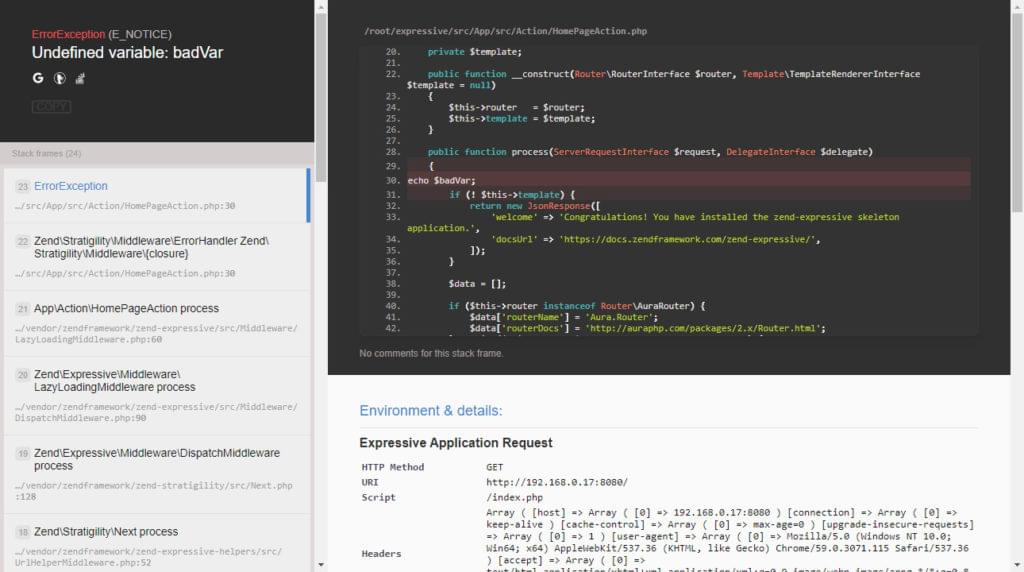
Expressive also comes with the Whoops error handler. To test it, open src/App/src/Action/HomePageAction.php and type echo $badVar in the process() method, then refresh the page. You will see the Whoops error handler.
Expressive还附带了Whoops错误处理程序。 要对其进行测试,请打开src/App/src/Action/HomePageAction.php ,然后在process()方法中键入echo $badVar ,然后刷新页面。 您将看到Whoops错误处理程序。
必要的改进 (Necessary Improvements)
基于反射的抽象工厂 (Reflection Based Abstract Factory)
Zend Expressive uses the Zend ServiceManager for Dependency Injection. In the default setup, you need to add configuration and potentially create a factory class for every single class you write. This feels burdensome after doing this about twice.
Zend Expressive使用Zend ServiceManager进行依赖注入。 在默认设置中,您需要添加配置并可能为编写的每个单个类创建一个工厂类。 这样做大约两次后,这感觉很沉重。
To avoid this, we will enable the reflection based abstract factory provided with Zend Expressive.
为避免这种情况,我们将启用Zend Expressive提供的基于反射的抽象工厂。
Add this to config/autoload/dependencies.global.php within the dependencies array:
加入这config/autoload/dependencies.global.php的内dependencies数组:
'abstract_factories' => [
    \Zend\ServiceManager\AbstractFactory\ReflectionBasedAbstractFactory::class
],
Now, whenever you are working in a class and need a dependency, just add it to your constructor. The reflection abstract factory will see what your class needs and automatically grab it from the service container. You only need to create factories now in exceptional cases where you need something different from the default service provided by the service container.
现在,无论何时在类中工作并需要依赖项,只需将其添加到构造函数中即可。 反射抽象工厂将看到您的类需要什么,并自动从服务容器中获取它。 仅在例外情况下,您现在需要创建工厂,在这种情况下,您需要与服务容器提供的默认服务有所不同的东西。
If you’re concerned about speed; In production, we can have a process that generates factories for your classes that were being handled by the reflection factory with vendor/bin/generate-factory-for-class.
如果您担心速度; 在生产中,我们可以有一个过程为您的类生成工厂,这些工厂由反射工厂使用vendor/bin/generate-factory-for-class 。
教义 (Doctrine)
Zend Expressive provides no database tooling or ORM. I’ve chosen Doctrine as my ORM of choice after much research and building a few ORMs of my own. It just works.
Zend Expressive不提供数据库工具或ORM。 经过大量研究并建立了一些自己的ORM之后,我选择了Doctrine作为我的ORM。 它只是工作。
Install Doctrine and Symfony Yaml via Composer:
通过Composer安装Doctrine和Symfony Yaml:
composer require dasprid/container-interop-doctrine symfony/yamlCreate a file config/cli-config.php with these contents:
使用以下内容创建文件config/cli-config.php :
<?php

use Doctrine\ORM\Tools\Console\ConsoleRunner;

chdir(dirname(__DIR__));
require 'vendor/autoload.php';

/**
 * Self-called anonymous function that creates its own scope and keep the global namespace clean.
 */
return call_user_func(function () {
    /** @var \Interop\Container\ContainerInterface \$container */
    $container = require 'config/container.php';

    $entityManager = $container->get(\Doctrine\ORM\EntityManager::class);
    return ConsoleRunner::createHelperSet($entityManager);
});
Replace the contents of config/autoload/dependencies.global.php with the following:
将config/autoload/dependencies.global.php的内容替换为以下内容:
<?php

use Zend\Expressive\Application;
use Zend\Expressive\Container;
use Zend\Expressive\Delegate;
use Zend\Expressive\Helper;
use Zend\Expressive\Middleware;

return [
    // Provides application-wide services.
    // We recommend using fully-qualified class names whenever possible as
    // service names.
    'dependencies' => [
        'abstract_factories' => [
            \Zend\ServiceManager\AbstractFactory\ReflectionBasedAbstractFactory::class
        ],
        // Use 'aliases' to alias a service name to another service. The
        // key is the alias name, the value is the service to which it points.
        'aliases' => [
            'Zend\Expressive\Delegate\DefaultDelegate' => Delegate\NotFoundDelegate::class,
        ],
        // Use 'invokables' for constructor-less services, or services that do
        // not require arguments to the constructor. Map a service name to the
        // class name.
        'invokables' => [
            // Fully\Qualified\InterfaceName::class => Fully\Qualified\ClassName::class,
            \Doctrine\DBAL\Logging\DebugStack::class => \Doctrine\DBAL\Logging\DebugStack::class,
            Helper\ServerUrlHelper::class => Helper\ServerUrlHelper::class,
            Middleware\ImplicitHeadMiddleware::class => Middleware\ImplicitHeadMiddleware::class,
            Middleware\ImplicitOptionsMiddleware::class => Middleware\ImplicitOptionsMiddleware::class,
        ],
        // Use 'factories' for services provided by callbacks/factory classes.
        'factories'  => [
            Application::class                => Container\ApplicationFactory::class,
            Delegate\NotFoundDelegate::class  => Container\NotFoundDelegateFactory::class,
            \Doctrine\ORM\EntityManager::class  => \ContainerInteropDoctrine\EntityManagerFactory::class,
            Helper\ServerUrlMiddleware::class => Helper\ServerUrlMiddlewareFactory::class,
            Helper\UrlHelper::class           => Helper\UrlHelperFactory::class,
            Helper\UrlHelperMiddleware::class => Helper\UrlHelperMiddlewareFactory::class,
            Zend\Stratigility\Middleware\ErrorHandler::class => Container\ErrorHandlerFactory::class,
            Middleware\ErrorResponseGenerator::class         => Container\ErrorResponseGeneratorFactory::class,
            Middleware\NotFoundHandler::class                => Container\NotFoundHandlerFactory::class,
        ],
    ],
];
Create this file to set up the Doctrine driver config/autoload/doctrine.global.php.
创建此文件以设置Doctrine驱动程序config/autoload/doctrine.global.php 。
<?php

return [
    'doctrine' => [
        'driver' => [
            'orm_default' => [
                'class' => \Doctrine\Common\Persistence\Mapping\Driver\MappingDriverChain::class,
                'drivers' => [],
            ],
        ],
    ],
];
Create this file for your database credentials config/autoload/doctrine.local.php.
为您的数据库凭据config/autoload/doctrine.local.php创建此文件。
<?php
return [
    'doctrine' => [
        'connection' => [
            'orm_default' => [
                'params' => [
                    'url' => 'mysql://root:password1@localhost/expressive',
                ],
            ],
        ],
    ],
];
Test by running ./vendor/bin/doctrine. You should see the help prompt.
通过运行./vendor/bin/doctrine测试。 您应该看到帮助提示。
古尔普 (Gulp)
Gulp is my current tool of choice for frontend workflow. There are many, many frontend build tools available. Look if you like, but you may get lost in the sea of shiny new JavaScript libraries out there. I don’t want to get too involved here as this is more a PHP tutorial than JS, but I do want to show how gulp should be configured to work with Zend Expressive.
Gulp是我当前选择的前端工作流工具。 有很多可用的前端构建工具。 看看是否喜欢,但您可能会迷失在闪亮的新JavaScript库的海洋中。 我不想在这里参与过多,因为这比JS更像是PHP教程,但我想展示如何配置gulp以与Zend Expressive一起使用。
Create a package.json file with these contents:
创建具有以下内容的package.json文件:
{
  "name": "expressive",
  "version": "1.0.0",
  "description": "",
  "main": "index.js",
  "devDependencies": {
    "del": "^3.0.0",
    "gulp": "github:gulpjs/gulp#4.0",
    "gulp-cached": "^1.1.1",
    "gulp-imagemin": "^3.3.0",
    "gulp-minify-css": "^1.2.4",
    "gulp-rename": "^1.2.2",
    "gulp-sass": "^3.1.0",
    "gulp-uglify": "^2.1.2",
    "gulp-usemin": "^0.3.28"
  },
  "scripts": {
    "test": "echo \"Error: no test specified\" && exit 1"
  },
  "author": "",
  "license": "ISC"
}
Run npm install. You may want to run npm update also, if you are reading this tutorial a while after it was written.
运行npm install 。 如果在编写本教程后的一段时间内正在阅读本教程,则可能还需要运行npm update 。
Then, create a gulpfile.js with these contents:
然后,使用以下内容创建一个gulpfile.js :
'use strict';

var cache = require('gulp-cached');
var del = require('del');
var gulp = require('gulp');
var imagemin = require('gulp-imagemin');
var minifyCss = require('gulp-minify-css');
var path = require('path');
var rename = require('gulp-rename');
var sass = require('gulp-sass');
var uglify = require('gulp-uglify');

// CSS Processing
gulp.task('clean-css', function() {
    return del('public/css', { force: true });
});

gulp.task('compile-sass', function() {
    return gulp.src('src/*/public/sass/**/*.scss', { base: './' })
        .pipe(cache('compile-sass'))
        .pipe(sass().on('error', sass.logError))
        .pipe(rename(function (path) {
            path.dirname = path.dirname.replace(/^src\/([^\/]+\/)public\/sass/, '$1');
        }))
        .pipe(gulp.dest('public/css/'));
});

gulp.task('copy-css', function() {
    return gulp.src('src/*/public/css/**/*.css', { base: './' })
        .pipe(cache('copy-css'))
        .pipe(rename(function (path) {
            path.dirname = path.dirname.replace(/^src\/([^\/]+\/)public\/css/, '$1');
        }))
        .pipe(gulp.dest('public/css/'));
});

gulp.task('minify-css', function() {
    return gulp.src(['public/css/**/*.css', '!public/css/**/*.min.css'], { base: './' })
        .pipe(cache('minify-css'))
        .pipe(minifyCss())
        .pipe(rename(function (path) {
            path.dirname = path.dirname.replace(/^public\/css/, '');
        }))
        .pipe(rename({ extname: '.min.css' }))
        .pipe(gulp.dest('public/css'))
    ;
});
gulp.task('process-css', gulp.series(['compile-sass', 'copy-css'], 'minify-css'));

// JS Processing
gulp.task('clean-js', function() {
    return del('public/js', { force: true });
});

gulp.task('copy-js', function() {
    return gulp.src('src/*/public/js/**/*.js', { base: './' })
        .pipe(cache('copy-js'))
        .pipe(rename(function (path) {
            path.dirname = path.dirname.replace(/^src\/([^\/]+\/)public\/js/, '$1');
        }))
        .pipe(gulp.dest('public/js/'));
});

gulp.task('minify-js', function() {
    return gulp.src(['public/js/**/*.js', '!public/js/**/*.min.js'], { base: './' })
        .pipe(cache('minify-js'))
        .pipe(uglify())
        .pipe(rename(function (path) {
            path.dirname = path.dirname.replace(/^public\/js/, '');
        }))
        .pipe(rename({ extname: '.min.js' }))
        .pipe(gulp.dest('public/js'))
    ;
});
gulp.task('process-js', gulp.series('copy-js', 'minify-js'));

// Image processing
gulp.task('clean-img', function() {
    return del('public/img', { force: true });
});

gulp.task('process-img', function() {
    return gulp.src('src/*/public/img/**/*.{gif,jpg,jpeg,png,svg}', { base: './' })
        .pipe(cache('process-img'))
        .pipe(imagemin())
        .pipe(rename(function (path) {
            path.dirname = path.dirname.replace(/^src\/([^\/]+\/)public\/img/, '$1');
        }))
        .pipe(gulp.dest('public/img'));
});


// Top level commands
gulp.task('default', gulp.parallel('process-js', 'process-css', 'process-img'));
gulp.task('clean', gulp.parallel('clean-js', 'clean-css', 'clean-img'));

gulp.task('watch', function() {
    gulp.watch(['src/*/public/sass/**/*.scss','src/*/public/css/**/*.css'], gulp.series('process-css'));
    gulp.watch('src/*/public/js/**/*.js', gulp.series('process-js'));
    gulp.watch('src/*/public/img/**/*.{gif,jpg,jpeg,png,svg}', gulp.series('process-img'));
});
Run gulp and ensure that it runs without errors.
运行gulp并确保其运行无误。
Now you can run gulp to compile sass, minify css, minify js, and optimize images across all of your modules. You can follow that up with gulp watch to have these all automatically be processed as they are changed. The cache gulp module ensures that only changed files are ever processed so this should process changes very quickly.
现在,您可以运行gulp来编译sass,最小化css,最小化js并优化所有模块中的图像。 您可以使用gulp watch进行后续操作,以在更改它们时自动对其进行处理。 缓存gulp模块可确保仅处理已更改的文件,因此该处理将非常Swift地进行。
Test this by creating one of these files:
通过创建以下文件之一进行测试:
src/App/public/sass/sasstest.scsssrc/App/public/sass/sasstest.scsssrc/App/public/css/test.csssrc/App/public/css/test.csssrc/App/public/js/test.jssrc/App/public/js/test.jssrc/App/public/img/test.jpgsrc/App/public/img/test.jpg
And then run gulp. Look for the files in public/css/App, public/js/App, or public/img/App.
然后运行gulp 。 在public/css/App , public/js/App或public/img/App查找文件。
Run gulp watch, change the source files, and then watch for the files in public to update.
运行gulp watch ,更改源文件,然后监视公共文件是否更新。
控制台命令 (Console Commands)
And last, but definitely not least, you will need a way to run console commands. We will use Symfony’s Console for this,which already ships with Zend Expressive so we do not need to manually require it.
最后,但同样重要的是,您将需要一种运行控制台命令的方法。 我们将为此使用Zenf Expressive随附的Symfony控制台 ,因此我们不需要手动要求它。
Create a file called bin/console:
创建一个名为bin/console的文件:
#!/usr/bin/env php
<?php

chdir(dirname(__DIR__));
require 'vendor/autoload.php';

/**
 * Self-called anonymous function that creates its own scope and keep the global namespace clean.
 */
call_user_func(function () {
    /** @var \Interop\Container\ContainerInterface $container */
    $container = require 'config/container.php';

    $app = new \Symfony\Component\Console\Application('Application console');

    $commands = $container->get('config')['console']['commands'];
    foreach ($commands as $command) {
        $app->add($container->get($command));
    }

    $app->run();
});
Then, you can create Symfony commands and register them via config/autoload/console.global.php or from within your modules like this:
然后,您可以创建Symfony命令并通过config/autoload/console.global.php或从模块中注册它们,如下所示:
<?php

return [
    'console' => [
        'commands' => [
            \App\Command\HelloWorldCommand::class,
        ],
    ],
];
Add any dependencies your console commands need to the constructor just like any other class in Expressive. Make sure to call parent::__construct() in your constructor or your command won’t work.
就像Expressive中的任何其他类一样,将控制台命令需要的所有依赖项添加到构造函数中。 确保在parent::__construct()调用parent::__construct() ,否则您的命令将无效。
Here is an example command with a dependency:
这是带有依赖项的示例命令:
<?php

namespace App\Command;

use Doctrine\ORM\EntityManager;
use Monolog\Logger;
use Symfony\Component\Console\Command\Command;
use Symfony\Component\Console\Input\InputArgument;
use Symfony\Component\Console\Input\InputInterface;
use Symfony\Component\Console\Input\InputOption;
use Symfony\Component\Console\Output\OutputInterface;

class HellowWorld extends Command
{
    /**
     * @var EntityManager
     */
    private $entityManager;

    public function __construct(EntityManager $entityManager, $name = null)
    {
        $this->entityManager = $entityManager;
        parent::__construct($name);
    }

    /**
     * Configures the command
     */
    protected function configure()
    {
        $this->setName('hello')
            ->setDescription('Says hello')
        ;
    }

    /**
     * Executes the current command
     */
    protected function execute(InputInterface $input, OutputInterface $output)
    {
        $output->writeln("Hello World!");

        // Do something with the entityManager
        $this->entityManager->find('Blog\Entity\BlogEntity');
    }
}
To run your command:
运行命令:
php bin/console helloWe can go a little bit further and add a logger. This is useful for passing to service models that encapsulate a lot of logic and need debug logging throughout.
我们可以再进一步添加一个记录器。 这对于传递给封装了许多逻辑并需要调试日志记录的服务模型很有用。
Run this command:
运行以下命令:
composer require monolog/monolog symfony/monolog-bridge;Then, add this to your execute method in your command:
然后,将其添加到命令中的execute方法中:
protected function execute(InputInterface $input, OutputInterface $output)
{
    $logger = new \Monolog\Logger('collect-product-data');
    $logger->pushHandler(new \Symfony\Bridge\Monolog\Handler\ConsoleHandler($output));
    $logger->debug('Log something);
}
结论 (Conclusion)
You are now ready to begin building an enterprise level application with all of the tools you could ever want at your fingertips.
现在,您就可以开始使用触手可及的所有工具来构建企业级应用程序。
In the next post we’ll start learning how to build modules on this foundation, starting off with a blog module.
在下一篇文章中,我们将从博客模块开始学习如何在此基础上构建模块。
翻译自: https://www.sitepoint.com/rapid-enterprise-app-development-zend-expressive/


 490
490

 被折叠的 条评论
为什么被折叠?
被折叠的 条评论
为什么被折叠?
 到【灌水乐园】发言


