


This article was peer reviewed by Abdul Malik Ikhsan and Matthew Weier O’Phinney. Thanks to all of SitePoint’s peer reviewers for making SitePoint content the best it can be!
本文由Abdul Malik Ikhsan和Matthew Weier O'Phinney进行同行评审。 感谢所有SitePoint的同行评审人员使SitePoint内容达到最佳状态!
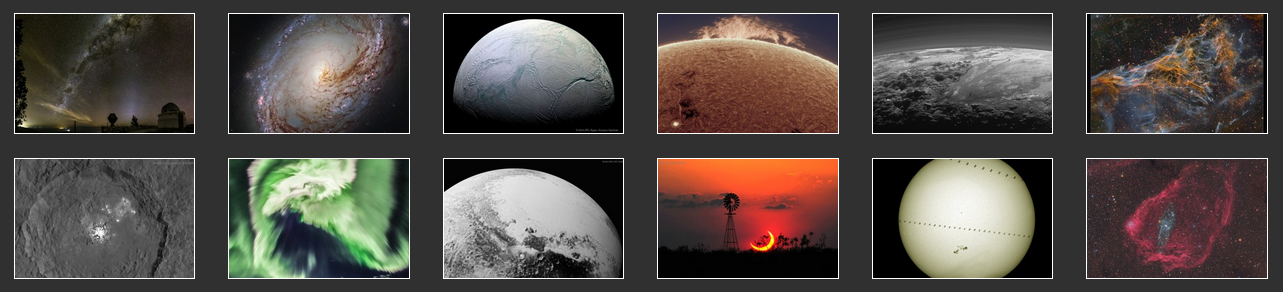
In this article, we are going to use Zend Expressive to build a photo gallery using the NASA Astronomy Picture of the Day API. The end result will be the AstroSplash website which was created for the purpose of this article.
在本文中,我们将使用Zend Expressive通过NASA 天文学的每日图片 API构建照片库。 最终结果将是为本文目的而创建的AstroSplash网站。
Zend Expressive is an exciting new micro-framework for building PSR-7 middleware applications. Micro-frameworks are smaller, faster and more flexible than full stack frameworks. They tend to be aimed at more experienced developers who do not require as much assistance designing their applications and prefer the flexibility of building their applications from a variety of decoupled components.
Zend Expressive是用于构建PSR-7中间件应用程序的令人兴奋的新微型框架。 与全栈框架相比,微框架更小,更快,更灵活。 他们倾向于针对经验丰富的开发人员,他们不需要太多的帮助来设计其应用程序,而是更喜欢从各种分离的组件中构建应用程序的灵活性。
Middleware is a term that will be used a lot in this article. A good definition of middleware is given by the Zend Expressive documentation:
中间件是一个在本文中将经常使用的术语。 Zend Expressive文档给出了很好的中间件定义:
“Middleware is any code sitting between a request and a response; it typically analyzes the request to aggregate incoming data, delegates it to another layer to process, and then creates and returns a response.”
“中间件是位于请求和响应之间的任何代码; 它通常分析请求以汇总传入的数据,将其委托给另一层进行处理,然后创建并返回响应。”
StackPHP has provided a method for PHP developers to create middleware since 2013. However, there are some key differences between StackPHP middleware and the middleware that we will encounter in this article. For our intents and purposes, the only compatible elements are theoretical.
自2013年以来, StackPHP为PHP开发人员提供了一种创建中间件的方法。但是,StackPHP中间件与本文将要遇到的中间件之间存在一些关键差异。 就我们的意图和目的而言,唯一兼容的元素是理论上的。
Do not worry if this still sounds confusing, these concepts are all best demonstrated by example! So, without further ado, let us dive into making our app.
如果这听起来仍然令人困惑,请不要担心,这些概念都可以通过示例很好地展示! 因此,事不宜迟,让我们开始致力于制作我们的应用程序。
介绍我们的应用程序 (Introducing Our App)
We are going to make an app using the API provided by NASA for their Astronomy Picture of the Day website. This is a great website that provides some fascinating daily images, but it is a little bit out-dated. With some work we could use this API to create a really easy to browse photo gallery!
我们将使用NASA提供的API制作其“ 天文学当日图片”网站的应用 。 这是一个很棒的网站,提供一些引人入胜的每日图片,但是有些过时了。 通过一些工作,我们可以使用此API创建一个真正易于浏览的照片库!
Whilst reading this article, it may help to reference the AstroSplash public repository on GitHub. This contains the source code for the finished app, which is live at astrosplash.com.
在阅读本文时,可能有助于参考GitHub上的AstroSplash公共存储库 。 它包含完成的应用程序的源代码,该源代码位于astrosplash.com中 。
创建一个Zend富有表现力的项目 (Creating a Zend Expressive Project)
It is recommended, but not required, to use the Homestead Improved Vagrant VM to quickly create a development environment.
建议(但不是必需)使用Homestead Enhanced Vagrant VM快速创建开发环境。
Zend Expressive provides a very useful skeleton project installer that we can use to configure the framework and our chosen components. We can use the following composer command to create our application:
Zend Expressive提供了一个非常有用的框架项目安装程序 ,我们可以使用它来配置框架和我们选择的组件。 我们可以使用以下composer命令来创建我们的应用程序:
composer create-project -s rc zendframework/zend-expressive-skeleton <project-directory>We should replace <project-directory> with the name of the directory that we are going to install Zend Expressive into. When using the Homestead Improved Vagrant VM, this will be Project and the command should be run in the Code directory. If the installer complains about the Project directory already existing, just remove it and run the command again.
我们应将<project-directory>替换为要将Zend Expressive安装到的目录的名称。 当使用Homestead Enhanced Vagrant VM时,它将是Project并且该命令应在Code目录中运行。 如果安装程序抱怨Project目录已经存在,则将其删除并再次运行命令。
The installer will give us the option to choose from some different components that the framework supports. We are going to stick largely to the defaults and use FastRoute, Zend ServiceManager and the Whoops error handler. There is no default choice for a templating engine, so we are going to use Plates.
安装程序将为我们提供从框架支持的一些不同组件中进行选择的选项。 我们将主要使用默认值,并使用FastRoute,Zend ServiceManager和Whoops错误处理程序。 模板引擎没有默认选择,因此我们将使用Plates。

If we load up the app in a browser we should now see a page welcoming us to Zend Expressive! Have a browse around the files that have been created for us, paying particular attention to the config directory. This contains all the data that Zend ServiceManager will use to build the container, which is the heart of our Zend Expressive application.
如果我们在浏览器中加载应用程序,我们现在应该会看到一个页面,欢迎我们使用Zend Expressive! 浏览为我们创建的文件,尤其要注意config目录。 它包含Zend ServiceManager将用来构建容器的所有数据,这是我们Zend Expressive应用程序的核心。
Next, we need to remove all the example code that we will not be using. Change into the project directory and run the following commands:
接下来,我们需要删除所有将不使用的示例代码。 切换到项目目录并运行以下命令:
rm public/favicon.ico
rm public/zf-logo.png
rm src/Action/*
rm test/Action/*
rm templates/app/*
rm templates/layout/*
配置容器 (Configuring the Container)
The container is a key part of our app. It will contain routes, middleware definitions, services and the rest of our app’s configuration.
容器是我们应用程序的关键部分。 它将包含路由,中间件定义,服务以及我们应用程序其余部分的配置。
In a moment, we will need to create a service for our app’s index page action. Before we start, let us borrow a good practice from the Zend Expressive documentation on naming our services:
稍后,我们将需要为我们的应用程序的索引页面操作创建服务。 在开始之前,让我们借鉴Zend Expressive文档中关于命名服务的良好做法:
“We recommend using fully-qualified class names whenever possible as service names, with one exception: in cases where a service provides an implementation of an interface used for typehints, use the interface name.”
“我们建议尽可能使用完全合格的类名称作为服务名称,但有一个例外:在服务提供用于类型提示的接口实现的情况下,请使用该接口名称。”
With that in mind, head to config/autoload/dependencies.global.php and replace the contents with this:
考虑到这一点,请转到config/autoload/dependencies.global.php并将其内容替换为:
<?php

return [
    'dependencies' => [
        'factories' => [
            Zend\Expressive\Application::class => Zend\Expressive\Container\ApplicationFactory::class,
        ],
    ],
];
We have removed the invokables key, as we will not need to define any services of this type for our app here. Invokable services are services that can be instantiated without constructor arguments.
我们已删除了invokables键,因为我们无需在此处为我们的应用程序定义任何此类服务。 可调用服务是无需实例化构造函数即可实例化的服务。
The first service to create is the application service. If you have a look at the front controller (public/index.php) you will see that it retrieves the application service from the container to run our app. This service has dependencies, so we have to list it under the factories key. By doing this, we have told Zend ServiceManager that it must use the given factory class to create the service. Zend Expressive provides many other factories for creating some of the core services.
创建的第一个服务是应用程序服务。 如果您查看前端控制器( public/index.php ),您会看到它从容器中检索应用程序服务以运行我们的应用程序。 该服务具有依赖性,因此我们必须在factories键下列出它。 通过这样做,我们已经告诉Zend ServiceManager,它必须使用给定的工厂类来创建服务。 Zend Expressive提供了许多其他工厂来创建一些核心服务。
Next, open up config/autoload/routes.global.php and replace the contents with:
接下来,打开config/autoload/routes.global.php并将内容替换为:
<?php

return [
    'dependencies' => [
        'invokables' => [
            Zend\Expressive\Router\RouterInterface::class => Zend\Expressive\Router\FastRouteRouter::class,
        ],
        'factories' => [
            App\Action\IndexAction::class => App\Action\IndexFactory::class,
        ]
    ],

    'routes' => [
        [
            'name' => 'index',
            'path' => '/',
            'middleware' => App\Action\IndexAction::class,
            'allowed_methods' => ['GET'],
        ],
    ],
];
The first entry under the dependencies key just tells the framework that it can create a router by instantiating the FastRoute adapter class without passing it any constructor parameters. The entry under the factories key is for our index action service. We will write the code for this service, and its factory, in the next section.
dependencies项键下的第一个条目只是告诉框架,它可以通过实例化FastRoute适配器类而无需向其传递任何构造函数参数来创建路由器。 factories键下的条目用于我们的索引操作服务。 我们将在下一部分中为该服务及其工厂编写代码。
The routes key will be loaded into the router by Zend Expressive, and should contain an array of route descriptors. In the single route descriptor that we have defined, the path key matches the entry to the index route, the middleware key tells the framework which service to use as a handler and the allowed_methods key specifies which HTTP methods are allowed. The allowed_methods key can be set to Zend\Expressive\Router\Route::HTTP_METHOD_ANY to specify that any HTTP method is allowed.
routes密钥将由Zend Expressive加载到路由器中,并且应包含一组路由描述符。 在我们定义的单个路由描述符中, path键将条目与索引路由匹配, middleware键告诉框架将哪个服务用作处理程序,而allowed_methods键指定允许的HTTP方法。 可以将allowed_methods密钥设置为Zend\Expressive\Router\Route::HTTP_METHOD_ANY以指定允许使用任何HTTP方法。
路由中间件 (Route Middleware)
It is time for us to create the index action service that we attached to the index route in our routes configuration file. Action classes take the form of route middleware in Zend Expressive, which is just middleware that we only want to bind to certain routes.
现在是时候在路由配置文件中创建附加到索引路由的索引操作服务了。 动作类在Zend Expressive中采用路由中间件的形式,这只是我们只想绑定到某些路由的中间件。
Our action class will be located, relative to our project root, at src/Action/IndexAction.php. Inside, it will look like this:
相对于项目根,我们的操作类位于src/Action/IndexAction.php 。 在内部,它看起来像这样:
<?php

namespace App\Action;

use Psr\Http\Message\ServerRequestInterface;
use Psr\Http\Message\ResponseInterface;
use Zend\Expressive\Template\TemplateRendererInterface;
use Zend\Stratigility\MiddlewareInterface;

class IndexAction implements MiddlewareInterface
{
    private $templateRenderer;

    public function __construct(TemplateRendererInterface $templateRenderer)
    {
        $this->templateRenderer = $templateRenderer;
    }

    public function __invoke(ServerRequestInterface $request, ResponseInterface $response, callable $next = null)
    {
        $html = $this->templateRenderer->render('app::index');
        $response->getBody()->write($html);
        return $response->withHeader('Content-Type', 'text/html');
    }
}
Here we have used dependency injection to obtain an implementation of the template renderer interface. Later we will need to create the factory class that handles this dependency injection.
在这里,我们已经使用依赖注入来获得模板渲染器接口的实现。 稍后,我们将需要创建处理此依赖项注入的工厂类。
The presence of the __invoke magic method makes this class callable. It is called with PSR-7 messages as parameters and also an optional next piece of middleware in the chain. As all index requests are handled by this middleware, we do not need to call the next middleware in the chain and can instead directly return a response. The signature used here for callable middleware is very common:
__invoke magic方法的存在使此类可以调用 。 它以PSR-7消息作为参数来调用,也是链中可选的下一个中间件。 由于所有索引请求都由该中间件处理,因此我们无需调用链中的下一个中间件,而可以直接返回响应。 此处用于可调用中间件的签名非常常见:
public function __invoke(ServerRequestInterface $request, ResponseInterface $response, callable $next = null);Middleware created using this pattern will also be supported by Relay, a PSR-7 middleware dispatcher. Likewise, middleware created for the Slim v3 framework, another PSR-7 middleware framework, will be compatible with Zend Expressive. Slim currently provides middleware for CSRF protection and HTTP caching.
使用此模式创建的中间件也将受到PSR-7中间件调度程序Relay的支持。 同样,为Slim v3框架创建的中间件(另一个PSR-7中间件框架)将与Zend Expressive兼容。 Slim当前提供用于CSRF保护和HTTP缓存的中间件。
When our action is called, it will render the app::index template, write it to the body of our response and return the response with the text/html content type. Because PSR-7 messages are immutable, every time we want to add a header to the response we have to create a new response object. The reasons for this are explained in the meta document for the PSR-7 specification.
调用我们的操作时,它将呈现app::index模板,将其写入响应的主体,并以text/html内容类型返回响应。 由于PSR-7消息是不可变的 ,因此每次我们想向响应中添加标头时,我们都必须创建一个新的响应对象。 PSR-7规范的meta文档中对此原因进行了说明。
Next, we have to write the factory class that the container will use to instantiate our index action class. Our factory class will be located, relative to our project root, at src/Action/IndexFactory.php. Inside, our factory will look like this:
接下来,我们必须编写容器类将用来实例化索引操作类的工厂类。 我们的工厂类相对于我们的项目根目录位于src/Action/IndexFactory.php 。 在内部,我们的工厂将如下所示:
<?php

namespace App\Action;

use Interop\Container\ContainerInterface;
use Zend\Expressive\Template\TemplateRendererInterface;

class IndexFactory
{
    public function __invoke(ContainerInterface $container)
    {
        $templateRenderer = $container->get(TemplateRendererInterface::class);
        return new IndexAction($templateRenderer);
    }
}
Again, we use the __invoke magic method to make our class callable. The container will call this class, passing an instance of itself as a single parameter. We then use the container to retrieve an implementation of the template renderer service, inject this into our action and return it. Here it might be worth taking the time to look back at the configuration for our container, so we can see how it all ties up.
同样,我们使用__invoke magic方法使我们的类可调用 。 容器将调用该类,并将其实例作为单个参数传递。 然后,我们使用容器检索模板渲染器服务的实现,将其注入到我们的操作中并返回它。 在这里可能值得花时间回顾一下容器的配置,因此我们可以看到它们之间的关系。
模板化 (Templating)
The only missing piece to our puzzle so far is the templating. In our index action, we ask the template renderer for the app::index template, but we have not created this yet. Zend Expressive uses the namespace::template notation for referring to templates. In our container configuration, Plates has been configured to know that all templates under the app namespace could be found at templates/app relative to the project root and that it should use .phtml as the template file extension. Two other namespaces have been configured, error and layout.
到目前为止,我们难题中唯一缺少的部分就是模板。 在我们的索引操作中,我们向模板渲染器请求app::index模板,但尚未创建此模板。 Zend Expressive使用namespace::template表示法来引用模板。 在我们的容器配置中, Plates已配置为知道可以在相对于项目根目录的templates/app找到app命名空间下的所有模板,并且应使用.phtml作为模板文件扩展名。 还配置了其他两个名称空间: error和layout 。
First, let us create the layout template. As the name for this template will be layout::default, under our configuration its path will be templates/layout/default.phtml.
首先,让我们创建布局模板。 由于此模板的名称为layout::default ,因此在我们的配置layout::default ,其路径为templates/layout/default.phtml 。
<!DOCTYPE html>
<html lang="en">
    <head>
        <meta charset="utf-8" />
        <title><?=$this->e($title);?></title>
    </head>
    <body>
        <?=$this->section('content')?>
    </body>
</html>
Next, we will create the app::index template at templates/app/index.phtml. We are going to make it extend the layout::default template that we just created. The templates in the error namespace have already been configured to extend the layout::default template.
接下来,我们将在templates/app/index.phtml创建app::index模板。 我们将使其扩展刚才创建的layout::default模板。 error名称空间中的模板已经配置为扩展layout::default模板。
<?php $this->layout('layout::default', ['title' => 'Astronomy Picture of the Day']) ?>

<h1>Astronomy Picture of the Day App</h1>
<p>Welcome to my Astronomy Picture of the Day App. It will use an API provided by NASA to deliver awesome astronomy pictures.</p>
Load the app up in your browser and you should see the template that we just created!
在浏览器中加载该应用程序,您应该看到我们刚刚创建的模板!
管道中间件 (Pipe Middleware)
The Zend Expressive documentation on pipe middleware states the following:
有关管道中间件的Zend Expressive文档指出以下内容:
“When you pipe middleware to the application, it is added to a queue, and dequeued in order until a middleware returns a response instance. If none ever returns a response instance, execution is delegated to a “final handler”, which determines whether or not to return an error, and, if so, what kind of error to return.”
“当您将中间件通过管道传输到应用程序时,它将被添加到队列中,并按顺序出队,直到中间件返回响应实例为止。 如果没有人返回响应实例,则将执行委派给“最终处理程序”,由该程序确定是否返回错误,如果返回,则确定返回哪种错误。
Pipe middleware can be used to create application firewalls, authentication layers, analytics programs and much more. Zend Expressive actually uses pipe middleware to perform the routing. In our app, we are going to use pipe middleware to create an application level cache.
管道中间件可用于创建应用程序防火墙,身份验证层,分析程序等。 Zend Expressive实际上使用管道中间件来执行路由。 在我们的应用程序中,我们将使用管道中间件创建应用程序级缓存。
To start, we need to obtain a caching library.
首先,我们需要获取一个缓存库。
composer require doctrine/cache ^1.5Next, we need to make the below additions to our config/autoload/dependencies.global.php file:
接下来,我们需要在config/autoload/dependencies.global.php文件中添加以下内容:
<?php

return [
    'dependencies' => [
        'factories' => [
            // ...
            Doctrine\Common\Cache\Cache::class => App\DoctrineCacheFactory::class,
        ],
    ],

    'application' => [
        'cache_path' => 'data/doctrine-cache/',
    ],
];
We have added a doctrine cache service that requires a custom factory class which we will write shortly. As the fastest way to get our app up and running is using a file system cache, we have to create a directory for this service to use.
我们添加了一个学说缓存服务,该服务需要一个自定义的工厂类,我们将在稍后编写。 由于启动和运行我们的应用程序的最快方法是使用文件系统缓存,因此我们必须创建一个目录以供该服务使用。
mkdir data/doctrine-cacheThe last change that we need to make to our configuration is to tell Zend Expressive about our middleware service and add it to the middleware pipe, before the routing takes place. Open up config/autoload/middleware-pipeline.global.php and replace it with this:
我们需要对配置进行的最后更改是在路由发生之前,告诉Zend Expressive我们的中间件服务并将其添加到中间件管道中。 打开config/autoload/middleware-pipeline.global.php并将其替换为:
<?php

return [
    'dependencies' => [
        'factories' => [
            App\Middleware\CacheMiddleware::class => App\Middleware\CacheFactory::class,
        ]
    ],

    'middleware_pipeline' => [
        'pre_routing' => [
            [ 'middleware' => App\Middleware\CacheMiddleware::class ],
        ],
        'post_routing' => [
        ],
    ],
];
Our factory for the doctrine cache will be located at src/DoctrineCacheFactory.php. If we ever needed to change the cache that our app used, all we would need to do is change this file (and its configuration) to use a different doctrine cache driver.
我们用于理论缓存的工厂位于src/DoctrineCacheFactory.php 。 如果我们需要更改应用程序使用的缓存,我们要做的就是更改此文件(及其配置)以使用其他原则的缓存驱动程序。
<?php

namespace App;

use Doctrine\Common\Cache\FilesystemCache;
use Interop\Container\ContainerInterface;
use Zend\ServiceManager\Exception\ServiceNotCreatedException;

class DoctrineCacheFactory
{
    public function __invoke(ContainerInterface $container)
    {
        $config = $container->get('config');

        if (!isset($config['application']['cache_path'])) {
            throw new ServiceNotCreatedException('cache_path must be set in application configuration');
        }

        return new FilesystemCache($config['application']['cache_path']);
    }
}
Our middleware factory, located at src/Middleware/CacheFactory.php, will inject the cache service into our middleware:
我们的中间件工厂位于src/Middleware/CacheFactory.php ,它将把缓存服务注入到我们的中间件中:
<?php

namespace App\Middleware;

use Doctrine\Common\Cache\Cache;
use Interop\Container\ContainerInterface;

class CacheFactory
{
    public function __invoke(ContainerInterface $container)
    {
        $cache = $container->get(Cache::class);
        return new CacheMiddleware($cache);
    }
}
All that leaves is the middleware itself. Create src/Middleware/CacheMiddleware.php and place the following code inside:
剩下的就是中间件本身。 创建src/Middleware/CacheMiddleware.php并将以下代码放入其中:
<?php

namespace App\Middleware;

use Doctrine\Common\Cache\Cache;
use Psr\Http\Message\ResponseInterface;
use Psr\Http\Message\ServerRequestInterface;
use Zend\Stratigility\MiddlewareInterface;

class CacheMiddleware implements MiddlewareInterface
{
    private $cache;

    public function __construct(Cache $cache)
    {
        $this->cache = $cache;
    }

    public function __invoke(ServerRequestInterface $request, ResponseInterface $response, callable $next = null)
    {
        $cachedResponse = $this->getCachedResponse($request, $response);

        if (null !== $cachedResponse) {
            return $cachedResponse;
        }

        $response = $next($request, $response);

        $this->cacheResponse($request, $response);

        return $response;
    }

    private function getCacheKey(ServerRequestInterface $request)
    {
        return 'http-cache:'.$request->getUri()->getPath();
    }

    private function getCachedResponse(ServerRequestInterface $request, ResponseInterface $response)
    {
        if ('GET' !== $request->getMethod()) {
            return null;
        }

        $item = $this->cache->fetch($this->getCacheKey($request));

        if (false === $item) {
            return null;
        }

        $response->getBody()->write($item['body']);

        foreach ($item['headers'] as $name => $value) {
            $response = $response->withHeader($name, $value);
        }

        return $response;
    }

    private function cacheResponse(ServerRequestInterface $request, ResponseInterface $response)
    {
        if ('GET' !== $request->getMethod() || !$response->hasHeader('Cache-Control')) {
            return;
        }

        $cacheControl = $response->getHeader('Cache-Control');

        $abortTokens = array('private', 'no-cache', 'no-store');

        if (count(array_intersect($abortTokens, $cacheControl)) > 0) {
            return;
        }

        foreach ($cacheControl as $value) {
            $parts = explode('=', $value);

            if (count($parts) == 2 && 'max-age' === $parts[0]) {
                $this->cache->save($this->getCacheKey($request), [
                    'body'    => (string) $response->getBody(),
                    'headers' => $response->getHeaders(),
                ], intval($parts[1]));

                return;
            }
        }
    }
}
Our middleware will first attempt to retrieve a response from the cache. If the cache contains a valid response, this response is returned and the next middleware is not called. If, however, the cache contains no valid response, the responsibility for generating a response will be passed on to the next middleware in the pipe.
我们的中间件将首先尝试从缓存中检索响应。 如果缓存包含有效的响应,则将返回此响应,并且不会调用下一个中间件。 但是,如果缓存不包含有效的响应,则生成响应的责任将传递到管道中的下一个中间件。
Before returning the final response from the pipe, it will attempt to cache it for next time. A brief check is performed to see if the response is cacheable before persisting it.
在从管道返回最终响应之前,它将尝试将其下一次缓存。 进行简短检查以查看响应在持久化之前是否可缓存。
If we go back to our index action class, we can add a cache control header to the response object that tells the cache middleware we just created to cache the response for an hour:
如果返回索引操作类,则可以向响应对象添加一个缓存控制标头,该标头告诉我们刚刚创建的用于缓存响应一个小时的缓存中间件:
public function __invoke(ServerRequestInterface $request, ResponseInterface $response, callable $next = null)
{
    $html = $this->templateRenderer->render('app::index');
    $response->getBody()->write($html);

    return $response
        ->withHeader('Content-Type', 'text/html')
        ->withHeader('Cache-Control', ['public', 'max-age=3600']);
}
This is an incredibly primitive cache that will only work when we assume that the response object returned by the later middleware in the pipe will be quite simple. There are a range of other headers that could influence how our cache should handle a response. For now, this will suffice as a demonstration of how pipe middleware can take advantage of the layered design of our application.
这是一个难以置信的原始缓存,只有当我们假设管道中的后续中间件返回的响应对象非常简单时,该缓存才起作用。 还有许多其他标头可能会影响我们的缓存应如何处理响应。 现在,这足以说明管道中间件如何利用我们的应用程序的分层设计。
Whilst developing our app, it might be worth disabling the cache control header to prevent the caching of old responses. If we need to clear the cache, we can use the command:
在开发我们的应用程序时,可能有必要禁用缓存控制标头以防止缓存旧响应。 如果需要清除缓存,可以使用以下命令:
rm -rf data/doctrine-cache/*It should be noted that the Cache-Control header activates client side caching. Our browser will remember responses stored in its own cache, even after they have been removed from the server cache.
应该注意的是, Cache-Control标头激活了客户端缓存。 即使从服务器缓存中删除了响应,我们的浏览器也会记住存储在其自己的缓存中的响应。
集成NASA API (Integrating the NASA API)
Whilst we could use the NASA API directly, there are several complications to this approach. The two major ones are that the NASA API does not provide any method to retrieve collections of results or obtain thumbnails. Our solution is to use a wrapper API that has been created specifically for this article.
尽管我们可以直接使用NASA API,但是这种方法存在一些复杂性。 两个主要方面是NASA API不提供任何方法来检索结果集合或获取缩略图。 我们的解决方案是使用专门为本文创建的包装API 。
Run the following command in the project root:
在项目根目录中运行以下命令:
composer require andrewcarteruk/astronomy-picture-of-the-day ^0.1Make the following additions to the config/autoload/dependencies.global.php file:
在config/autoload/dependencies.global.php文件中添加以下内容:
<?php

return [
    'dependencies' => [
        'factories' => [
            // ...
            AndrewCarterUK\APOD\APIInterface::class => App\APIFactory::class,
        ],
    ],
    'application' => [
        // ...
        'results_per_page' => 24,
        'apod_api' => [
            'store_path' => 'public/apod',
            'base_url' => '/apod',
        ],
    ],
];
We will also need to create a local dependencies file at config/autoload/dependencies.local.php:
我们还需要在config/autoload/dependencies.local.php创建一个本地依赖文件:
<?php

return [
    'application' => [
        'apod_api' => [
            'api_key' => 'DEMO_KEY',
            // DEMO_KEY might be good for a couple of requests
            // Get your own here: https://api.nasa.gov/index.html#live_example
        ],
    ],
];
And add the following routes to the config/autoload/routes.global.php file:
并将以下路由添加到config/autoload/routes.global.php文件:
<?php

return [
    'dependencies' => [
        // ...
        'factories' => [
            // ...
            App\Action\PictureListAction::class => App\Action\PictureListFactory::class,
        ],
    ],
    'routes' => [
        // ...
        [
            'name' => 'picture-list',
            'path' => '/picture-list[/{page:\d+}]',
            'middleware' => App\Action\PictureListAction::class,
            'allowed_methods' => ['GET'],
        ],
    ],
];
So what do these changes to our configuration do? Well, we have added a route that we can use to list recent pictures from the NASA API. This route accepts an optional integer page attribute which we can use for pagination. We have also created services for our API wrapper and the action that we will attach to this route.
那么这些对我们配置的更改做了什么? 好了,我们添加了一条路线,可以用来列出NASA API中的最新图片。 该路由接受一个可选的整数页面属性,我们可以将其用于分页。 我们还为API包装器和将附加到此路由的操作创建了服务。
We will need to make the store path that we specify in the apod_api key and, if applicable, add the path to the .gitignore file. The API wrapper will store thumbnails in this directory so it must exist within the public directory, otherwise it will not be able to create public URLs for the thumbnails.
我们将需要创建在apod_api键中指定的存储路径,并在适用时将路径添加到.gitignore文件。 API包装器会将缩略图存储在此目录中,因此它必须存在于public目录中,否则它将无法为缩略图创建公共URL。
mkdir public/apodThe factory for the API is quite simple. Create a file at src/APIFactory.php and place the following code inside:
API的工厂非常简单。 在src/APIFactory.php创建一个文件,并将以下代码放入其中:
<?php

namespace App;

use AndrewCarterUK\APOD\API;
use GuzzleHttp\Client;
use Interop\Container\ContainerInterface;
use Zend\ServiceManager\Exception\ServiceNotCreatedException;

class APIFactory
{
    public function __invoke(ContainerInterface $container)
    {
        $config = $container->get('config');

        if (!isset($config['application']['apod_api'])) {
            throw new ServiceNotCreatedException('apod_api must be set in application configuration');
        }

        return new API(new Client, $config['application']['apod_api']);
    }
}
The API wrapper uses Guzzle to make HTTP requests to the API endpoint. All we need to do is inject a client instance and the configuration from our config service and we are good to go!
API包装器使用Guzzle向API端点发出HTTP请求。 我们要做的就是从config服务中注入客户端实例和配置,我们一切顺利!
The action that will handle the routes that we have just created will need to be injected with the API service. Our action factory will be located at /src/Action/PictureListFactory.php and should look like this:
需要处理刚刚创建的路由的操作将需要注入API服务。 我们的动作工厂将位于/src/Action/PictureListFactory.php并且应如下所示:
<?php

namespace App\Action;

use AndrewCarterUK\APOD\APIInterface;
use Interop\Container\ContainerInterface;
use Zend\ServiceManager\Exception\ServiceNotCreatedException;

class PictureListFactory
{
    public function __invoke(ContainerInterface $container)
    {
        $apodApi = $container->get(APIInterface::class);
        $config  = $container->get('config');

        if (!isset($config['application']['results_per_page'])) {
            throw new ServiceNotCreatedException('results_per_page must be set in application configuration');
        }

        return new PictureListAction($apodApi, $config['application']['results_per_page']);
    }
}
Now all that is left is the action itself. Create src/Action/PictureListAction.php and place the following code inside:
现在剩下的就是动作本身。 创建src/Action/PictureListAction.php并将以下代码放入其中:
<?php

namespace App\Action;

use AndrewCarterUK\APOD\APIInterface;
use Psr\Http\Message\ServerRequestInterface;
use Psr\Http\Message\ResponseInterface;
use Zend\Stratigility\MiddlewareInterface;

class PictureListAction implements MiddlewareInterface
{
    private $apodApi;
    private $resultsPerPage;

    public function __construct(APIInterface $apodApi, $resultsPerPage)
    {
        $this->apodApi        = $apodApi;
        $this->resultsPerPage = $resultsPerPage;
    }

    public function __invoke(ServerRequestInterface $request, ResponseInterface $response, callable $out = null)
    {
        $page     = intval($request->getAttribute('page')) ?: 0;
        $pictures = $this->apodApi->getPage($page, $this->resultsPerPage);

        $response->getBody()->write(json_encode($pictures));

        return $response
            // ->withHeader('Cache-Control', ['public', 'max-age=3600'])
            ->withHeader('Content-Type', 'application/json');
    }
}
All this action does is retrieve a page of pictures from the API and export the result as JSON. The example shows how to add a cache control header to the response for our cache middleware, however, it is best to leave this commented out during development.
所有这些操作只是从API检索图片页面并将结果导出为JSON。 该示例显示了如何将缓存控制标头添加到我们的缓存中间件的响应中,但是,最好在开发过程中将此注释保留下来。
Now, all that we need to do is create a utility for populating our store. The file below can be run in the command line. It obtains the container from the configuration, installs a signal handler so that it can shutdown cleanly and runs the updateStore method from the API wrapper. Create it at bin/update.php.
现在,我们要做的就是创建一个用于填充商店的实用程序。 下面的文件可以在命令行中运行。 它从配置中获取容器,安装信号处理程序,以便可以干净地关闭并从API包装器运行updateStore方法。 在bin/update.php创建它。
<?php

chdir(__DIR__.'/..');

include 'vendor/autoload.php';

$container = include 'config/container.php';

// Create a SIGINT handler that sets a shutdown flag
$shutdown = false;

declare(ticks = 1);
pcntl_signal(SIGINT, function () use (&$shutdown) {
    $shutdown = true;
});

$newPictureHandler = function (array $picture) use (&$shutdown) {
    echo 'Added: ' . $picture['title'] . PHP_EOL;

    // If the shutdown flag has been set, die
    if ($shutdown) {
        die;
    }
};

$errorHandler = function (Exception $exception) use (&$shutdown) {
    echo (string) $exception . PHP_EOL;

    // If the shutdown flag has been set, die
    if ($shutdown) {
        die;
    }
};

$container->get(AndrewCarterUK\APOD\APIInterface::class)->updateStore(20, $newPictureHandler, $errorHandler);
Now we can run the command below to update our store with the pictures of the last 20 days from the API. This can take a while, but as the store is updated we should be able to monitor the /picture-list route in our browsers to see a JSON feed of pictures. It may be worth disabling the cache headers on the response whilst monitoring the feed, otherwise it will not appear to be updating!
现在,我们可以运行以下命令,以使用API中最近20天的图片更新商店。 这可能需要一段时间,但是随着商店的更新,我们应该能够在浏览器中监视/picture-list路由,以查看图片的JSON提要。 在监视提要的同时禁用响应上的缓存头可能是值得的,否则它似乎不会更新!
Make sure that you get your own API key off NASA, the DEMO_KEY will hit a request limit very quickly and start returning 429 response codes.
确保您从NASA获得了自己的API密钥 ,DEMO_KEY将很快达到请求限制,并开始返回429响应代码。
php bin/update.phpIf we want our app to update automatically, we will need to set this command to run daily. We should also change the first parameter of the updateStore method call to 1, so that it only tries to download today’s picture.
如果我们希望我们的应用程序自动更新,则需要将此命令设置为每天运行。 我们还应该将updateStore方法调用的第一个参数更改为1 ,以便它仅尝试下载今天的图片。
And that is where our journey ends (or begins!) with Zend Expressive for this app. All that is left to do is to modify our templates to use AJAX to load pictures from our new routes. The AstroSplash repository shows one way of doing this (templates/app/index.phtml and templates/layout/default.phtml) – but this is where we get to put a personal touch on our app, so do have a play!
这就是我们的旅程使用Zend Expressive结束(或开始!)的地方。 剩下要做的就是修改我们的模板,以使用AJAX从新路线中加载图片。 AstroSplash存储库显示了一种执行此操作的方法( templates/app/index.phtml和templates/layout/default.phtml )–但这是我们可以对我们的应用程序进行个性化处理的地方,所以一定要发挥作用!
摘要 (Summary)
Using a middleware oriented framework such as Zend Expressive lets us design our application in layers. In the simplest form, we can use route middleware to imitate the controller actions that we might be familiar with from other frameworks. However, the power of middleware lies in its ability to intercept and modify requests and responses at all stages of the application.
使用面向中间件的框架(例如Zend Expressive),我们可以分层设计应用程序。 以最简单的形式,我们可以使用路由中间件来模仿其他框架可能熟悉的控制器操作。 但是,中间件的功能在于它能够拦截和修改应用程序各个阶段的请求和响应。
Zend Expressive is a brilliant framework as it tries to get out of your way. All of the code that we have written could be very easily transferred to work in a different framework, or even used in an application without a framework.
Zend Expressive是一个出色的框架,它试图摆脱阻碍。 我们编写的所有代码都可以很容易地转移到其他框架中工作,甚至可以在没有框架的应用程序中使用。
The variety of components that are supported out of the box by Zend Expressive make it very difficult to dislike anything about the framework; any component that we are not happy with can be easily changed. Currently, the framework supports three routers (FastRoute, Aura.Router, ZF2 Router), three containers (Zend ServiceManager, Pimple, Aura.DI) and three templating engines (Plates, Twig, Zend View).
Zend Expressive开箱即用地支持各种组件,这使得很难不喜欢该框架。 我们不满意的任何组件都可以轻松更改。 当前,该框架支持三个路由器( FastRoute , Aura.Router , ZF2 Router ),三个容器( Zend ServiceManager , Pimple , Aura.DI )和三个模板引擎( Plates , Twig , Zend View )。
On top of all of this, the Zend Expressive documentation contains in-depth documentation on the framework and all of the support components. It also contains handy quick start guides for getting up and running straight away.
最重要的是, Zend Expressive文档包含有关框架和所有支持组件的深入文档。 它还包含方便的快速入门指南,可立即起床和运行。
Have you tried it? Did you follow along? What do you like / dislike about Zend Expressive? Let us know in the comments below, and be sure to hit that like button if you found this tutorial useful!
你有试过吗 你有跟进吗? 您喜欢/不喜欢Zend Expressive? 让我们在下面的评论中知道,如果您发现本教程有用,请确保单击“点赞”按钮!
翻译自: https://www.sitepoint.com/build-nasa-photo-gallery-zend-expressive/


 623
623

 被折叠的 条评论
为什么被折叠?
被折叠的 条评论
为什么被折叠?
 到【灌水乐园】发言


