


predictionio
In this tutorial, I’m going to walk you through PredictionIO, an open-source machine learning server, which allows you to create applications that could do the following:
在本教程中,我将向您介绍PredictionIO ,这是一个开放源代码的机器学习服务器,它使您可以创建可以执行以下操作的应用程序:
- recommend items (e.g. movies, products, food) 推荐物品(例如电影,产品,食物)
- predict user behavior 预测用户行为
- identify item similarity 识别项目相似性
- rank items 排名项目

You can pretty much build any machine learning application with ease using PredictionIO. You don’t have to deal with numbers and algorithms and you can just concentrate on building the app itself.
您可以使用PredictionIO轻松构建任何机器学习应用程序。 您不必处理数字和算法,而可以专注于构建应用程序本身。
Note that this two-part tutorial is a revival of our older PredictionIO post which, due to some changes in the tool, is no longer accurate to such a degree it warranted a full rewrite.
请注意,本教程分为两部分,是对我们较早的PredictionIO帖子的复兴,由于该工具的某些更改,该帖子不再准确到可以完全重写的程度。
安装与配置 (Installation and Configuration)
The first thing that you need to do is install PredictionIO and its dependencies. You can do that in one of the following ways:
您需要做的第一件事是安装PredictionIO及其依赖项。 您可以通过以下方式之一进行操作:
- Quick Install Script 快速安装脚本
- Manual Install 手动安装
We’ll install using the Vagrant method. This way we can play with PredictionIO locally without having to deal with installation headaches. If you’re feeling adventurous, however, feel free to to pick any installation method mentioned in their documentation. Or, if you already have an existing Homestead Improved setup, you can use that instead and then install PredictionIO with the quick install script.
我们将使用Vagrant方法安装。 这样,我们可以在本地使用PredictionIO,而无需处理安装难题。 但是,如果您喜欢冒险,请随意选择其文档中提到的任何安装方法。 或者,如果您已有现有的Homestead Improvementd设置 ,则可以改用该设置 ,然后使用快速安装脚本安装PredictionIO。
To install PredictionIO with Vagrant, open a terminal and execute the following command to clone the Vagrant file for bringing up the PredictionIO virtual machine.
要将PredictionIO与Vagrant一起安装,请打开终端并执行以下命令来克隆Vagrant文件,以启动PredictionIO虚拟机。
git clone https://github.com/PredictionIO/PredictionIO-Vagrant.gitOnce done, navigate to the directory and switch to the master branch:
完成后,导航到目录并切换到master分支:
cd PredictionIO-Vagrant/
git checkout master
Open the Vagrantfile and change the cpu execution cap and memory setting if you want. By default memory is set to 2048mb and cpu execution cap is 90. If you have more memory and a powerful processor, bump this up to a higher value. Note that cpuexecutioncap can only have a value of up to 100. The default value of 90 here means that a single virtual CPU can use up to 90% of a single host CPU.
如果需要,请打开Vagrantfile并更改cpu执行上限和内存设置。 默认情况下,内存设置为2048mb ,cpu执行上限为90 。 如果您有更多的内存和强大的处理器,请将其提高到更高的值。 请注意, cpuexecutioncap的值最多只能为100 。 这里的默认值90表示单个虚拟CPU最多可以使用单个主机CPU的90%。
config.vm.provider "virtualbox" do |v|
    v.customize ["modifyvm", :id, "--cpuexecutioncap", "90", "--memory", "2048"]
end
In order to expose the virtual machine to the host machine, you need to comment out the following line. Feel free to change the value for the ip if you want.
为了将虚拟机公开给主机,您需要注释掉以下行。 如果需要,可以随时更改ip的值。
config.vm.network :private_network, ip: "192.168.33.10"You can then edit the host file of the host machine to point out to this IP address. This way you can access the app at, for example, http://movierec.dev on the browser.
然后,您可以编辑主机的主机文件以指向该IP地址。 这样,您可以在浏览器上的http://movierec.dev上访问该应用程序。
192.168.33.10 movierec.devOnce you’re done configuring the Vagrantfile, save it then execute the following command to boot up the virtual machine:
完成Vagrantfile配置Vagrantfile ,保存它,然后执行以下命令以启动虚拟机:
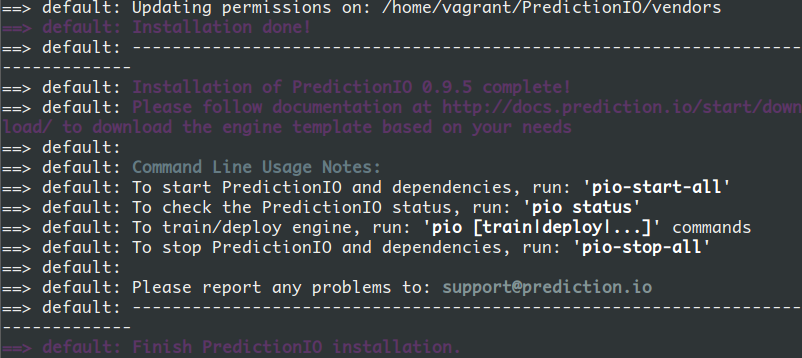
vagrant upSince this is the first time that you’ve run the command, it will go ahead and execute the installation commands in the provisioning file (provision.sh) which, if you take a look at it, is basically using the quick install script. And if PredictionIO is already installed, it will simply start it with the pio-start-all command. This will start PredictionIO and all of its dependencies.
由于这是您第一次运行该命令,因此它将继续执行预配置文件( provision.sh )中的安装命令,如果您看一下,它基本上是在使用快速安装脚本。 如果已经安装了PredictionIO,则只需使用pio-start-all命令将其pio-start-all 。 这将启动PredictionIO及其所有依赖项。
电影数据库API (The Movie DB API)
Since we are building a movie recommendation app, we need to have a decent list of movies that we can use for our app. For that, we will use the movie DB API.
由于我们正在构建电影推荐应用程序,因此我们需要有一个不错的电影列表,我们可以将其用于我们的应用程序。 为此,我们将使用movie DB API 。
In order to get access to their API, you first have to sign up for an account on their website. On your account page, click on the API link. You will then be prompted to enter your personal information along with the type of use. Once you’re done, you will get an email containing the API key that you can use to perform requests.
为了访问他们的API,您首先必须在他们的网站上注册一个帐户。 在您的帐户页面上,单击API链接。 然后将提示您输入您的个人信息以及使用类型。 完成后,您将收到一封电子邮件,其中包含可用于执行请求的API密钥。
应用概述 (Overview of the App)
Before we build the app, I’ll first provide you with an overview. The app should be as simple as possible so we’ll only implement two essential features:
在构建应用程序之前,我将首先为您提供概述。 该应用程序应尽可能简单,因此我们将仅实现两个基本功能:
learning phase – this is the part where the app will randomly pick a specific movie from the database and show it to the user. We will then ask the user for on input whether he likes or dislikes the movie.
学习阶段 –这是应用程序从数据库中随机挑选特定电影并将其显示给用户的部分。 然后,我们将要求用户输入是否喜欢或不喜欢这部电影。
recommendation phase – this is the part where the app would recommend movies based on the inputs made by the user in the learning phase.
推荐阶段 –这是应用程序根据用户在学习阶段的输入来推荐电影的部分。
If you’re more of a visual person, here’s what the learning phase looks like:
如果您更像一个有视觉感的人,那么学习阶段如下所示:

And here’s the recommendation phase:
这是推荐阶段:

We won’t be implementing a log in system. This means that each time the app is accessed in the browser, the user is considered to be a new one. The user’s session will be kept intact throughout the learning phase and will only be cleared after showing the user a list of recommended movies.
我们将不会实施登录系统。 这意味着每次在浏览器中访问该应用程序时,该用户就被视为新用户。 在整个学习阶段,用户的会话将保持不变,并且仅在向用户显示推荐电影列表后才会清除。
创建推荐引擎 (Creating the Recommendation Engine)
PredictionIO works by utilizing engines. Engines are responsible for making predictions. They contain machine learning algorithms used for crunching the data provided by an app. It can then respond to prediction queries after the machine learning algorithm has done its job.
PredictionIO通过利用引擎来工作。 引擎负责做出预测。 它们包含用于处理应用程序提供的数据的机器学习算法。 然后,它可以在机器学习算法完成其工作之后响应预测查询。
The PredictionIO team already provides official template engines which can do things like rank products, e-commerce recommendation, recommend similar products, classify items, generic recommendation, and many others. The more advanced PredictionIO users have also created their own engines. These engines can be found at templates.prediction.io. In this tutorial, we’re going to use the generic recommendation engine. You can install an engine by using the pio template get command. This requires two arguments: the ID of the engine and the name that you want to give to the engine.
PredictionIO团队已经提供了官方模板引擎,可以执行诸如对产品进行排名,电子商务推荐,推荐类似产品,对商品进行分类,通用推荐等工作。 更高级的PredictionIO用户还创建了自己的引擎。 这些引擎可以在template.prediction.io中找到。 在本教程中,我们将使用通用推荐引擎 。 您可以使用pio template get命令安装引擎。 这需要两个参数:引擎的ID和您要赋予引擎的名称。
pio template get PredictionIO/template-scala-parallel-recommendation RecommendationEngineNote: This will ask you to enter the template’s Scala package name. You can enter anything you want here. A good convention to use is com. and then your name. After that, it will install the engine in the current directory. So if you want to organize things a little bit, you can create a folder named predictionio-engines and put all your engines in there.
注意:这将要求您输入模板的Scala软件包名称。 您可以在此处输入任何内容。 com.是一个很好的约定com. 然后是你的名字 之后,它将引擎安装在当前目录中。 因此,如果您想进行一些整理,可以创建一个名为predictionio-engines的文件夹,并将所有引擎放在其中。
Once the engine has been created, we need to update it so it can handle custom events. The default configuration of the recommendation engine only handles ratings given to a specific item. For this movie recommendation app, we will only have the user like or dislike a random movie. We can configure it by editing the src/main/scala/DataSource.scala file which you can find in the root of the engine directory.
创建引擎后,我们需要对其进行更新,以便它可以处理自定义事件。 推荐引擎的默认配置仅处理赋予特定项目的等级。 对于此电影推荐应用,我们只会让用户喜欢或不喜欢随机电影。 我们可以通过编辑src/main/scala/DataSource.scala文件来配置它,您可以在引擎目录的根目录中找到该文件。
Once you have the file opened, look for the eventNames variable and set its value to Some(List("like", "dislike")). Next, look for the ratingValue variable and set its type and value to the following:
打开文件后,查找eventNames变量并将其值设置为Some(List("like", "dislike")) 。 接下来,查找ratingValue变量并将其类型和值设置为以下内容:
Double = event.event match {
  case "like" => 5.0
  case "dislike" => 1.0
  case _ => throw new Exception(s"Unexpected event ${event} is read.")
}
Here’s a side by side comparison of the default one and the updated one:
这是默认值和更新后值的并排比较:
//default
eventNames = Some(List("rate", "buy")),

//updated
eventNames = Some(List("like", "dislike")),

//default
val ratingValue: Double = event.event match {
  case "rate" => event.properties.get[Double]("rating")
  case "buy" => 4.0 // map buy event to rating value of 4
  case _ => throw new Exception(s"Unexpected event ${event} is read.")
}

//updated
val ratingValue: Double = event.event match {
  case "like" => 5.0
  case "dislike" => 1.0
  case _ => throw new Exception(s"Unexpected event ${event} is read.")
}
创建一个新的PredictionIO App (Creating a New PredictionIO App)
For every app where we want to use PredictionIO, there’s a counterpart PredictionIO app. There can be more than one app hosted on a single server so this is used to identify each app. You can create a new app by using the pio app new command.
对于我们要使用PredictionIO的每个应用程序,都有一个对应的PredictionIO应用程序。 单个服务器上可以托管多个应用程序,因此可用于识别每个应用程序。 您可以使用pio app new命令创建一个新应用。
pio app new MovieRecommendationAppThis will return an access key which we can use in the app that we’re going to create. You can take note of the access key now or you can use the pio app list command later to list all the apps that you currently have.
这将返回一个访问密钥,我们可以在将要创建的应用程序中使用它。 您可以立即记下访问键,也可以稍后使用pio app list命令列出当前拥有的所有应用程序。
安装依赖项 (Installing Dependencies)
Now we’re ready to build the app. We will be using the Lumen Microframework for this app. You can install it by using the create-project command provided by Composer:
现在我们准备构建该应用程序。 我们将为此应用程序使用Lumen Microframework 。 您可以使用Composer提供的create-project命令来安装它:
composer create-project laravel/lumen blog "5.1.*"Once that’s done, we can update the composer.json file inside the lumen directory so we can install the other dependencies. The require object should now look like this:
完成后,我们可以更新lumen目录中的composer.json文件,以便我们可以安装其他依赖项。 现在,require对象应如下所示:
"require": {
    "laravel/lumen-framework": "5.1.*",
    "vlucas/phpdotenv": "~1.0",
    "predictionio/predictionio": "~0.8.2",
    "elasticsearch/elasticsearch": "~1.0",
    "guzzlehttp/guzzle": "~5.0"
},
The laravel/lumen-framework and vlucas/phpdotenv are there by default since we installed lumen using composer create-project. The other dependencies that we have are the following:
laravel/lumen-framework和vlucas/phpdotenv默认存在,因为我们使用composer create-project安装了流明。 我们拥有的其他依赖项如下:
predictionio/predictionio– the PredictionIO PHP SDK. This allows us to talk to the PredictionIO server.predictionio/predictionio- PredictionIO PHP SDK 。 这使我们可以与PredictionIO服务器对话。elasticsearch/elasticsearch– an elasticsearch client for PHP. We use this to save and retrieve movie details.elasticsearch/elasticsearch- PHP的elasticsearch客户端 。 我们使用它来保存和检索电影详细信息。guzzlehttp/guzzle– an HTTP client for PHP. We use this to make requests to the TMDB API.guzzlehttp/guzzle- PHP的HTTP客户端 。 我们使用它向TMDB API发出请求。
After that, all we need to do is execute composer install.
之后,我们需要做的就是执行composer install 。
结论 (Conclusion)
In this introductory part, we’ve learned how to set up PredictionIO, all while customizing the recommendation engine and installing the dependencies. Stay tuned for the next part, where we will start building the movie recommendation app.
在此介绍性的部分中,我们学习了如何设置PredictionIO,同时自定义推荐引擎和安装依赖项。 请继续关注下一部分,我们将在此开始构建电影推荐应用程序。
翻译自: https://www.sitepoint.com/predictionio-bootstrapping-a-movie-recommendation-app/
predictionio


 1201
1201

 被折叠的 条评论
为什么被折叠?
被折叠的 条评论
为什么被折叠?
 到【灌水乐园】发言


