


The PHP community started to adopt the testing culture relatively recently. Despite there being some debates on how to achieve this, nobody can argue the importance of having your code fully covered by tests. In this article, we’re going to explore a tool that will help you in a major part of the testing culture called continuous testing. As described on Wikipedia:
PHP社区最近才开始采用测试文化。 尽管关于如何实现此目标存在一些争论,但是没有人可以争论让代码完全被测试覆盖的重要性。 在本文中,我们将探索一种工具,该工具将在称为“ 持续测试 ”的测试文化的主要部分中为您提供帮助。 如Wikipedia所述:
Continuous testing is the process of executing automated tests as part of the software delivery pipeline to obtain immediate feedback on the business risks associated with a software release candidate.
连续测试是作为软件交付管道的一部分执行自动化测试的过程,以获取有关与候选软件版本相关的业务风险的即时反馈。
Sismo is a small component which you can easily integrate with your projects to make the process of continuous testing easier. Sismo’s main focus is to run your tests and send you status notifications. That’s all!
Sismo是一个很小的组件,您可以轻松地将其与项目集成,从而使连续测试的过程更加轻松。 Sismo的主要重点是运行测试并向您发送状态通知。 就这样!

如何安装 (How to Install)
The Sismo project is available on GitHub and contains a compile script that you can run to generate a single file called sismo.php.
Sismo项目在GitHub上可用,并且包含一个compile脚本,您可以运行该compile脚本来生成一个名为sismo.php文件。
The other way is to download the file directly from the project’s website and add it to your project.
另一种方法是直接从项目的网站下载文件并将其添加到您的项目中。
配置Sismo (Configuring Sismo)
To run Sismo, you need to have a configuration file which tells it how to run your tests and where to run them.
要运行Sismo,您需要有一个配置文件,该文件告诉它如何运行测试以及在何处运行测试。
// tests/sismo-config.php

$projects = array();
$projects[] = new Sismo\Project('500px API (master branch)', __DIR__.'/../');

return $projects;
Now, we run sismo.php from the commandline.
现在,我们从命令行运行sismo.php 。
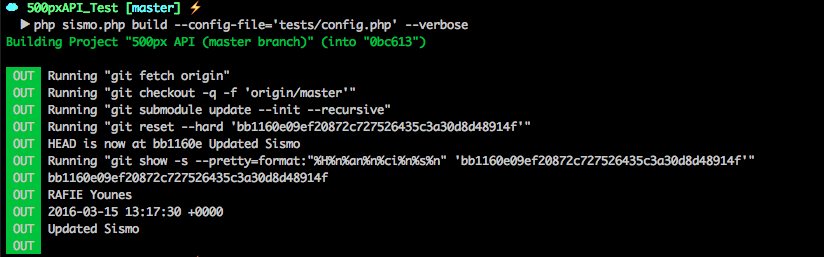
php sismo.php build --config-file='tests/config.php'

# The --verbose option will tell you what the command is doing.
php sismo.php build --config-file='tests/config.php' --verbose
If you don’t specify your config.php file in the command, Sismo will look for it under the user directory ~/.sismo/config.php. You can also specify it using an environment variable that you can set using the command line:
如果您未在命令中指定config.php文件,Sismo将在用户目录~/.sismo/config.php下查找该文件。 您还可以使用可在命令行中设置的环境变量来指定它:
export SISMO_CONFIG_PATH="tests/config.php"The data path is where Sismo stores the projects temporarily to run tests. You can use the --data-path option directly in the command or use the SISMO_DATA_PATH environment variable to update it.
数据路径是Sismo临时存储项目以运行测试的位置。 您可以直接在命令中使用--data-path选项,也可以使用SISMO_DATA_PATH环境变量进行更新。
php sismo.php build --config-file='tests/config.php' --data-path='.sismo/data' --verbose
If you’re working on a new feature or creating a patch for a bug, you can tell Sismo which branch to run the command on.
如果您正在开发新功能或为错误创建补丁,则可以告诉Sismo在哪个分支上运行命令。
// tests/config.php

$projects = array();

$pxProject = new Sismo\Project('500px API (master branch)', __DIR__.'/../');
$pxProject->setBranch('master');

$projects[] = $pxProject;

return $projects;
By default, Sismo will run the phpunit command, but you can change this using the setCommand method when configuring your project. You may also specify a bash statement, because it will directly be run on the terminal.
默认情况下,Sismo将运行phpunit命令,但是您可以在配置项目时使用setCommand方法更改此命令。 您还可以指定bash语句,因为它将直接在终端上运行。
// tests/config.php

$pxProject->setCommand('./vendors.sh; phpunit');
In our case, we have the project on our local machine, but Sismo supports GitHub, Bitbucket and SSH (remote) hosted projects.
在我们的例子中,我们在本地计算机上有项目,但是Sismo支持GitHub,Bitbucket和SSH(远程)托管项目。
// tests/config.php

$projects = array();

$pxProject = new Sismo\GithubProject('500px API (master branch)', 'whyounes/500pxAPI_Test');
$pxProject->setBranch('master');
$projects[] = $pxProject;

return $projects;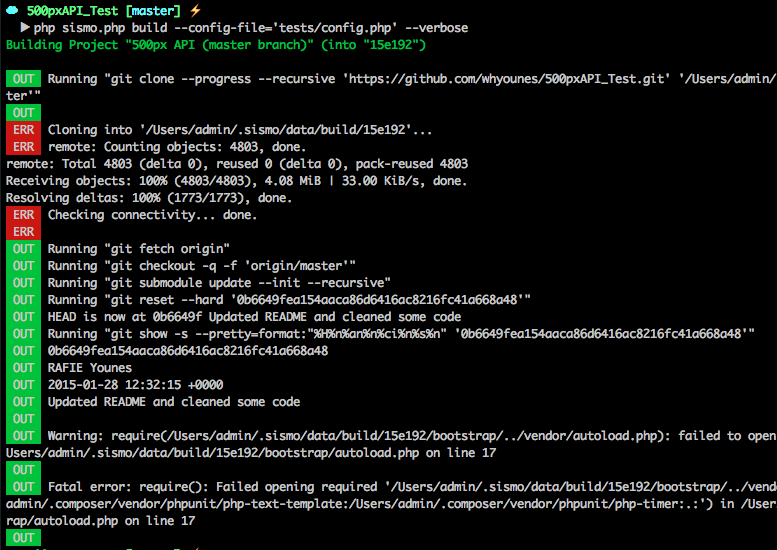
使用通知器 (Using Notifiers)
Sismo has a list of notifiers that you can use to notify you about the build status. The most common way type is via email, but the same example applies for IRC, GitHub, etc.
Sismo具有通知者列表,您可以使用这些通知者来通知您构建状态。 最常见的方式是通过电子邮件,但是同一示例适用于IRC,GitHub等。
// tests/config.php

$projects = array();
$mailNotifier = new Sismo\Notifier\MailNotifier('example@gmail.com');

$pxProject = new Sismo\Project('500px API (master branch)', __DIR__."/..");
$pxProject->setBranch('master');
$pxProject->addNotifier($mailNotifier);
$projects[] = $pxProject;

return $projects;
创建自定义通知程序 (Creating Custom Notifiers)
To create our own notifier, we need to extend the Sismo\Notifier\Notifier abstract class and define the notify method. We’re going to create a notifier for Slack, which will notify our team on the chat channel about the build status.
要创建自己的通知程序,我们需要扩展Sismo\Notifier\Notifier抽象类并定义notify方法。 我们将为Slack创建一个通知程序,该通知程序将在聊天频道上通知我们的团队构建状态。
After cloning the Sismo repository from GitHub, you’ll find a folder under the Sismo namespace where contributors can add their custom notifiers.
从GitHub克隆Sismo存储库后,您将在Sismo名称空间下找到一个文件夹,供Sismo在其中添加其自定义通知程序。
To post a message to Slack, we need a token, channel name, and an optional username. You can check the documentation for the list of available parameters.
要将消息发布到Slack,我们需要令牌,频道名称和可选的用户名。 您可以查看文档以获取可用参数列表。
class SlackNotifier extends Notifier
{
    protected $token;
    protected $channel;
    protected $username;

    protected $apiEndpoint = "https://slack.com/api/chat.postMessage";
    protected $messageFormat = "%author% - %name% - %message% - %status%";

    /**
     * Constructor.
     *
     * @param string       $token
     * @param string       $channel
     * @param string       $username
     */
    public function __construct($token, $channel, $username = null)
    {
        $this->token = $token;
        $this->channel = $channel;
        $this->username = $username;
    }

    public function notify(Commit $commit)
    {
        return $this->sendMessage($commit);
    }
}
The notify method will receive a Commit containing all the details about the tested commit. We can also use the Notifier@format method to format the commit message using the messageFormat attribute.
notify方法将收到一个Commit其中包含有关已测试提交的所有详细信息。 我们还可以使用Notifier@format方法通过messageFormat属性来格式化提交消息。
class SlackNotifier extends Notifier
{
    //...

    /**
     * Format commit message using the message format
     * @param  Commit $commit
     * @return string
     */
    protected function getCommitMessage($commit)
    {
        $message = $this->format($this->messageFormat, $commit);

        return $message;
    }

    /**
     * Push message to Slack
     * @param  Commit $commit
     * @return bool|string The response message, or false if an error occured.
     */
    protected function sendMessage($commit)
    {
        $curlData = [
            "token"     => $this->token,
            "channel"   => $this->channel,
            "username"  => $this->username ?: "Sismo Bot",
            "text"      => $this->getCommitMessage($commit)
        ];
        $url = $this->apiEndpoint . "?" . http_build_query($curlData);
        $output = file_get_contents($url);

        return $output;
    }
}
存储构建信息 (Storing Build Information)
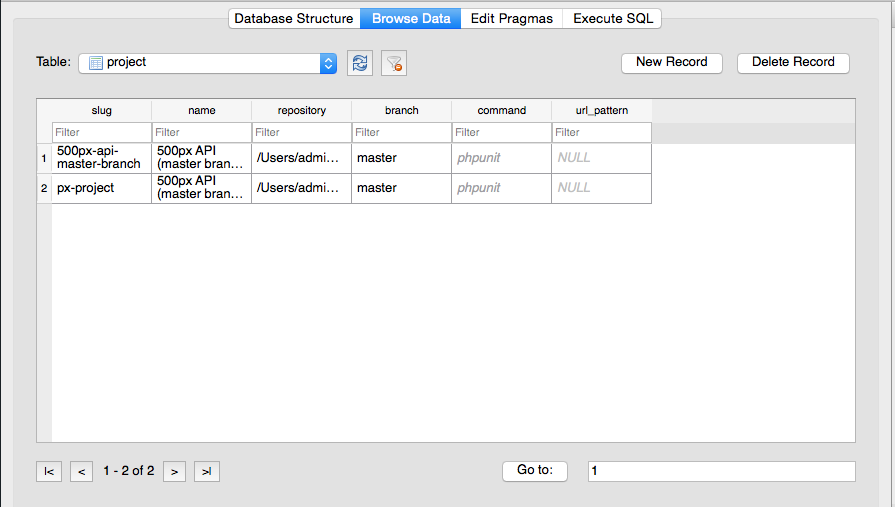
Sismo stores all the test information inside an SQLite database that we can find under the data folder. We can use it for debugging or inspect it if something went wrong with the application while testing.
Sismo将所有测试信息存储在SQLite数据库中,我们可以在data文件夹下找到该数据库。 我们可以将其用于调试或在测试过程中检查应用程序是否出现问题。
We can also run a built-in PHP server php sismo.php run localhost:9000 to browse our projects and build statuses.
我们还可以运行内置PHP服务器php sismo.php run localhost:9000来浏览我们的项目并构建状态。
使用Git挂钩 (Using Git Hooks)
A useful trick that could automate the process a little bit further is to attach Sismo directly to our Git process, and make it run whenever we commit new changes. Git hooks are scripts stored under the .git/hooks directory. We’ll use the post-commit hook to run Sismo. You can read more about Git hooks here, here and here.
一个可以使流程进一步自动化的有用技巧是将Sismo直接附加到我们的Git流程,并在我们提交新更改时使其运行。 Git挂钩是存储在.git/hooks目录下的脚本。 我们将使用post-commit挂钩来运行Sismo。 您可以在这里 , 这里和这里阅读有关Git钩子的更多信息。
#!/bin/bash

rootDir=$(git rev-parse --show-toplevel)
export SISMO_CONFIG_PATH="$rootDir/tests/config.php"

cd $rootDir
php sismo.php build --verbose
The rootDir variable holds the root path to our project, and we use it to set the SISMO_CONFIG_PATH environment variable like we mentioned earlier. That’s it! The script will run after every commit.
rootDir变量保存了我们项目的根路径,就像前面提到的,我们使用它来设置SISMO_CONFIG_PATH环境变量。 而已! 该脚本将在每次提交后运行。
结论 (Conclusion)
Sismo does one thing, and does it well. In this article, we saw how we can integrate it with our development cycle and how to configure the notification system. If you’ve used Sismo before, let us know your experience with it! If you have any questions or comments, make sure to post them below and I’ll do my best to answer them!
Sismo做一件事,并且做得很好。 在本文中,我们了解了如何将其与我们的开发周期集成以及如何配置通知系统。 如果您以前使用过Sismo,请告诉我们您的使用经验! 如果您有任何问题或意见,请确保将其张贴在下面,我将尽力回答!
翻译自: https://www.sitepoint.com/continuous-testing-with-sismo/


 1090
1090

 被折叠的 条评论
为什么被折叠?
被折叠的 条评论
为什么被折叠?
 到【灌水乐园】发言


