svg 中插入svg_WordPress SVG支持:如何在WordPress中启用SVG

svg 中插入svg

Vector images are becoming increasingly common on the web. SVGs provide a scalable, responsive and fast alternative to standard images with the primary benefit being that they look crisp and sharp across any device and they are typically smaller in file size.

矢量图像在网络上变得越来越普遍。 SVG提供了可伸缩,响应Swift的替代标准图像的功能,主要优点是它们在任何设备上看起来都清晰明快,并且文件大小通常较小。

Cross-browser support is also now comprehensive, with all modern browsers supporting SVGs when used with the image tag or in CSS as part of the background property.

跨浏览器的支持现在也得到了全面的支持,所有现代浏览器在与image标记一起使用或在CSS中作为background属性的一部分时都支持SVG。

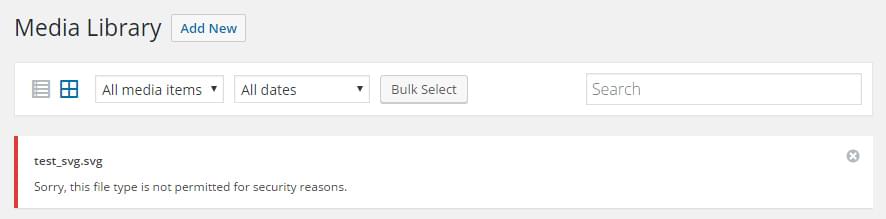
If you’re using WordPress, you’re probably familiar with the Media Library and how it works as a central repository for your media assets. The manager which handles uploading of files is initially restricted to a listing of approved file types.

如果您使用的是WordPress,则可能熟悉媒体库及其作为媒体资源的中央存储库的工作方式。 最初,处理文件上传的管理器仅限于已批准文件类型的列表

Today’s tutorial will focus on how we can add SVG media support and also improve WordPress’ processing, handling and display of SVGs overall.

今天的教程将重点介绍如何添加SVG媒体支持,以及改善WordPress对SVG的整体处理,处理和显示。

背景故事-为什么WordPress中不支持SVG? (Backstory – Why No SVG Support in WordPress?)

You’re probably wondering why SVGs never made it onto the list of supported file types in WordPress, the answer is entirely about security.

您可能想知道为什么SVG从未进入WordPress支持的文件类型列表,答案完全是关于安全性的。

SVGs are not raster images like other formats (such as png, jpg, gif), they are actually vectors and because of that they can potentially be used to carry malicious JavaScript. There’s a great article from Bjørn Johansen which pinpoints how this all works. The short and sweet of it is that JavaScript can be injected into it and it’s executed when the SVG is displayed.

SVG不是像其他格式(例如pngjpggif )那样的光栅图像,它们实际上是矢量,因此,它们有可能被用来携带恶意JavaScript。 比约恩·约翰森(BjørnJohansen)有一篇很棒的文章 ,指出了这一切的工作原理。 它的简短之处就是可以将JavaScript注入其中,并在显示SVG时执行它。

WordPress core developers have been discussing SVG inclusion for a very long time (3 – 4 years) and the main sticking point is the potential security risks it could pose. The media manager is used across several levels, from full site administrators to editors and contributors, what this means is that there are several groups who could potentially upload (unwittingly or intentionally) malicious SVG files to a site.

WordPress核心开发人员已经讨论了SVG包含时间很长 (3-4年),主要的问题是它可能带来的潜在安全风险。 从整个站点管理员到编辑者和贡献者,媒体管理器可用于多个级别,这意味着有多个组可以潜在地(不经意或有意地)将恶意SVG文件上传到站点。

There most likely won’t be any movement on this for a while and sadly that means SVGs won’t be a default upload option anytime soon.

暂时不会出现任何动静,可悲的是,这意味着SVG不会很快成为默认的上传选项。

svg media library reject alert

将SVG格式添加到允许的文件类型 (Adding the SVG Format to the Allowed File Types)

Thankfully, because WordPress is highly flexible, we can adjust the file types allowed to be uploaded to the media library. We need only to hook into the upload_mimes filter and add our SVG support. You can add this code to either your functions.php file in your child theme or create it as a plugin.

值得庆幸的是,由于WordPress具有高度的灵活性,因此我们可以调整允许上传到媒体库的文件类型。 我们只需要挂接到upload_mimes过滤器并添加我们的SVG支持即可。 您可以将此代码添加到子主题中的functions.php文件中,也可以将其创建为插件。

//add SVG to allowed file uploads
function add_file_types_to_uploads($file_types){

    $new_filetypes = array();
    $new_filetypes['svg'] = 'image/svg+xml';
    $file_types = array_merge($file_types, $new_filetypes );

    return $file_types;
}
add_action('upload_mimes', 'add_file_types_to_uploads');

What we’re doing is hooking into the array of allowed file types and adding the SVG extension (which is image/svg+xml) as an accepted file type.

我们正在做的是挂接到允许的文件类型数组中,并添加SVG扩展名(即image/svg+xml )作为可接受的文件类型。

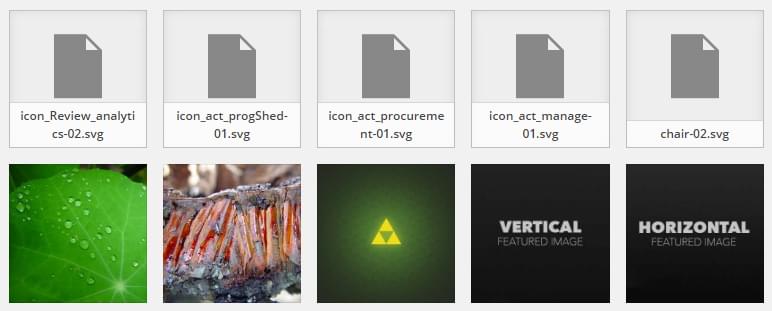
That’s all we need to do to enable WordPress to upload these images. Now when you go to the media library you can drag and drop your SVGs straight into the library and they’ll appear as a standard file.

我们要做的就是使WordPress能够上传这些图像。 现在,当您进入媒体库时,可以将SVG直接拖放到库中,它们将显示为标准文件。

wordpress svg library

改善媒体库中的SVG显示 (Improving SVG Display in the Media Library)

Because SVGs aren’t a default file type, the display and processing of them is provided ‘as is’, meaning that they will all work in the admin dashboard, but you won’t necessarily have the most streamlined user experience.

由于SVG不是默认文件类型,因此将按“原样”提供它们的显示和处理,这意味着它们都将在管理仪表板中正常工作,但是您不一定会获得最简化的用户体验。

One such area where SVG optimisation is lacking is the ‘Grid View’ of the library.

缺少SVG优化的此类领域之一是库的“网格视图”。

When viewing SVGs in this view, each SVG appears as the generic placeholder, showing a default icon and the name of the file (as seen in the previous image). While this still all works, it doesn’t really help you much as unless you memorized the file names of your SVGs you won’t know which is which. What it should display is the image itself, not a placeholder.

在此视图中查看SVG时,每个SVG均显示为通用占位符,显示默认图标和文件名(如上图所示)。 尽管这一切仍然有效,但它并没有真正帮助您,除非您记住了SVG的文件名,否则您将不知道哪个是哪个。 它应该显示的是图像本身,而不是占位符。

That’s what we’re going to look at now, optimising the ‘Grid’ so that we get something more visually useful.

这就是我们现在要看的,优化“网格”,以便我们获得视觉上更有用的东西。

在网格视图中手动更新SVG (Manually Updating SVGs in the Grid View)

WordPress’ media library is built dynamically, fetching all of the uploaded files asynchronously as the page loads and fetching more as you scroll. That being the case there isn’t really any filter or action that you can hook into to adjust how files are displayed. You need to use JavaScript to do your changes manually.

WordPress的媒体库是动态构建的,页面加载时异步获取所有上传的文件,滚动时获取更多内容。 在这种情况下,实际上没有任何您可以挂钩的过滤器或操作来调整文件的显示方式。 您需要使用JavaScript手动进行更改。

What we’re looking for is to replace the default icon and wording displayed for SVGs with the image itself. Doing this will make managing a library of SVGs much simpler.

我们正在寻找的是用图像本身替换为SVG显示的默认图标和文字。 这样做将简化SVG库的管理。

The plan to is execute a function on each attachment in the media library. This function will execute only for applicable SVG images and will trigger an AJAX call to a custom PHP function. Inside this function we will return the SVG image URL to replace our default icon.

计划对媒体库中的每个附件执行一个功能。 此函数将仅对适用的SVG图像执行,并会触发对自定义PHP函数的AJAX调用。 在此函数内,我们将返回SVG图片网址以替换默认图标。

突变观察者 (Mutation Observers)

One of the first complexities with the media library is that it’s all built dynamically. We can’t trigger a function on page load or reliably with a setTimeout because we’ll never be sure when it’s ready. What we need to do is trigger our function when the DOM has been updated and our attachments added to the page.

媒体库的最初复杂性之一是它们都是动态构建的。 我们无法在页面加载时触发函数,也无法通过setTimeout可靠地触发函数,因为我们永远无法确定函数何时准备就绪。 我们需要做的是在DOM更新并将附件添加到页面后触发函数。

This is a perfect use case to implement Mutation Observers

这是实现Mutation Observers的完美用例

‘Mutation Observers’ provide a way for developers to react to changes in the DOM and to get a listing of all changes (mutations) that have happened for it’s nodes. These observers replace the deprecated mutation events and have fairly comprehensive browser support, working on all modern systems, even back to IE11.

“突变观察者”为开发人员提供了一种对DOM中的变化做出React并获得其节点发生的所有变化(变异)列表的方法。 这些观察者取代了已弃用的mutation events并具有相当全面的浏览器支持,可在所有现代系统上使用,甚至可以回溯到IE11。

Admin CSS调整以改善SVG显示 (Admin CSS Tweaks to Improve SVG Display)

There are several places we need to apply some light styling to ensure our SVG images look great across the whole WordPress backend. The only real note is that in older browsers (IE8-IE10) SVGs don’t like to be resized and require a set height and width attribute when displayed as an image. For our purposes and for the majority of browsers, these CSS tweaks will be enough.

我们需要在几个地方应用一些浅色样式,以确保我们的SVG图像在整个WordPress后端看起来都很棒。 唯一需要注意的是,在较旧的浏览器(IE8-IE10)中,SVG不喜欢调整大小,并且在显示为图像时要求设置高度和宽度属性。 对于我们的目的和大多数浏览器而言,这些CSS调整就足够了。

The main issue we will run into is that no height or width values are assigned to the SVGs, causing them to collapse (and becoming invisible). Setting the SVGs width to 100% and it’s height will solve this.

我们将遇到的主要问题是,没有为SVG分配高度或宽度值,从而导致它们崩溃(并变得不可见)。 将SVG的宽度设置为100%且其高度将解决此问题。

媒体库网格布局 (Media Library Grid Layout)

The newer default grid layout provides an easy to use interface for managing and viewing your attachments. While it’s great and works well, it doesn’t do a very good job of showcasing your SVGs, defaulting them to an icon with their filename.

较新的默认网格布局提供了易于使用的界面,用于管理和查看附件。 尽管它很棒并且可以很好地工作,但是在展示SVG,将它们默认为带有文件名的图标方面做得并不是很好。

What we need is for the SVG image itself to be shown as the preview, making it easier for us to manage collections of SVGs.

我们需要将SVG图像本身显示为预览,从而使我们更易于管理SVG的集合。

The difficulty with this is that the library is built dynamically, meaning that we need to adjust everything in JavaScript to get it the way we want. This is where our Mutation Observer comes into play. We can look for all newly added DOM nodes and then check if they’re an attachment, if they are we can manipulate them the way we want.

这样做的困难在于该库是动态构建的,这意味着我们需要调整JavaScript中的所有内容以使其达到我们想要的方式。 这就是我们的突变观察者发挥作用的地方。 我们可以查找所有新添加的DOM节点,然后检查它们是否为附件,如果它们是附件,我们可以按所需方式对其进行操作。

Our solution involves using JavaScript to detect our attachment and passing it’s ID back to PHP so we can fetch the full attachment URL. For that to work we need to hook into WordPress’s AJAX functionality and register a custom function such as below.

我们的解决方案涉及使用JavaScript检测附件并将其ID传递回PHP,以便我们获取完整的附件URL。 为此,我们需要使用WordPress的AJAX功能并注册一个自定义功能,如下所示。

//call our function when initiated from JavaScript
add_action('wp_AJAX_svg_get_attachment_url', 'get_attachment_url_media_library');

The wp_AJAX_{name_of_action} hook is used to create custom AJAX calls. Meaning that whenever WordPress AJAX is called it will look for an action that has the same name registered with this hook. In our case when we call our AJAX function later on, we will be passing in the action called svg_get_attachment_url, which will in turn call our get_attachment_url_media_library function.

wp_AJAX_{name_of_action}挂钩用于创建自定义AJAX调用。 这意味着每当调用WordPress AJAX时,它都会查找具有与此钩子注册的相同名称的action 。 在本例中,当我们稍后调用AJAX函数时,我们将传递名为svg_get_attachment_url的动作,该动作将依次调用我们的get_attachment_url_media_library函数。

If this is your first time looking into WordPress AJAX, then reading the Codex documentation is a good place to start.

如果这是您第一次研究WordPress AJAX,那么阅读Codex文档是一个不错的起点。

Our function to return the URL of the attachment is pretty simple:

我们返回附件URL的功能非常简单:

//called via AJAX. returns the full URL of a media attachment (SVG) function get_attachment_url_media_library(){

    $url = '';
    $attachmentID = isset($_REQUEST['attachmentID']) ? $_REQUEST['attachmentID'] : '';
    if($attachmentID){
        $url = wp_get_attachment_url($attachmentID);
    }

    echo $url;

    die();
}

Now that we have our PHP elements sorted, let’s jump into the JavaScript component and add the following. You’ll need to add the following to an enqueued public facing script for this to work.

现在我们已经对PHP元素进行了排序,让我们进入JavaScript组件并添加以下内容。 您需要将以下内容添加到排队的面向公众的脚本中,才能正常工作。

//create a mutation observer to look for added 'attachments' in the media uploader
var observer = new MutationObserver(function(mutations){

  // look through all mutations that just occured
  for (var i=0; i < mutations.length; i++){

    // look through all added nodes of this mutation
    for (var j=0; j < mutations[i].addedNodes.length; j++){

        //get the applicable element
        element = $(mutations[i].addedNodes[j]); 

        //execute only if we have a class
        if(element.attr('class')){

            elementClass = element.attr('class');
            //find all 'attachments'
            if (element.attr('class').indexOf('attachment') != -1){

                //find attachment inner (which contains subtype info)
                attachmentPreview = element.children('.attachment-preview');
                if(attachmentPreview.length != 0){

                    //only run for SVG elements
                    if(attachmentPreview.attr('class').indexOf('subtype-svg+xml') != -1){

                        //bind an inner function to element so we have access to it. 
                        var handler = function(element){

                            //do a WP AJAX call to get the URL 
                            $.AJAX({

                                url: AJAXurl,
                                data: {
                                    'action'        : 'svg_get_attachment_url',
                                    'attachmentID'  : element.attr('data-id')
                                },
                                success: function(data){
                                    if(data){
                                        //replace the default image with the SVG
                                        element.find('img').attr('src', data);
                                        element.find('.filename').text('SVG Image');
                                    }
                                }
                            });

                        }(element); 

                    }
                }
            }
        }
    }
  }
});

observer.observe(document.body, {
  childList: true,
  subtree: true
});

Here’s a breakdown of how it all works:

以下是所有工作原理的细分:

  • We create a new ‘Mutation Observer’ and listen to all changes on the body element. We’re looking for our attachments which load dynamically (initially as the library opens and additionally as we scroll to load more).

    我们创建一个新的“ Mutation Observer”,并监听body元素上的所有更改。 我们正在寻找动态加载的附件(最初是在库打开时,另外是在滚动以加载更多内容时)。
  • We go through all the added DOM elements and assign them to our element, it’s on this element we will do our comparisons to check if we’re on the right element.

    我们遍历所有添加的DOM元素,并将它们分配给我们的element ,在该元素上,我们将进行比较以检查是否在正确的元素上。

  • We check that our element has a class (as sometimes we loop through standard text elements) and then we use it’s class to see if it has the attachment class name. Each of our attachments will have this so it’s these elements we’re looking for.

    我们检查我们的元素是否具有一个类(有时我们遍历标准文本元素),然后使用它的类来查看它是否具有attachment类名称。 我们每个附件都有这个,因此我们正在寻找这些元素。

  • Once we’re on an attachment we do another check to ensure we’re on a single attachment (as sometimes we could be on other elements that just so happen to be related to attachments, but not an attachment themselves), then a search for any children with the 'attachment-previewclass will let us know if we’re on the right track.

    一旦进入附件,我们将再次检查以确保我们位于单个附件(有时我们可能位于恰好与附件相关的其他元素上,而不是与附件本身相关),然后搜索任何拥有'attachment-preview课程的孩子都会告诉我们我们是否走上了正确的道路。

  • The next step is checking if the attachment preview has the subtype-svg+xml class. We only want to trigger our functionality for SVG images.

    下一步是检查附件预览是否具有subtype-svg+xml类。 我们只想触发SVG图像的功能。

  • Here is the important part. For each attachment, we create a new function and pass in the element as a reference. Inside this we create a AJAX call. It’s here we extract the data-id and call our PHP function we registered before. Our action is called svg_get_attachment_url and this relates to the function hooked to the wp_AJAX_svg_get_attachment_url action.

    这是重要的部分。 对于每个附件,我们创建一个新函数并将该element作为参考传递。 在其中,我们创建一个AJAX调用。 在这里,我们提取data-id并调用我们之前注册PHP函数。 我们的动作称为svg_get_attachment_url ,这与钩接到wp_AJAX_svg_get_attachment_url动作的函数有关。

  • Our AJAX function passes the attachment ID back to PHP which we use the fetch the URL of the object. We pass it back to our AJAX call so it can then be appended to element, visually updating it.

    我们的AJAX函数将附件ID传递回PHP,我们使用它获取对象的URL。 我们将其传递回AJAX调用,以便随后可以将其附加到element ,以可视方式对其进行更新。

There’s a fair few moving parts here, but the majority of them handle finding the right DOM elements to execute our function against. When it’s all said and done you’ll now see your SVG images displayed in a grid:

这里很少有活动的部分,但是其中大多数会处理找到合适的DOM元素来执行我们的功能。 说完这些,您现在将看到在网格中显示的SVG图像:

WordPress svg library after
补充笔记: (Additional Notes:)
  • The good thing about this is that it’s triggered whenever the DOM changes such as on initial library load, library scrolling (loading new attachments) and also when dropping a new attachment onto the library, uploading it.

    这样做的好处是, 每当DOM更改时,例如在初始库加载,库滚动(加载新附件)以及将新附件拖放到库中并上载时, 都会触发DOM

  • The speed at which you see your SVG images appear will be entirely up to WordPress as each SVG attachment has to perform it’s own AJAX call and then pass back it’s URL, forcing the browser to load the new image. We are effectively waiting twice which will slow things down. While all of this works it might take several seconds for everything to ‘pop’ into place.

    您看到SVG图像的速度将完全取决于WordPress,因为每个SVG附件必须执行其自己的AJAX调用,然后传回其URL,从而迫使浏览器加载新图像。 我们实际上在等待两次,这会使事情变慢。 尽管所有这些工作都可能需要几秒钟的时间才能将所有内容“弹出”到位。

  • Another interesting ‘feature’ (issue) is that when you drop new images into the media library, all of the attachments are refreshed, meaning that the AJAX fetching and image rendering has to happen again. There’s not really much that can be adjusted here as it’s part of the dynamic process of the media library.

    另一个有趣的“功能”( 问题 )是,当您将新图像放入媒体库时,所有附件都将刷新,这意味着AJAX获取和图像渲染必须再次进行。 由于媒体库是动态过程的一部分,因此实际上没有太多可调整的地方。

媒体库列布局 (Media Library Column Layout)

When you view the media library using the traditional column layout, you’ll notice that again SVG’s aren’t displayed correctly.

使用传统的列布局查看媒体库时,您会注意到SVG再次无法正确显示。

column media library before

The reason it looks like this is because they don’t have a set height or any CSS to style them. We need to adjust them much like we did for the featured image section:

看起来像这样的原因是因为它们没有设置高度或样式CSS。 我们需要像对特色图片部分一样进行调整:

/*adjust SVG images when displayed inside media library column view*/
table.media .column-title .media-icon img[src*='.svg']{
    width: 100%;
    height: auto;
}

This will style your SVG previews so that they look inline with the other images. You’ll be able to see exactly what they are at a glance.

这将为您的SVG预览设置样式,以使其与其他图像保持一致。 您将一眼就能清楚地看到它们的含义。

column media library after

媒体附件预览 (Media Attachment Preview)

When you’re inside the ‘Grid’ layout for the media library, you can click on an item to have it open up in a modal window that displays attachment metadata, that’s another area we need to adjust so that our SVGs are displayed.

当您位于媒体库的“网格”布局中时,可以单击一个项目以在显示附件元数据的模式窗口中将其打开,这是我们需要调整的另一个区域,以便显示SVG。

Here’s how it looks by default, notice the default icon used.

这是默认情况下的外观,请注意所使用的默认图标。

attachment details svg before

Unlike other areas, we already have the full URL to the SVG as part of this modal, it’s displayed under the URLfield. The complexity here is that although we have the information on hand, because it’s dynamic we need to create another listener that looks for when the attachment preview is opened (or navigated though) and populate the media pane with the applicable SVG.

与其他区域不同,作为此模式的一部分,我们已经具有指向SVG的完整URL,该URL显示在URL字段下。 此处的复杂性在于,尽管我们掌握了信息,但由于它是动态的,因此我们需要创建另一个侦听器,以在打开(或浏览)附件预览时寻找并用适用的SVG填充媒体窗格。

Let’s jump back into our JavaScipt file and add the following:

让我们跳回到JavaScipt文件并添加以下内容:

//Observer to adjust the media attachment modal window 
var attachmentPreviewObserver = new MutationObserver(function(mutations){
    // look through all mutations that just occured
    for (var i=0; i < mutations.length; i++){

        // look through all added nodes of this mutation
        for (var j=0; j < mutations[i].addedNodes.length; j++){

            //get element
            var element = $(mutations[i].addedNodes[j]);

            //check if this is the attachment details section or if it contains the section
            //need this conditional as we need to trigger on initial modal open (creation) + next and previous navigation through media items
            var onAttachmentPage = false;
            if( (element.hasClass('attachment-details')) || element.find('.attachment-details').length != 0){
                onAttachmentPage = true;
            }

            if(onAttachmentPage == true){   
                //find the URL value and update the details image
                var urlLabel = element.find('label[data-setting="url"]');
                if(urlLabel.length != 0){
                    var value = urlLabel.find('input').val();
                    element.find('.details-image').attr('src', value);
                }
            }
        } 
    }   
});

attachmentPreviewObserver.observe(document.body, {
  childList: true,
  subtree: true
});

Here’s how it all works:

运作方式如下:

  • We create a new ‘Mutation Observer’ and attach it to the body, looking for all changes (including the child nodes and all their children).

    我们创建一个新的“突变观察者”并将其附加到主体,以查找所有更改(包括子节点及其所有子节点)。
  • We loop through all the mutations and added nodes. We’re looking for an element that has either the attachment-details class or has it as one of its descendants. The reason we have this conditional is so that it’s triggered when the modal is initially opened and each time the modal is updated (by clicking through the next and previous buttons). This is because as you navigate through the triggering element itself will be the attachment-details DOM element.

    我们遍历所有突变并添加了节点。 我们正在寻找一个具有attachment-details类或将其作为其后代之一的元素。 之所以有此条件,是因为它在最初打开模态以及每次更新模态时都会触发(通过单击下一个和上一个按钮)。 这是因为当您浏览触发元素本身时,将是attachment-details DOM元素。

  • Once we know we’re inside the right place we need to search for the URL element and extract it. Once we have it, we populate our preview with the SVG image.

    一旦知道我们在正确的位置,我们需要搜索URL元素并将其提取。 有了它后,我们将使用SVG图像填充预览。

After we’re all done, the attachment details modal now looks like this:

完成所有步骤后,附件详细信息模态现在如下所示:

attachment details svg after

前端输出 (Output on the Front-end)

When WordPress outputs images that have SVG content as their source, often you’ll find nothing will be visible. This is caused by the SVG not having a correct width and height set as either attributes or in CSS (which makes sense considering SVGs aren’t supported).

当WordPress输出以SVG内容为源的图像时,通常您将看不到任何东西。 这是由于SVG没有将正确的宽度和高度设置为属性或CSS设置的(考虑到不支持SVG才有意义)。

To get this to work we need to add another style that will apply and make our SVG elements responsive.

为了使它起作用,我们需要添加另一种样式,该样式将应用并使我们的SVG元素具有响应能力。

/*sets all SVG's to be responsive. displaying at full width*/
img[src*='.svg']{
    width: 100%;
    height: auto;
}

After you add this to your style.css all of your SVG images will stretch full width and maintain their aspect ratio (on modern browsers).

将其添加到style.css所有SVG图像都会拉伸全宽并保持其纵横比(在现代浏览器上)。

Here’s an example of how a standard SVG image now looks with its new styling.

这是一个示例,说明标准SVG图像现在具有新样式的外观。

svg output front end

One thing to be conscious of is since it’s a selector it’s fairly weak, it can be overridden by your theme or by other plugins. It’s up to you to make sure these things look good on the front-end and that they scale well.

要意识到的一件事是,由于它是一个选择器,因此它相当弱,可以被您的主题或其他插件覆盖。 您需要确保这些东西在前端看起来不错,并且可以很好地扩展。

包装全部 (Wrapping It All Up)

With these changes you’ll be able to use and interact with SVGs like any other image, being able to quickly view them and manipulate them without having to worry which SVG is which.

通过这些更改,您将能够像使用其他任何图像一样使用SVG并与之交互,从而能够快速查看和操纵它们,而不必担心哪个SVG。

Hopefully at some point SVGs will be introduced into WordPress core and all of this will be seamlessly handled in the back-end for you, but until then these workarounds will have to do.

希望在某些时候将SVG引入到WordPress核心中,所有这些将在后端为您无缝处理,但是在此之前,这些变通办法必须要做。

For some further reading checkout Alex Walkers article The Designer’s Guide to Working with SVG – Pt 1 and Maria Antonietta Perna’s article on Canvas vs. SVG: Choosing the Right Tool for the Job.

有关更多阅读内容,请阅读Alex Walkers的文章SVG设计者指南– Pt 1和Maria Antonietta Perna的文章Canvas vs. SVG:为工作选择合适的工具

翻译自: https://www.sitepoint.com/wordpress-svg/

svg 中插入svg

  • 0
    点赞
  • 0
    收藏
    觉得还不错? 一键收藏
  • 0
    评论

“相关推荐”对你有帮助么?

  • 非常没帮助
  • 没帮助
  • 一般
  • 有帮助
  • 非常有帮助
提交
评论
添加红包

请填写红包祝福语或标题

红包个数最小为10个

红包金额最低5元

当前余额3.43前往充值 >
需支付:10.00
成就一亿技术人!
领取后你会自动成为博主和红包主的粉丝 规则
hope_wisdom
发出的红包
实付
使用余额支付
点击重新获取
扫码支付
钱包余额 0

抵扣说明:

1.余额是钱包充值的虚拟货币,按照1:1的比例进行支付金额的抵扣。
2.余额无法直接购买下载,可以购买VIP、付费专栏及课程。

余额充值