


This article was peer reviewed by Wern Ancheta. Thanks to all of SitePoint’s peer reviewers for making SitePoint content the best it can be!
本文由Wern Ancheta进行同行评审。 感谢所有SitePoint的同行评审人员使SitePoint内容达到最佳状态!
Laravel Socialite is a package developed to abstract away any social authentication complexities and boilerplate code into a fluent and expressive interface.
Laravel Socialite是一个软件包,旨在将任何社会身份验证复杂性和样板代码抽象为一个流畅,表达性的界面。

Socialite only supports Google, Facebook, Twitter, LinkedIn, Github, and Bitbucket as OAuth providers. They won’t be adding any others to the list, however, there’s a community-driven collection called Socialite Providers, which contains plenty of unofficial providers for Socialite. More on this in the next section.
Socialite仅作为OAuth提供者支持Google,Facebook,Twitter,LinkedIn,Github和Bitbucket。 他们不会在列表中添加其他任何人,但是,有一个社区驱动的集合,称为Socialite Providers ,其中包含许多Socialite的非官方提供者。 下一节将对此进行更多介绍。
I’ll assume you already have a fresh Laravel application instance up and running on your machine, so you can see the code in action along the way. If you need a good development environment, you’re free to use Homestead Improved.
我假设您已经在计算机上启动并运行了一个新的Laravel应用程序实例,因此您可以一路看到正在运行的代码。 如果您需要一个好的开发环境,则可以自由使用Homestead Improvement 。
基于表单的身份验证 (Form Based Authentication)
Before getting into OAuth authentication, let’s set up Laravel’s standard form based authentication. To do this, we run the make:auth artisan command, which installs all the necessary views as well as the required authentication endpoints.
在进行OAuth身份验证之前,让我们设置Laravel基于表单的标准身份验证。 为此,我们运行make:auth artisan命令,该命令将安装所有必需的视图以及必需的身份验证端点。
php artisan make:authNote We also need to run
php artisan migrateto make sure theuserstable is created.注意我们还需要运行
php artisan migrate以确保创建了users表。
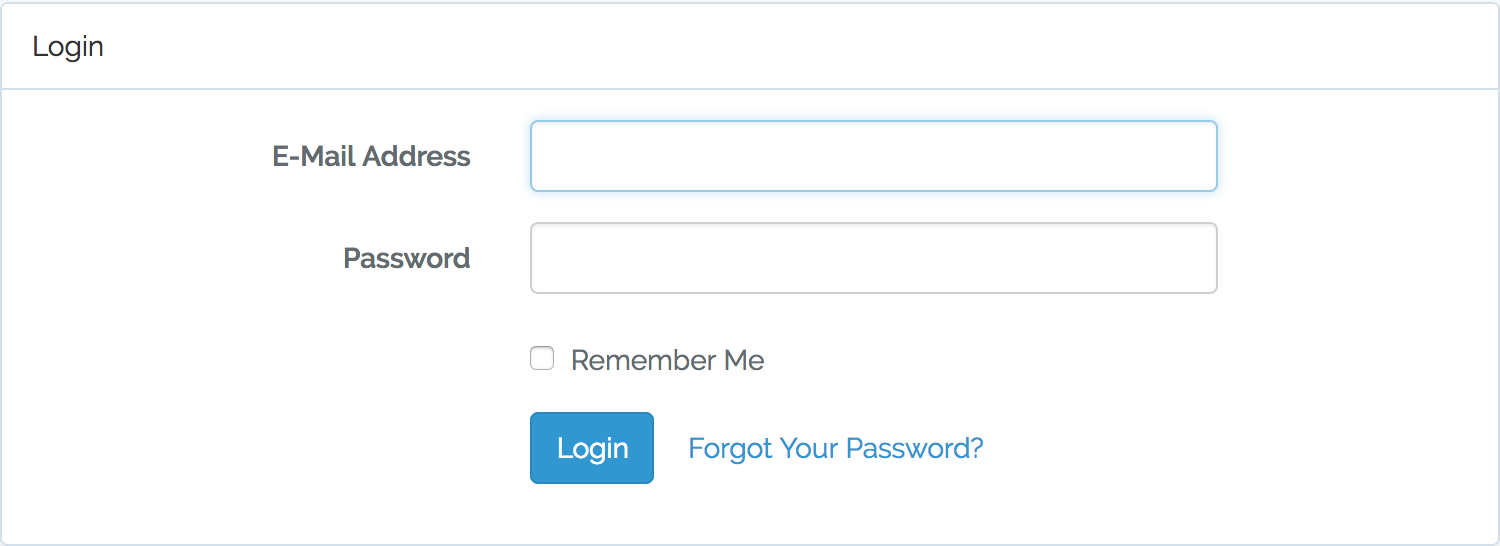
Now, if we head over to /login, we should see a nice Bootstrap-styled login page that works.
现在,如果我们转到/login ,应该会看到一个不错的Bootstrap样式的登录页面,该页面可以正常工作。
添加社会认证 (Adding Social Authentication)
To get started with Socialite, we install it with Composer:
要开始使用Socialite,请使用Composer安装它:
composer require laravel/socialiteOnce installed, Socialite’s service provider and facade should be registered in config/app.php – just like with any other Laravel package.
安装完成后,Socialite的服务提供商和Facade必须在config/app.php注册,就像其他Laravel软件包一样。
config/app.php
config/app.php
<?php

// ...

'providers' => [

        // ...

        /*
         * Package Service Providers...
         */
        Laravel\Socialite\SocialiteServiceProvider::class,

    ],

// ...
And here’s the facade alias:
这是facade别名:
<?php

// ...
'aliases' => [

        // ...

        'Socialite' => Laravel\Socialite\Facades\Socialite::class,

    ],
// ...
Socialite is registered as a lazy-loaded singleton service inside the service container.
Socialite在服务容器中注册为延迟加载的单例服务。
组态 (Configuration)
To use any provider, we need to register an OAuth application on that provider platform. In return, we’ll be given a pair of client ID and client secret keys as our credentials for interacting with the provider’s API.
要使用任何提供程序,我们需要在该提供程序平台上注册OAuth应用程序。 作为回报,我们将获得一对客户端ID和客户端密钥作为与提供者的API进行交互的凭据。
We need to add the credentials in config/services.php for each provider:
我们需要为每个提供者在config/services.php添加凭据:
// ...

'facebook' => [
        'client_id'     => env('FB_CLIENT_ID'),
        'client_secret' => env('FB_CLIENT_SECRET'),
        'redirect'      => env('FB_URL'),
],

'twitter' => [
        'client_id'     => env('TWITTER_CLIENT_ID'),
        'client_secret' => env('TWITTER_CLIENT_SECRET'),
        'redirect'      => env('TWITTER_URL'),
],

'github' => [
        'client_id'     => env('GITHUB_CLIENT_ID'),
        'client_secret' => env('GITHUB_CLIENT_SECRET'),
        'redirect'      => env('GITHUB_URL'),
],

// ...
The actual key values are put into the .env file in the project’s root directory.
实际的键值放在项目根目录下的.env文件中。
数据库注意事项 (Database Considerations)
Since the users table structure hasn’t been designed to integrate social authentications, we first need to do a few tweaks there.
由于users表结构尚未设计为集成社交身份验证,因此我们首先需要在此处进行一些调整。
Usually, when users take the social authentication approach, they don’t have to choose a password unless we ask them to do so (after OAuth authorization – please don’t do that). Apart from that, the user may not have an email address associated with the respective OAuth provider. Hence, we need to make email and password fields nullable.
通常,当用户采用社交身份验证方法时,除非我们要求他们选择密码(在OAuth授权之后–请勿这样做 ),否则他们不必选择密码。 除此之外,用户可能没有与各个OAuth提供商关联的电子邮件地址。 因此,我们需要使email和password字段为nullable 。
To modify the schema, we use Laravel’s schema builder. Before modifying the fields in the existing tables, we need to have doctrine/dbal package installed.
要修改架构,我们使用Laravel的架构生成器。 在修改现有表中的字段之前,我们需要安装doctrine/dbal软件包。
composer require doctrine/dbalLet’s start with users:
让我们从users开始:
php artisan make:migration prepare_users_table_for_social_authentication --table usersNow, we make email and password fields nullable:
现在,我们将email和password字段设置为nullable :
File:
database/migrations/xxxxxx_prepare_users_table_for_social_authentication.php文件:
database/migrations/xxxxxx_prepare_users_table_for_social_authentication.php
<?php

// ...

/**
     * Run the migrations.
     *
     * @return void
     */
    public function up()
    {
        Schema::table('users', function (Blueprint $table) {

        // Making email and password nullable
            $table->string('email')->nullable()->change();
            $table->string('password')->nullable()->change();

        });
    }

    /**
     * Reverse the migrations.
     *
     * @return void
     */
    public function down()
    {
        Schema::table('users', function (Blueprint $table) {

            $table->string('email')->nullable(false)->change();
            $table->string('password')->nullable(false)->change();

        });
    }

// ...
For storing a user’s linked social accounts, we create the model and its migration file together:
为了存储用户链接的社交帐户,我们一起创建模型及其迁移文件:
php artisan make:model LinkedSocialAccount --migrationFile:
database/migrations/xxxxxx_create_linked_social_accounts_table.php文件:
database/migrations/xxxxxx_create_linked_social_accounts_table.php
<?php

// ...

public function up()
    {
        Schema::create('linked_social_accounts', function (Blueprint $table) {

            $table->increments('id');
            $table->bigInteger('user_id');
            $table->string('provider_name')->nullable();
            $table->string('provider_id')->unique()->nullable();
            $table->timestamps();

        });
    }

    /**
     * Reverse the migrations.
     *
     * @return void
     */
    public function down()
    {
        Schema::dropIfExists('linked_social_accounts');
    }

// ...
provider_name is the name of the provider while provider_id is the user’s ID on the provider platform.
provider_name是provider_name的名称, provider_id是提供者平台上的用户ID。
To apply the changes, we run migrate:
要应用更改,我们运行migrate :
php artisan migrate模型 (The Models)
Each user can have many linked social accounts, which implies a one-to-many relationship between User and LinkedSocialAccounts. To define this relationship, we add the following method to the User model:
每个用户可以有许多链接的社交帐户,这意味着User和LinkedSocialAccounts之间是一对多的关系。 为了定义这种关系,我们向User模型添加以下方法:
File:
app/User.php文件 :
app/User.php
// ...

public function accounts(){
    return $this->hasMany('App\LinkedSocialAccount');
}

 // ...
Let’s add the inverse of this relationship in LinkedSocialAccount model as well:
让我们在LinkedSocialAccount模型中也添加此关系的逆函数:
File: app/LinkedSocialAccounts.php
文件 : app/LinkedSocialAccounts.php
<?php
// ...

public function user()
{
    return $this->belongsTo('App\User');
}

// ...
Additionally, we make provider_name and provider_id mass assignable, by adding them to the $fillable array in LinkedSocialAccounts.
此外,通过将它们添加到LinkedSocialAccounts的$fillable LinkedSocialAccounts数组中,我们可以使provider_name和provider_id 质量可分配 。
File:
app/LinkedSocialAccounts.php文件 :
app/LinkedSocialAccounts.php
<?php

// ...

protected $fillable = ['provider_name', 'provider_id' ];

public function user()
{
    return $this->belongsTo('App\User');
}
This allows us to use the create() method when associating a social account with the user.
这使我们在将社交帐户与用户关联时可以使用create()方法。
控制器 (Controllers)
Now, we create the controller under the Auth namespace. We need two actions in our controller class, one for redirecting the user to the OAuth provider and another for receiving the callback from the provider.
现在,我们在Auth名称空间下创建控制器。 我们在控制器类中需要执行两项操作,一项用于将用户重定向到OAuth提供程序,另一项用于接收来自提供程序的回调。
php artisan make:controller 'Auth\SocialAccountController'We edit the controller class and end up with something like this:
我们编辑控制器类,并得到如下结果:
File:
app/Http/Controllers/Auth/SocialAccountController.php文件 :
app/Http/Controllers/Auth/SocialAccountController.php
<?php

    /**
     * Redirect the user to the GitHub authentication page.
     *
     * @return Response
     */
    public function redirectToProvider($provider)
    {
        return \Socialite::driver($provider)->redirect();
    }

    /**
     * Obtain the user information
     *
     * @return Response
     */
    public function handleProviderCallback(\App\SocialAccountsService $accountService, $provider)
    {

        try {
            $user = \Socialite::with($provider)->user();
        } catch (\Exception $e) {
            return redirect('/login');
        }

        $authUser = $accountService->findOrCreate(
            $user,
            $provider
        );

        auth()->login($authUser, true);

        return redirect()->to('/home');
    }
}
In the preceding code, redirectToProvider() redirects the user to the respective authorization endpoint – by calling the provider’s redirect() method.
在前面的代码中, redirectToProvider()通过调用提供程序的redirect()方法将用户重定向到相应的授权端点。
<?php
// ...
 return Socialite::driver($provider)->redirect();
// ...
We can also change the default scopes using scopes(), before calling redirect():
我们还可以在调用redirect()之前使用scopes()更改默认范围:
<?php
// ...
 return Socialite::driver($provider)->scopes(['users:email'])->redirect();
// ...
Since the behavior of OAuth providers isn’t predictable at all times, we use a try/catch block to take care of unexpected situations. If everything goes as expected without an exception, the user object (an instance of Laravel\Socialite\Contracts\User) is retrieved from the provider. This object exposes a few getter methods for retrieving the user’s information – including name, email, access token, etc. You can find the available methods in the documentation.
由于OAuth提供者的行为并非始终都是可预测的,因此我们使用try/catch块来处理意外情况。 如果一切正常,则从提供程序中检索用户对象( Laravel\Socialite\Contracts\User的实例)。 该对象公开了一些用于获取用户信息的getter方法-包括名称,电子邮件,访问令牌等。您可以在文档中找到可用的方法。
Next, we retrieve the local user object (residing in our users table) or create one if it doesn’t exist yet. To do this, we call findOrCreate() from a helper class called SocialAccountsService (this class is injected as an argument into handleProviderCallback() method).
接下来,我们检索本地用户对象(位于users表中)或创建一个本地对象(如果尚不存在)。 为此,我们从名为SocialAccountsService的帮助程序类中调用findOrCreate() (此类作为参数注入到handleProviderCallback()方法中)。
After retrieving the user object, we log the user in, redirecting them to the dashboard page.
检索用户对象后,我们将用户登录,将其重定向到仪表板页面。
Now, let’s create our helper class SocialAccountService.php.
现在,让我们创建我们的助手类SocialAccountService.php 。
Under the App namespace, create a file with the following code:
在App命名空间下,使用以下代码创建文件:
File:
app/SocialAccountService.php文件 :
app/SocialAccountService.php
<?php

namespace App;

use Laravel\Socialite\Contracts\User as ProviderUser;

class SocialAccountService
{
    public function findOrCreate(ProviderUser $providerUser, $provider)
    {
        $account = LinkedSocialAccount::where('provider_name', $provider)
                   ->where('provider_id', $providerUser->getId())
                   ->first();

        if ($account) {
            return $account->user;
        } else {

        $user = User::where('email', $providerUser->getEmail())->first();

        if (! $user) {
            $user = User::create([
                'email' => $providerUser->getEmail(),
                'name'  => $providerUser->getName(),
            ]);
        }

        $user->accounts()->create([
            'provider_id'   => $providerUser->getId(),
            'provider_name' => $provider,
        ]);

        return $user;

        }
    }
}
This class has only one job and one method for creating or obtaining a local user and associating a social account with it.
此类仅具有一项工作和一种创建或获取本地用户并将其与社交帐户相关联的方法。
In findOrCreate, we first query the linked_social_accounts table to see if there’s any social account registered with the current provider ID. If so, we return the local user object to which this social account belongs:
在findOrCreate ,我们首先查询linked_social_accounts表以查看是否有任何使用当前提供者ID注册的社交帐户。 如果是这样,我们将返回此社交帐户所属的本地用户对象:
<?php
// ...

if ($account) {
   return $account->user;
}

// ...
If no social account is found, either the user does not exist or the user hasn’t linked any social accounts yet. With that in mind, we search the users table by email, because the user may have registered into our system via the registration form. If no user is found, we create a new user entry and associate the current social account with it.
如果未找到社交帐户,则表明该用户不存在或该用户尚未链接任何社交帐户。 考虑到这一点,我们通过电子邮件搜索users表,因为用户可能已通过注册表格注册到我们的系统中。 如果未找到用户,我们将创建一个新的用户条目,并将当前的社交帐户与其关联。
路线 (Routes)
We need two routes for our social authentication feature:
我们的社交身份验证功能需要两条途径:
File:
routes/web.php文件 :
routes/web.php
<?php

// ...

Route::get('login/{provider}',          'Auth\SocialAccountController@redirectToProvider');
Route::get('login/{provider}/callback', 'Auth\SocialAccountController@handleProviderCallback');
In the above routes, provider is specified as a route parameter. This allows us to reuse these two routes for other providers as well.
在上述路由中, provider被指定为route参数 。 这也使我们可以将这两个路由重用于其他提供者。
示例:通过Github进行身份验证 (Example: Authentication via Github)
To test out what we’ve built, let’s add Github as our social authentication (login) option.
为了测试我们构建的内容,让我们添加Github作为我们的社交身份验证(登录)选项。
First, we need to register a new OAuth application on Github.
首先,我们需要在Github上注册一个新的OAuth应用程序 。
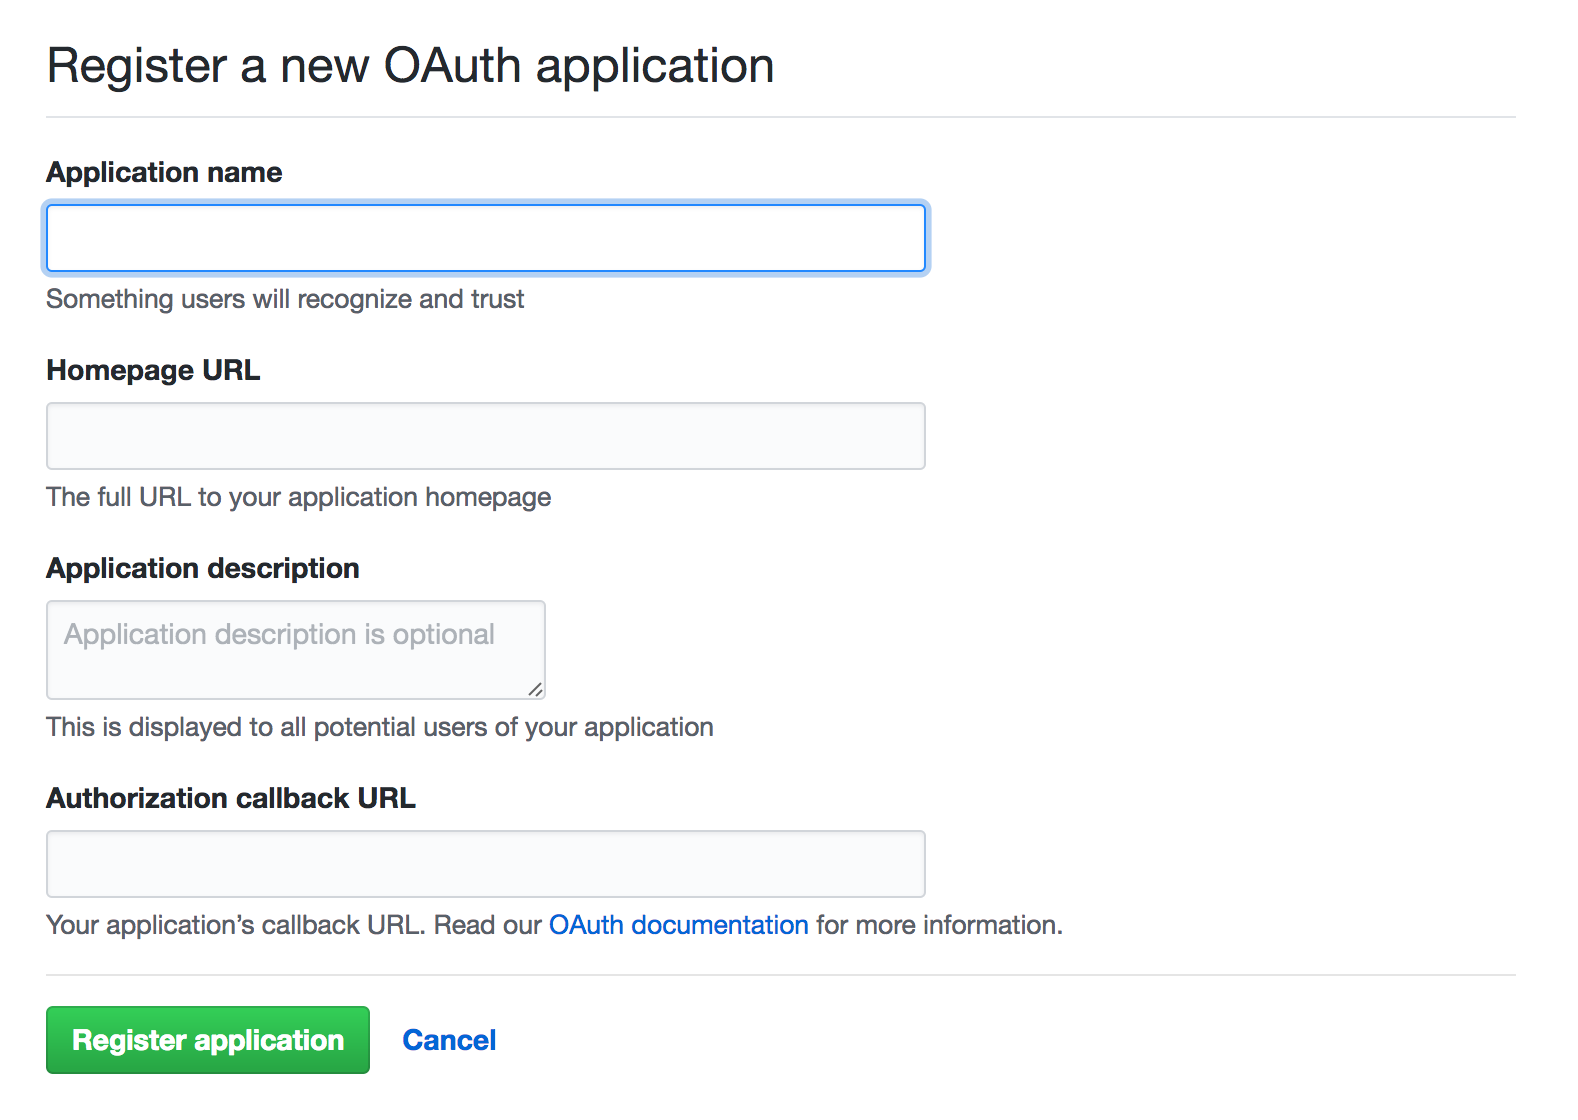
On the app creation page, there are a few fields we need to fill:
在应用程序创建页面上,我们需要填写一些字段:
Application Name should be a descriptive name for our application. This is what the users will see when redirected to Github to authorize our application.
应用程序名称应该是我们应用程序的描述性名称。 这是用户重定向到Github来授权我们的应用程序时将看到的内容。
Homepage URL is our website’s URL. It can be
http://localhost:8000or any other valid domain.主页URL是我们网站的URL。 它可以是
http://localhost:8000或任何其他有效域。Authorization Callback URL is an endpoint on our website to which the user is redirected after the authorization is completed.
授权回调URL是我们网站上的终结点,授权完成后,用户将重定向到该终结点。
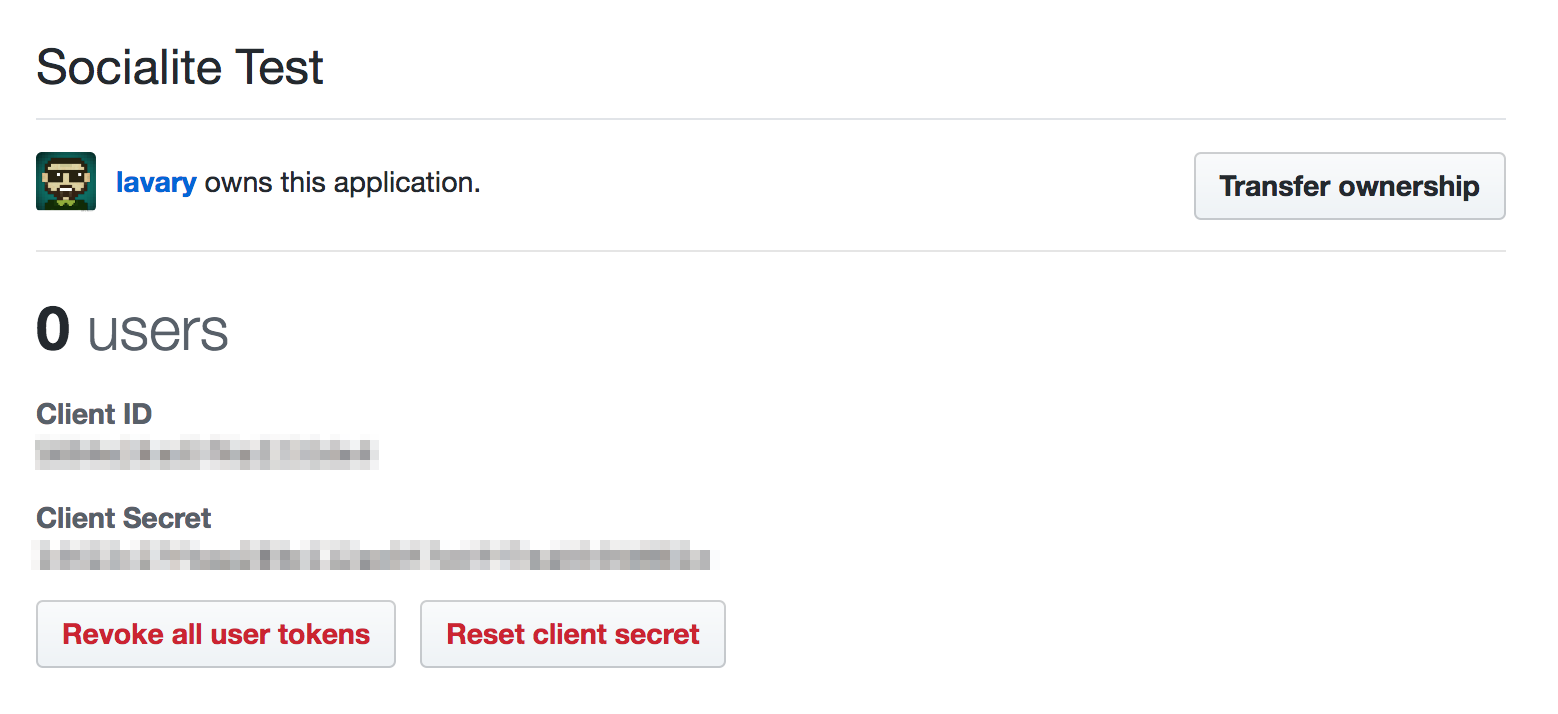
After creating the application, we’re redirected to the edit page where we can find (and copy) our keys.
创建应用程序后,我们将重定向到编辑页面,在这里我们可以找到(并复制)密钥。
组态 (Configuration)
In this step, we add our Github credentials to config/services.php:
在这一步中,我们将Github凭据添加到config/services.php :
File:
config/services.php文件 :
config/services.php
<?php

// ...

'github' => [
        'client_id'     => env('GITHUB_CLIENT_ID'),
        'client_secret' => env('GITHUB_CLIENT_SECRET'),
        'redirect'      => env('GITHUB_URL'),
],

// ...
Although we can directly put the credentials and the callback URL inside config/services.php, we keep them in our application’s .env file (and automatically load them from services.php file using getenv()). This is useful when we want to change the values in our production environment without touching the code.
尽管我们可以将凭据和回调URL直接放在config/services.php ,但.env它们保存在应用程序的.env文件中(并使用getenv()从services.php文件中自动加载它们)。 当我们想要在生产环境中更改值而不接触代码时,这很有用。
File:
.env档案 :
.env
GITHUB_CLIENT_ID=API Key
GITHUB_CLIENT_SECRET=API secret
GITHUB_URL=callbackurl
将Github链接添加到登录页面 (Adding the Github Link to the Login Page)
The last piece of the puzzle is adding the Github link to the login page. Open resources/views/auth/login.blade.php and put the following code in the proper place.
最后一个难题是将Github链接添加到登录页面。 打开resources/views/auth/login.blade.php并将以下代码放在正确的位置。
File:
resources/views/auth/login.blade.php文件 :
resources/views/auth/login.blade.php
<!-- Login page HTML code  -->

<a href="/login/github"  class="btn btn-default btn-md">Log in with Github</a>

<!-- Login page HTML code  -->
It should look like this:
它看起来应该像这样:
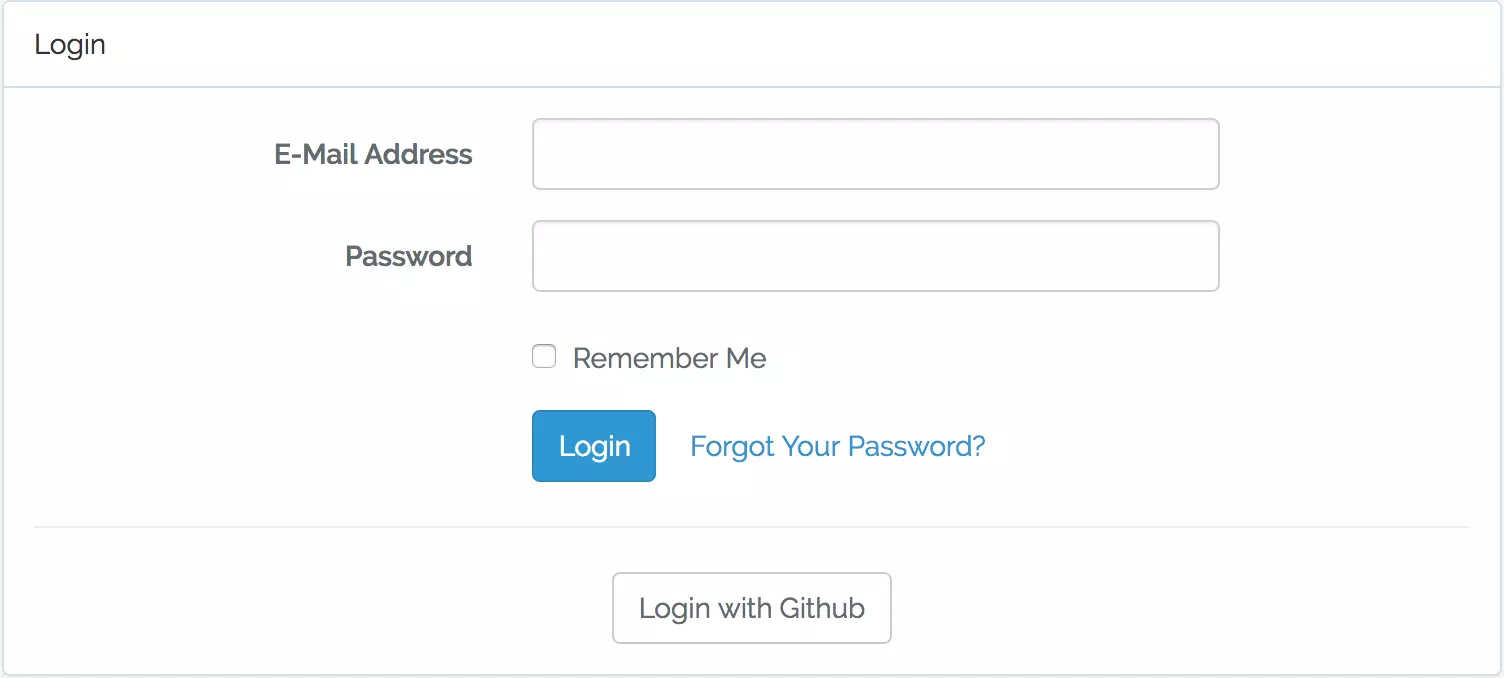
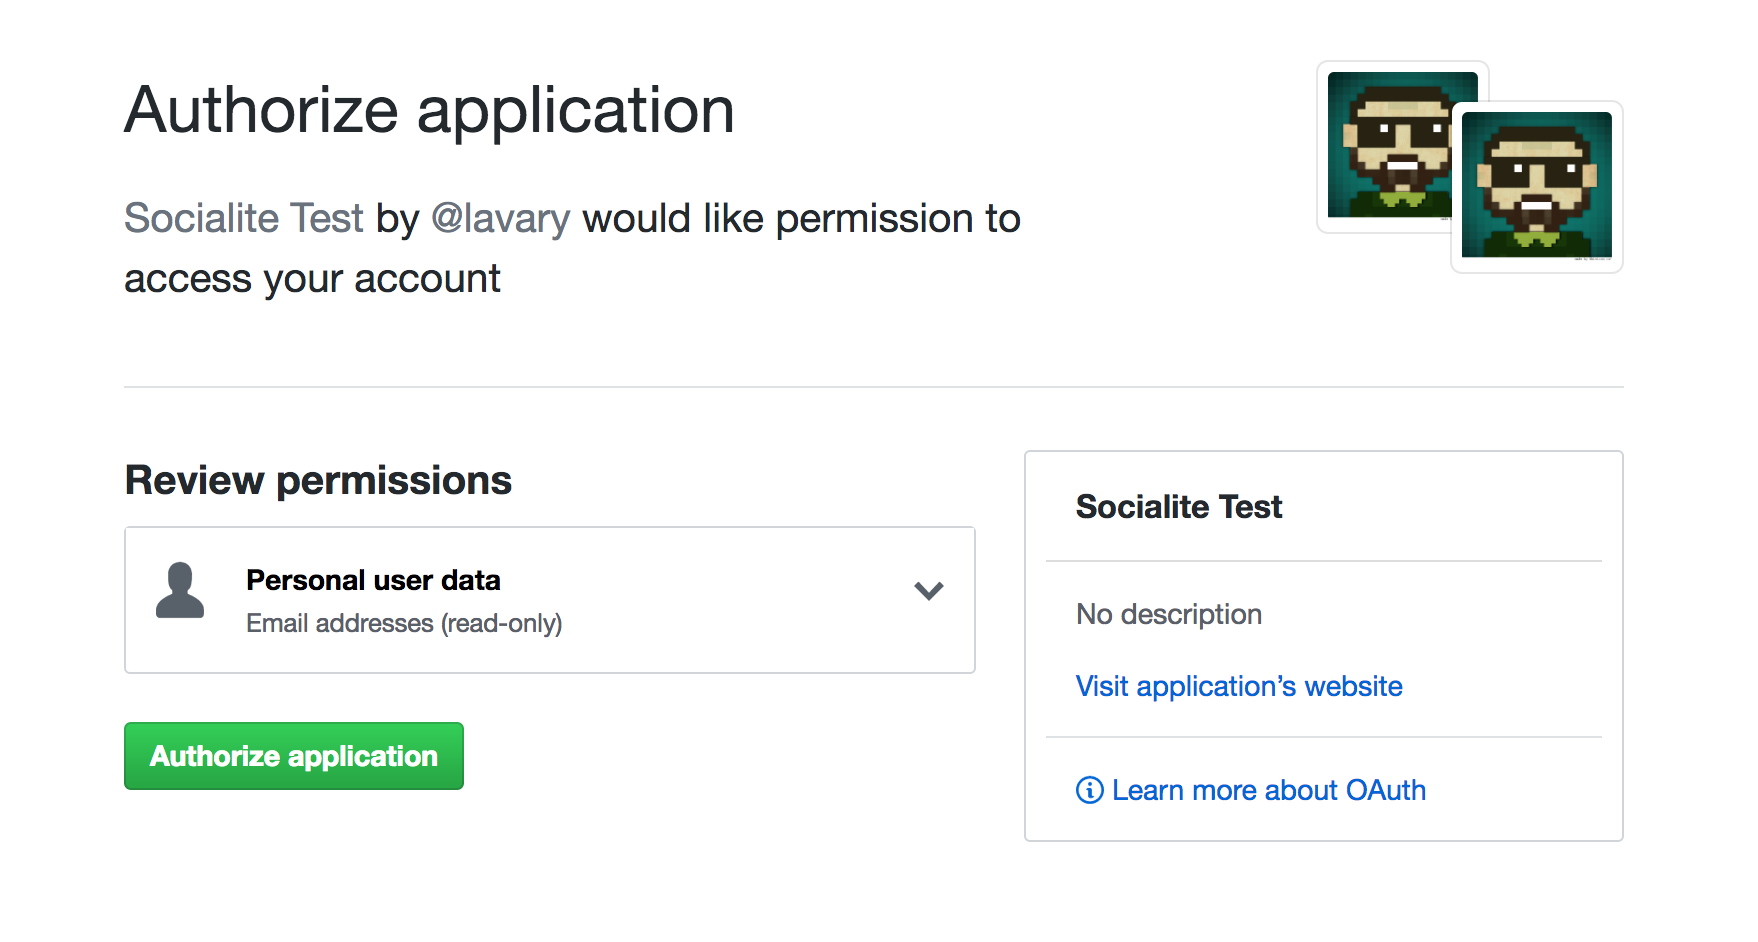
If we click on Log in with Github, we’ll be sent to Github’s authorization page:
如果单击用Github登录 ,我们将被发送到Github的授权页面:
社交名流提供者项目 (Socialite Providers Project)
Socialite Providers is a community-driven project providing plenty of unofficial providers for Socialite. Each provider is installed as an independent package (via Composer).
社交名流提供者是一个社区驱动的项目,为社交名流提供了大量非官方的提供者。 每个提供程序都作为独立的软件包安装(通过Composer)。
Providers use the Manager package, developed as part of the Socialite Providers project and installed with each provider as a dependency, to register themselves as Socialite providers.
提供者使用Manager软件包 (将其作为Socialite Providers项目的一部分开发并随依赖关系与每个提供者一起安装)注册为Socialite提供者。
The Manager package comes with a Laravel service provider, which extends Socialite’s default service provider. To use the providers in the SP collection, we need to replace this service provider with Socialite’s:
Manager软件包随附Laravel服务提供商,该服务提供商扩展了Socialite的默认服务提供商。 要使用SP集合中的提供程序,我们需要将此服务提供程序替换为Socialite的:
File: config/app.php
文件 : config/app.php
// ...

        SocialiteProviders\Manager\ServiceProvider:class,

        // ...
Note: service providers and socialite providers are two different concepts with similar names and should not be confused with each other. A service provider is a class for registering a service inside Laravel’s service container, while Socialite providers (or simply providers) are classes for interacting with different OAuth providers.
注意:服务提供者和社交名流提供者是两个不同的名称相似的概念,不应相互混淆。 服务提供者是用于在Laravel的服务容器中注册服务的类,而Socialite提供者(或简称为提供者)是用于与不同的OAuth提供者进行交互的类。
Each provider from the collection comes with an event listener, which needs to be added to the app/Provider/EventServiceProvider class, to listen to the SocialiteWasCalled event.
集合中的每个提供程序都带有一个事件侦听器 ,该侦听器需要添加到app/Provider/EventServiceProvider类中,以侦听SocialiteWasCalled事件。
Whenever Socialite is accessed, the SocialiteWasCalled event is triggered. Consequently, all providers listening to this event will register themselves with Socialite (implementing the observer pattern).
每当访问SocialiteWasCalled都会触发SocialiteWasCalled事件。 因此,所有收听此事件的提供者都将向Socialite注册(实施观察者模式 )。
File:
app/Providers/EventServiceProvider.php文件 :
app/Providers/EventServiceProvider.php
<?php

// ...

protected $listen = [
    \SocialiteProviders\Manager\SocialiteWasCalled::class => [
        'SocialiteProviders\Deezer\DeezerExtendSocialite@handle',
    ],
];
The above example registers a provider for authenticating via Deezer.
上面的示例注册了一个通过Deezer进行身份验证的提供程序。
Note: Standard Socialite providers can still be used unless we override them with a provider of the same name.
注意:除非我们使用相同名称的提供程序覆盖它们,否则仍可以使用标准Socialite提供程序。
示例:通过Spotify进行身份验证 (Example: Authentication via Spotify)
As an example, let’s add Spotify as a login option.
例如,让我们添加Spotify作为登录选项。
First, we head over to Socialite Providers to find the provider for Spotify – in the left sidebar.
首先,我们转到Socialite Providers ,在左侧边栏中找到Spotify的提供商。
Each provider has its own manual for installation and usage. To install the provider for Spotify, we use Composer:
每个提供者都有自己的安装和使用手册。 要为Spotify安装提供程序,我们使用Composer:
composer install socialproviders/spotify组态 (Configuration)
Again, we need to register an app on Spotify’s developer platform to obtain our credentials. Once we get the keys, we add them to our settings.
同样,我们需要在Spotify的开发人员平台上注册一个应用程序以获取我们的凭据。 获取密钥后,将它们添加到我们的设置中。
The Manager package makes it super easy to configure settings for new providers. Unlike the standard providers, we don’t have to add an entry in config/services.php per provider. Instead, we only add the settings to our application’s .env file – thanks to the Manager’s Config Retriever helper class.
通过Manager软件包,可以非常轻松地为新提供程序配置设置。 与标准提供程序不同,我们不必在每个提供程序的config/services.php添加条目。 相反,由于Manager的Config Retriever帮助程序类,我们仅将设置添加到应用程序的.env文件中。
The settings should be called CLIENT_ID, CLIENT_SECRET, and REDIRECT_URL, prefixed with their provider name:
这些设置应名为CLIENT_ID , CLIENT_SECRET和REDIRECT_URL ,并以提供者名称作为前缀 :
File:
.env档案:
.env
SPOTIFY_CLIENT_ID = YOUR_CLIENT_ID_ON_SPOTIFY
SPOTIFY_CLIENT_SECRET = YOUR_CLIENT_SECRET_ON_SPOTIFY
SPOTIFY_REDIRECT_URL = YOUR_CALL_BACK_URL
风景 (The View)
Next, we add the Log in with Spotify link to the login page:
接下来,我们将“ 使用Spotify登录”链接添加到登录页面:
File:
resources/views/auth/login.blade.php文件:
resources/views/auth/login.blade.php
<!-- Login page HTML code -->
<a href="/login/spotify" class="btn btn-default btn-md">Log in with Spotify</a>
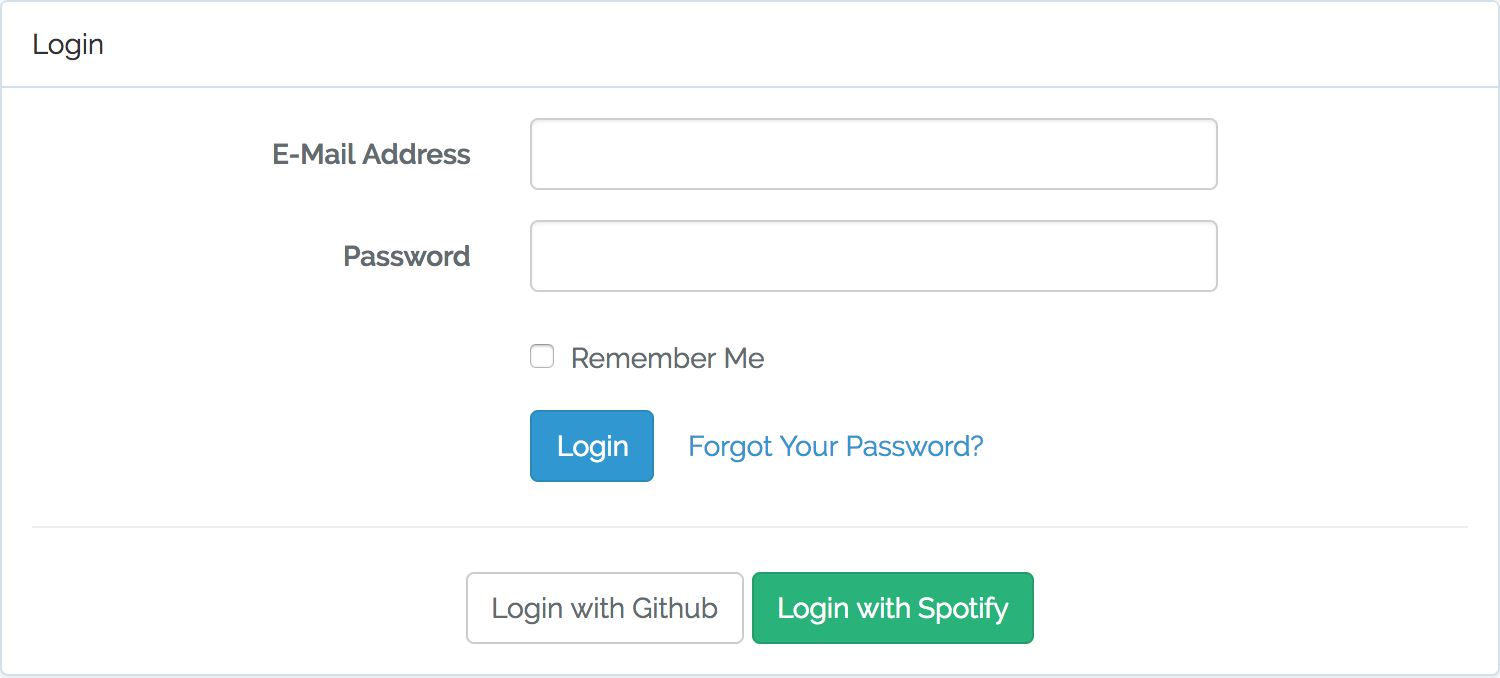
<!-- Login page HTML code -->The login page should now look like this:
现在,登录页面应如下所示:
We can reuse the routes we defined in the previous example (authentication via Github) or create new routes with new controllers and logic.
我们可以重用在上一个示例中定义的路由(通过Github进行身份验证),或者使用新的控制器和逻辑创建新的路由。
By clicking on Login with Spotify, we’ll be redirected to Spotify’s authorization page:
通过单击Login with Spotify ,我们将被重定向到Spotify的授权页面:
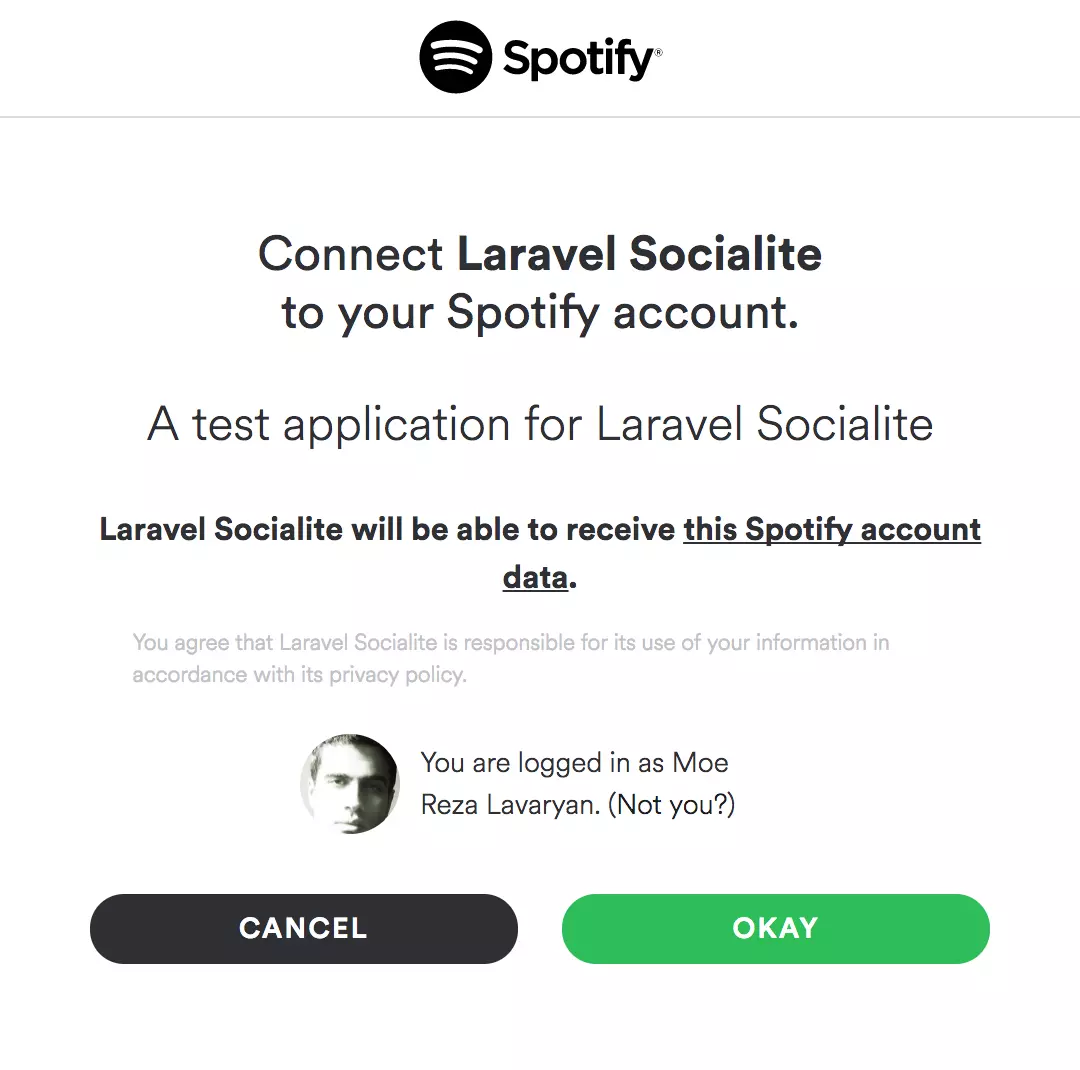
This means it works!
这意味着它有效!
创建自定义提供程序 (Creating a Custom Provider)
We can easily create our own provider if we can’t find a certain provider in the Socialite Providers collection.
如果我们在Socialite Providers集合中找不到某个提供程序,则可以轻松创建自己的提供程序。
Each provider consists of two components:
每个提供程序都包含两个组件:
- The provider class 提供者类
- The event listener 事件监听器
提供者类别 (Provider Class)
A provider class contains all the logic for handling OAuth related operations.
提供程序类包含用于处理OAuth相关操作的所有逻辑。
If you want to support OAuth 1.0 as well, you need to implement a separate provider class for it.
如果还想支持OAuth 1.0,则需要为其实现一个单独的提供程序类。
To get started quickly, let’s take a look at Deezer’s provider class from the SP collection:
为了快速入门,让我们看一下SP集合中的Deezer的提供程序类:
File:
vendor/socialiteproviders/deezer/Provider.php文件:
vendor/socialiteproviders/deezer/Provider.php
<?php

namespace SocialiteProviders\Deezer;

use SocialiteProviders\Manager\OAuth2\User;
use Laravel\Socialite\Two\ProviderInterface;
use SocialiteProviders\Manager\OAuth2\AbstractProvider;

class Provider extends AbstractProvider implements ProviderInterface
{
    /**
     * Unique Provider Identifier.
     */
    const IDENTIFIER = 'DEEZER';

    /**
     * {@inheritdoc}
     */
    protected $scopes = ['basic_access', 'email'];

    /**
     * {@inheritdoc}
     */
    protected function getAuthUrl($state)
    {
        return $this->buildAuthUrlFromBase(
            'https://connect.deezer.com/oauth/auth.php', $state
        );
    }

    /**
     * {@inheritdoc}
     */
    protected function getTokenUrl()
    {
        return 'https://connect.deezer.com/oauth/access_token.php';
    }

    /**
     * {@inheritdoc}
     */
    protected function getUserByToken($token)
    {
        $response = $this->getHttpClient()->get(
            'https://api.deezer.com/user/me?access_token='.$token
        );

        return json_decode($response->getBody()->getContents(), true);
    }

    /**
     * {@inheritdoc}
     */
    protected function mapUserToObject(array $user)
    {
        return (new User())->setRaw($user)->map([
            'id' => $user['id'], 'nickname' => $user['name'],
            'name' => $user['firstname'].' '.$user['lastname'],
            'email' => $user['email'], 'avatar' => $user['picture'],
        ]);
    }

    /**
     * {@inheritdoc}
     */
    protected function getCodeFields($state = null)
    {
        return [
            'app_id' => $this->clientId, 'redirect_uri' => $this->redirectUrl,
            'scope' => $this->formatScopes($this->scopes, $this->scopeSeparator),
            'state' => $state, 'response_type' => 'code',
        ];
    }

    /**
     * {@inheritdoc}
     */
    public function getAccessToken($code)
    {
        $url = $this->getTokenUrl().'?'.http_build_query(
            $this->getTokenFields($code), '', '&', $this->encodingType
        );

        $response = file_get_contents($url);

        $this->credentialsResponseBody = json_decode($response->getBody(), true);

        return $this->parseAccessToken($response->getBody());
    }

    /**
     * {@inheritdoc}
     */
    protected function getTokenFields($code)
    {
        return [
            'app_id' => $this->clientId,
            'secret' => $this->clientSecret,
            'code' => $code,
        ];
    }

    /**
     * {@inheritdoc}
     */
    protected function parseAccessToken($body)
    {
        parse_str($body, $result);

        return $result['access_token'];
    }
}
Each provider class extends the abstract class Laravel\Socialite\Two\AbstractProvider. This abstract class contains a few concrete methods for handling generic OAuth 2.0 operations – from formatting scopes to getting and handling access tokens. We just need to extends this abstract class and implement its abstract methods.
每个提供程序类都扩展了抽象类Laravel\Socialite\Two\AbstractProvider 。 这个抽象类包含一些用于处理通用OAuth 2.0操作的具体方法-从格式化范围到获取和处理访问令牌。 我们只需要扩展此抽象类并实现其抽象方法即可。
Additionally, we need to implement ProviderInterface, which specifies two methods to implement, redirect() and user().
另外,我们需要实现ProviderInterface ,它指定了两种实现方法: redirect()和user() 。
As you probably remember from the previous section, redirect() redirects users to the OAuth provider’s authorization page, while user() returns an instance of Laravel\Socialite\Contracts\User – containing a user’s information from the provider platform.
您可能在上一节中还记得, redirect()将用户重定向到OAuth提供程序的授权页面,而user()返回Laravel\Socialite\Contracts\User的实例–包含来自提供程序平台的用户信息。
提供者的事件监听器 (Provider’s Event Listener)
The provider’s event listener is a class, which registers the provider as a Socialite provider, whenever SocialiteWasCalled event is triggered.
提供程序的事件侦听器是一个类,每当触发SocialiteWasCalled事件时,该类便会将提供程序注册为Socialite提供程序。
Let’s take a look at Deezer’s event listener:
让我们看一下Deezer的事件监听器:
File: vendor/socialiteproviders/deezer/DeezerExtendSocialite.php
文件: vendor/socialiteproviders/deezer/DeezerExtendSocialite.php
<?php

namespace SocialiteProviders\Deezer;

use SocialiteProviders\Manager\SocialiteWasCalled;

class DeezerExtendSocialite
{
    /**
     * Register the provider.
     *
     * @param \SocialiteProviders\Manager\SocialiteWasCalled $socialiteWasCalled
     */
    public function handle(SocialiteWasCalled $socialiteWasCalled)
    {
        $socialiteWasCalled->extendSocialite(
            'deezer', __NAMESPACE__.'\Provider'
        );
    }
}
The event SocialiteWasCalled has a method extendSocialite(), which accepts the provider’s class as an argument and registers it with Socialite.
事件SocialiteWasCalled具有方法extendSocialite() ,该方法接受提供程序的类作为参数并将其注册到Socialite。
结语 (Wrapping Up)
Social authentication has never been easier when using Laravel. We learned how to authenticate our users using a wide array of OAuth providers. We also learned how to create our own provider.
使用Laravel时,社交身份验证从未如此简单。 我们学习了如何使用各种OAuth提供程序对用户进行身份验证。 我们还学习了如何创建自己的提供程序。
Other than the provider’s name and provider ID, you can store additional social information in the users table, including avatars, access tokens, refresh tokens (if any), just to name a few. You can also interact with the provider’s API or even take some actions on behalf of the user. Of course, only if the user has given you the permission to do so.
除了提供者的名称和提供者ID,您可以在users表中存储其他社交信息,包括化身,访问令牌,刷新令牌(如果有),仅举几例。 您还可以与提供者的API进行交互,甚至可以代表用户采取一些措施。 当然,只有在用户允许您这样做的情况下。
The full code for this tutorial is available on Github, in case you want to try it for yourself.
本教程的完整代码可在Github上获得 ,以防您自己尝试。
If you have any questions on the topic or if we’ve missed anything, let us know in the comments below!
如果您对此主题有任何疑问,或者我们有任何遗漏,请在下面的评论中告诉我们!
翻译自: https://www.sitepoint.com/easily-add-social-logins-to-your-app-with-socialite/


 294
294

 被折叠的 条评论
为什么被折叠?
被折叠的 条评论
为什么被折叠?
 到【灌水乐园】发言


