


joomla一键部署
This article was originally published on Alibaba Cloud. Thank you for supporting the partners who make SitePoint possible.
本文最初发表在阿里云上 。 感谢您支持使SitePoint成为可能的合作伙伴。
Joomla! is a free and open source content management system (CMS), and is one of the most popular among them. According to the official website, Joomla! is built on a model-view-controller web application framework that can be used independently of the CMS, allowing you to build powerful online applications.
Joomla! 是一个免费的开源内容管理系统(CMS),并且是其中最受欢迎的系统之一。 根据官方网站,Joomla! 基于模型-视图-控制器Web应用程序框架构建,该框架可独立于CMS使用,从而使您能够构建功能强大的在线应用程序。
One of my personal favorite features of Joomla! is the multi-language support with its large library of language packs. You can also translate the website admin backend with language extensions, helping you to easily localize your website.
我最喜欢的Joomla功能之一! 是其大型语言包库提供的多语言支持。 您还可以翻译带有语言扩展名的网站管理员后端,以帮助您轻松地本地化网站。
This step-by-step guide will walk you through setting up and deploying a Joomla! website on an Alibaba Cloud Elastic Compute Service (ECS) instance with Ubuntu 16.04.
本分步指南将引导您完成设置和部署Joomla! 带有Ubuntu 16.04的阿里云弹性计算服务(ECS)实例上的Web站点。
要求和先决条件 (Requirements and Prerequisites)
Before we deploy our Joomla! instance, we need to fulfill the following requirements. We need to set up an Alibaba Cloud Elastic Compute Service (ECS) Linux server (Ubuntu 16.04) with basic configurations. You should also allocate administrator (sudo) privileges to a non-root user.
在部署我们的Joomla之前! 例如,我们需要满足以下要求。 我们需要使用基本配置来设置阿里云弹性计算服务(ECS)Linux服务器(Ubuntu 16.04)。 您还应该将管理员(sudo)特权分配给非root用户。
You can refer to this guide for setting up your Alibaba Cloud ECS instance. If you don't have an Alibaba Cloud account, you can sign up for free and enjoy $300 of Free Trial credit.
您可以参考本指南来设置您的阿里云ECS实例。 如果您没有阿里云帐户,则可以免费注册并获得$ 300的免费试用信用 。
在Ubuntu 16.04 ECS实例上安装Joomla (Installing Joomla on an Ubuntu 16.04 ECS Instance)
To install Joomla on our server, we need to first install a LAMP (Linux, Apache, MySQL, PHP) stack.
要在我们的服务器上安装Joomla,我们首先需要安装LAMP(Linux,Apache,MySQL,PHP)堆栈。
步骤1:连接到服务器 (Step 1: Connect to Your Server)
There are many ways to connect to your server, but I will be using the Alibaba Cloud console for simplicity. To do this, go to your instance section and click connect from your created instance. You will be redirected to the Terminal.
有很多方法可以连接到服务器 ,但是为了简单起见,我将使用阿里云控制台。 为此,请转到您的实例部分,然后从创建的实例中单击连接。 您将被重定向到终端。
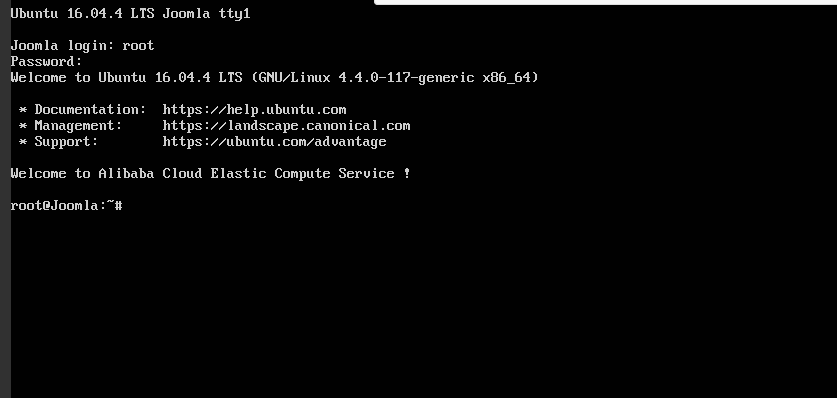
Enter username as Root and the password you created. If you didn't create a password, just continue by hitting enter. You are logged in to your server as system administrator.
输入用户名作为Root和您创建的密码。 如果您没有创建密码,请按Enter继续。 您已以系统管理员身份登录到服务器。
All the commands in the following sections should be typed in this terminal.
以下各节中的所有命令都应在此终端中键入。
步骤2:安装Apache (Step 2: Install Apache)
To install Apache, update your server repository list by typing command below.
要安装Apache,请通过在下面键入命令来更新服务器存储库列表。
sudo apt-get update
sudo apt-get update
Then install the Apache web server.
然后安装Apache Web服务器。
sudo apt-get install apache2
sudo apt-get install apache2
步骤3:安装MySQL (Step 3: Install MySQL)
Joomla, like most other content management systems, requires MySQL for its backend. So we need to install MySQL and link it to PHP.
与大多数其他内容管理系统一样,Joomla的后端也需要MySQL。 因此,我们需要安装MySQL并将其链接到PHP。
To do this, add the following command.
为此,请添加以下命令。
sudo apt-get install mysql-server php7.0-mysql
sudo apt-get install mysql-server php7.0-mysql
You'll be asked to enter a MySQL password. Keep the password secure because you will need it later.
系统将要求您输入MySQL密码。 确保密码安全,因为以后需要它。
Complete the installation process of MySQL with the command below.
使用以下命令完成MySQL的安装过程。
/usr/bin/mysql_secure_installation
/usr/bin/mysql_secure_installation
You'll be asked to enter the MySQL password you just created. Continue with the installation process by making the following selections.
系统将要求您输入刚创建MySQL密码。 进行以下选择,继续安装过程。
Would you like to setup VALIDATE password plugin ? [Y/N] N
Change the root password ? [ Y/N ] N
Remove anonymous users ? [Y/N] Y
Disallow root login remotely ? [Y/N] Y
Remove test database and access to it ? [Y/N] Y
Reload privilege tables now ? [Y/N] Y
步骤4:安装PHP (Step 4: Install PHP)
Joomla! requires PHP to be installed. Execute the following command to install PHP 7.0 and other required PHP modules.
Joomla! 需要安装PHP。 执行以下命令以安装PHP 7.0和其他必需PHP模块。
sudo apt-get install php7.0 libapache2-mod-php7.0 php7.0-mcrypt php7.0-xml php7.0-curl php7.0-json php7.0-cgi
sudo apt-get install php7.0 libapache2-mod-php7.0 php7.0-mcrypt php7.0-xml php7.0-curl php7.0-json php7.0-cgi
步骤5:确认安装LAMP (Step 5: Confirm LAMP Installation)
To confirm LAMP stack has been installed on your Ubuntu 16.04 server, follow the procedures below.
要确认您的Ubuntu 16.04服务器上已安装LAMP堆栈,请按照以下步骤操作。
Open the web browser and navigate to your server's IP address. You'll see the Apache2 Ubuntu Default page.
打开Web浏览器,然后导航到服务器的IP地址。 您将看到Apache2 Ubuntu Default页面。
Note: To check your server’s public IP address, check your ECS Instance dashboard. You'll see both private and public IP addresses. Use the public IP address to access your website. If you don't see the public IP address consider setting up an Elastic IP address.
注意 :要检查服务器的公共IP地址,请检查ECS实例仪表板。 您将同时看到私有和公共IP地址。 使用公共IP地址访问您的网站。 如果看不到公用IP地址,请考虑设置一个弹性IP地址 。
In order to confirm the PHP installation on your server, remove the default page and replace it with the PHP code below. To do this use the commands below.
为了确认服务器上PHP安装,请删除默认页面,然后将其替换为下面PHP代码。 为此,请使用以下命令。
rm /var/www/html/index.html
rm /var/www/html/index.html
Replace with a new file:
替换为新文件:
touch /var/www/html/index.php
nano /var/www/html/index.php
Enter a sample PHP code below:
在下面输入示例PHP代码:
<?php
phpinfo();
?>
To check your page, navigate to your web browser and enter the public IP address. You should see information about PHP installation if the LAMP stack is correctly installed on your server.
要检查您的页面,请导航至Web浏览器并输入公共IP地址。 如果在服务器上正确安装了LAMP堆栈,则应该看到有关PHP安装的信息。
Now remove the index.php file using commands below:
现在,使用以下命令删除index.php文件:
rm /var/www//html/index.php
rm /var/www//html/index.php
第6步:安装和配置Joomla! 在ECS上 (Step 6: Install and Configure Joomla! on ECS)
We are almost done. In this step we will be installing Joomla!.
我们快完成了。 在此步骤中,我们将安装Joomla!。
Before downloading and installing Joomla!, we need to open the Apache web server’s root directory.
在下载和安装Joomla!之前,我们需要打开Apache Web服务器的根目录。
cd /var/www/html
cd /var/www/html
Then, download the Joomla! installation file.
然后,下载Joomla! 安装文件。
wget [https://downloads.joomla.org/cms/joomla3/3-7.5-Stable-Full-Package.zip](https://downloads.joomla.org/cms/joomla3/3-7.5-Stable-Full-Package.zip)
wget [https://downloads.joomla.org/cms/joomla3/3-7.5-Stable-Full-Package.zip](https://downloads.joomla.org/cms/joomla3/3-7.5-Stable-Full-Package.zip)
Make sure the version you installed is the latest version.
确保您安装的版本是最新版本。
To unzip the downloaded archive, install unzip.
要解压缩下载的档案,请安装解压缩。
sudo apt-get install unzip
sudo apt-get install unzip
Unzip the downloaded Joomla Zip file:
解压缩下载的Joomla Zip文件:
unzip Joomla_3-7.5-Stable-Full_Package.zip
unzip Joomla_3-7.5-Stable-Full_Package.zip
If you can't unzip the .tar.gz file, use the following command:
如果无法解压缩.tar.gz文件,请使用以下命令:
tar -xvzf Joomla_3-7.5-Stable-Full_Package.tar.gz
tar -xvzf Joomla_3-7.5-Stable-Full_Package.tar.gz
Next, activate the .htaccess file by renaming it.
接下来,通过重命名来激活.htaccess文件。
mv htaccess.txt .htacess
mv htaccess.txt .htacess
Then set the appropriate file permissions:
然后设置适当的文件权限:
chown -R www-data /var/www/html
chmod -R 755/var/www/html
步骤7:为Joomla创建MySQL数据库和用户! (Step 7: Create a MySQL Database and User for Joomla!)
Joomla! makes use of relational databases to store and manage sites and user data. In this tutorial, we will use MySQL on our ECS instance. However, for production purposes, I recommend using Alibaba Cloud Apsara DB for increased security and reliability.
Joomla! 利用关系数据库来存储和管理站点以及用户数据。 在本教程中,我们将在ECS实例上使用MySQL。 但是,出于生产目的,我建议使用阿里云Apsara DB来提高安全性和可靠性。
Since we have installed MySQL before, we just need to create a database and user for Joomla. To do this, log in to your MySQL account using the command below.
由于我们之前已经安装了MySQL,因此我们只需要为Joomla创建数据库和用户。 为此,请使用以下命令登录到您MySQL帐户。
mysql -u root -p
mysql -u root -p
You'll be prompted to enter the MySQL password you created above. After successfully logging in, you'll be taken to the MySQL shell.
系统将提示您输入上面创建MySQL密码。 成功登录后,您将进入MySQL Shell。
Let's now create a database for Joomla!. You can name it anything you like. In my command below, I have used "joomla".
现在让我们为Joomla!创建一个数据库。 您可以随意命名。 在下面的命令中,我使用了“ joomla”。
mysql > CREATE DATABASE joomla ;
mysql > CREATE DATABASE joomla ;
Remember that every command in MySQL ends with a terminator semicolon (;). Create a new user and grant it permission to the database. You can replace "user" and "password" with the username and password of your choice.
请记住,MySQL中的每个命令都以终止符(;)结尾。 创建一个新用户并向其授予数据库权限。 您可以使用您选择的用户名和密码替换“用户”和“密码”。
mysql>GRANT ALL PRIVILEGES on joomla.* to ‘ user'@ ‘locahost' identified by ‘password';
mysql>GRANT ALL PRIVILEGES on joomla.* to ' user'@ 'locahost' identified by 'password';
Now, flush the privileges so that the current MySQL instance is aware of the recent privilege changes that we have made. Enter the command below.
现在,刷新特权,以便当前MySQL实例知道我们最近进行的特权更改。 在下面输入命令。
mysql>FLUSH PRIVILEGES ;
mysql>FLUSH PRIVILEGES ;
Exit from MySQL shell with this command:
使用以下命令从MySQL Shell退出:
msql>exit;
msql>exit;
Now you should be back to your server terminal.
现在您应该回到服务器终端。
步骤8:通过Web界面完成安装过程 (Step 8: Complete the Installation Process through Web Interface)
First, we need to restart the Apache Web server. Enter the following commands to do that:
首先,我们需要重新启动Apache Web服务器。 输入以下命令来执行此操作:
systemct1 restart apache2
systemct1 restart apache2
Open your web browser and navigate to your server's public IP address. You'll see the Joomla! web interface. Continue with the installation process.
打开您的Web浏览器并导航到服务器的公共IP地址。 您会看到Joomla! 网络界面。 继续安装过程。
Enter your MySQL username, password, and database in the Database Configuration section. In our case, this looks like:
在“ 数据库配置”部分中输入您MySQL用户名,密码和数据库。 在我们的例子中,这看起来像:
Database Type : MySQL
Host Name : localhost
Username : user
Password : password
Database Name : joomla
Table Prefix : joomla_
Old Database Process : Remove .
Fill out the remaining required information until you finish the installation process. That's it!
填写剩余的必需信息,直到完成安装过程。 而已!
最后的想法 (Final Thoughts)
As mentioned previously, if you're planning to deploy a Joomla website for production, I would recommend using Alibaba Cloud ApsaraDB for RDS. Alibaba Cloud ApsaraDB for RDS (Relational Database Service) is an on-demand database service that will free you up from the administrative task of managing a database. This leaves you with more time to focus on your core business.
如前所述,如果您打算将Joomla网站部署用于生产,我建议您使用RDS的阿里云ApsaraDB 。 用于RDS(关系数据库服务)的阿里云ApsaraDB是一项按需数据库服务,它将使您摆脱管理数据库的管理任务。 这使您有更多时间专注于核心业务。
翻译自: https://www.sitepoint.com/how-to-deploy-and-host-a-joomla-website-on-alibaba-cloud-ecs/
joomla一键部署


 2082
2082


 被折叠的 条评论
为什么被折叠?
被折叠的 条评论
为什么被折叠?
 到【灌水乐园】发言


