


 本文介绍了如何使用Laravel和Google Authenticator实现两因素身份验证(2FA)以提高Web应用安全性。通过2FA,用户需要提供密码(第一因素)和来自2FA应用的一次性密码(第二因素)才能登录。文中详细阐述了2FA的工作原理,以及如何设置Laravel项目,包括创建迁移、修改模型、设置路由、创建控制器、构建表单请求和视图,最后测试2FA功能。
This article was peer reviewed by Jad Bitar, Niklas Keller, Marco Pivetta, and Anthony Chambers. Thanks to all of SitePoint’s peer reviewers for making SitePoint content the best it can be!
这篇文章由Jad Bitar , Niklas Keller , Marco Pivetta和Anthony Chambers进行了同行评审 。 感谢所有SitePoint的同行评审人员使SitePoint内容达到最佳状态!
There are many ways an attacker can get a user’s password. It could happen through social engineering, key logging, or by some other nefarious means. Passwords alone are not enough to protect users from their accounts being compromised, specially if an attacker somehow has their credentials.
攻击者可以通过多种方式获取用户密码。 它可能是通过社会工程 , 密钥记录或其他一些邪恶的方式发生的。 仅密码不足以保护用户免遭其帐户的攻击,尤其是在攻击者以某种方式拥有其凭据的情况下。
To get around this serious shortcoming, the concept of two-factor authentication (2FA) was created. A password, which is one factor, is not enough to authenticate a user. The notion is that a user must use something they have (first factor) and something they know (second factor) to authenticate. A password is something the user knows. For the “something they have” part, many things can be used. Some solutions use biometrics, like a fingerprint, voice pattern recognition, or iris scan. These are relatively expensive solutions. Other second factor authentication methods include one-time passwords (OTP). These are passwords that are generated on a device and good for use once. Typically there are two types of OTPs; counter based, and time based. Using 2FA is better than just username and password alone because it is very difficult for an attacker to procure both the password and the second factor.
为了解决这一严重缺陷,创建了两因素身份验证(2FA)的概念。 密码是一个因素,不足以对用户进行身份验证。 概念是用户必须使用他们拥有的东西(第一因素)和他们知道的东西(第二因素)进行身份验证。 密码是用户知道的。 对于“他们拥有的东西”部分,可以使用很多东西。 一些解决方案使用生物识别技术,例如指纹,语音模式识别或虹膜扫描。 这些是相对昂贵的解决方案。 其他第二因素身份验证方法包括一次性密码(OTP)。 这些密码是在设备上生成的并且可以一次使用。 通常,有两种类型的OTP: 基于计数器和基于时间。 使用2FA优于仅使用用户名和密码,因为攻击者很难同时获得密码和第二因素。
In this tutorial, we will use Laravel and Google Authenticator to demonstrate how to implement 2FA in a webapp. Google Authenticator is just one implementation of the Time-Based One-Time Password (TOTP) algorithm, RFC 6238. This industry standard is used in a lot of various 2FA solutions. There are some advantages of Google Authenticator over some other 2FA solutions on the market. After you download the app to your smartphone, you can use it offline. Many other 2FA solutions need to be connected somehow; they send an SMS message, or a push notification, or even call the smartphone with a recorded message. This is not good for users that might be in a location where their phone is cut off from the outside world, like in an office located in the basement of a building.
在本教程中,我们将使用Laravel和Google Authenticator演示如何在Web应用程序中实现2FA。 Google Authenticator只是基于时间的一次性密码(TOTP)算法RFC 6238的一种实现 。 该行业标准用于许多2FA解决方案中。 与市场上其他一些2FA解决方案相比,Google Authenticator有一些优势。 将应用程序下载到智能手机后,即可离线使用。 许多其他2FA解决方案都需要以某种方式进行连接。 他们发送SMS消息或推送通知,甚至用记录的消息呼叫智能手机。 对于可能位于电话与外界隔离的位置的用户(例如,位于建筑物地下室的办公室中),这是不好的。
How the TOTP works is that the server generates a secret key. This secret key is then passed to the user. The secret key is used in combination with the current Unix timestamp to generate a six digit number, using a keyed-hash message authentication code (HMAC) based algorithm. This six digit number is the OTP. It changes every 30 seconds.
TOTP的工作方式是服务器生成一个密钥。 然后将此秘密密钥传递给用户。 秘密密钥与当前的Unix时间戳结合使用,以使用基于密钥的哈希消息认证码(HMAC)的算法来生成六位数的数字。 这六位数字是OTP。 它每30秒更改一次。
建立 (Setup)
家园 (Homestead)
This article assumes Laravel Homestead is installed. It is not necessary to use it, but the commands might differ slightly if you use a different environment and requires PHP 7. If you are not familiar with Homestead and want to produce similar results as this article aims to produce, please visit this SitePoint article that shows how to setup Homestead.
本文假定已安装Laravel Homestead。 不必使用它,但是如果您使用其他环境并且需要PHP 7,则命令可能会略有不同。如果您不熟悉Homestead并且想要产生与本文旨在产生的结果相似的结果,请访问此 SitePoint文章。展示了如何设置Homestead。
作曲家 (Composer)
Create a new Laravel project.
创建一个新的Laravel项目。
composer create-project --prefer-dist laravel/laravel ProjectMake sure you go to the project folder
确保您转到项目文件夹
cd ProjectThere is a Laravel package that includes a PHP version of the Google Authenticator. We will use it in this project. First, we will include Antonio Carlos Ribeiro’s Laravel package using Composer. We will also install a library to do Base32 encoding in constant time.
有一个Laravel软件包,其中包含PHP版本的Google Authenticator。 我们将在本项目中使用它。 首先,我们将使用Composer包括Antonio Carlos Ribeiro的Laravel软件包。 我们还将安装一个库,以在恒定时间内进行Base32编码。
composer require pragmarx/google2fa
composer require paragonie/constant_time_encoding
After Composer has installed the package, we must now tell Laravel about it. Open config/app.php and add PragmaRX\Google2FA\Vendor\Laravel\ServiceProvider::class, to the providers array. Also, add 'Google2FA' => PragmaRX\Google2FA\Vendor\Laravel\Facade::class, to the aliases array.
在Composer安装该软件包之后,我们现在必须将其告知Laravel。 打开config/app.php并将PragmaRX\Google2FA\Vendor\Laravel\ServiceProvider::class,到providers数组。 另外,将'Google2FA' => PragmaRX\Google2FA\Vendor\Laravel\Facade::class,到aliases数组。
脚手架 (Scaffolding)
Laravel includes scaffolding to create all the controllers, views, and routes needed for basic user registration, login, etc. We will use the auth scaffolding to quickly build the login and registration screens.
Laravel包含用于创建基本用户注册,登录等所需的所有控制器,视图和路由的支架。我们将使用auth支架快速构建登录和注册屏幕。
php artisan make:authWe will modify some of the auto-generated code to add two-factor authentication.
我们将修改一些自动生成的代码以添加双重身份验证。
数据库和模型 (Database and Models)
We need to store the secret key used to create the one-time password in the user’s record. To do this, create a migration for the new database column needed.
我们需要在用户记录中存储用于创建一次性密码的密钥。 为此,请为所需的新数据库列创建迁移。
php artisan make:migration add_google2fa_secret_to_usersOpen the newly created migration file located in the database/migrations folder. It will be named something like 2016_01_06_152631_add_google2fa_secret_to_users.php. Replace the contents of the file with the code below:
打开位于database/migrations文件夹中的新创建的迁移文件。 它将被命名为类似2016_01_06_152631_add_google2fa_secret_to_users.php 。 用以下代码替换文件的内容:
<?php

use Illuminate\Database\Schema\Blueprint;
use Illuminate\Database\Migrations\Migration;

class AddGoogle2faSecretToUsers extends Migration
{
    /**
     * Run the migrations.
     *
     * @return void
     */
    public function up()
    {
        Schema::table('users', function ($table) {
            $table->string('google2fa_secret')->nullable();
        });
    }

    /**
     * Reverse the migrations.
     *
     * @return void
     */
    public function down()
    {
        Schema::table('users', function ($table) {
            $table->dropColumn('google2fa_secret');
        });
    }
}
When the migration is run, the column google2fa_secret is added to the users table. When the migration is rolled back, that column is removed from the table.
运行迁移时, google2fa_secret列添加到users表。 回滚迁移后,该列将从表中删除。
Next, we will run the migration to set up the database tables.
接下来,我们将运行迁移以设置数据库表。
php artisan migrateNow that the column google2fa_secret has been added to the users table, we should update the App\User model to make it a bit more secure. By default, if the program converts the data from an instance of App\User to JSON, the contents of the google2fa_secret column will be a part of the JSON object. We will block this action. Open the App\User model, app/User.php, and add the array element google2fa_secret as a string to the hidden attribute.
现在已将google2fa_secret列添加到users表中,我们应该更新App\User模型以使其更加安全。 默认情况下,如果程序将数据从App\User实例转换为JSON,则google2fa_secret列的内容将成为JSON对象的一部分。 我们将阻止此操作。 打开App\User模型app/User.php ,并将数组元素google2fa_secret作为字符串添加到hidden属性。
路线 (Routes)
Open up the web routes file routes/web.php and add the following routes to the bottom:
打开网络路由文件routes/web.php并在底部添加以下路由:
Route::get('/2fa/enable', 'Google2FAController@enableTwoFactor');
Route::get('/2fa/disable', 'Google2FAController@disableTwoFactor');
Route::get('/2fa/validate', 'Auth\AuthController@getValidateToken');
Route::post('/2fa/validate', ['middleware' => 'throttle:5', 'uses' => 'Auth\AuthController@postValidateToken']);
The routes we added do various things.
我们添加的路线可做各种事情。
When a user goes to /2fa/enable, it will create the 2FA secret key and provide instructions on how to configure their device to use it. When a user goes to /2fa/disable, it will remove the 2FA secret key from the user’s account so that they can log in without having to provide the one-time password. After a user authenticates with their username and password, if they have a 2FA secret key set up, they will be redirected to /2fa/validate via a HTTP GET. This route shows a form where they can put in their one-time password. When the user submits the form, it goes to /2fa/validate via a HTTP POST. This route makes sure the one-time password passed in by the user is valid. The route also uses the throttle Laravel middleware. If an attacker has your password, it is easy to go through all combinations of the 6-digit token in an automated way. The throttle is set for a maximum of 5 requests per minute. Laravel’s throttle middleware is based on IP address. This article just shows you the concept of throttling and doesn’t protect against a distributed brute force attack. In a production implementation, consider doing throttling based on user.
当用户转到/2fa/enable ,它将创建2FA密钥,并提供有关如何配置其设备以使用它的说明。 当用户转到/2fa/disable ,它将从用户帐户中删除2FA密钥,这样他们就可以登录而无需提供一次性密码。 用户使用其用户名和密码进行身份验证后,如果设置了2FA密钥,则将通过HTTP GET将其重定向到/2fa/validate 。 此路线显示一种表单,他们可以在其中输入一次性密码。 当用户提交表单时,它将通过HTTP POST转到/2fa/validate 。 此路由可确保用户传递的一次性密码有效。 该路线还使用throttle Laravel中间件。 如果攻击者拥有您的密码,则可以很容易地自动完成6位令牌的所有组合。 节流阀设置为每分钟最多5个请求。 Laravel的节流中间件基于IP地址。 本文只是向您展示了节流的概念,并不能防止分布式蛮力攻击。 在生产实现中,请考虑根据用户进行节流。
控制器 (Controllers)
We will create a new controller to enable and disable 2FA support for a user:
我们将创建一个新的控制器来为用户启用和禁用2FA支持:
php artisan make:controller Google2FAControllerOpen the new controller Google2FAController and replace the contents with the code below:
打开新的控制器Google2FAController并将内容替换为以下代码:
<?php

namespace App\Http\Controllers;

use Crypt;
use Google2FA;
use Illuminate\Http\Request;
use App\Http\Controllers\Controller;
use Illuminate\Foundation\Validation\ValidatesRequests;
use \ParagonIE\ConstantTime\Base32;

class Google2FAController extends Controller
{
    use ValidatesRequests;

    /**
     * Create a new authentication controller instance.
     *
     * @return void
     */
    public function __construct()
    {
        $this->middleware('web');
    }

    /**
     *
     * @param \Illuminate\Http\Request $request
     * @return \Illuminate\Http\Response
     */
    public function enableTwoFactor(Request $request)
    {
        //generate new secret
        $secret = $this->generateSecret();

        //get user
        $user = $request->user();

        //encrypt and then save secret
        $user->google2fa_secret = Crypt::encrypt($secret);
        $user->save();

        //generate image for QR barcode
        $imageDataUri = Google2FA::getQRCodeInline(
            $request->getHttpHost(),
            $user->email,
            $secret,
            200
        );

        return view('2fa/enableTwoFactor', ['image' => $imageDataUri,
            'secret' => $secret]);
    }

    /**
     *
     * @param \Illuminate\Http\Request $request
     * @return \Illuminate\Http\Response
     */
    public function disableTwoFactor(Request $request)
    {
        $user = $request->user();

        //make secret column blank
        $user->google2fa_secret = null;
        $user->save();

        return view('2fa/disableTwoFactor');
    }

    /**
     * Generate a secret key in Base32 format
     *
     * @return string
     */
    private function generateSecret()
    {
        $randomBytes = random_bytes(10);

        return Base32::encodeUpper($randomBytes)
    }
}
The method, enableTwoFactor(), gets executed when a user wants to setup 2FA. First, it generates a new secret key. Unfortunately at this time, the key generation function inside the 2FA library does not use a cryptographically secure PRNG, so we use the random_bytes() function to create the bytes for our secret key and Base32 encode it. Then, the method stores an encrypted version of the secret key to the users table.
当用户想要设置2FA时,将执行enableTwoFactor()方法。 首先,它生成一个新的密钥。 不幸的是,这时2FA库中的密钥生成函数未使用加密安全的PRNG ,因此我们使用random_bytes()函数为我们的秘密密钥创建字节,并使用Base32对其进行编码。 然后,该方法将密钥的加密版本存储到用户表。
Next, a 200x200px QR barcode image that contains the secret key and other metadata needed for the Google Authenticator mobile app is generated. This image is encoded in the Data URI scheme so we can inline it into the webpage. Next, the enableTwoFactor view is loaded to display the QR barcode and the secret key as text, just in case they use a RFC 6238 compatible app that can’t read QR barcodes.
接下来,生成一个200x200px的QR条码图像,其中包含密钥和Google Authenticator移动应用所需的其他元数据。 该图像以数据URI方案编码,因此我们可以将其内联到网页中。 接下来,加载enableTwoFactor视图以将QR条码和密钥显示为文本,以防万一它们使用了RFC 6238兼容的应用程序,该应用程序无法读取QR条码。
The disableTwoFactor() method is called when a user wants to disable 2FA. It puts a null value into the database for the secret key and then displays a view that says that 2FA has been disabled.
当用户想要禁用2FA时,将调用disableTwoFactor()方法。 它将null值放入密钥的数据库中,然后显示一个视图,指出2FA已被禁用。
Now, we will make a few modifications to the Auth controller. Open app/Http/Controllers/Auth/AuthController.php and put the following lines of code near the top in the use section:
现在,我们将对Auth控制器进行一些修改。 打开app/Http/Controllers/Auth/AuthController.php并将以下代码行放在use部分的顶部附近:
use Cache;
use Illuminate\Http\Request;
use Illuminate\Support\Facades\Auth;
use Illuminate\Contracts\Auth\Authenticatable;
use App\Http\Requests\ValidateSecretRequest;
After a user authenticates, the Auth controller sees if there is an authenticated() method. If so, the controller executes that method. By default, the scaffolding does not create the authenticated() method. We will create this method and use it to prompt someone to put in the one-time password if they have set up the 2FA secret key. Inside the same AuthController class, add the following method:
用户进行身份验证后,Auth控制器将查看是否存在authenticated()方法。 如果是这样,则控制器执行该方法。 默认情况下,脚手架不会创建authenticated()方法。 我们将创建此方法,并用它来提示某人输入一次性密码(如果他们已设置2FA密钥)。 在同一AuthController类中,添加以下方法:
/**
     * Send the post-authentication response.
     *
     * @param  \Illuminate\Http\Request $request
     * @param  \Illuminate\Contracts\Auth\Authenticatable $user
     * @return \Illuminate\Http\Response
     */
    private function authenticated(Request $request, Authenticatable $user)
    {
        if ($user->google2fa_secret) {
            Auth::logout();

            $request->session()->put('2fa:user:id', $user->id);

            return redirect('2fa/validate');
        }

        return redirect()->intended($this->redirectTo);
    }
If the user has set up 2FA, this method logs out the user, saves their user id to the session, and redirects them to a page where they can enter the one-time password. If the user does not have 2FA set up, it redirects them to the homepage without logging them out.
如果用户已设置2FA,则此方法将注销该用户,将其用户ID保存到会话中,然后将其重定向到可以输入一次性密码的页面。 如果用户未设置2FA,则会将其重定向到首页而不注销。
The getValidateToken() method displays the page where a user can enter in their one-time password. In the AuthController class, add this method:
getValidateToken()方法显示页面,用户可以在其中输入一次性密码。 在AuthController类中,添加以下方法:
/**
     *
     * @return \Illuminate\Http\Response
     */
    public function getValidateToken()
    {
        if (session('2fa:user:id')) {
            return view('2fa/validate');
        }

        return redirect('login');
    }
If the session with the user id does not exist, the user gets redirected to the login page. If the user id is set in the session, the view is shown.
如果具有用户ID的会话不存在,则该用户将被重定向到登录页面。 如果在会话中设置了用户标识,则显示该视图。
Once the user clicks the “Validate” button on the one-time password page, the request is routed to the postValidateToken() method. Add the following code to the AuthController class:
一旦用户单击一次性密码页面上的“ Validate”按钮,该请求便被路由到postValidateToken()方法。 将以下代码添加到AuthController类中:
/**
     *
     * @param  App\Http\Requests\ValidateSecretRequest $request
     * @return \Illuminate\Http\Response
     */
    public function postValidateToken(ValidateSecretRequest $request)
    {
        //get user id and create cache key
        $userId = $request->session()->pull('2fa:user:id');
        $key    = $userId . ':' . $request->totp;

        //use cache to store token to blacklist
        Cache::add($key, true, 4);

        //login and redirect user
        Auth::loginUsingId($userId);

        return redirect()->intended($this->redirectTo);
    }
Before this method is run, validation is done via the ValidateSecretRequest form request class. If validation fails, the postValidateToken() method is not executed. After validation, the one-time password is added to a blacklist for 4 minutes. This is done because the 2FA library allows codes up to 4 minutes old to be valid and we don’t want a user to be able to reuse a code during that window. Next, the user is logged into the system and redirected to the homepage.
在运行此方法之前,将通过ValidateSecretRequest表单请求类完成ValidateSecretRequest 。 如果验证失败,则不会执行postValidateToken()方法。 验证后,一次性密码将被添加到黑名单中达4分钟。 这样做是因为2FA库允许有效时间不超过4分钟的代码有效,而且我们不希望用户能够在该窗口期间重用代码。 接下来,用户登录到系统并重定向到主页。
Lastly, make sure that in the AuthController class, the redirectTo property is set to /home. This redirects users to the homepage /home instead of the welcome page / after login.
最后,确保在AuthController类中, redirectTo属性设置为/home 。 登录后,这会将用户重定向到主页/home而不是欢迎页面/ 。
表格申请 (Form Request)
To create a new form request class, execute the following command:
要创建新的表单请求类,请执行以下命令:
php artisan make:request ValidateSecretRequestOpen app/Http/Requests/ValidateSecretRequest.php and replace the contents with the code below:
打开app/Http/Requests/ValidateSecretRequest.php并将内容替换为以下代码:
<?php

namespace App\Http\Requests;

use Cache;
use Crypt;
use Google2FA;
use App\User;
use App\Http\Requests\Request;
use Illuminate\Validation\Factory as ValidatonFactory;

class ValidateSecretRequest extends Request
{
    /**
     *
     * @var \App\User
     */
    private $user;

    /**
     * Create a new FormRequest instance.
     *
     * @param \Illuminate\Validation\Factory $factory
     * @return void
     */
    public function __construct(ValidatonFactory $factory)
    {
        $factory->extend(
            'valid_token',
            function ($attribute, $value, $parameters, $validator) {
                $secret = Crypt::decrypt($this->user->google2fa_secret);

                return Google2FA::verifyKey($secret, $value);
            },
            'Not a valid token'
        );

        $factory->extend(
            'used_token',
            function ($attribute, $value, $parameters, $validator) {
                $key = $this->user->id . ':' . $value;

                return !Cache::has($key);
            },
            'Cannot reuse token'
        );
    }

    /**
     * Determine if the user is authorized to make this request.
     *
     * @return bool
     */
    public function authorize()
    {
        try {
            $this->user = User::findOrFail(
                session('2fa:user:id')
            );
        } catch (Exception $exc) {
            return false;
        }

        return true;
    }

    /**
     * Get the validation rules that apply to the request.
     *
     * @return array
     */
    public function rules()
    {
        return [
            'totp' => 'bail|required|digits:6|valid_token|used_token',
        ];
    }
}
We are doing three things in this file;
我们在此文件中执行三件事;
- Setting up two custom validator rules 设置两个自定义验证器规则
- Making sure that the user is authorized to do this request 确保用户有权执行此请求
- Defining what the validation rules for this request are. 定义此请求的验证规则。
In the class constructor, we set up the custom validator rules. The first rule makes sure that the user has presented a valid TOTP token. The second rule makes sure the user hasn’t submitted a token on the blacklist. Normally, custom validator rules are used for many different requests and so defined in the AppServiceProvider class. But, since these rules are only being used in one request, we put it in this class’ constructor.
在类构造函数中,我们设置了自定义验证器规则。 第一条规则确保用户提供了有效的TOTP令牌。 第二条规则可确保用户尚未在黑名单上提交令牌。 通常,自定义验证程序规则用于许多不同的请求,因此在AppServiceProvider类中进行了定义。 但是,由于这些规则仅在一个请求中使用,因此我们将其放在此类的构造函数中。
The authorize() method checks and sees if it can get a user record based on the user id stored in the session. If this doesn’t work, then the request is not considered authorized.
authorize()方法根据会话中存储的用户ID检查并查看它是否可以获得用户记录。 如果这不起作用,则该请求不被视为已授权。
The rules() method defines the validation rules. The rules say that the token must not be empty, be a six digit number, be valid, and not be on the user’s blacklist.
rules()方法定义验证规则。 规则规定,令牌不得为空,为六位数字,有效且不能在用户的黑名单中。
观看次数 (Views)
On the homepage, we need to add a section that allows a user to enable or disable 2FA. Open resources/views/home.blade.php and add the following code just before the last closing div tag:
在主页上,我们需要添加一个部分,允许用户启用或禁用2FA。 打开resources/views/home.blade.php并在最后一个div标记之前添加以下代码:
<div class="row">
<div class="col-md-10 col-md-offset-1">
<div class="panel panel-default">
<div class="panel-heading">Two-Factor Authentication</div>
<div class="panel-body">
@if (Auth::user()->google2fa_secret)
<a href="{{ url('2fa/disable') }}" class="btn btn-warning">Disable 2FA</a>
@else
<a href="{{ url('2fa/enable') }}" class="btn btn-primary">Enable 2FA</a>
@endif
</div>
</div>
</div>
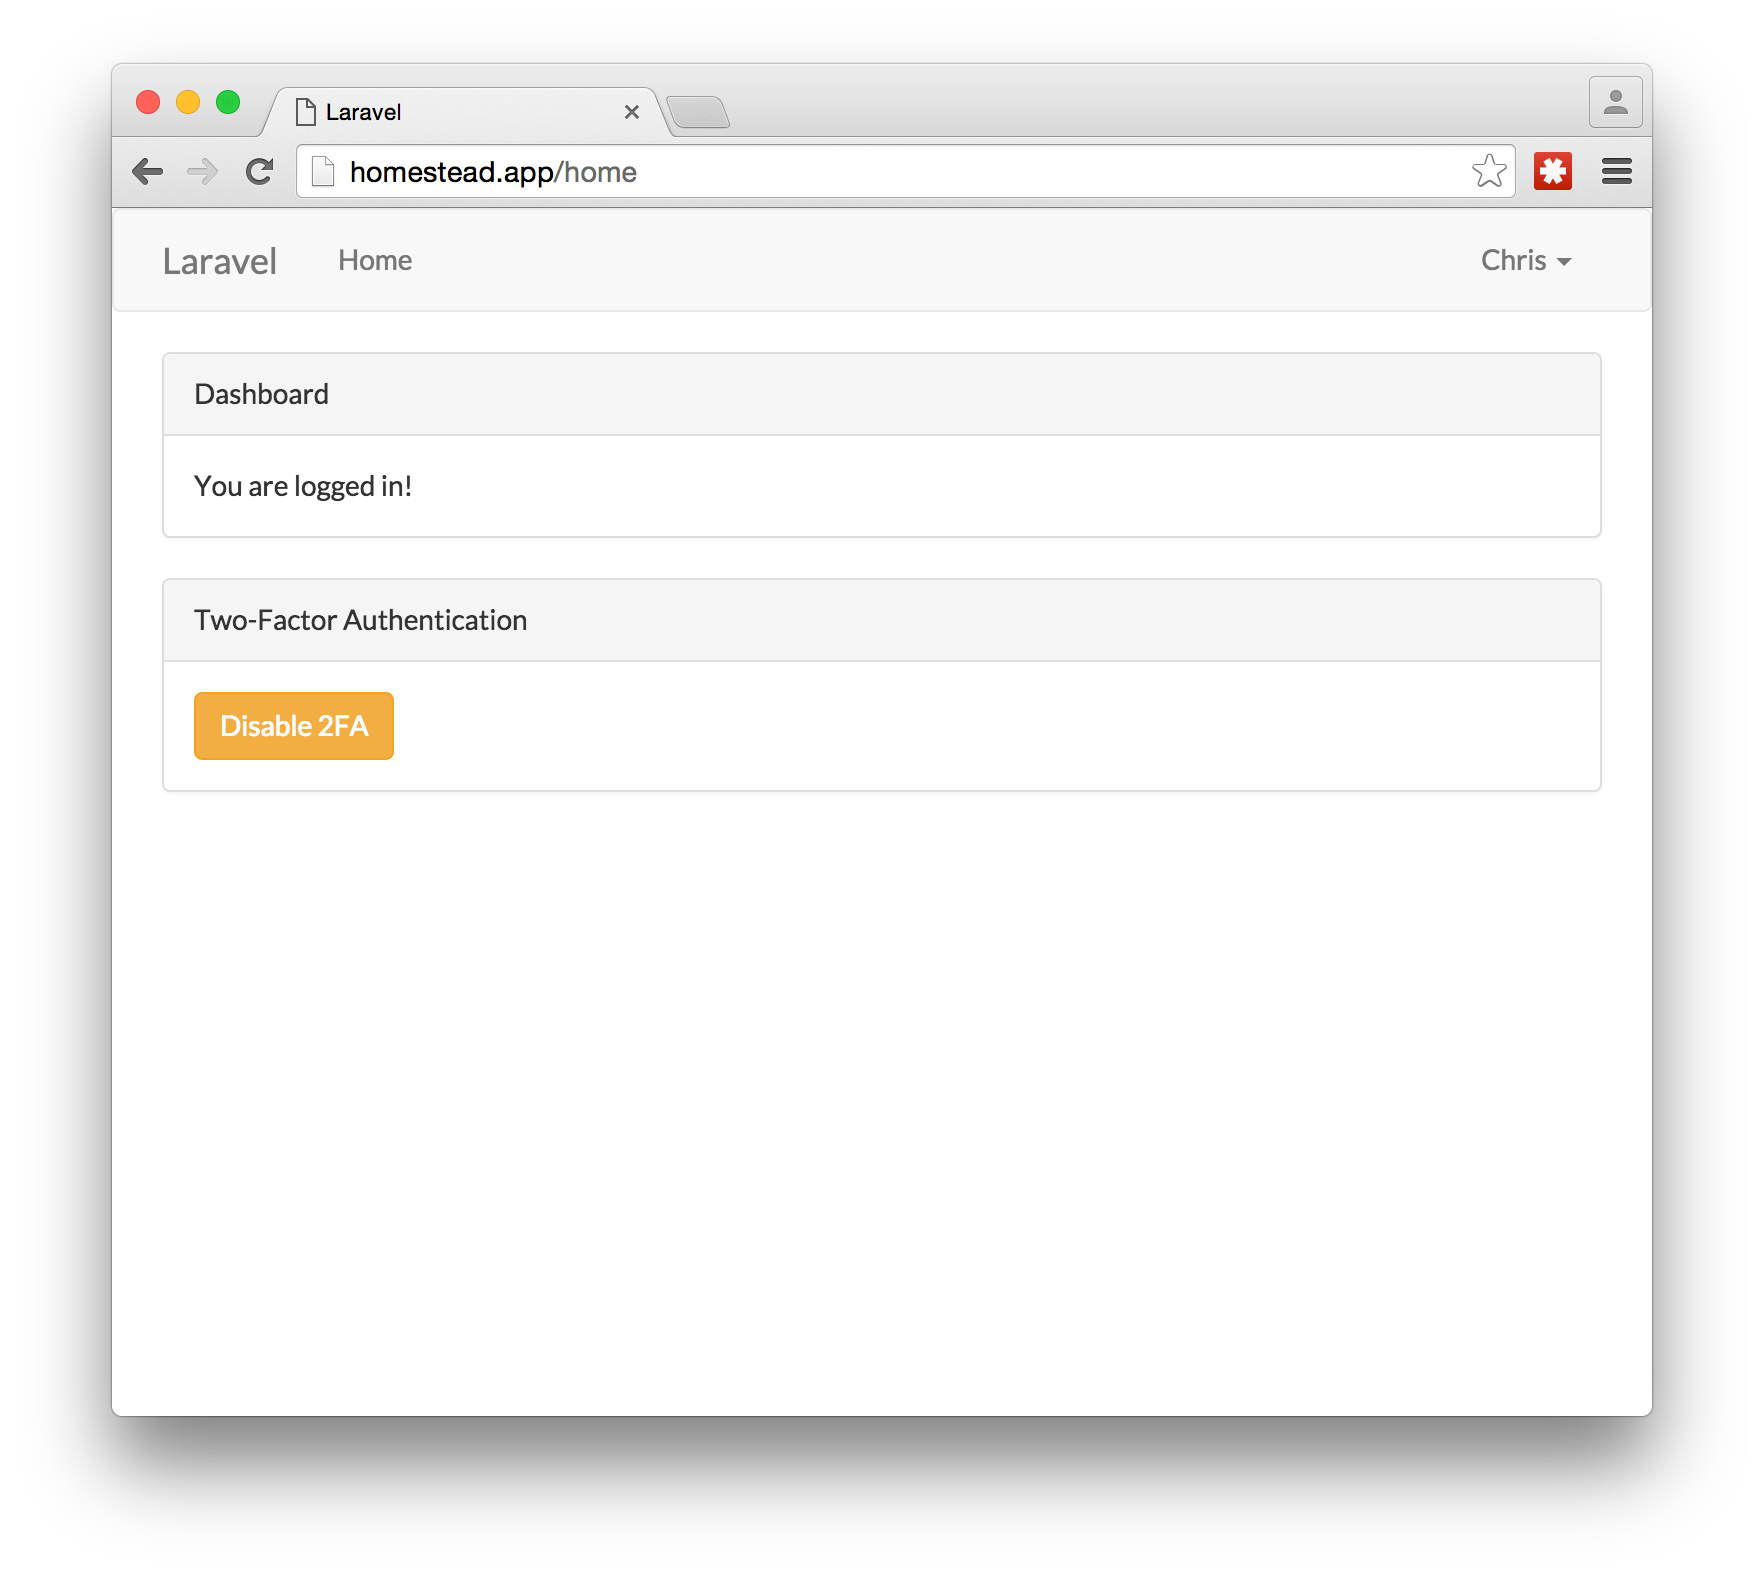
</div>When the user does not have the google2fa_secret field set, then a button is shown that allows them to enable 2FA. When the google2fa_secret field is set, then a button is shown that allows them to disable 2FA.
如果用户未设置google2fa_secret字段,则会显示一个按钮,允许他们启用2FA。 设置google2fa_secret字段后,会显示一个按钮,允许他们禁用2FA。
For this project, we will create some new views. We will put them in their own directory. Create the directory 2fa in the views folder:
对于此项目,我们将创建一些新视图。 我们将它们放在自己的目录中。 在views文件夹中创建目录2fa :
mkdir resources/views/2faLet’s create the page that displays the secret key with instructions on how to configure the user’s 2FA device. Create the view file enableTwoFactor.blade.php in the newly created resources/views/2fa folder and put the following contents into it:
让我们创建一个显示密钥的页面,其中包含有关如何配置用户的2FA设备的说明。 在新创建的resources/views/2fa文件夹中创建视图文件enableTwoFactor.blade.php ,并将以下内容放入其中:
@extends('layouts.app')

@section('content')
<div class="container spark-screen">
    <div class="row">
        <div class="col-md-10 col-md-offset-1">
            <div class="panel panel-default">
                <div class="panel-heading">2FA Secret Key</div>

                <div class="panel-body">
                    Open up your 2FA mobile app and scan the following QR barcode:
                    <br />
                    <img alt="Image of QR barcode" src="{{ $image }}" />

                    <br />
                    If your 2FA mobile app does not support QR barcodes,
                    enter in the following number: <code>{{ $secret }}</code>
                    <br /><br />
                    <a href="{{ url('/home') }}">Go Home</a>
                </div>
            </div>
        </div>
    </div>
</div>
@endsection
If a user decides to disable 2FA, create a page to let them know it has been disabled. Create a file called disableTwoFactor.blade.php in the resources/views/2fa folder and put the following code into it:
如果用户决定禁用2FA,请创建一个页面以告知他们已被禁用。 在resources/views/2fa文件夹中创建一个名为disableTwoFactor.blade.php的文件,并将以下代码放入其中:
@extends('layouts.app')

@section('content')
<div class="container spark-screen">
    <div class="row">
        <div class="col-md-10 col-md-offset-1">
            <div class="panel panel-default">
                <div class="panel-heading">2FA Secret Key</div>

                <div class="panel-body">
                    2FA has been removed
                    <br /><br />
                    <a href="{{ url('/home') }}">Go Home</a>
                </div>
            </div>
        </div>
    </div>
</div>
@endsection
After the user authenticates with their email and password, we need a page where a user can enter in their one-time password generated from their 2FA device. Create a new file called validate.blade.php in the resources/views/2fa folder and put the following view code into it:
在用户使用电子邮件和密码进行身份验证之后,我们需要一个页面,用户可以在其中输入从2FA设备生成的一次性密码。 在resources/views/2fa文件夹中创建一个名为validate.blade.php的新文件,并将以下视图代码放入其中:
@extends('layouts.app')

@section('content')
<div class="container spark-screen">
    <div class="row">
        <div class="col-md-8 col-md-offset-2">
            <div class="panel panel-default">
                <div class="panel-heading">2FA</div>

                <div class="panel-body">
                    <form class="form-horizontal" role="form" method="POST" action="/2fa/validate">
                        {!! csrf_field() !!}

                        <div class="form-group{{ $errors->has('totp') ? ' has-error' : '' }}">
                            <label class="col-md-4 control-label">One-Time Password</label>

                            <div class="col-md-6">
                                <input type="number" class="form-control" name="totp">

                                @if ($errors->has('totp'))
                                <span class="help-block">
                                    <strong>{{ $errors->first('totp') }}</strong>
                                </span>
                                @endif
                            </div>
                        </div>

                        <div class="form-group">
                            <div class="col-md-6 col-md-offset-4">
                                <button type="submit" class="btn btn-primary">
                                    <i class="fa fa-btn fa-mobile"></i>Validate
                                </button>
                            </div>
                        </div>
                    </form>
                </div>
            </div>
        </div>
    </div>
</div>
@endsection
测试出来 (Testing it Out)
We should now have all the pieces in place to make the example work.
现在,我们应该准备就绪以完成示例工作。
You can use any RFC 6238 compatible program, but to follow along with this tutorial, please use Google Authenticator. First, go to the Apple iTunes App Store or the Google Play Store and download the app.
您可以使用任何与RFC 6238兼容的程序,但要继续学习本教程,请使用Google Authenticator。 首先,转到Apple iTunes App Store或Google Play商店并下载该应用程序。
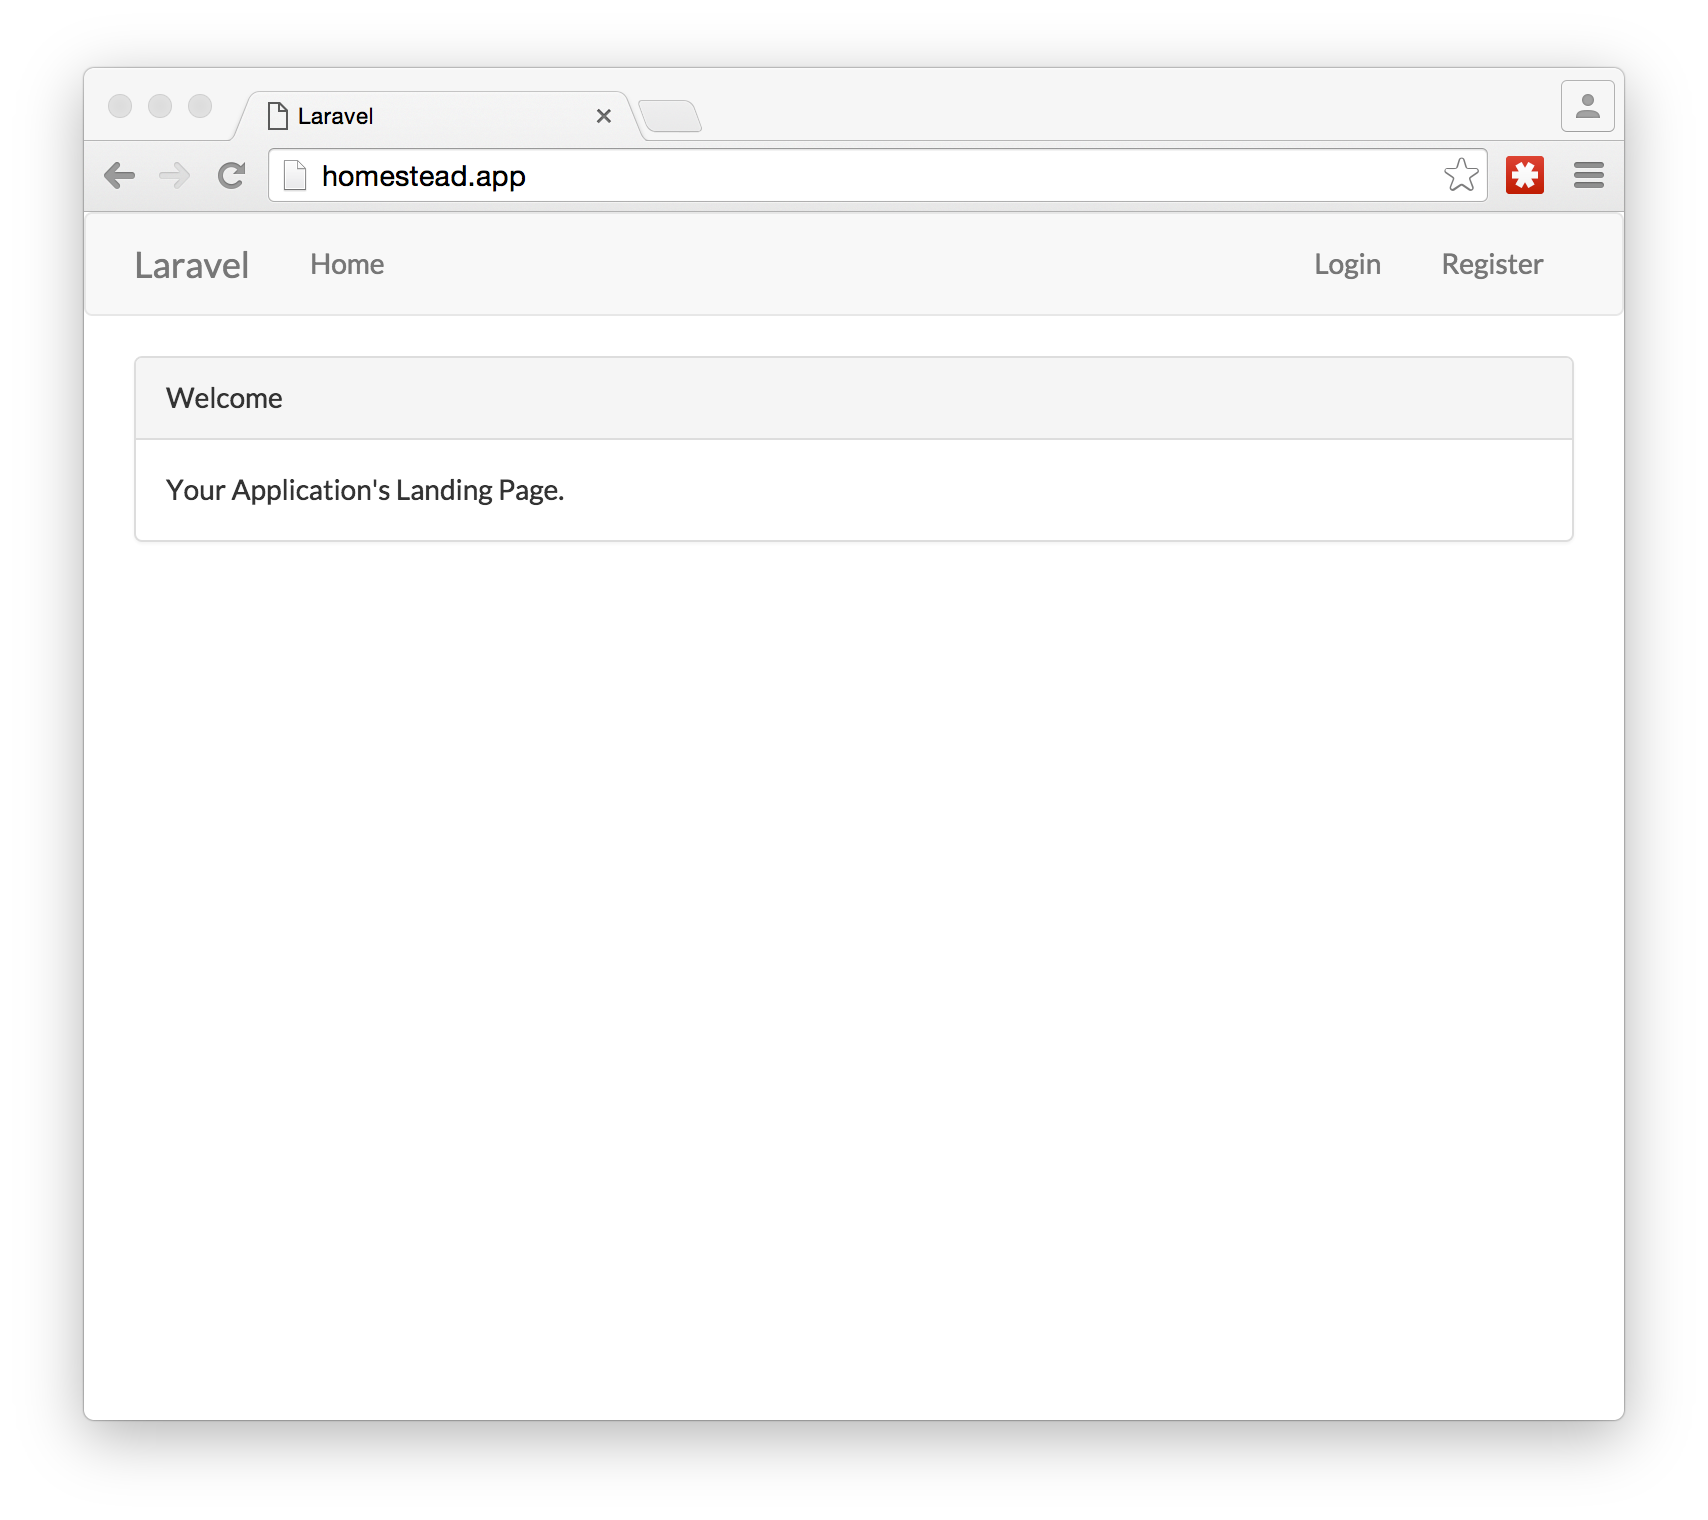
Next, open up the landing page of the app at http://homestead.app. You should see a welcome page. In the upper right hand corner, there is a sign-up link. Click on it and register for a new account.
接下来,在http://homestead.app上打开应用程序的登录页面。 您应该会看到一个欢迎页面。 在右上角有一个注册链接。 单击它并注册一个新帐户。
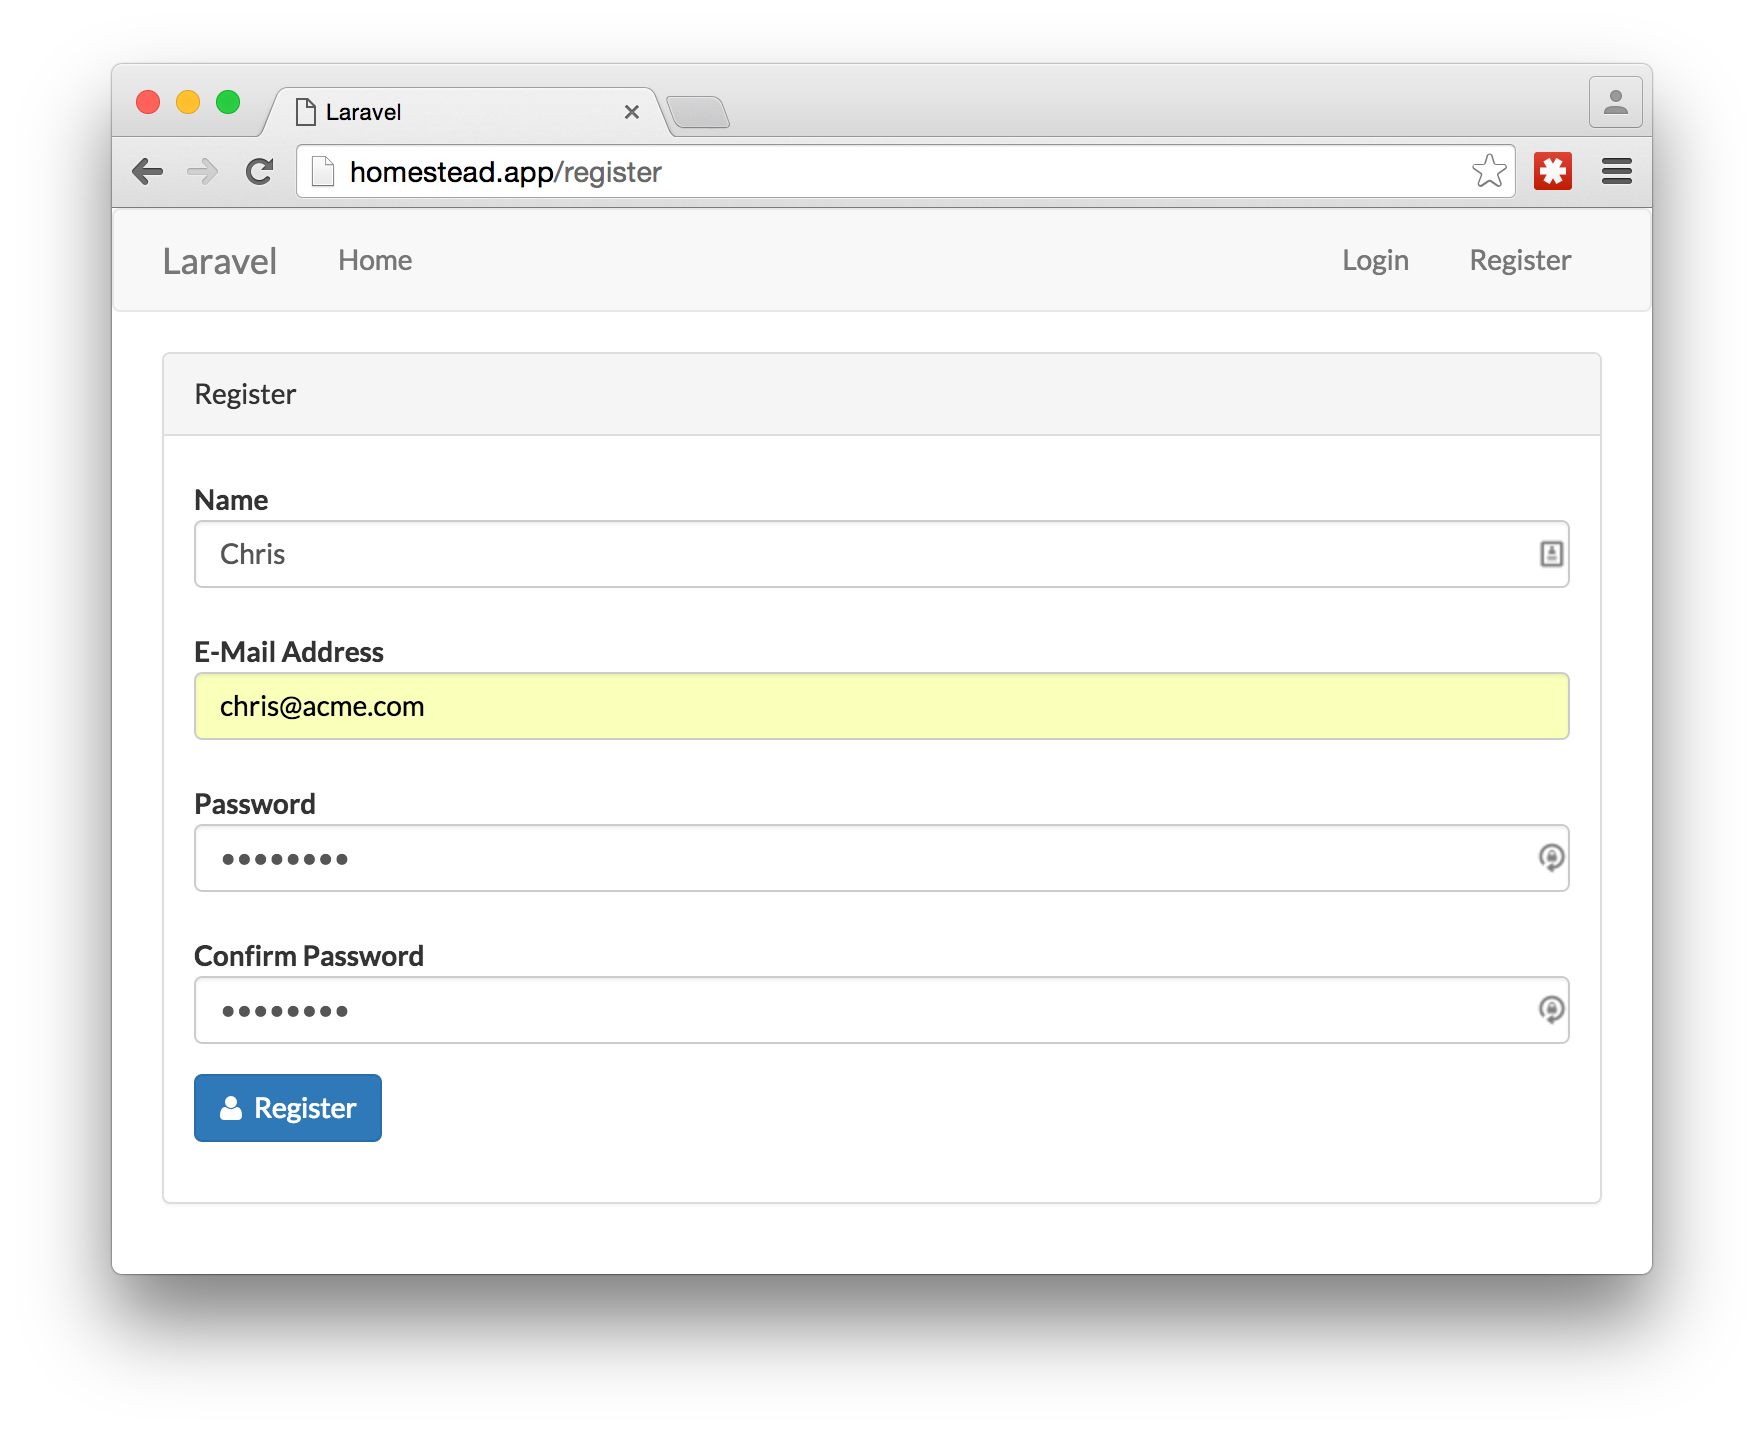
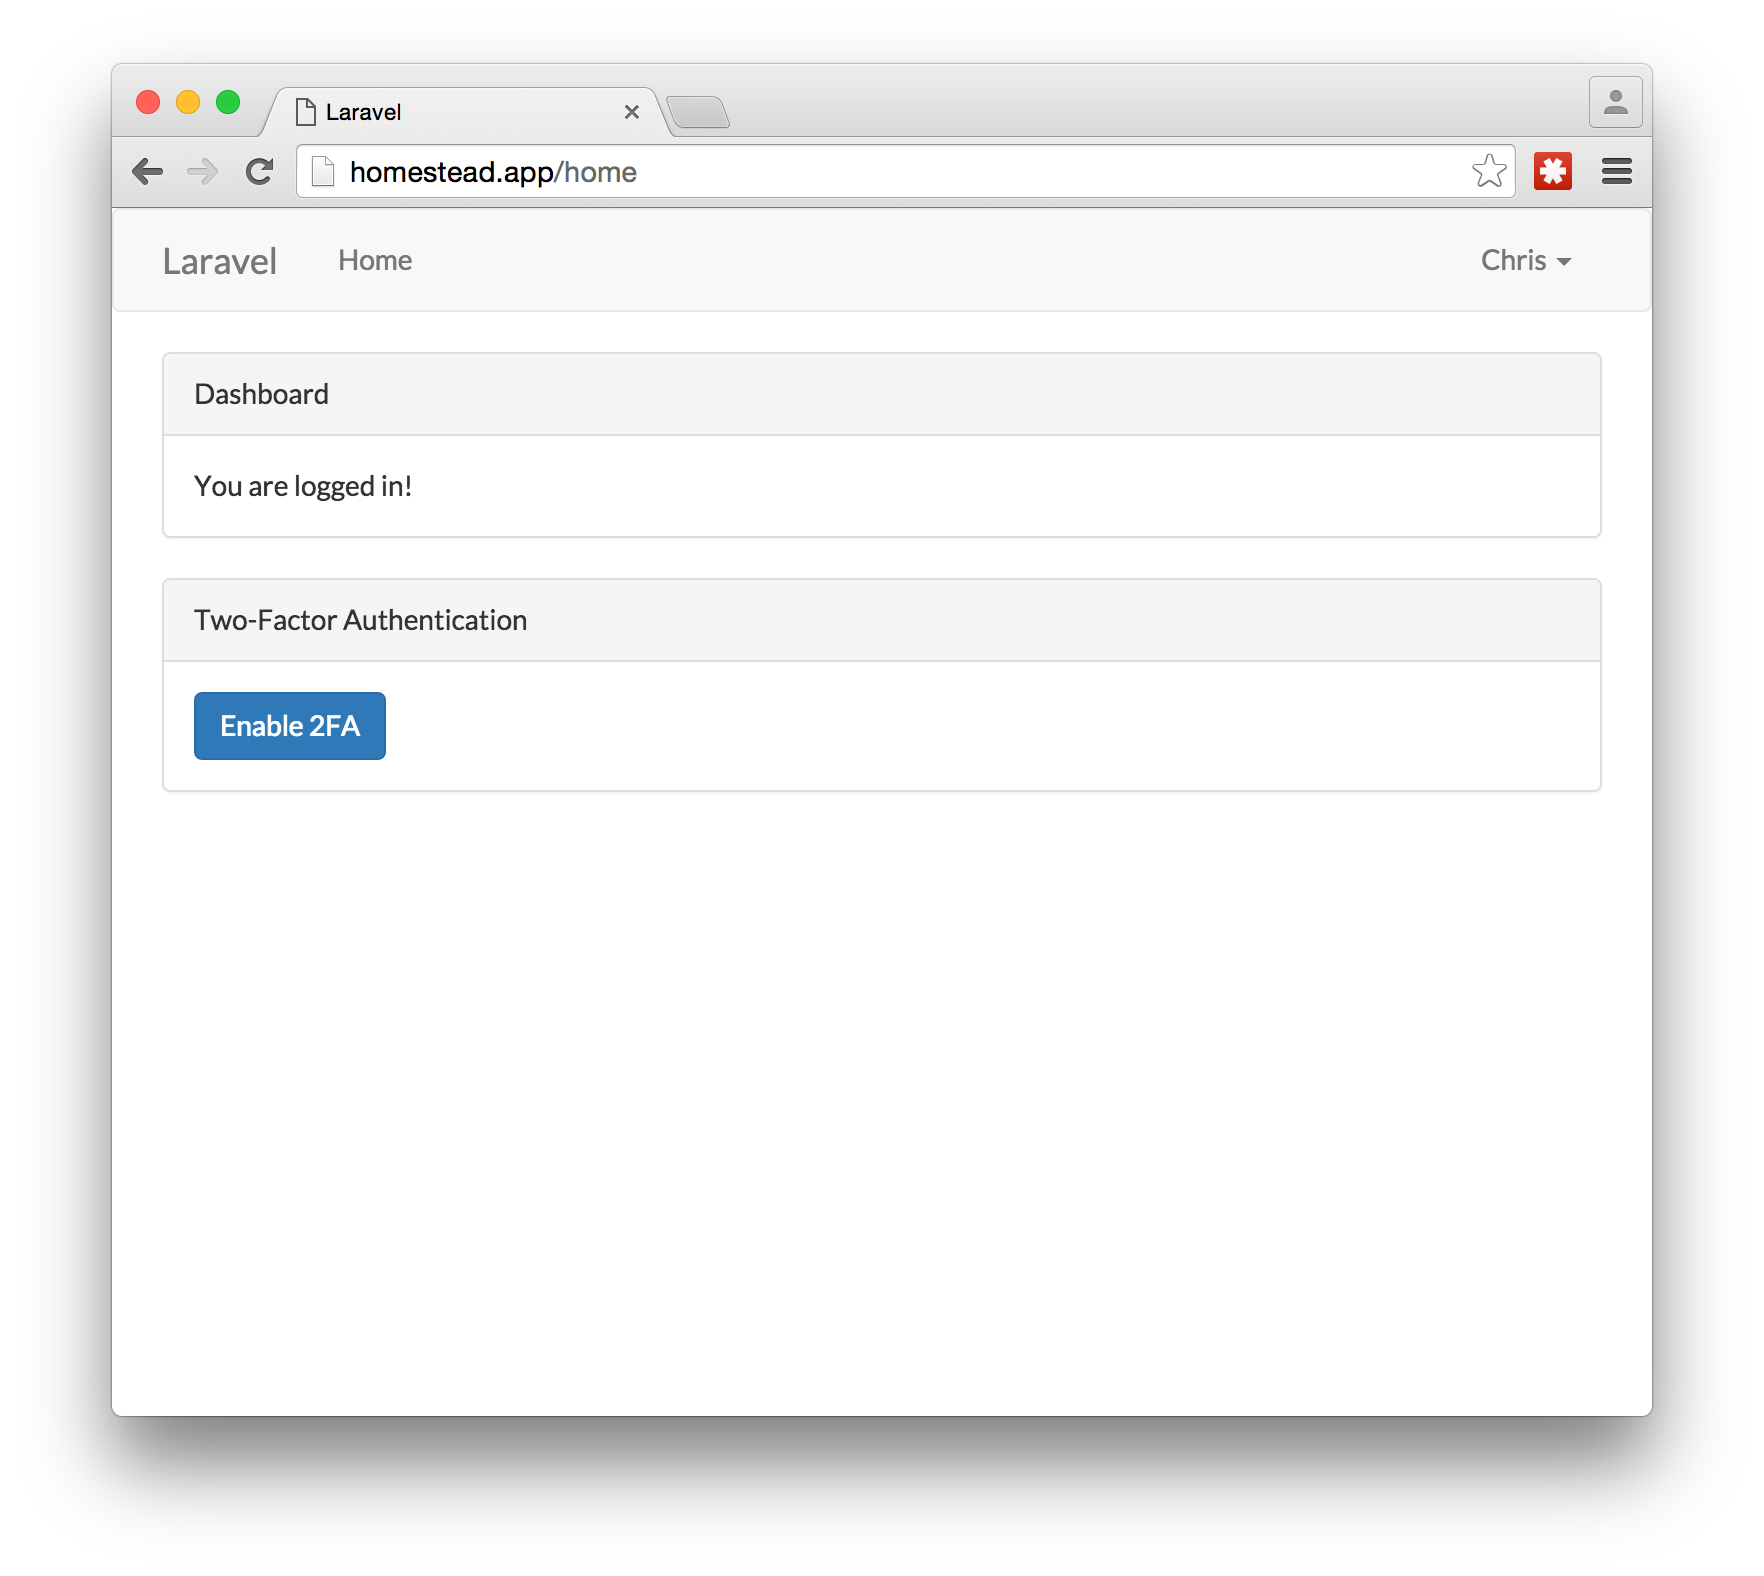
Once you register for a new account, you should be automatically logged in and redirected to the homepage. On this page, you should see a section that talks about Two-Factor Authentication and enabling it. Click on the button to enable 2FA.
注册新帐户后,您应该会自动登录并重定向到主页。 在此页面上,您应该看到有关两因素身份验证和启用它的部分。 单击按钮启用2FA。
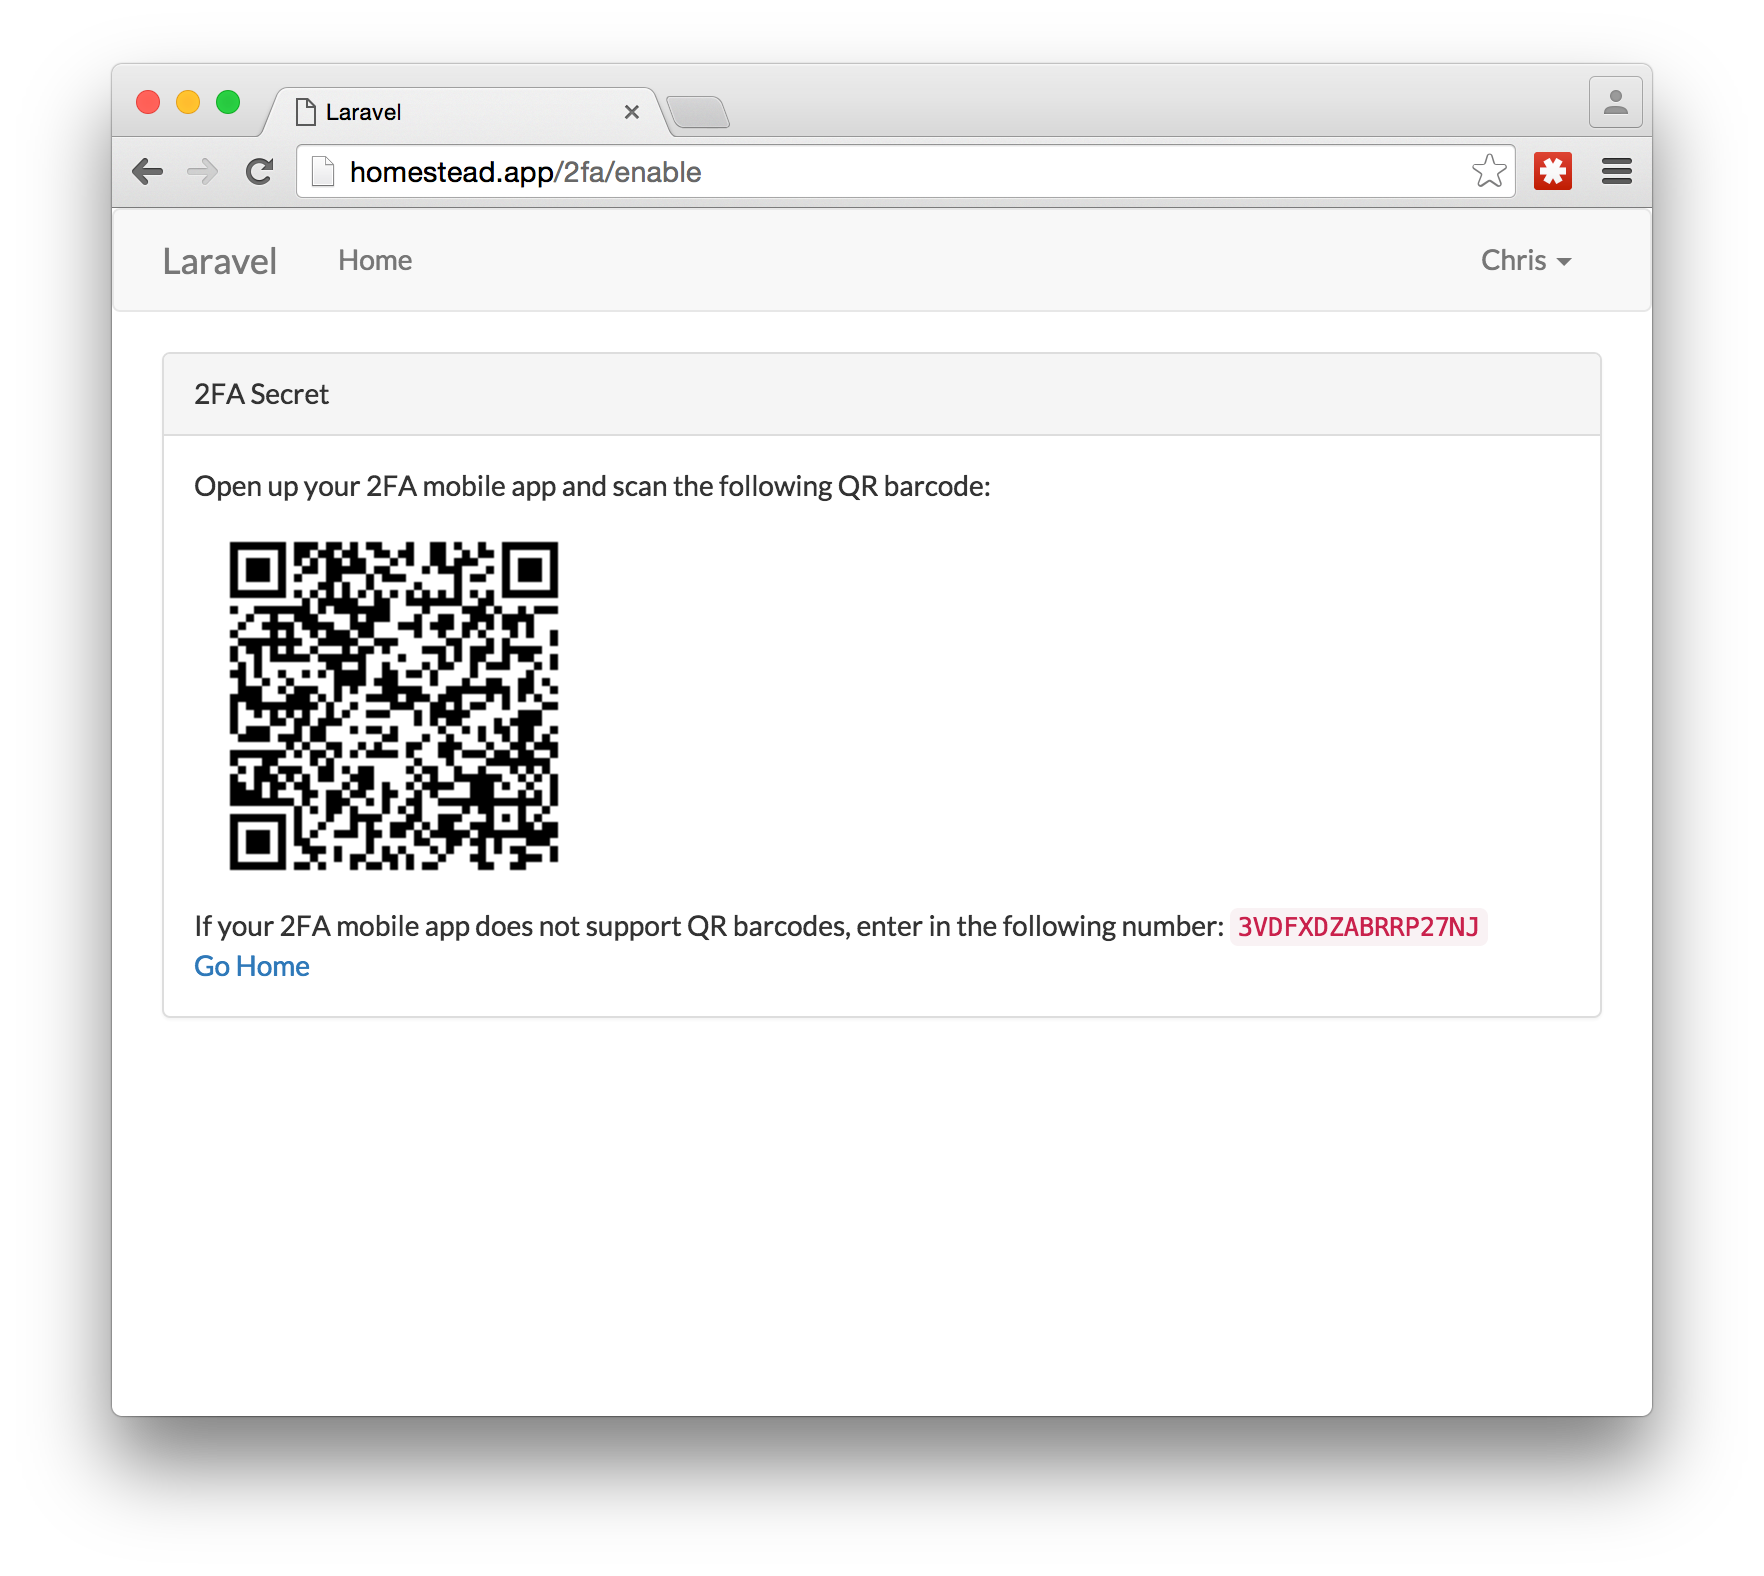
On the screen, you should see a QR barcode. This is the secret key that the app generated that you need to load into your 2FA mobile app.
在屏幕上,您应该看到QR条码。 这是应用程序生成的密钥,您需要将该密钥加载到2FA移动应用程序中。
Open up the Google Authenticator app and click on the add button at the bottom of the screen. It should ask if you want to scan a barcode or manually enter in the secret key. Pick the first option.
打开Google Authenticator应用,然后点击屏幕底部的添加按钮。 它应该询问您是要扫描条形码还是手动输入密钥。 选择第一个选项。
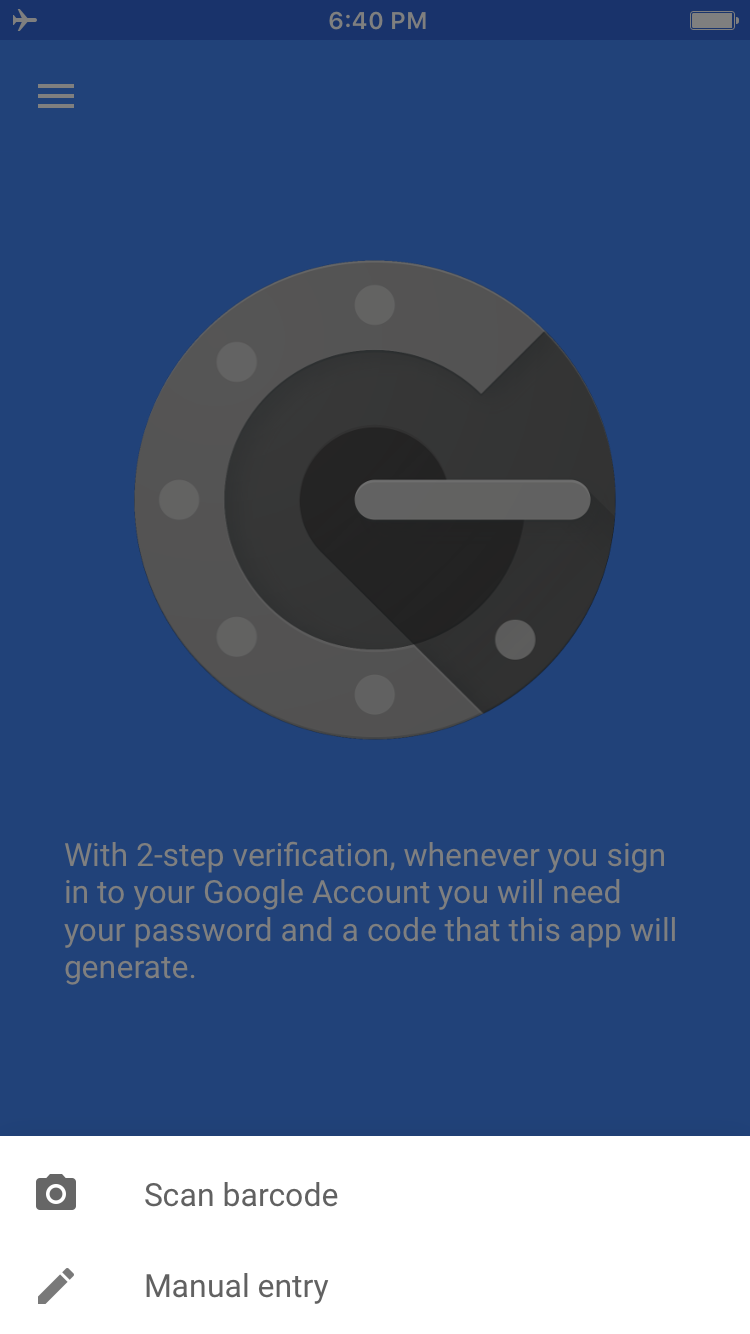
Hold the phone up to the screen of your computer to scan the barcode. After the QR barcode is scanned, there should be a new entry in the list of one-time passwords.
将手机抬到计算机屏幕上,以扫描条形码。 扫描QR条码后,一次性密码列表中应该有一个新条目。
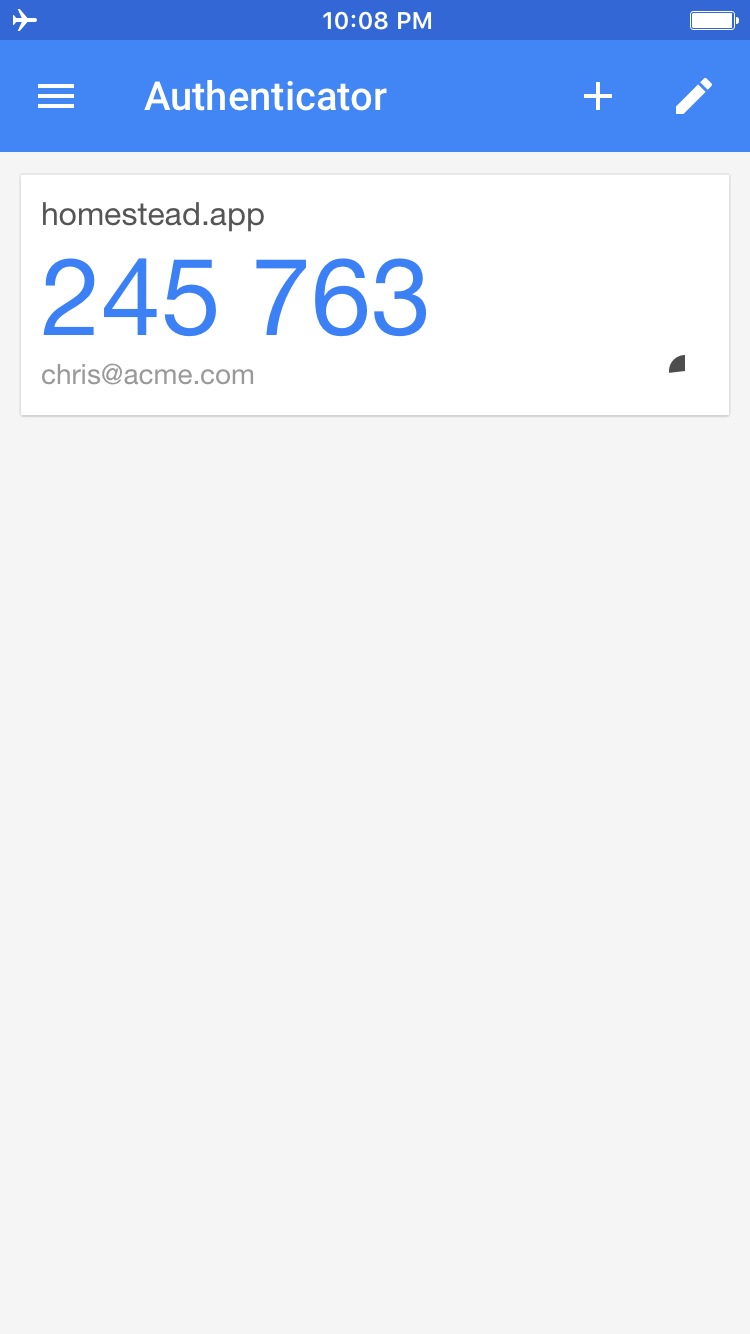
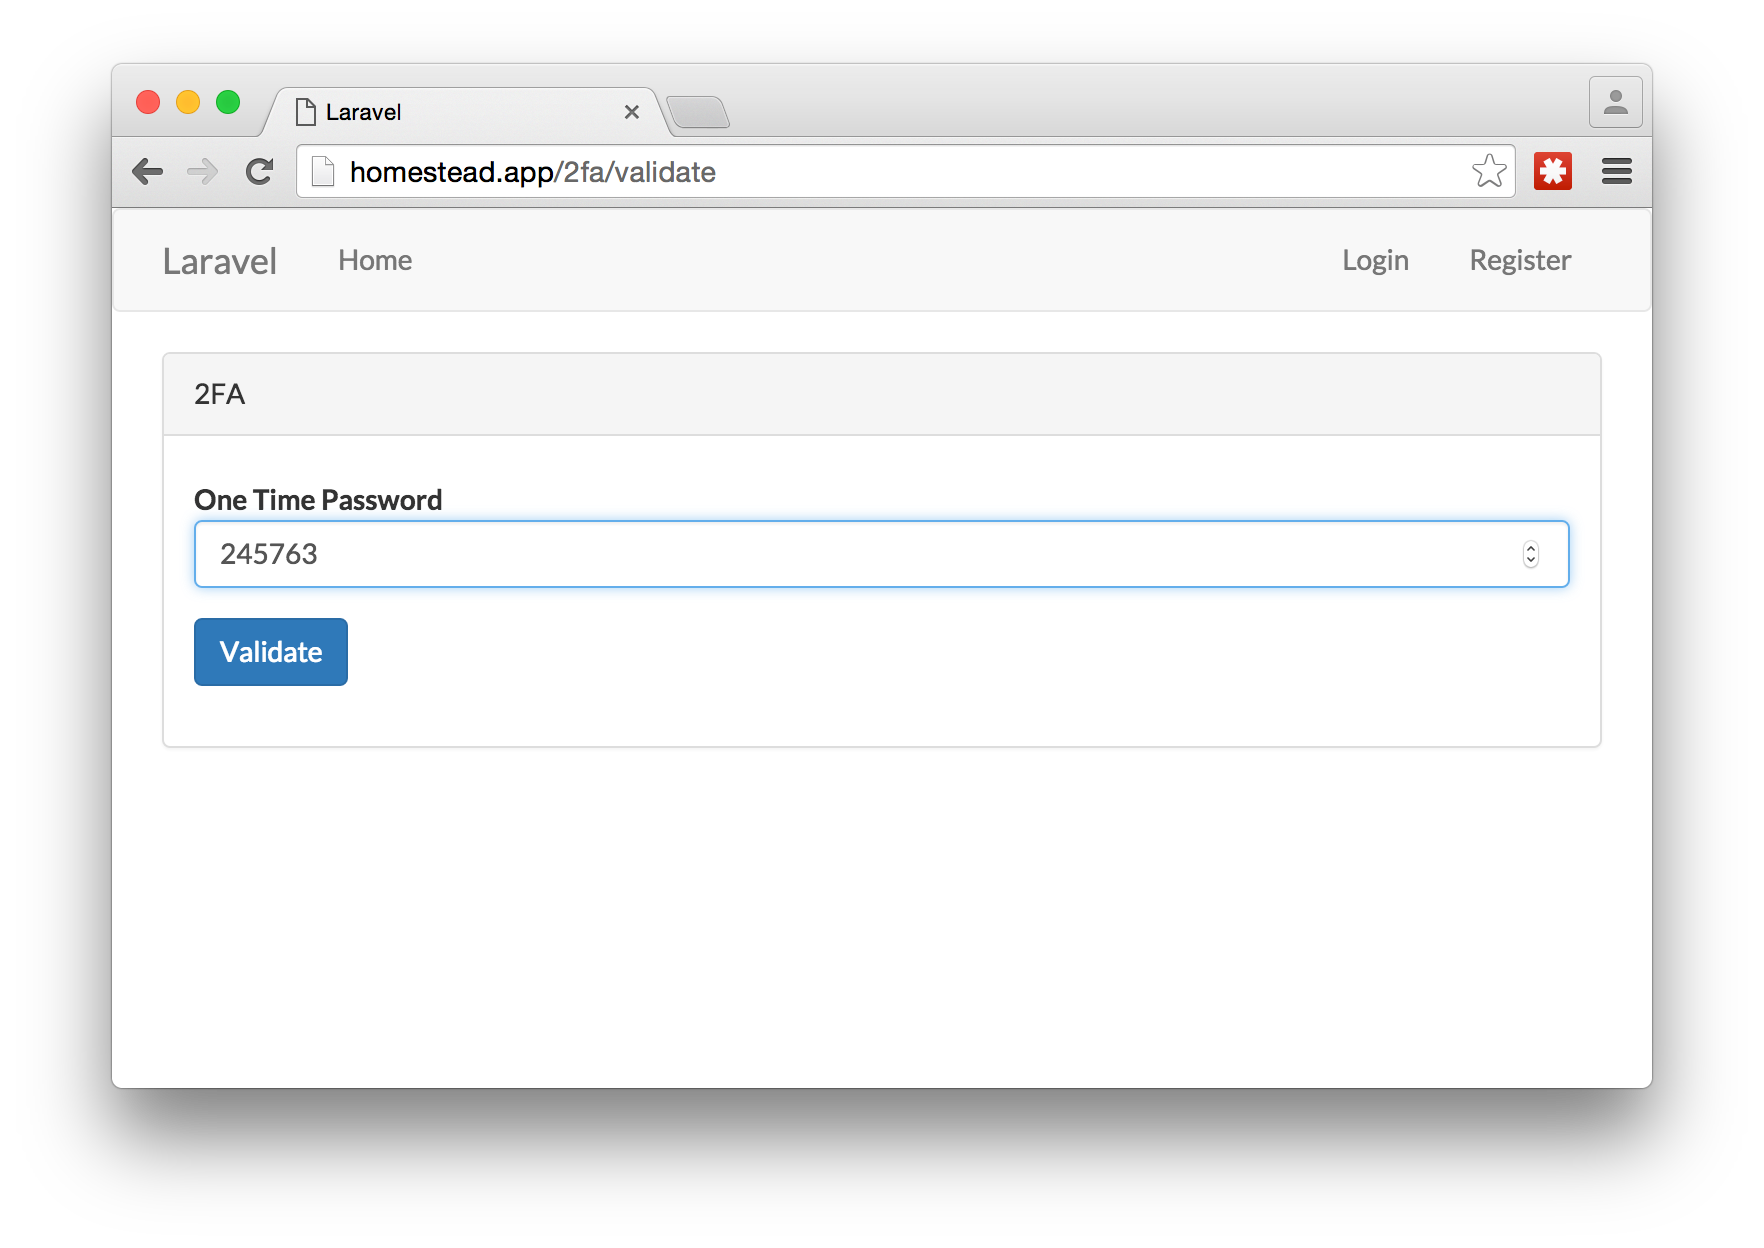
Next, log out of the webapp, and re-login. This time, after you use your email and password, you should see a screen that asks for the one-time password.
接下来,注销Webapp,然后重新登录。 这次,在使用电子邮件和密码之后,您应该会看到一个询问一次性密码的屏幕。
Make sure the Google Authenticator app is open and put the number that is currently being displayed into the webpage and submit the value.
确保Google Authenticator应用已打开,然后将当前显示的号码输入网页中并提交值。
After that, you should be authenticated and be directed to the homepage.
之后,您应该通过身份验证并定向到主页。
If you want to disable the 2FA, you can do it on the homepage by clicking on the “Disable 2FA” at the bottom.
如果要禁用2FA,可以在主页上单击底部的“禁用2FA”来执行此操作。
There will be a confirmation page saying that 2FA has been disabled.
将出现一个确认页面,指出2FA已被禁用。
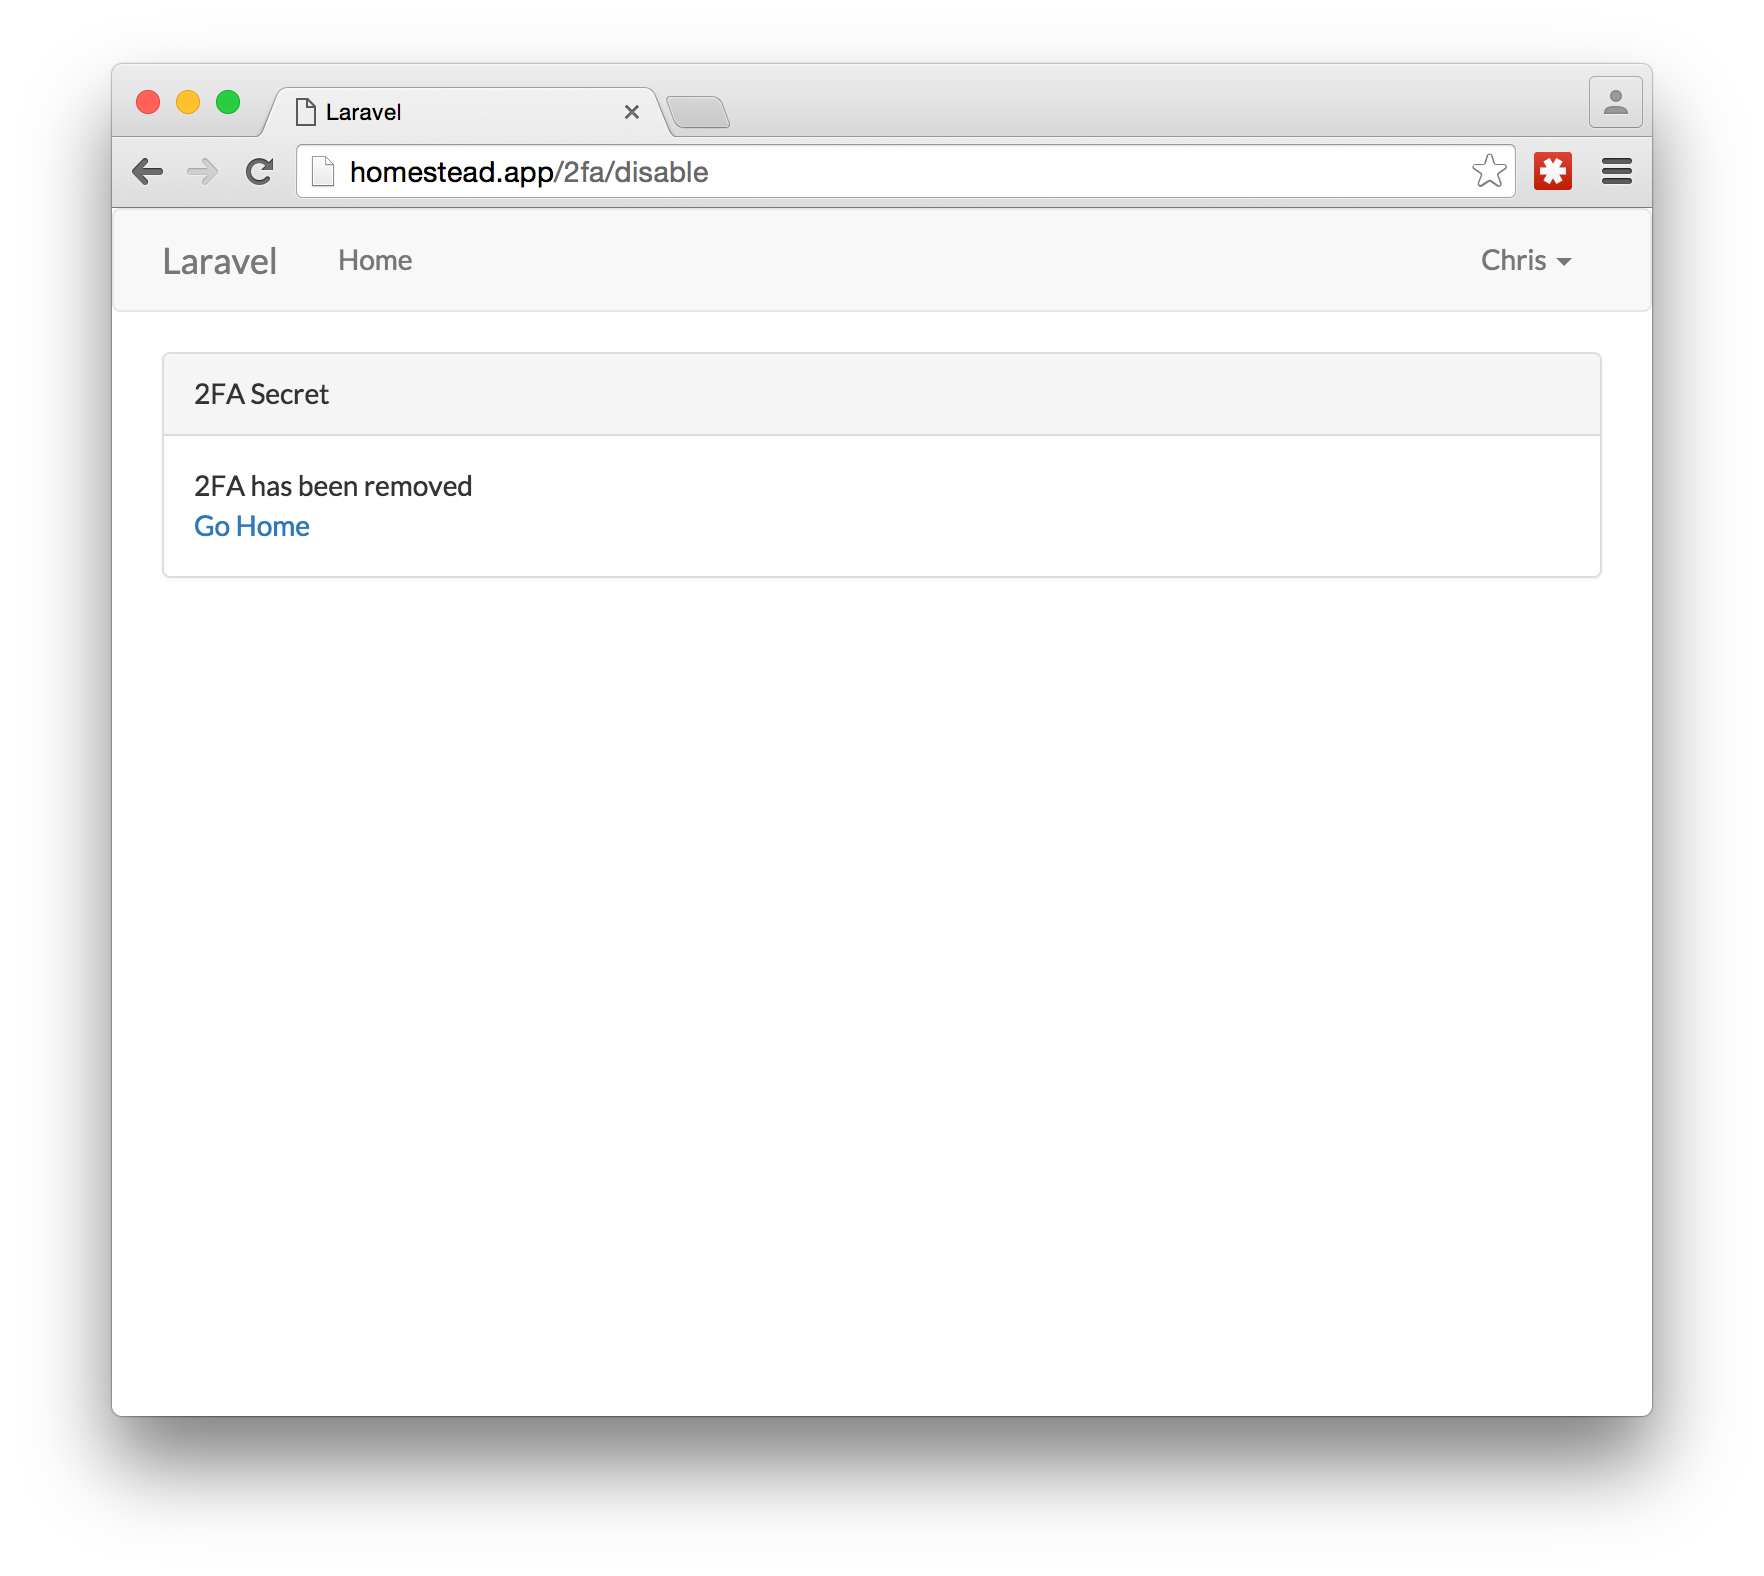
Now you can log in without the one-time password.
现在,您无需使用一次性密码即可登录。
结论 (Conclusion)
By default, the login process and TOTP setup process does not happen via HTTPS. In a production environment, make sure it happens over HTTPS.
默认情况下,登录过程和TOTP设置过程不会通过HTTPS进行。 在生产环境中,请确保它通过HTTPS发生。
In this article, we have seen how adding a one-time password to the authentication process makes logging in more secure. Next, we walked through building an app in Laravel that uses an implementation of Google Authenticator to do 2FA.
在本文中,我们已经看到了向身份验证过程添加一次性密码如何使登录更加安全。 接下来,我们逐步学习了在Laravel中构建一个应用程序,该应用程序使用Google Authenticator的实现来执行2FA。
If you would like to see the completed example, it is located on Github.
如果您想查看完整的示例,它位于Github上 。
翻译自: https://www.sitepoint.com/2fa-in-laravel-with-google-authenticator-get-secure/


 1171
1171

 被折叠的 条评论
为什么被折叠?
被折叠的 条评论
为什么被折叠?
 到【灌水乐园】发言


