Github is one of the best ways to share code and collaborate. In this article, we are going to learn how to consume their API and how we can use it to accomplish some of our daily tasks.
Github是共享代码和协作的最佳方法之一。 在本文中,我们将学习如何使用他们的API,以及如何使用它来完成一些日常任务。

我们正在建设 (What We’re Building)
We are going to explore some of the daily tasks that can be accomplished through the Github API and build a small app using Laravel to illustrate the use cases. You can check the final result on Github.
我们将探索一些可以通过Github API完成的日常任务,并使用Laravel构建一个小型应用程序来说明用例。 您可以在Github上查看最终结果。
授权书 (Authorisation)
Before starting to consume the API, we need to set some form of authorisation. The API gives you access to all publicly available data, but some endpoints need user permission. You can create a new token with some specific scope access using the application settings. The scopes depend on your application’s needs, like accessing user email, updating user profile, etc.
在开始使用API之前,我们需要设置某种形式的授权。 该API可让您访问所有公开可用的数据,但某些端点需要用户许可。 您可以使用应用程序设置创建具有特定范围访问权限的新令牌。 范围取决于您应用程序的需求,例如访问用户电子邮件,更新用户配置文件等。
Password authorisation is only necessary in some special cases, like accessing user authorised applications. In that case, you need to provide your username or email, and your password.
仅在某些特殊情况下才需要密码授权,例如访问用户授权的应用程序 。 在这种情况下,您需要提供用户名或电子邮件以及密码。
设置我们的应用程序 (Setting Up Our Application)
For our sample app, I will be using Laravel 5 and the KnpLabs Github PHP implementation. Be sure to update your composer.json file. Rename .env.example to .env after creating a new Laravel project (composer create-project laravel/laravel) and update it with your credentials.
对于我们的示例应用程序,我将使用Laravel 5和KnpLabs Github PHP实现。 确保更新您的composer.json文件。 创建新的Laravel项目( composer create-project laravel/laravel )后,将.env.example重命名为.env ,并使用您的凭据进行更新。
// .env
APP_DEBUG=true
GITHUB_EMAIL=USER_EMAIL
GITHUB_USERNAME=USERNAME
GITHUB_PASSWORD=PASSWORD
GITHUB_TOKEN=ACCESS_TOKEN
Your don’t really need to add your username and password, we only use them to illustrate the limitation of using the token authentication.
您实际上不需要添加用户名和密码,我们仅使用它们来说明使用令牌身份验证的局限性。
绑定Github客户端 (Binding Github Client)
// bootstrap/app.php

$app->singleton(‘Github\Client', function(){
  $client = new Github\Client();

  return $client;
});
You may have noticed that we didn’t use our token. This is because most of the public actions are done without any authorisation, but for every endpoint you’ll find the level of authentication needed to access it.
您可能已经注意到我们没有使用令牌。 这是因为大多数公共操作都是在没有任何授权的情况下完成的,但是对于每个端点,您都会发现访问它所需的身份验证级别。
路由 (Routing)
Our demo will include several main functionalities.
我们的演示将包括几个主要功能。
- List user repositories. 列出用户存储库。
- Navigate through the user repository files. 浏览用户存储库文件。
- Edit and commit a file. 编辑并提交文件。
- List the repository’s latest commits. 列出存储库的最新提交。
// app/Http/routes.php

Route::get('/', ['uses' => 'GithubController@index', 'as' => 'index']);

Route::get('/finder', ['uses' => 'GithubController@finder', 'as' => 'finder']);

Route::get('/edit', ['uses' => 'GithubController@edit', 'as' => 'edit_file']);

Route::post('/update', ['uses' => 'GithubController@update', 'as' => 'update_file']);

Route::get('/commits', ['uses' => 'GithubController@commits', 'as' => 'commits']);
控制器 (Controllers)
The GithubController class is our main controller and holds most of the logic. When the class constructor is called, we resolve the the Github\Client class from the container and load our username environment variable.
GithubController类是我们的主控制器,包含大多数逻辑。 调用类构造函数时,我们从容器中解析Github\Client类,并加载我们的用户名环境变量。
// app/Http/Controllers/GithubController.php

class GithubController extends Controller
{

  private $client;

  /*
   * Github username
   *
   * @var string
   * */
  private $username;

  public function __construct(\Github\Client $client)
  {
    $this->client = $client;
    $this->username = env('GITHUB_USERNAME');
  }

}
上市资料库 (Listing Repositories)
用户名存储库 (Repositories by Username)
You can retrieve the repos by username using the /users/:username/repos endpoint. We can access the endpoint like so:
您可以使用/users/:username/repos端点按用户名检索存储/users/:username/repos 。 我们可以这样访问端点:
$repos = $this->client->api('user')->repositories($username);The api method will resolve the needed class depending on the parameter (user, current_user, repo, etc).
api方法将根据参数( user , current_user , repo等)解析所需的类。
认证用户 (Authenticated User)
The other way is to retrieve the current authenticated user repositories using the /user/repos endpoint. The main difference is that private repos are hidden when using only the username endpoint.
另一种方法是使用/user/repos端点检索当前已认证的用户存储库。 主要区别在于,仅使用用户名端点时,私有存储库是隐藏的。
// client is our Github\Client
$repos = $this->client->api('current_user')->repositories();
Now that we know the first benefit of using authenticated requests, let’s add our token to the Github\Client binding.
现在我们知道了使用身份验证请求的第一个好处,让我们将令牌添加到Github\Client绑定中。
$app->singleton('Github\Client', function () {
  $client = new Github\Client();
  $token = env('GITHUB_TOKEN');

  if (!isset($token)) {
    dd("Github token is not set.");
  }

  //$client->authenticate(env('GITHUB_EMAIL'), env('GITHUB_PASSWORD'), Github\Client::AUTH_HTTP_PASSWORD);
  $client->authenticate($token, null, Github\Client::AUTH_HTTP_TOKEN);

  return $client;
});
The authenticate method decides the authentication process using the third parameter constant, if you chose the email and password method, be sure to change the assertion test. You can check the docs for more info.
authenticate方法使用第三个参数常量来决定认证过程,如果您选择了电子邮件和密码方法,请确保更改断言测试。 您可以检查文档以获取更多信息。
// app/Http/Controllers/GithubController.php

  public function index()
  {
    try {
      $repos = $this->client->api('current_user')->repositories();

	  return View::make('repos', ['repos' => $repos]);
    } catch (\RuntimeException $e) {
      $this->handleAPIException($e);
    }
  }//index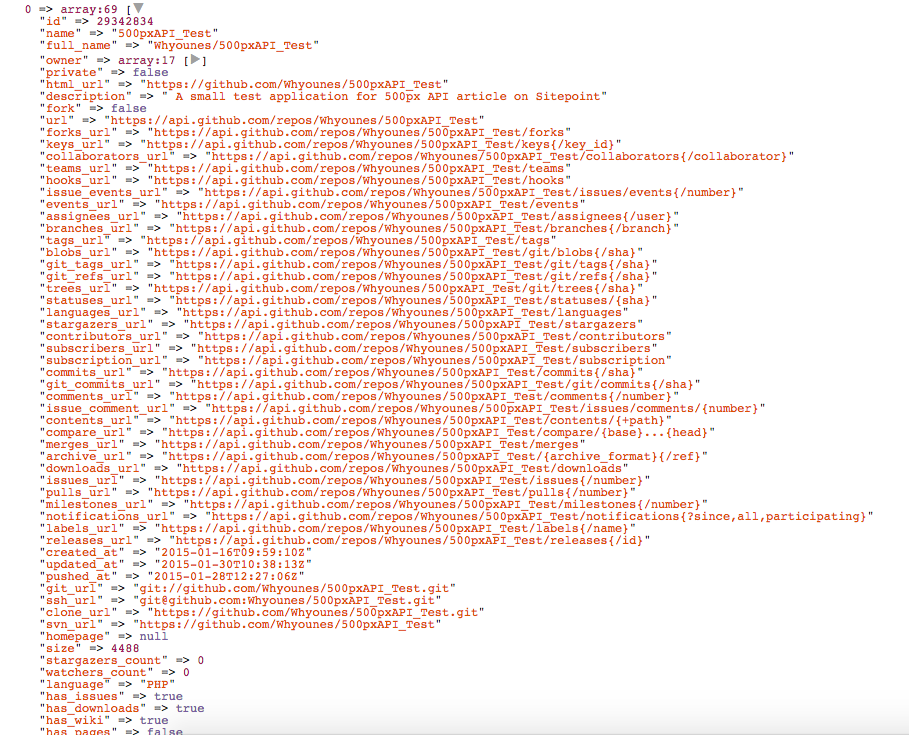
The repo name is passed to the next route, and it’s used to query the API for the repository content. You can read more in the docs.
存储库名称将传递到下一条路由,用于查询API的存储库内容。 您可以在docs中阅读更多内容。
// app/resources/views/repos.blade.php

@extends('layouts.master')

@section('content')

    <div class="list-group">
        @foreach($repos as $repo)
            <a class="list-group-item" href="/finder?repo={{ $repo['name'] }}">
                <h4 class="list-group-item-heading">{{ $repo['name'] }}</h4>
                <p class="list-group-item-text">{{ $repo['description'] }}</p>
            </a>
        @endforeach
    </div>

@endsection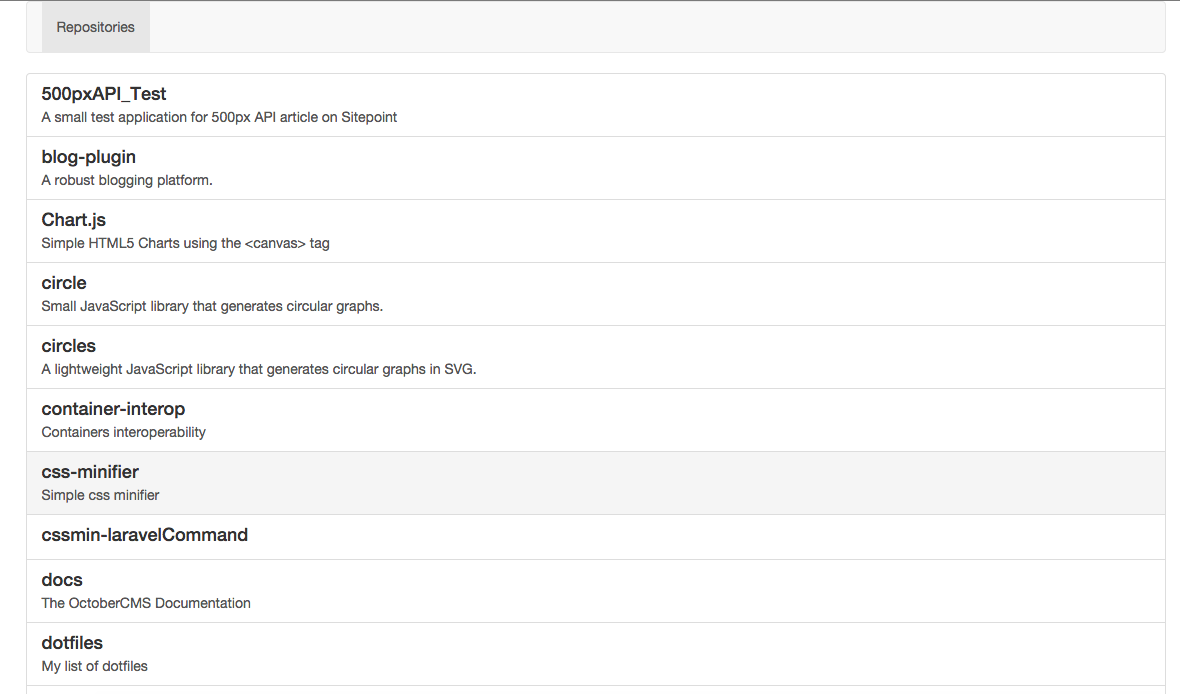
The page can also display the stargazers count, download count…etc. When the user clicks on the link we need to load the repository content and provide the ability to browse the repository files.
该页面还可以显示观星人数,下载人数等。 当用户单击链接时,我们需要加载存储库内容并提供浏览存储库文件的功能。
储存库内容 (Repository Content)
To retrieve a repository’s content, you need to specify the owner, repository name and the path that you want to retrieve. You can read more in the docs.
要检索存储库的内容,您需要指定所有者,存储库名称和要检索的路径。 您可以在docs中阅读更多内容。
// app/Http/Controllers/GithubController.php

public function finder()
{
  $repo = Input::get('repo');
  $path = Input::get('path', '.');

  try {
    $result = $this->client->api('repo')->contents()->show($this->username, $repo, $path);

    return View::make('finder', ['parent' => dirname($path), 'repo' => $repo, 'items' => $result]);
  } catch (\RuntimeException $e) {
    $this->handleAPIException($e);
  }
}//finder
The Github\Api\Repository\Contents@show method accepts four parameters, the fourth one is the branch and it defaults to master.
Github\Api\Repository\Contents@show方法接受四个参数,第四个是分支,默认为master 。
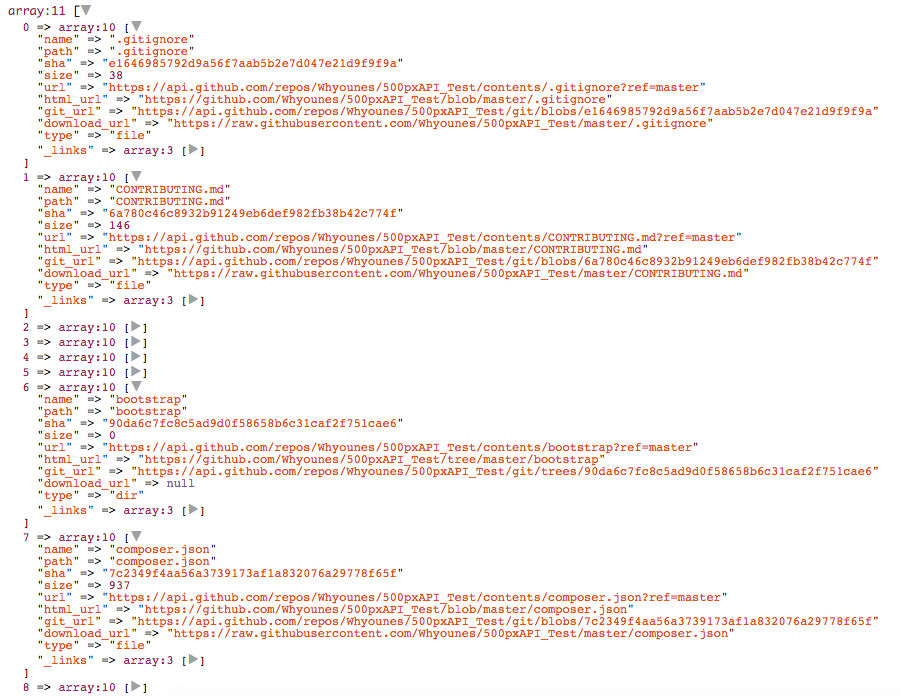
When the user selects a folder we reload the same page with the new path, and when selecting a file we redirect them to the edit page.
当用户选择文件夹时,我们将使用新路径重新加载同一页面,而当选择文件时,我们会将其重定向到编辑页面。
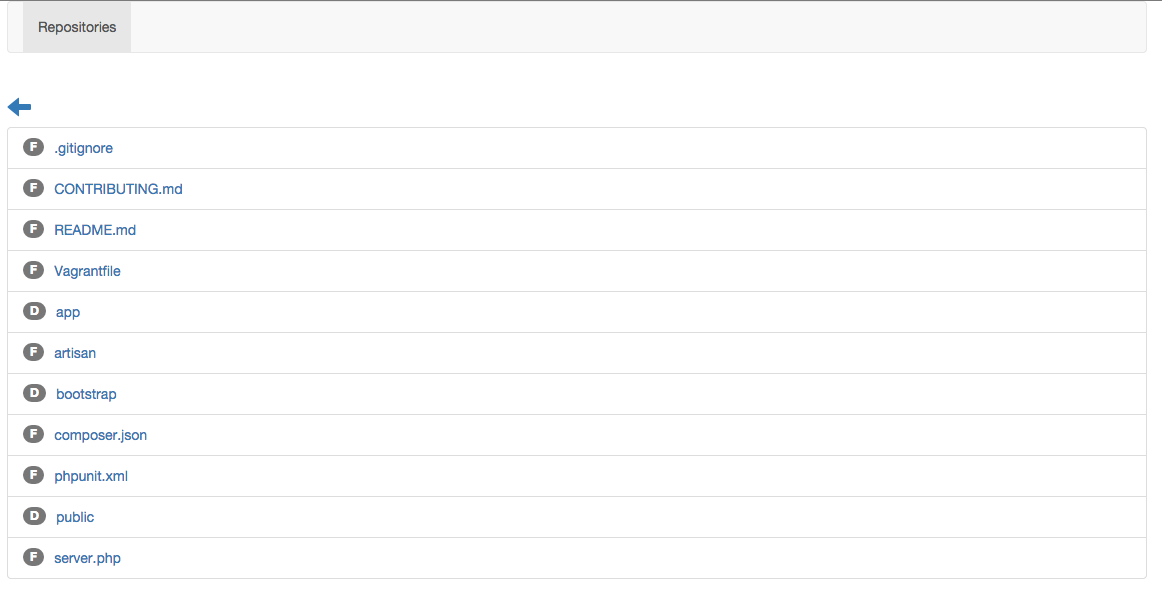
// app/resources/views/finder.blade.php

<ul class="list-group">
    @foreach($items as $item)
        <li class="list-group-item">
            @if(isset($item['type']) && $item['type'] == 'file')
                <a href="/edit?repo={{ $repo }}&path={{ $item['path'] }}">{{ $item['name'] }}</a>
                <span class="badge">F</span>
            @else
                <a href="/finder?repo={{ $repo }}&path={{ $item['path'] }}">{{ $item['name'] }}</a>
                <span class="badge">D</span>
            @endif
        </li>
    @endforeach
</ul>
If the current item type is a file we create the link to the edit page, otherwise we create a link with the new folder path. We also add a badge to simplify file type identification and a go back link.
如果当前项目类型是文件,我们将创建指向编辑页面的链接,否则,将创建具有新文件夹路径的链接。 我们还添加了徽章以简化文件类型识别和返回链接。
编辑档案 (Editing Files)
The Github\Api\Repository\Contents@show method returns either an array of items or an item with the correct file type.
Github\Api\Repository\Contents@show方法返回项目数组或具有正确文件类型的项目 。

When the file type is a file, the content will be base64 encoded. We won’t be dealing with other types such as submodule or symlink.
当文件类型为file ,内容将以base64编码。 我们不会处理其他类型,例如submodule或symlink 。
// app/Http/Controllers/GithubController.php

public function edit()
{
  $repo = Input::get('repo');
  $path = Input::get('path');

  try {
    $file = $this->client->api('repo')->contents()->show($this->username, $repo, $path);

    $content = base64_decode($file['content']);
    $commitMessage = "Updated file " . $file['name'];

    return View::make('file_update', [
        'file'    => $file,
        'path'    => $path,
        'repo'    => $repo,
        'content' => $content,
        'commitMessage'  => $commitMessage
    ]);
  } catch (\RuntimeException $e) {
    $this->handleAPIException($e);
  }
}//edit
// app/resources/views/file_update.blade.php
<ol class="breadcrumb">
<li><a href="{{ $file['download_url'] }}" target="_blank">Download</a></li>
<li><a href="{{ $file['html_url'] }}" target="_blank">View file</a></li>
</ol>
{!! Form::open(['url' => '/update', 'method' => 'POST']) !!}
<input name="path" value="{{ $path }}" type="hidden"/>
<input name="repo" value="{{ $repo }}" type="hidden"/>
<div class="form-group">
<label for="content">File content:</label>
<textarea class="form-control" name="content" id="content" cols="30" rows="10">{{ $content }}</textarea>
</div>
<div class="form-group">
<label for="commit">Commit message:</label>
<input class="form-control" type="text" id="commit" name="commit" value="{{ $commitMessage }}"/>
</div>
<div class="form-group">
<input type="submit" class="btn btn-primary btn-control" value="Submit" />
</div>
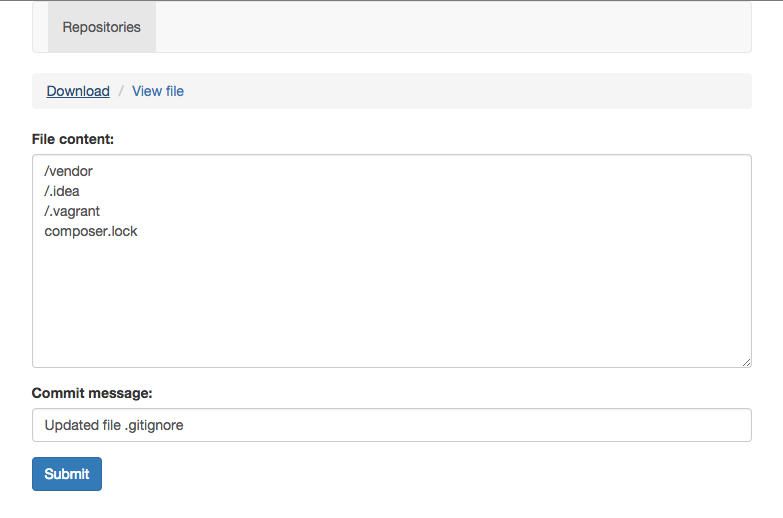
{!! Form::close() !!}After getting the file, we decode the content, create a standard commit message and generate the edit view. The other passed variables are needed for storing file updates.
获取文件后,我们解码内容,创建标准提交消息并生成编辑视图。 需要使用其他传递的变量来存储文件更新。
The /repos/:owner/:repo/contents/:path endpoint accepts three other required parameters along with the owner, repo and path. You can read more about repo content in the docs.
/repos/:owner/:repo/contents/:path端点接受其他三个必需参数以及owner , repo和path 。 您可以在docs中阅读有关回购内容的更多信息。
message: Commit message.message:提交消息。content: File content.content:文件内容。sha: File checksum.sha:文件校验和。
// app/Http/Controllers/GithubController.php

public function update()
{
  $repo = Input::get('repo');
  $path = Input::get('path');
  $content = Input::get('content');
  $commit = Input::get('commit');

  try {
    $oldFile = $this->client->api('repo')->contents()->show($this->username, $repo, $path);
    $result = $this->client->api('repo')->contents()->update(
        $this->username,
        $repo,
        $path,
        $content,
        $commit,
        $oldFile['sha']
    );

    return \Redirect::route('commits', ['path' => $path, 'repo' => $repo]);
  } catch (\RuntimeException $e) {
    $this->handleAPIException($e);
  }
}//update
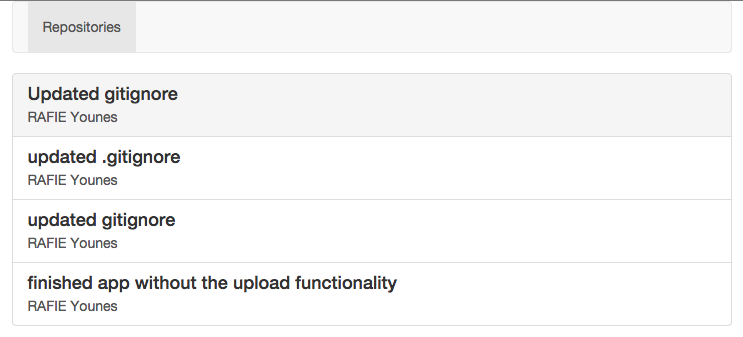
You can pass the file checksum as a hidden input inside our form like we did with the path to avoid calling the API, but I prefer this way. The last parameter to the update method is the branch which defaults to master. After a successful update we redirect the user to the commits page to view their latest commits.
您可以像在避免调用API的path那样,将文件校验和作为隐藏输入传递到表单内部,但是我更喜欢这种方式。 update方法的最后一个参数是默认为master的分支。 成功更新后,我们将用户重定向到提交页面以查看其最新提交。
提交 (Commits)
The /repos/:owner/:repo/commits endpoint returns the list of commits for a certain repository. We also have the ability to filter commits by date range, author, or by path. You can read more about the supported parameters in the docs.
/repos/:owner/:repo/commits端点返回某个存储库的提交列表。 我们还具有按日期范围,作者或路径过滤提交的功能。 您可以在docs中阅读有关受支持参数的更多信息。
// app/Http/Controllers/GithubController.php

public function commits()
{
  $repo = Input::get('repo');
  $path = Input::get('path');

  try {
    $commits = $this->client->api('repo')->commits()->all($this->username, $repo, ['path' => $path]);

    return View::make('commits', ['commits' => $commits]);
  } catch (\RuntimeException $e) {
    $this->handleAPIException($e);
  }
}
The handleException method is only dumping the exception which occurred, but you can use the response code and the exception message to take appropriate action.
handleException方法仅转储发生的异常,但是您可以使用响应代码和异常消息来采取适当的措施。
// app/Http/Controllers/GithubController.php

public function handleAPIException($e)
{
  dd($e->getCode() . ' - ' . $e->getMessage());
}
结论 (Conclusion)
What I liked about the Github API is that it’s very readable. You can extend the demo by adding the ability to download the repo to your computer or create a filter for the commits page to easily filter through users commits, etc.
我喜欢Github API的原因是它可读性强。 您可以通过添加将仓库下载到计算机上的功能或为提交页面创建过滤器以轻松筛选用户提交等功能来扩展演示。
Github’s API gives you the ability to build some amazing tools using its data. In fact, there is a great one called GithubArchive built using the public API, be sure to check it out. If you have any comments or questions, leave them below.
Github的API使您能够使用其数据构建一些出色的工具。 实际上,有一个很棒的使用公共API构建的名为GithubArchive的应用程序 ,请务必将其检出。 如果您有任何意见或疑问,请留在下面。


 168
168

 被折叠的 条评论
为什么被折叠?


