


In our previous articles in this series, we covered what Docker is, and then how to manually build Docker containers for WordPress.
在本系列的前几篇文章中, 我们介绍了Docker是什么 ,然后介绍了如何为WordPress手动构建Docker容器 。
In this article I’ll show you how to set up Docker in a much easier way. Docker has an official image for WordPress that makes it easier to get started. We’ll also check out Docker Compose for a Heroku-like configuration. After all, building and managing containers manually can take a lot of work.
在本文中,我将向您展示如何以更简单的方式设置Docker。 Docker拥有WordPress的官方映像 ,使入门变得更容易。 我们还将检查Docker Compose以获得类似Heroku的配置。 毕竟,手动构建和管理容器可能需要很多工作。
官方WordPress Docker映像 (The Official WordPress Docker Image)
Before we get started, make sure you create a new folder and navigate inside that folder.
在开始之前,请确保您创建一个新文件夹并在该文件夹中导航。
In my previous article we built a MySQL container. The official WordPress image (by the Docker team) requires you to have a running MySQL container.
在上一篇文章中,我们构建了一个MySQL容器 。 官方WordPress映像(由Docker团队提供)要求您具有一个正在运行MySQL容器。
docker run --name wordpressdb -e MYSQL_ROOT_PASSWORD=password -e MYSQL_DATABASE=wordpress -d mysql:5.7Next, search for ‘WordPress’ on Docker Hub and pull that image.
接下来,在Docker Hub上搜索“ WordPress”并提取该图像。
docker pull wordpress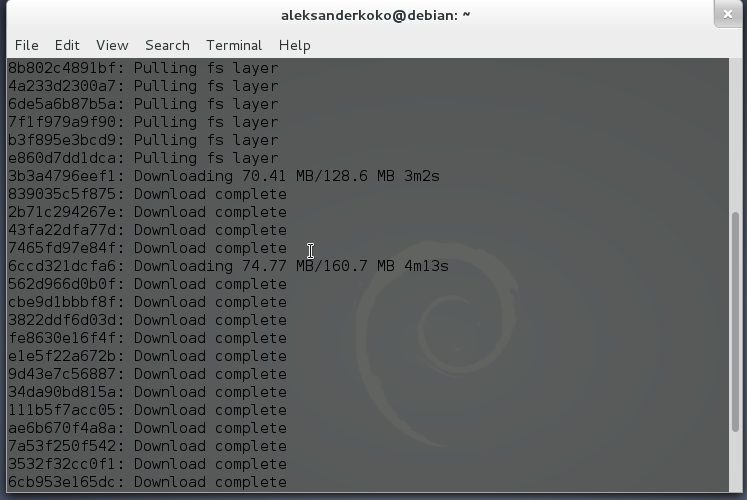
Then, build a container from it.
然后,从中构建一个容器。
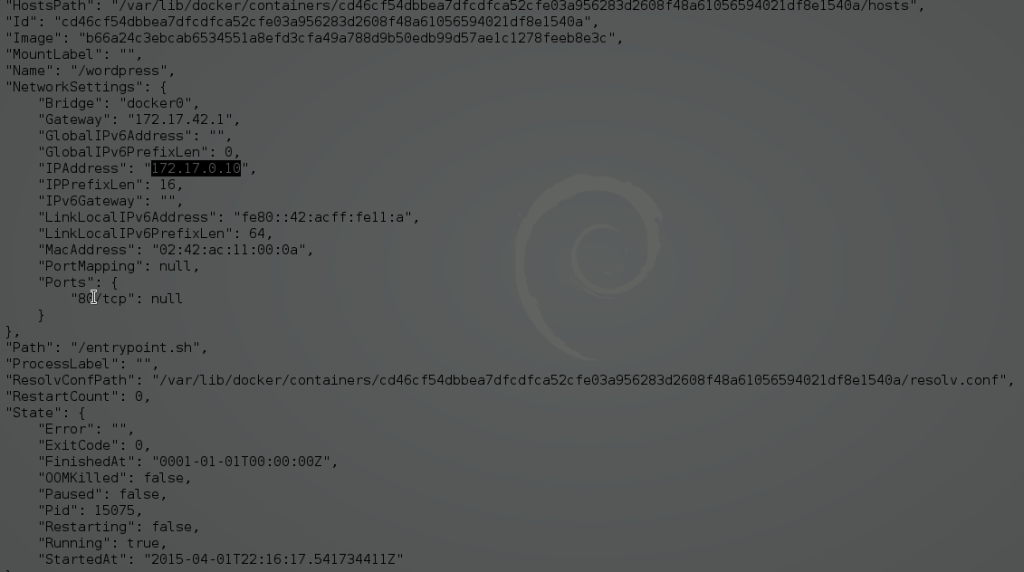
docker run -e WORDPRESS_DB_PASSWORD=password -d --name wordpress --link wordpressdb:mysql wordpressWe see two environment variables. WORDPRESS_DB_PASSWORD is the database password for our user. But we haven’t yet specified this. Don’t worry though, this image will use default values for environment variables that we haven’t specified (when the container is first created). For example, WORDPRESS_DB_USER will be root if we don’t define it. The same applies to the database name with wordpress as the default. Check out the official documentation for additional environment variables. -d makes the container to run in the background. We can’t see the IP address of the container, to get this execute docker inspect wordpress to get its IP and port. Mine is 172.17.0.10 and the port is 80. Using docker inspect, you can find lots of useful information about a container.
我们看到两个环境变量。 WORDPRESS_DB_PASSWORD是我们用户的数据库密码。 但是我们还没有指定。 不过请放心,此图片将为我们未指定的环境变量使用默认值(首次创建容器时)。 例如,如果我们不定义WORDPRESS_DB_USER , WORDPRESS_DB_USER它将是root 。 对于以wordpress为默认值的数据库名称也是如此。 请查阅官方文档以获取其他环境变量。 -d使容器在后台运行。 我们看不到容器的IP地址,要执行此操作,请docker inspect wordpress以获取其IP和端口。 我的是172.17.0.10 ,端口是80。使用docker inspect ,您可以找到许多有关容器的有用信息。
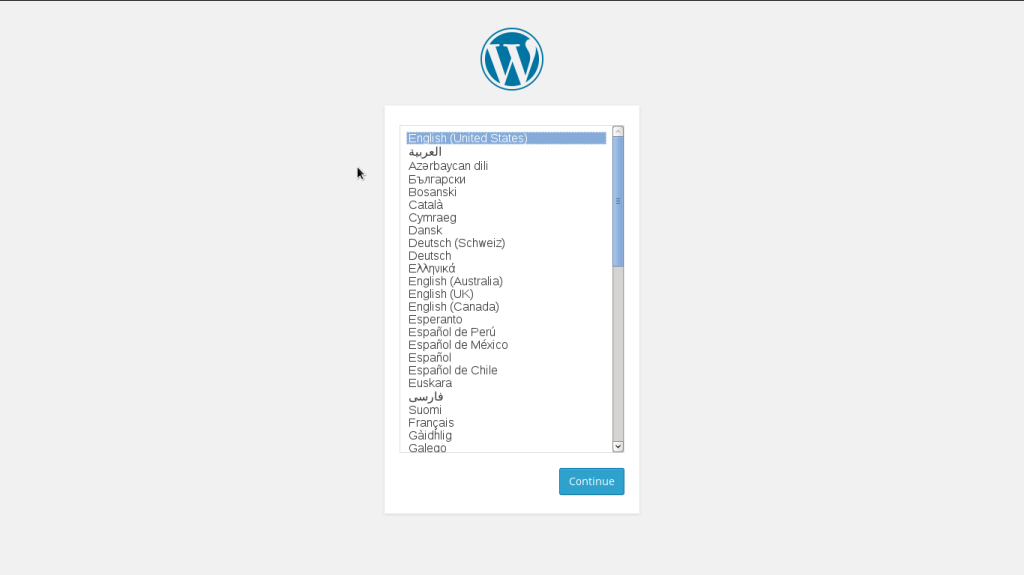
Visit the IP of your wordpress container in your browser and you’ll see something like this:
在浏览器中访问您的wordpress容器的IP,您将看到以下内容:
The problem with this example is that we can’t access the WordPress files, also each time we start the container, it will change it’s IP. But we can easily fix both of these issues.
这个示例的问题在于,我们无法访问WordPress文件,而且每次启动容器时,它都会更改其IP。 但是我们可以轻松解决这两个问题。
docker run -e WORDPRESS_DB_PASSWORD=password -d --name wordpress --link wordpressdb:mysql -p 127.0.0.2:8080:80 -v "$PWD/":/var/www/html wordpressThis is a very long command, we see two new arguments here. The -p and -v arguments. The -p argument is used for port mapping. Inside the container, Apache runs on port 80. We tell Docker that we’ll use the port 8080 to communicate with the port 80 inside the container. Also, we specified 127.0.0.2 as the IP for this container. -v "$PWD/":/var/www/html will map the two folders. By default, the container puts the WordPress files in the /var/www/html directory which is the filesystem inside the container (this is nothing to do with our local filesystem). Check out your current directory and you’ll see that some additional files are there.
这是一个很长的命令,我们在这里看到两个新参数。 -p和-v参数。 -p参数用于端口映射 。 在容器内,Apache在端口80上运行。 我们告诉Docker我们将使用端口8080与容器内部的端口80通信。 另外,我们指定127.0.0.2作为此容器的IP。 -v "$PWD/":/var/www/html将映射两个文件夹。 默认情况下,容器将WordPress文件放在容器内的文件系统/var/www/html目录中(这与我们的本地文件系统无关)。 检出当前目录,您会发现那里还有一些其他文件。
Using your new container, you’ll now be able to modify files in our filesystem. In the previous example, it was much more work to be able to write to our filesystem. This method is a lot simpler. But can it be more simpler? Sure it can!
使用新的容器,您现在可以修改我们文件系统中的文件。 在前面的示例中,要写入我们的文件系统需要做更多的工作。 这种方法要简单得多。 但是可以更简单吗? 当然可以!
Docker撰写 (Docker Compose)
Until now, we’ve seen how to create our containers using commands on the terminal. As much as I love Linux and the terminal, I really don’t want to create the containers using the command line and remembering the various arguments all the time. That’s why Docker Compose exists.
到目前为止,我们已经看到了如何使用终端上的命令创建容器。 尽管我非常喜欢Linux和终端,但我真的不想使用命令行创建容器并一直记住各种参数。 这就是为什么Docker Compose存在的原因。
This tool started under the name Fig (not by the Docker team) as an Open Source, easier solution to manage multiple containers. Now the tool is officially maintained by Docker (under the name Docker Compose). Before moving to Compose, make sure to first install it. All you need is a docker-compose.yml file and a new project folder. In this file we’ll write all the configuration that is needed to build the wordpress and mysql container. Docker Compose, just like Docker CLI, uses the Docker daemon to create the containers, so basically you can do almost everything that you did with the CLI.
该工具以Fig (不是Docker团队)的名义启动,是一个开放源代码,可以轻松管理多个容器。 现在,该工具已由Docker正式维护(名称为Docker Compose)。 转到Compose之前,请确保先安装 。 您只需要一个docker-compose.yml文件和一个新的项目文件夹。 在此文件中,我们将编写构建wordpress和mysql容器所需的所有配置。 就像Docker CLI一样,Docker Compose使用Docker守护进程创建容器,因此基本上您可以完成使用CLI所做的几乎所有事情。
Let’s see an example:
让我们来看一个例子:
web:
    image: wordpress
    links:
     - mysql
    environment:
     - WORDPRESS_DB_PASSWORD=password
    ports:
     - "127.0.0.3:8080:80"
mysql:
    image: mysql:5.7
    environment:
     - MYSQL_ROOT_PASSWORD=password
     - MYSQL_DATABASE=wordpress
This should be familiar to most readers. web and mysql are the names of the containers. When these containers are built from Compose, the actual names are different. A container created from Compose has a name like [foldername]compose_[containername]_[number]. The [foldername] would be the parent folder of docker-compose.yml, [containername] would be web or mysql in this case and [number] would be the number of the container. The good thing about Compose is that you can have more than one container of one type. We could have two web containers. Their names in this case would be [foldername]compose_web_1 and [foldername]compose_web_2. This also applies to other containers that are defined in docker-compose.yml (the mysql container for example).
大多数读者应该熟悉这一点。 web和mysql是容器的名称。 从Compose构建这些容器时,实际名称是不同的。 通过Compose创建的容器的名称类似于[foldername]compose_[containername]_[number] 。 在这种情况下, [number]文件夹[foldername]将是docker-compose.yml的父文件夹,在此情况下, [containername]将是web或mysql ,而[number]将是容器的编号。 关于Compose的好处是,您可以拥有一个类型的多个容器。 我们可以有两个Web容器。 在这种情况下,它们的名称将为[foldername]compose_web_1和[foldername]compose_web_2 。 这也适用于docker-compose.yml中定义的其他容器(例如mysql容器)。
When using containers of one type, you’ll need to specify separate IP addresses.
使用一种类型的容器时,您需要指定单独的IP地址。
environment:
     - WORDPRESS_DB_PASSWORD=password
This works like -e WORDPRESS_DB_PASSWORD=password.
这类似于-e WORDPRESS_DB_PASSWORD=password 。
links:
     - mysql
This works like --link mysql:mysql.
这就像--link mysql:mysql 。
ports:
     - "127.0.0.3:8080:80"
This works just like -p 127.0.0.3:8080:80.
就像-p 127.0.0.3:8080:80一样工作。
To learn more about Docker Compose commands and docker-compose.yml, you’ll find the CLI reference here and docker-compose.yml reference here.
要了解有关Docker Compose命令和docker-compose.yml更多信息,请在此处找到CLI参考,并在此处找到docker-compose.yml参考 。
Now that you’ve got your docker-compose.yml file, execute docker-compose up and Compose will start building the containers for you. Navigate to 127.0.0.3:8080 and you’ll again see a welcome page. Now, all we need is access to the WordPress files.
现在您已经有了docker-compose.yml文件,执行docker-compose.yml docker-compose up ,Compose将开始为您构建容器。 导航至127.0.0.3:8080 ,您将再次看到欢迎页面。 现在,我们只需要访问WordPress文件即可。
As we’ve discussed previously, to get access to the WordPress files on our local filesystem, we need to do something like -v "$PWD/":/var/www/html. You should add a working directory and map two folders (one on your container and one on your local filesystem). To do this, we just add the following two lines:
如前所述,要访问本地文件系统上的WordPress文件,我们需要执行-v "$PWD/":/var/www/html 。 您应该添加一个工作目录并映射两个文件夹(一个在容器上,一个在本地文件系统上)。 为此,我们只需添加以下两行:
working_dir: /var/www/html
    volumes:
     - wordpress/wp-content/:/var/www/html/wp-content
The working_dir tells the WordPress image to install WordPress in that directory. volumes: behaves like -v "$PWD/wordpress":/var/www/html/wp-content. The WordPress files live under /var/www/html folder. We’re really only interested in the wp-content folder, since that’s where our plugins and themes reside. After all, most developers only deal with this folder.
working_dir告诉WordPress映像在该目录中安装WordPress。 volumes:行为类似于-v "$PWD/wordpress":/var/www/html/wp-content 。 WordPress文件位于/var/www/html文件夹下。 我们实际上只对wp-content文件夹感兴趣,因为这是我们的插件和主题所在的位置。 毕竟,大多数开发人员只处理此文件夹。
Again, execute docker-compose up. If you’re on Linux, you should change the permissions of the wordpress folder (the local folder) to writable. That’s because the containers are created by the Docker daemon, a process that starts when the system boots (by the sudo user). To fix this execute:
再次执行docker-compose up 。 如果您使用的是Linux,则应将wordpress文件夹(本地文件夹)的权限更改为可写。 这是因为容器是由Docker守护进程创建的,该进程在系统启动时(由sudo用户启动)启动。 要解决此问题,请执行以下操作:
sudo chmod -R 777 wordpressYou’ll now have write access to these folders and you’ll be good to go!
现在,您将拥有对这些文件夹的写访问权,您将一路顺风!
结论 (Conclusion)
In this article we saw how to use the official WordPress Docker image, with a quick introduction to Docker Compose. If you haven’t checked the previous articles in this series, you can find them below:
在本文中,我们了解了如何使用官方的WordPress Docker镜像,并快速介绍了Docker Compose。 如果您尚未查看本系列的前几篇文章,则可以在下面找到它们:
This series wouldn’t be complete without showing you how to deploy a WordPress project. In the next article, I’ll show you how to deploy a Docker-based WordPress project on DigitalOcean. Stay tuned!
如果不向您展示如何部署WordPress项目,那么本系列将是不完整的。 在下一篇文章中,我将向您展示如何在DigitalOcean上部署基于Docker的WordPress项目。 敬请关注!
If you’ve been reading the series this far, you should now have a much better understanding of the underlying concepts of how Docker works. You should now be able to work with abstractions and tools that make things even easier. If you have any questions please leave a comment below. I know that it’s the third time I’m asking, but I’m very interested if would you consider using Docker in production for your next project?
如果您到目前为止已经阅读了该系列文章,那么您现在应该对Docker工作原理的基本概念有了更好的了解。 现在,您应该能够使用使事情变得更加容易的抽象和工具。 如有任何疑问,请在下面发表评论。 我知道这是我第三次询问,但是我非常感兴趣,您是否考虑在生产中为下一个项目使用Docker?
翻译自: https://www.sitepoint.com/how-to-use-the-official-docker-wordpress-image/


 644
644

 被折叠的 条评论
为什么被折叠?
被折叠的 条评论
为什么被折叠?
 到【灌水乐园】发言


