


Drupal is a very flexible content management system for building websites. It provides many great features out of the box which enable us to build comprehensive sites without writing any PHP code. It also provides features to add more functionality through the use of modules.
Drupal是用于构建网站的非常灵活的内容管理系统。 它提供了许多开箱即用的强大功能,使我们无需编写任何PHP代码即可构建全面的站点。 它还提供了通过使用模块来添加更多功能的功能。
By default, the Drupal node types are an article and a page. This might be good for basic sites, but if we plan on having a more complex website, we’ll want to add different node types. We can even define those by writing a module!
默认情况下,Drupal节点类型是文章和页面。 这对于基本站点可能很好,但是如果我们计划拥有一个更复杂的网站,我们将要添加不同的节点类型。 我们甚至可以通过编写模块来定义它们!
In this article you’ll see how to write a custom Drupal module which will install new node types using the Drupal hooks and API.
在本文中,您将看到如何编写自定义的Drupal模块,该模块将使用Drupal挂钩和API安装新的节点类型。
创建模块 (Creating Your Module)
Let’s start by creating the basic structure of a module in which we’ll create our new content type.
让我们从创建模块的基本结构开始,在该模块中创建新的内容类型。
To create a module, in the sites/all/modules directory of your Drupal installation create a new directory named productcustomtype. In that folder, then create three files:
要创建模块,请在Drupal安装的sites/all/modules目录中创建一个名为productcustomtype的新目录。 在该文件夹中,然后创建三个文件:
productcustomtype.info– will contain the information about the module so that Drupal will recognize it and show it in the list.productcustomtype.info–将包含有关模块的信息,以便Drupal能够识别它并将其显示在列表中。productcustomtype.install– will have details about things you are going to install or uninstall for the module.productcustomtype.install–将包含有关要为模块安装或卸载的内容的详细信息。productcustomtype.module– will contain code to implement the Drupal hooks used by the module.productcustomtype.module–将包含代码以实现模块使用的Drupal挂钩。
Once you have made the directory, open productcustomtype.info and add the following code to it:
创建目录后,打开productcustomtype.info并向其中添加以下代码:
name = productcustomtype
description = A new content type of Product
package = Product Custom node Type
core = 7.x
files[] = productcustomtype.install
files[] = productcustomtype.module
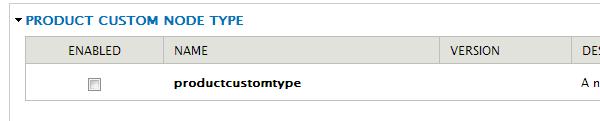
The above simply defines some parameters for our module so Drupal can use it and display the information about our module. Once this is done we should see our module in the module list as shown below. But don’t enable it just yet – we’ll do that after the next step.
上面只是为我们的模块定义了一些参数,因此Drupal可以使用它并显示有关我们模块的信息。 完成此操作后,我们应该在模块列表中看到我们的模块,如下所示。 但是暂时不要启用它-我们将在下一步之后执行。
安装和卸载节点 (Installing and Uninstalling the Node)
Once we have the basic files for the module in place, we can start writing code for installing the custom node type. The first hook we need to implement is hook_node_info. Using this hook, a module can define one or more node types in Drupal. The hook implementation returns an array defining the new node type which the module is going to add.
一旦有了模块的基本文件,就可以开始编写用于安装自定义节点类型的代码。 我们需要实现的第一个钩子是hook_node_info 。 使用此挂钩,模块可以在Drupal中定义一个或多个节点类型。 挂钩实现返回一个数组,该数组定义了模块要添加的新节点类型。
To implement this hook, add the following code to productcustomtype.module:
要实现此挂钩,请将以下代码添加到productcustomtype.module :
<?php
/**
 * Implements hook_node_info()
 */
function productcustomtype_node_info() {
    return array(
        'product' => array(
            'name' => t('Product'),
            'base' => 'product',
            'description' => t('You can define new Products here'),
            'has_title' => TRUE,
            'title_label' => t('Product title')
         )
    );
}
The implementation returns an array defining a new node type product along with some of its properties, such as its name, description, if it has a title, and base (which is used in different hooks for this content type).
该实现返回一个数组,该数组定义一个新的节点类型产品及其一些属性,例如其名称,描述(如果它具有标题)和基础(用于此内容类型的不同挂钩)。
As we have defined that this node type has a title, we need to show the title text field when the form for this node is displayed to add content. To do this, we will have to implement the hook hook_form.
由于我们已定义该节点类型具有标题,因此,当显示该节点的表单以添加内容时,我们需要显示标题文本字段。 为此,我们将必须实现hook hook_form 。
The hook_form hook is used to show the form used to create/edit nodes. The hook is implemented in productcustomtype.module as follows:
hook_form钩子用于显示用于创建/编辑节点的表单。 该钩子在productcustomtype.module实现,如下所示:
<?php
/**
 * Implement hook_form()
 */
function product_form($node, $form_state) {
    return node_content_form($node, $form_state);
}
We simply use the Drupal API which gives an implementation of hook_form and adds a title field provided the node definition has the has_title attribute set (which we do have set in our case).
我们简单地使用Drupal API,该API提供了hook_form的实现,并添加了title字段,前提是节点定义具有has_title属性集(在我们的案例中确实已设置)。
Once we’ve got this done, we need to implement the hook_install hook to add the body field to the new node type.
完成此操作后,我们需要实现hook_install挂钩,以将body字段添加到新的节点类型。
Add the implementation to productcustomtype.install as follows:
将实现添加到productcustomtype.install ,如下所示:
<?php
/**
 * Implements hook_install().
 */
function productcustomtype_install() {
    node_types_rebuild();
    $types = node_type_get_types();|
      node_add_body_field($types['product']);
}
We first save all of the new node types created by different modules (including ours) by calling the Drupal API node_types_rebuild() function. Then we get all of the node types and call node_add_body_field() on our type to add the body field.
我们首先通过调用Drupal API node_types_rebuild()函数来保存由不同模块(包括我们的模块)创建的所有新节点类型。 然后,获取所有节点类型,并在类型上call node_add_body_field()以添加body字段。
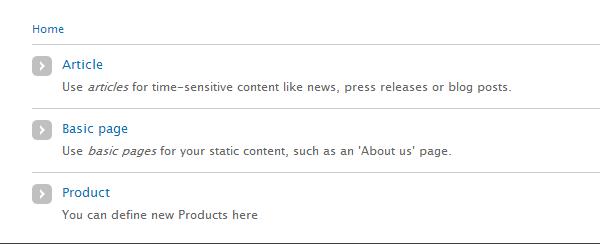
Once we have done this we can enable our module which will install our new node type. Then we should be able to see our new type when we click on add content as follows:
完成此操作后,我们可以启用将安装新节点类型的模块。 然后,当我们单击添加内容时,我们应该能够看到我们的新类型,如下所示:
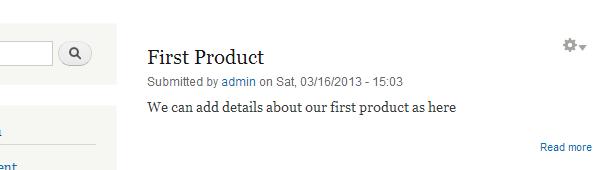
If we add a new product, it will also be seen on the Drupal home page.
如果我们添加新产品,那么它也会在Drupal主页上显示。
All modules in Drupal should clean up any data they create in the database or any types they have added when it is uninstalled by the user. To support this, we have to implement the hook_uninstall in our productcustomtype.install file as follows:
Drupal中的所有模块都应清除用户在数据库中创建的所有数据或用户卸载时添加的任何类型。 为此,我们必须在productcustomtype.install文件中实现hook_uninstall ,如下所示:
<?php
/**
 * Implements hook_uninstall().
 */
function productcustomtype_uninstall() {
    $ournewtype = 'product';
    $sql = 'SELECT nid FROM {node} n WHERE n.type = :type';
    $result = db_query($sql, array(':type' => $ournewtype));
    $nodeids = array();
    foreach ($result as $row) {
        $nodeids[] = $row->nid;
    }
    node_delete_multiple($nodeids);
    node_type_delete($ournewtype);
}
we first find out all of the node IDs which are nodes of our installed content type. Once we have collected the IDs, we use the API function node_delete_multiple() to deletes multiple nodes. Then we use the node_type_delete() function to delete our node type.
我们首先找出所有节点ID,这些ID是我们已安装内容类型的节点。 收集ID后,我们将使用API函数node_delete_multiple()删除多个节点。 然后,我们使用node_type_delete()函数删除节点类型。
Now if we uninstall our module, all of the nodes of our type and our type itself should be deleted.
现在,如果我们卸载模块,则应该删除我们类型的所有节点以及类型本身。
创建额外的字段 (Creating Extra Fields)
Once we’ve added the new node type we have functionality similar to that of a node. But what if we want to add more fields depending on the node type? For example, if it’s a product type then we might want to add two more fields like price and quantity.
添加新的节点类型后,我们将具有与节点相似的功能。 但是,如果我们想根据节点类型添加更多字段怎么办? 例如,如果它是一种产品类型,那么我们可能想再添加两个字段,例如价格和数量。
For this, we have to first create the fields and then then create field instances on our node type. We write two new functions in the productcustomtype.install file to define the fields and the field instances.
为此,我们必须首先创建字段,然后在节点类型上创建字段实例。 我们在productcustomtype.install文件中编写了两个新函数,以定义字段和字段实例。
<?php
function _productcustomtype_installed_fields() {
    $t = get_t();
    return array(
        'productcustomtype_price' => array(
            'field_name' => 'productcustomtype_price',
            'label' => $t('Price of the product'),
            'type' => 'text'
        ),
        'productcustomtype_quantity' => array(
            'field_name' => 'productcustomtype_quantity',
            'label' => $t('Quantity of the product'),
            'type' => 'text'
        )
    );
}

function _productcustomtype_installed_instances() {
    $t = get_t();
    return array(
        'productcustomtype_price' => array(
            'field_name' => 'productcustomtype_price',
            'type' => 'text',
            'label' => $t('Price of the product'),
            'widget' => array(
                'type' => 'text_textfield'
            ),
            'display' => array(
                'example_node_list' => array(
                    'label' => $t('Price of the product'),
                    'type' => 'text'
                )
            )
        ),
        'productcustomtype_quantity' => array(
            'field_name' => 'productcustomtype_quantity',
            'type' => 'text',
            'label' => $t('Quantity of the product'),
            'widget' => array(
                'type' => 'text_textfield'
            ),
            'display' => array(
                'example_node_list' => array(
                    'label' => $t('Quantity of the product'),
                    'type' => 'text'
                )
            )
        )
    );
}
We then create a function add_custom_fields() in productcustomtype.install which will read the array from and create the fields and instances.
然后,我们在productcustomtype.install创建一个函数add_custom_fields() ,该函数将从中读取数组并创建字段和实例。
<?php
function add_custom_fields() {
    foreach (_productcustomtype_installed_fields() as $field) {
        field_create_field($field);
    }
    foreach (_productcustomtype_installed_instances() as $fieldinstance) {
        $fieldinstance['entity_type'] = 'node';
        $fieldinstance['bundle'] = 'product';
        print_r($fieldinstance);
        field_create_instance($fieldinstance);
    }
}
Now we can just call the add_custom_fields() function in productcustomtype_install() so that the fields and field instances are installed when the module is installed.
现在,我们只需在productcustomtype_install()调用add_custom_fields()函数,即可在安装模块时安装字段和字段实例。
<?php
function productcustomtype_install() {
    node_types_rebuild();
    $types = node_type_get_types();
    node_add_body_field($types['product']);
    add_custom_fields();
}
We also need to update our productcustomtype_uninstall() function to remove the fields and field instances.
我们还需要更新productcustomtype_uninstall()函数以删除字段和字段实例。
<?php
function productcustomtype_uninstall() {
    $ournewtype = 'product';
    $sql = 'SELECT nid FROM {node} n WHERE n.type = :type';
    $result = db_query($sql, array(':type' => $ournewtype));
    $nodeids = array();
    foreach ($result as $row) {
        $nodeids[] = $row->nid;
    }
    node_delete_multiple($nodeids);
    delete_custom_fields();
    node_type_delete($ournewtype);
    field_purge_batch(500);
}

function delete_custom_fields() {
    foreach (array_keys(_productcustomtype_installed_fields()) as $field) {
        field_delete_field($field);
    }
    $instances = field_info_instances('node', 'product');
    foreach ($instances as $instance_name => $fieldinstance) {
        field_delete_instance($fieldinstance);
    }
}
Install the module again and click on product to add a new product and we should see the two fields as shown below:
再次安装模块,然后单击产品以添加新产品,我们应该看到两个字段,如下所示:
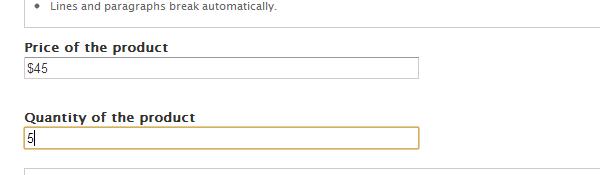
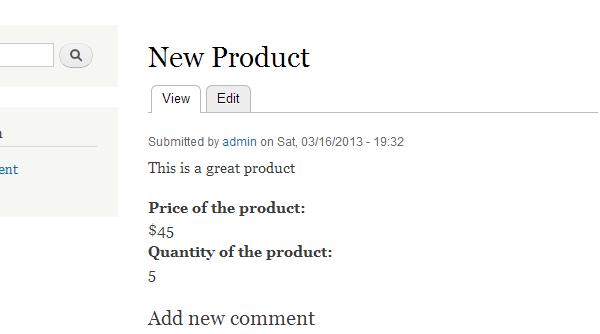
After we save the node and see it in the preview, we will see the fields as follows:
保存节点并在预览中看到它之后,我们将看到以下字段:
结论 (Conclusion)
The Drupal CMS provides many useful hooks and a powerful API which allow us to perform various customizations. In this article we were able to create a completely new node type which will appear in Drupal’s content section. And using Drupal’s API we also attached fields to this new node type so that anyone can easily add content using the new node type. So have fun creating your next new node type for your Drupal site.
Drupal CMS提供了许多有用的钩子和强大的API,使我们能够执行各种自定义。 在本文中,我们能够创建一个全新的节点类型,该节点类型将出现在Drupal的内容部分。 使用Drupal的API,我们还将字段附加到该新节点类型上,以便任何人都可以使用新节点类型轻松添加内容。 因此,为您的Drupal站点创建下一个新的节点类型很有趣。
Image via Fotolia
图片来自Fotolia
翻译自: https://www.sitepoint.com/creating-a-new-drupal-node-type/


 234
234

 被折叠的 条评论
为什么被折叠?
被折叠的 条评论
为什么被折叠?
 到【灌水乐园】发言


