


 本文介绍了如何使用Amazon CloudFront动态调整图像大小,从而解决Web应用中图像处理的问题。通过在URL中添加特殊前缀,如'maxD'或'minD',可以自动调整图像尺寸,而无需预先存储多个尺寸的图像。这种方法降低了服务器压力,同时借助CloudFront,可以利用其全球分发网络进一步提高性能和响应速度。
cloudfront
Images can cause major headaches for web app developers, especially if your app allows users to upload their own images. They are problematic for two reasons:
图像可能会给Web应用程序开发人员造成严重的麻烦,尤其是如果您的应用程序允许用户上传自己的图像时。 它们有问题的原因有两个:
Images are Bulky Compared to most other types of data you store (other than video), images take the most space.
图像过于庞大与存储的大多数其他类型的数据(视频除外)相比,图像占用的空间最大。
Images Need to be Resized For both aesthetic and performance reasons, images must be resized for use in different parts of your application. You need thumbnails, headers, inline-floats, and detailed zoom versions of your images.
需要调整图像的大小出于美观和性能方面的原因,必须调整图像的大小以用于应用程序的不同部分。 您需要图像的缩略图,页眉,内联浮动字体和详细的缩放版本。
In the past, I’ve developed all kinds of solutions to solve this problem. My original solution was to store 10 different sizes of every image, each created at the time of upload. That worked okay, but it was a killer on disk space and it wasn’t always as flexible as I needed it to be. If I needed a new image size I had to resize every existing image in the system. What a pain.
过去,我开发了各种解决方案来解决此问题。 我最初的解决方案是为每个图像存储10种不同尺寸的图像,每种图像都是在上载时创建的。 这样做还可以,但是它是磁盘空间上的杀手and,而且并不总是像我需要的那样灵活。 如果需要新的图像大小,则必须调整系统中每个现有图像的大小。 真痛苦
更好的解决方案 (A Better Solution)
With CloudFront, there’s a better way. I’ll show you how to put it together, but first I want to show you how you’ll use it (that’s the fun part, right?)
使用CloudFront,有更好的方法。 我将向您展示如何将其组合在一起,但首先,我想向您展示如何使用它(这是有趣的部分,对吧?)
Here’s the scenario: You upload an image to your server called “Penguins.jpg” that is 1024 x 768 pixels. You want to use that image as a thumbnail that’s 80 pixels square– what do you do?
情况如下:您将一个1024 x 768像素的图像上传到服务器上的“ Penguins.jpg”。 您想将该图像用作80像素见方的缩略图-您该怎么做?

Using the original image obviously won’t work. It’s just way too big.
使用原始图像显然不起作用。 太大了。
With the solution I will demonstrate, all you need to do is reference following URL in your source:
通过我将演示的解决方案,您所需要做的就是在源代码中引用以下URL:
<img src="//dynamiccdn.example.com/maxD_80/imagestore/Penguins.jpg" alt="" />
That was easy! Simply prefixing the name of the image with “maxD_80” automatically resized it down to a maximum width of 80 pixels on its longest side.
那很简单! 只需在图像名称前加上“ maxD_80”前缀,即可自动将图像尺寸调整为最长边最大80像素。
That’s okay, but what if you want to use a square thumbnail as background image and you want to make sure wide or tall images don’t have white spaces on the edge? Easy solution:
没关系,但是如果您想使用方形缩略图作为背景图像,并且要确保宽或高的图像边缘没有空白,该怎么办? 简单的解决方案:
<img src="//dynamiccdn.example.com/minD_80/imagestore/Penguins.jpg" alt="" />
Now we’re talking! Using “minD_80” instead of “maxD_80” results in an image that is as small as possible, but keeping the smallest side at least 80 pixels. Now it looks perfect!
现在我们在说话! 使用“ minD_80”而不是“ maxD_80”可以生成尽可能小的图像,但最小边至少要保留80个像素。 现在看起来很完美!
酷...但是如何? (Cool… but how?)
You’ll be surprised how simple the solution is– all thanks to cloud computing. Here’s what you’re going to need.
您将惊讶于该解决方案的简单性-多亏了云计算。 这就是您需要的。
- An Amazon Web Services account with CloudFront enabled 启用了CloudFront的Amazon Web Services帐户
- A web server running Apache (you can do it on Windows too with some extra work) 运行Apache的Web服务器(您也可以在Windows上做一些额外的工作)
- A little bit of PHP skill (Can you copy and paste?) 一点点PHP技巧(可以复制粘贴吗?)
Web服务器设置 (Web Server Setup)
Directory: imagestore Start by creating a directory called “imagestore” in the root of your web. This is where you’re going to store all the “original” images. You can organize them any way you want within this folder. For now, put a few large jpg files in there for testing.
目录:imagestore首先在您的网站根目录中创建一个名为“ imagestore”的目录。 您将在这里存储所有“原始”图像。 您可以在该文件夹中以任何需要的方式组织它们。 现在,在其中放置一些大的jpg文件进行测试。
.htaccess File You need to add a few lines in the .htaccess file in the root of your web (just create the file if it doesn’t exist):
.htaccess文件您需要在Web根目录的.htaccess文件中添加几行(如果文件不存在,请创建该文件):
RewriteEngine On
RewriteCond %{QUERY_STRING} (.*)
RewriteRule ^([^/]*)/imagestore/(.*).(jpg|jpeg)$ image.php?format=$1&path=imagestore/$2.$3
This code tells the server to send any request for jpg images in the “imagestore” directory (or any of its sub-directories) to the “image.php” file (which we’ll create next).
此代码告诉服务器将对“ imagestore”目录(或其任何子目录)中的jpg图像的任何请求发送到“ image.php”文件(我们将在接下来创建)。
PHP File: image.php Create this file in the root of your web. This file is going to do all the work of handling requests for formatted images.
PHP文件:image.php在您的网站根目录中创建此文件。 该文件将完成处理格式化图像请求的所有工作。
代码 (The Code)
Let’s walk through it a step at a time. To keep things simple we’re going to assume all of your images are jpg format. All of the following code snippets go right in the image.php file you just created.
让我们一次一步地进行操作。 为简单起见,我们假设您所有的图片均为jpg格式。 以下所有代码段都位于您刚创建的image.php文件中。
Let’s start by picking up the querystring variables (format and path) being submitted by the rewrite rule we previously added to our .htaccess file:
让我们首先选择先前添加到.htaccess文件中的重写规则提交的querystring变量(格式和路径):
$path = $_GET['path'];
$formats = explode(',', $_GET['format']);
We’re creating an array (using explode) out of the format. This will allow us to piggyback any number of formatting commands on a single image by separating each one with a comma in the URL.
我们正在使用格式创建数组(使用爆炸)。 通过在URL中用逗号分隔每个图像,这将使我们能够在单个图像上搭载任何数量的格式化命令。
Now create the image object using the $path variable we just created:
现在使用刚刚创建的$ path变量创建图像对象:
$image = imagecreatefromjpeg($path);Add some important headers. These headers tell the browser that the file you’re providing is a jpg image and it sets the expiration far into the future so the browser will cache the image for as long as possible:
添加一些重要的标题。 这些标头告诉浏览器您提供的文件是jpg图像,并且它将过期设置为很长的将来,因此浏览器将尽可能长时间地缓存图像:
header("Content-Type: image/jpeg");
header("Cache-control: Public");
$headerTimeOffset = 60 * 60 * 24 * 30;
$headeExpire = "Expires: ".gmdate("D, d M Y H:i:s",time()+$headerTimeOffset)." GMT";
header ($headeExpire);
Next we’ll loop through the format array we created before and apply the image formatting function (formatImage) which we’ll create soon.
接下来,我们将遍历之前创建的format数组,并应用我们即将创建的图像格式化功能(formatImage)。
foreach ($formats as $format) {
	$image = formatImage($format, $image);
}
Last, output the image and destroy the object:
最后,输出图像并销毁对象:
imagejpeg($image, Null, 100);
imagedestroy($image);
Okay… we’re getting close. Let’s look at three simple functions that work together to get the results we want. I’ve added some comments so you can walk through and see what’s happening, but if you just want to get it working all you need to do is copy and paste:
好吧...我们接近了。 让我们看一下三个简单的函数,它们可以协同工作以获得所需的结果。 我添加了一些评论,以便您可以逐步了解正在发生的事情,但是,如果您只是想使其正常工作,则只需复制和粘贴即可:
// Translates commands (like maxD_80 or minD_40) from your URL
// into the correct resampling functions.
function formatImage($format, $image) {
	// Get the original image sizes.
	$curW = imagesx($image);
	$curH = imagesy($image);
	// Split the format into parts separeted by "_"
	$formatParts = explode("_", $format);
	switch ($formatParts[0]) {
		// If the format command is maxD, resize the image
		// so that the largest side is the specified
		// number of pixels ($formatParts[1])
		case "maxD":
			if ($curW > $curH) {
				$ratio = $curH / $curW;
				$newW = (int) maxProtect($formatParts[1]);
				$newH = (int) (maxProtect($formatParts[1]) * $ratio);
			} else {
				$ratio = $curW / $curH;
				$newW = (int) (maxProtect($formatParts[1]) * ratio);
				$newH = (int) maxProtect($formatParts[1]);
			}
			$image = resizeImage($image, $newW, $newH);
			break;
		// If the format command is minD, resize the image
		// so that the smallest side is the specified
		// number of pixels ($formatParts[1])
		case "minD":
			if ($curW  800) $value = 800;
	return $value;
}
Whew! Are we done coding yet? Yes.
ew! 我们完成编码了吗? 是。
测试时间 (Time to Test)
Simply browse to images on your web in the imagestore folder. Now, in your URL, add the prefix with a maxD or minD command. Remember that these commands require a value after them separated by an underscore. Example: maxD_55
只需在imagestore文件夹中浏览到Web上的图像即可。 现在,在您的URL中,使用maxD或minD命令添加前缀。 请记住,这些命令在用下划线分隔后需要一个值。 示例:maxD_55
So if your original image URL looks like this: http://yourownwebsite.com/imagestore/Penguins.jpg
因此,如果您的原始图片网址看起来像这样:http: //yourownwebsite.com/imagestore/Penguins.jpg
Your new URL will look like this: http://yourownwebsite.com/maxD_55/imagestore/Penguins.jpg
您的新网址将如下所示:http: //yourownwebsite.com/maxD_55/imagestore/Penguins.jpg
那云呢? (What about the Cloud?)
While it’s fun to dynamically create image sizes with simple changes to your image URL, it’s not practical to stop here. Image resizing is very processor-intensive and handing all the requests for all your images all the time will really bog down your server.
通过对图像URL进行简单的更改来动态创建图像大小是很有趣的,但在这里停下来是不切实际的。 图像大小调整非常占用处理器资源,并且始终不停地处理所有图像的所有请求将使服务器瘫痪。
CloudFront provides an extremely simple solution. It’s designed to allow you to easily distribute content with low latency via a global network of edge locations. In other words, it automatically takes the load off your server and puts your content closer (geographically) to your customers.
CloudFront提供了非常简单的解决方案。 它旨在使您能够通过边缘位置的全球网络轻松地以低延迟分发内容。 换句话说,它会自动减轻服务器的负担,并使您的内容(在地理位置上)更接近客户。
We’re going to use CloudFront to keep cached versions of our resized images so our server only has to handle requests for new sizes periodically– not every time one needs to be served. Setting up CloudFront is a snap:
我们将使用CloudFront来保留调整大小后的图像的缓存版本,因此我们的服务器仅需要定期处理对新大小的请求,而不必每次都需要处理。 设置CloudFront很容易:

Start by signing-in to your Amazon Web Services management console:
首先登录到您的Amazon Web Services管理控制台:
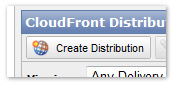
Find the CloudFront tab in the management console, then click “Create Distribution”: The Create Distribution Wizard will pop-up. The entries you make here are important. First, select “Custom Origin”. In the Origin DNS name, enter your domain name where the imagestore directory and image.php file are hosted. Under Protocol Policy, I recommend selecting Match Viewer.
在管理控制台中找到“ CloudFront”选项卡,然后单击“创建分发”:将弹出“创建分发向导”。 您在此处输入的内容很重要。 首先,选择“自定义来源”。 在原始DNS名称中,输入托管imagestore目录和image.php文件的域名。 在协议策略下,我建议选择“匹配查看器”。

You can breeze through the next two sections (Distribution Details and Review). After that you just need to wait about 15 minutes for AWS to create your distribution.
您可以轻松浏览接下来的两个部分(“分发详细信息”和“查看”)。 之后,您只需要等待约15分钟即可让AWS创建您的发行版。
Once you create your distribution, you’ll get a DNS name to use. It will look like: abcdefg1234.cloudfront.net
创建发行版后,您将获得要使用的DNS名称。 它看起来像:abcdefg1234.cloudfront.net
Now it’s time to complete the solution. Instead of creating images like this:
现在是时候完成解决方案了。 而不是像这样创建图像:

You’ll now reference your images like this:
您现在将像这样引用您的图像:
<img src="//abcdefg1234.cloudfront.net/minD_80/imagestore/Penguins.jpg" alt="" />That’s it– you’re done! Now whenever that image is requested, the request will go to CloudFront. The first time the image is requested, CloudFront will request it from your server. After that it will keep it in its cache and deliver it instantly for new requests. When it expires, it will just request it again from your server.
就这样–完成! 现在,无论何时请求该映像,请求都将转到CloudFront。 首次请求映像时,CloudFront将从您的服务器请求它。 之后,它将保留在其缓存中并立即将其交付以用于新请求。 到期后,它将再次从您的服务器请求。
下一步是什么? (What’s Next?)
There is still a lot you can do to make this system work better for your application. Here are a few ideas:
要使该系统更好地适合您的应用程序,您还有许多工作要做。 这里有一些想法:
Handle 404s Make sure your script is setup to handle cases where images are requested that don’t exist on your server.
处理404s确保您的脚本已设置为处理服务器上不存在请求的图像的情况。
Handle other Image Formats Setup the system to handle jpegs, pngs, gifs, and any other image format you use.
处理其他图像格式将系统设置为处理jpeg,png,gif和您使用的任何其他图像格式。
Add More Filters The full example below includes a bunch of useful filters that I’ve created, including examples of transforming your image to grayscale and adding pixelation effects. With php GD you have many available options. Check out ImageMagick for even more options for manipulating your images.
添加更多滤镜下面的完整示例包括一堆我创建的有用滤镜,包括将图像转换为灰度并添加像素化效果的示例。 使用php GD,您有许多可用的选项。 请查看ImageMagick,以获取更多处理图像的选项。
Watermarks, Cropping, and more! This type of system has so many possibilities. Easily set it up to add a watermark to every image or crop images to a specific size ratio.
水印,裁剪等! 这种系统有很多可能性。 轻松设置它,即可为每个图像或裁剪图像以特定的大小比例添加水印。
Integrate with Amazon S3 Storing the originals on your server is okay to start, but really you should be using Amazon S3 or another cloud storage service to store your originals. Making this change ensures you never have to worry about backups or scalability.
与Amazon S3集成可以开始将原始文件存储在服务器上,但是实际上您应该使用Amazon S3或其他云存储服务来存储原始文件。 进行此更改可确保您不必担心备份或可伸缩性。
Use a CNAME Don’t like serving images from a cloudfront.net domain name? No problem, you can configure CloudFront to use your own domain like cdn.yourdomain.com.
使用CNAME不喜欢从cloudfront.net域名提供图片? 没问题,您可以将CloudFront配置为使用自己的域,例如cdn.yourdomain.com。
Add Security This type of system allows people to “play around” with your images. If someone is malicious, they could actually use this system to really bog down your server (DoS attack). You can prevent this in many different ways. My favorite way is to use encoding and encryption for the format part of the image URL. This adds a little bit of work, but it prevents people from being able to hit your server with unlimited requests for infinite sizes of your image. There are plenty of other ways to prevent abuse… the main thing is to remember that you need to put something in place.
增加安全性这种类型的系统使人们可以“玩弄”您的图像。 如果有人恶意,他们实际上可以使用此系统来真正破坏您的服务器(DoS攻击)。 您可以通过许多不同的方式来防止这种情况。 我最喜欢的方法是对图像URL的格式部分使用编码和加密。 这增加了一点工作量,但是它阻止了人们无限制地请求无限大的图像来访问您的服务器。 还有很多其他防止滥用的方法……主要是要记住您需要放置一些东西。
玩得开心! (Have fun with it!)
This solution has transformed the way I design and develop using images in web applications. I no longer have to worry about rigid scenarios for image sizes and formatting. I can design whatever I want on the front end, and I never have to worry about disk space, performance, or creating routines to transform images in bulk. Hopefully you will find this concept useful as well.
该解决方案改变了我在Web应用程序中使用图像进行设计和开发的方式。 我不再需要担心图像大小和格式的僵化情况。 我可以在前端设计任何内容,而不必担心磁盘空间,性能或创建例程来批量转换图像。 希望您会发现这个概念也有用。
If you have any suggestions on how to improve or enhance the system, please post your comments below. And of course, if you have questions– please ask!
如果您对如何改进或增强系统有任何建议,请在下面发表您的评论。 当然,如果您有任何疑问,请询问!
常见问题 (FAQs)
What if I need to access the original version of my image? No problem! Just use any prefix. I like to use “o” for original. So my original image URL would look like this: http://dynamiccdn.example.com/o/imagestore/Penguins.jpg
如果我需要访问图像的原始版本怎么办? 没问题! 只需使用任何前缀即可。 我喜欢使用“ o”作为原稿。 因此,我的原始图片网址应如下所示:http://dynamiccdn.example.com/o/imagestore/Penguins.jpg
Why can’t I just use querystring variables after my image to specify formatting? That would be cool… but Amazon CloudFront ignores those variables.
为什么在图像后不能只使用querystring变量指定格式? 那太酷了……但是Amazon CloudFront会忽略这些变量。
This example only works for jpg file. I love pngs more. What gives?? To keep the code as simple as possible, this example only handles jpg files. But you can tweak the script to handle any image format you may be using.
本示例仅适用于jpg文件。 我更喜欢PNG。 是什么赋予了?? 为了使代码尽可能简单,此示例仅处理jpg文件。 但是您可以调整脚本以处理您可能使用的任何图像格式。
Why do you reference your images starting with “//” instead of “http://”? Good question. Using “//” forces the URL to reference the same protocol (http or https) as the page the user is currently viewing. It’s really handy and prevents some browsers from popping up “unsecure content” warnings.
为什么引用以“ //”而不是“ http://”开头的图像? 好问题。 使用“ //”会强制URL引用与用户当前正在浏览的页面相同的协议(http或https)。 它非常方便,可以防止某些浏览器弹出“不安全内容”警告。
完整脚本示例 (Full Script Example)
Here is the full working image.php script. It includes a lot of extra handy format options. The whole thing is less than 100 lines of code!
这是完整的工作image.php脚本。 它包括许多额外的方便格式选项。 整个过程少于100行代码!
$path = $_GET['path'];
$formats = explode(',', $_GET['format']);
$image = imagecreatefromjpeg($path);
header('Content-Type: image/jpeg');
header('Cache-control: Public');
$headerTimeOffset = 60 * 60 * 24 * 30;
$headeExpire = "Expires: " . gmdate ("D, d M Y H:i:s", time() + $headerTimeOffset) . " GMT";
header ($headeExpire);

foreach ($formats as $format) {
    $image = formatImage($format, $image);
}

imagejpeg($image, Null, 100);
imagedestroy($image);

function resizeImage($originalImage,$toWidth,$toHeight) {
    $width = imagesx($originalImage);
    $height = imagesy($originalImage);
    $imageResized = imagecreatetruecolor($toWidth, $toHeight);
    imagecopyresampled($imageResized, $originalImage, 0, 0, 0, 0, $toWidth, $toHeight, $width, $height);
    return $imageResized;
}

function formatImage($format, $image) {
    $curW = imagesx($image);
    $curH = imagesy($image);
    $formatParts = explode('_', $format);
    switch ($formatParts[0]) {
        case 'filterGray':
            #### Make it Grayscale
            imagefilter($image, IMG_FILTER_GRAYSCALE);
            break;
        case 'filterBlur':
            #### Blur It Up
            imagefilter($image, IMG_FILTER_GAUSSIAN_BLUR);
            break;
        case 'maxD':
            #### Maximum Either Dimension - maxD_100
            if ($curW > $curH) {
$ratio = $curH / $curW;
$newW = (int) maxProtect($formatParts[1]);
$newH = (int) (maxProtect($formatParts[1]) * $ratio);
            } else {
$ratio = $curW / $curH;
$newW = (int) (maxProtect($formatParts[1]) * ratio);
$newH = (int) maxProtect($formatParts[1]);
            }
            $image = resizeImage($image, $newW, $newH);
            break;
        case 'minD':
            #### Minimum Smallest Dimension - maxD_100
            if ($curW  800) $value = 800;
    return $value;
}
Image via Marc Dietrich / Shutterstock
图片来自Marc Dietrich / Shutterstock
翻译自: https://www.sitepoint.com/dynamic-image-delivery-with-cloudfront-2/
cloudfront


 4600
4600

 被折叠的 条评论
为什么被折叠?
被折叠的 条评论
为什么被折叠?
 到【灌水乐园】发言


