


blink 框架
Lumen, Silex, Slim, etc. you’ve heard of all of them. In this article, we’ll take a look at a newcomer called Blink.
流明,Silex,Slim等,您都听说过。 在本文中,我们将介绍一个名为Blink的新手。

Blink was built to improve high performance applications that consume a lot of server resources, and it uses the Swoole PHP extension to achieve this goal. As an example, we will build a Blink powered notejam for our demo. Let’s get started.
Blink旨在改善消耗大量服务器资源的高性能应用程序,并且使用Swoole PHP扩展来实现此目标。 作为示例,我们将为演示构建一个由Blink支持的notejam 。 让我们开始吧。
安装Swoole PHP扩展 (Installing the Swoole PHP Extension)
We mentioned earlier that Blink relies on the Swoole extension for better performance.
前面我们提到,Blink依赖Swoole扩展来获得更好的性能。
You can install the Swoole extension from source on Github. Follow this article if you don’t know how to do it.
您可以从Github上的源代码安装Swoole扩展。 如果您不知道如何操作,请遵循此文章 。
The alternative way to install it is by using the PEAR package manager, which is the approach I’ll take. I will be using an Ubuntu 14.04 image with the LAMP setup for this article, configured via Vaprobash – to get this exact setup, refer to the Vagrantfile in this project’s final repo. We could’ve used Homestead improved to easily set up the environment, but the Swoole extension is only compatible with PHP 5 for now, and Homestead Improved uses PHP 7 by default.
安装它的另一种方法是使用PEAR软件包管理器,这是我将采用的方法。 我将在本文中使用通过Lap设置进行安装的Ubuntu 14.04映像,并通过Vaprobash进行配置-要获得此确切设置,请参考该项目最终回购中的Vagrantfile。 我们本来可以使用Homestead改进版来轻松设置环境,但是Swoole扩展目前仅与PHP 5兼容,而Homestead改进版默认使用PHP 7。
# update repositories
sudo apt-get update

# Install pear manager
sudo apt-get install php-pear

# PHP source to compile the extension
sudo apt-get install php5-dev

# Used to install package dependencies
sudo apt-get install libcurl3-openssl-dev

# Installing Swoole
sudo pecl install swoole
The current Swoole version is 1.7.22-alpha and it’s not compatible with PHP 7, but there is an ongoing effort to make this happen in the next minor version.
当前的Swoole版本是1.7.22-alpha ,它与PHP 7不兼容,但仍在努力在下一个次要版本中实现这一目标。
After the commands above execute, we’re asked to add the extension=swoole.so line to php.ini. You can make sure that the extension is loaded by listing the available PHP modules command.
执行上述命令后,要求将extension=swoole.so行添加到php.ini 。 您可以通过列出可用PHP模块命令来确保扩展已加载。
php -m | grep 'swoole'安装闪烁 (Installing Blink)
Blink is available on Packagist, so we can use Composer to create a new project.
Packagist上提供了Blink,因此我们可以使用Composer创建一个新项目。
composer create-project --prefer-dist blink/seedAfter all the dependencies have been loaded, you can run the server from the command line.
加载所有依赖项之后,您可以从命令行运行服务器。
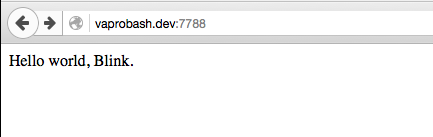
php blink server serveThis command will run an interactive shell for logs. However, you may use the php blink server start/stop/restart commands to manage the server.
此命令将为日志运行交互式外壳。 但是,您可以使用php blink server start/stop/restart命令来管理服务器。
We can make sure that everything is working as expected by visiting port 7788 of our local server:
我们可以通过访问本地服务器的端口7788来确保一切正常。
组态 (Configuration)
While Blink doesn’t provide an option from the command line to specify the port, we can use the config/server.php file to change it.
虽然Blink没有从命令行提供选项来指定端口,但是我们可以使用config/server.php文件进行更改。
// src/config/server.php

<?php
return [
    'class' => '\blink\server\SwServer',
    'bootstrap' => require __DIR__ . '/../bootstrap.php',
    'host' => '0.0.0.0',
    'port' => 8080,
];
Now, restart your server and check the browser using the new port. The config folder also holds configuration for our app and services.
现在,重新启动服务器,并使用新端口检查浏览器。 config文件夹还保存了我们的应用程序和服务的配置。
生成Notejam应用 (Building the Notejam App)
The Notejam application doesn’t contain a lot of functionality. You can check out the final app on Github. It offers:
Notejam应用程序不包含很多功能。 您可以在Github上查看最终的应用程序。 它提供:
- A sign in page with the forgot password option. 带有“忘记密码”选项的登录页面。
- A sign up page. 一个注册页面。
- Account settings. (change user password) 帐号设定。 (更改用户密码)
- Managing notes. 管理笔记。
- Managing pads. 管理护垫。
安装模板引擎 (Installing a Template Engine)
Blink doesn’t provide a templating engine by default, we need to choose and inject our own. I chose to work with Twig, but you can easily switch to another engine like Blade, Smarty, etc. The src/bootstrap.php file is responsible for registering our routes, services and executing our application, and we will use it to bind the Twig engine to the application container.
默认情况下,Blink不提供模板引擎,我们需要选择并注入自己的模板引擎。 我选择与Twig合作 ,但您可以轻松切换到另一个引擎,例如Blade,Smarty等src/bootstrap.php文件负责注册我们的路线,服务和执行我们的应用程序,我们将使用它来绑定将Twig引擎连接到应用程序容器。
// src/bootstrap.php

// ...
$app = new blink\core\Application($config);

require __DIR__.'/bindings.php';

return $app;
// src/bindings.php
<?php
/*
Registering Twig
*/
$app->bind('twig.loader', function () {
$view_paths = __DIR__.'/views';
$loader = new \Twig_Loader_Filesystem($view_paths);
return $loader;
});
$app->bind('twig', function () use($app) {
$options = [
'debug' => false,
'cache' => __DIR__.'/../cache/views/compiled'
];
$twig = new \Twig_Environment($app->get('twig.loader'), $options);
// register Twig Extensions
$twig->addExtension(new \Twig_Extension_Debug());
// register Twig globals
$twig->addGlobal('app', $app);
return $twig;
});Blink uses the Yii container for dependency injection. It has constructor and method injection, auto resolving for dependencies, etc. Check the documentation for more details.
Blink使用Yii容器进行依赖项注入。 它具有构造函数和方法注入,自动解析依赖关系等。有关更多详细信息,请参见文档。
安装数据库管理器 (Installing a Database Manager)
The Notejam application requires database access for managing users, notes and pads. We’re going to use the Eloquent package for that, so we need to require it using Composer.
Notejam应用程序需要数据库访问权限才能管理用户,便笺和便笺本。 我们将为此使用Eloquent软件包,因此我们需要使用Composer对其进行要求。
composer require illuminate/database 5.1.*
composer require illuminate/console 5.1.*
composer require illuminate/filesystem 5.1.*
We also required the console and filesystem packages to use database migrations to build our database.
我们还要求控制台和文件系统软件包使用数据库迁移来构建数据库。
// src/bindings.php

// ...

/*
    Registering Eloquent DB Manager
*/

use Illuminate\Database\Capsule\Manager as Capsule;

$capsule = new Capsule;
$capsule->addConnection(require __DIR__.'/config/database.php');

$app->bind('capsule', $capsule);
$capsule->setAsGlobal();
$capsule->bootEloquent();
// src/console/MigrateCommand.php
class MigrateCommand extends Command
{
public $name = 'migrate';
public $description = 'Migrate Database.';
protected function execute(InputInterface $input, OutputInterface $output)
{
$capsule = app('capsule');
$connectionResolver = $capsule->getDatabaseManager();
$repository = new DatabaseMigrationRepository($connectionResolver, 'migrations');
if( !$repository->repositoryExists() )
{
$repository->createRepository();
}
$migrator = new Migrator($repository, $connectionResolver, new Filesystem);
return $migrator->run(__DIR__.'/../database/migrations');
}
}// src/config/app.php
<?php
return [
// ...
'commands' => [
'App\Console\MigrateCommand',
]
];After registering our command, we can run php blink migrate to create our database.
注册我们的命令后,我们可以运行php blink migrate创建我们的数据库。
// src/database/migrations/2015_11_14_00_create_users_table.php

class CreateUsersTable extends Migration {
    public function up()
    {
       Capsule::schema()->create('users', function(Blueprint $table) {
            $table->increments('id');
            $table->string('email');
            $table->string('password', 60);
            $table->string('remember_token', 100)->nullable();
            $table->timestamps();
        });
    }

    public function down()
    {
        Capsule::schema()->drop('users');
    }
}
// src/database/migrations/2015_11_14_00_create_notes_table.php
class CreateNotesTable extends Migration {
public function up()
{
Capsule::schema()->create('notes', function(Blueprint $table) {
$table->increments('id');
$table->string('name', 255);
$table->text('text');
$table->integer('user_id');
$table->integer('pad_id')->nullable();
$table->timestamps();
});
}
public function down()
{
Capsule::schema()->drop('notes');
}
}// src/database/migrations/2015_11_14_00_create_pads_table.php
class CreatePadsTable extends Migration {
public function up()
{
Capsule::schema()->create('pads', function(Blueprint $table) {
$table->increments('id');
$table->string('name', 255);
$table->integer('user_id');
$table->timestamps();
});
}
public function down()
{
Capsule::schema()->drop('pads');
}
}路线 (Routes)
Application routes are registered inside http/routes.php, and should return an array containing our routes definitions.
应用程序路由在http/routes.php中注册,并应返回包含我们的路由定义的数组。
// src/http/routes.php

return [
    ['GET', '/signin', '\\App\\Http\\Controllers\\UserController@signin']
];
The first item in the array should define the request method. This could be a single item or an array to handle multiple request methods. The second item defines the request URL, and can contain rules for parameters.
数组中的第一项应定义请求方法。 这可以是单个项目,也可以是一个数组,用于处理多个请求方法。 第二项定义请求URL,并且可以包含参数规则。
// src/http/routes.php

return [
    ['GET', '/notes/{id}', '\\App\\Http\\Controllers\\NoteController@show']
];

// You can also use regex to filter parameters.

return [
    ['GET', '/notes/{id:\d+}', '\\App\\Http\\Controllers\\NoteController@show']
];
The third item specifies the request handler. This could be a Closure or a class name like the example above. Check the routes documentation for more details. Our full routes file looks like this.
第三项指定请求处理程序。 如上面的示例,这可以是Closure或类名。 查看路线文档以了解更多详细信息。 我们的完整路由文件如下所示。
// src/http/routes.php

return [
    ['GET', '/', function(blink\http\Response $response){
        return $response->redirect('/signin');
    }],

    // authentication
    ['GET', '/signin', 'UserController@signin'],
    ['POST', '/signin', 'UserController@processSignin'],

    ['GET', '/signup', 'UserController@signup'],
    ['POST', '/signup', 'UserController@store'],

    ['GET', '/logout', 'UserController@logout'],

    ['GET', '/settings', 'UserController@settings'],
    ['POST', '/settings', 'UserController@updateSettings'],

    //pads
    ['GET', '/pads', 'PadController@index'],
    ['GET', '/pads/{id:\d+}', 'PadController@show'],

    ['GET', '/pads/create', 'PadController@create'],
    ['POST', '/pads/create', 'PadController@store'],

    ['GET', '/pads/{id:\d+}/update', 'PadController@edit'],
    ['POST', '/pads/{id:\d+}/update', 'PadController@update'],

    ['GET', '/pads/{id:\d+}/delete', 'PadController@delete'],

    // Notes
    ['GET', '/notes', 'NoteController@index'],
    ['GET', '/notes/{id:\d+}', 'NoteController@show'],

    ['GET', '/notes/create', 'NoteController@create'],
    ['POST', '/notes/create', 'NoteController@store'],

    ['GET', '/notes/{id:\d+}/update', 'NoteController@edit'],
    ['POST', '/notes/{id:\d+}/update', 'NoteController@update'],

    ['GET', '/notes/{id:\d+}/delete', 'NoteController@delete'],
];
控制器 (Controllers)
Controllers are stored inside src/http/controllers, and you can avoid using the fully qualified namespace of your class if you store them there. However, you can use another path and change it inside the src/config/app.php file.
控制器存储在src/http/controllers内部,如果将它们存储在类中,则可以避免使用类的完全限定名称空间。 但是,您可以使用其他路径并在src/config/app.php文件src/config/app.php更改。
// src/config/app.php

<?php
return [
    // ...
    'controllerNamespace' => '\app\http\controllers',
];
// src/http/routes.php
return [
['GET', '/notes/{id}', 'NoteController@show'] // without a namespace
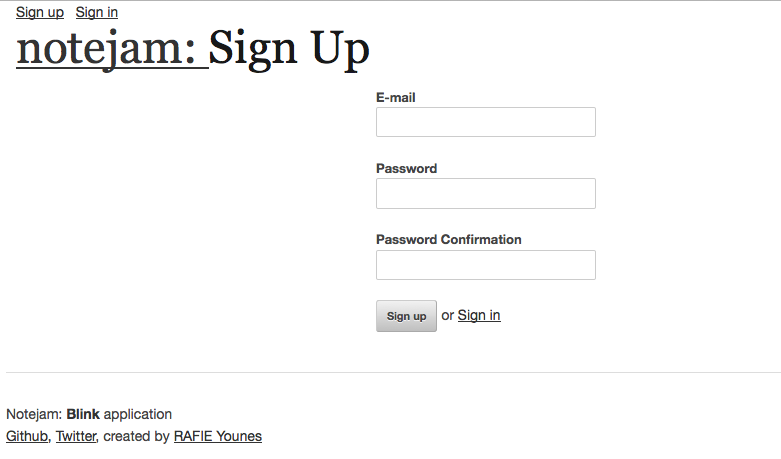
];注册 (Sign Up)
The Notejam application provides the HTML templates to be used, and we’re just going to convert them to Twig templates.
Notejam应用程序提供了要使用HTML模板,我们只是要将它们转换为Twig模板。
// src/views/user/signup.htm

{% extends 'layouts/layout.htm' %}

{% block page_title %}Sign Up{% endblock %}

{% block content %}
    <form action="/signup" method="POST" class="offset-by-six">
        <label for="email">E-mail</label>
        <input type="email" id="email" name="email" value="{{ oldInputs.email }}" />

        <label for="password">Password</label>
        <input type="password" id="password" name="password" value="" />

        <label for="password_confirmation">Password Confirmation</label>
        <input type="password" id="password_confirmation" name="password_confirmation" value="" />

        <input type="submit" value="Sign up" /> or <a href="/signin">Sign in</a>
    </form>
{% endblock %}
We’re extending the master layout that defines the common page structure including our page header and the errors partial.
我们正在扩展用于定义通用页面结构的主布局,包括我们的页面标题和部分错误。
// src/views/partials/errors.htm

{% set session = app.get('request').session %}

{% if session.get('success') or session.get('errors') %}
    <div class="alert-area">
        {% if session.get('success') %}
            <div class="alert alert-success">{{ session.get('success') }}</div>
        {% endif %}
        {% if session.get('errors') %}
            <div class="alert alert-error">
                {% for error in session.get('errors') %}
                    <ul class="errorlist">
                        <li>{{ error }}</li>
                    </ul>
                {% endfor %}
            </div>
        {% endif %}
    </div>
{% endif %}
We have access to the app container instance because we registered it as a global variable inside the Twig instance.
我们可以访问app容器实例,因为我们已将其注册为Twig实例中的全局变量。
Our sign up form contains an email, password and a password confirmation field. Now we need to render our page.
我们的注册表单包含电子邮件,密码和密码确认字段。 现在我们需要渲染页面。
// src/http/controllers/UserController.php

class UserController extends Object
{
    // ...

    public function signup()
    {
        return app()->twig->render('user/signup.htm');
    }
}
We handle the form submission inside our UserController@store method, and because we’ll need some validation logic, we can use the Illuminate/Validation component. So, let’s bind it to the container using our src/bindings.php file.
我们在UserController@store方法中处理表单提交,并且由于需要一些验证逻辑,因此可以使用Illuminate/Validation组件。 因此,让我们使用src/bindings.php文件将其绑定到容器。
// src/bindings.php

// ...
/*
    Registering Validator
 */

use Illuminate\Container\Container;
use Illuminate\Filesystem\Filesystem;
use Illuminate\Translation\FileLoader;
use Illuminate\Translation\Translator;
use Illuminate\Validation\Factory;
use Illuminate\Validation\DatabasePresenceVerifier;

$loader = new FileLoader(new Filesystem, __DIR__.'/lang');
$translator = new Translator($loader, 'en');
$validation = new Factory($translator, new Container);
$validation->setPresenceVerifier(new DatabasePresenceVerifier(app('capsule')->getDatabaseManager()));
$app->bind('validation', $validation);
The setPresenceVerifier method is useful in this case because we’ll be using the unique validation rule, which tests for the existence of the element in the database.
在这种情况下, setPresenceVerifier方法很有用,因为我们将使用unique验证规则,该规则将测试数据库中元素的存在。
// src/http/controllers/UserController.php

class UserController extends Object
{
    // ...
    public function store(Request $request, Hash $hash)
    {
        $rules = [
            'email'     => 'required|email|unique:users',
            'password'  => 'required|confirmed|min:8'
        ];

        $validator = app('validation')->make($request->all(), $rules);
        if ( $validator->fails() )
        {
            $request->session->add([
                'errors' => $validator->errors()->all(),
            ]);

            return app('twig')->render('user/signup.htm', [
                'oldInputs'     => $request->all()
            ]);
        }

        $user = new \App\Models\User;
        $user->email = $request->body->get('email');
        $user->password = $hash->make($request->body->get('password'));
        $user->save();

        $request->session->add(['success' => "Welcome to Notejam, you can now log in."]);

        return $response->redirect('/signin');
    }
}
Blink supports method injection, so we can just pass our classes as a parameter and they’ll be automatically resolved for us. After building the validation rules, if anything fails we return with old inputs. The $request->session object holds our current session instance, and this is where we store our success and error messages to be displayed by the errors partial.
Blink支持方法注入,因此我们只需将类作为参数传递即可,它们将自动为我们解决。 建立验证规则后,如果任何失败,我们将使用旧输入返回。 $request->session对象保存我们当前的会话实例,这是我们存储成功和错误消息的地方,错误消息将显示这些消息。
会话和放大器; 饼干 (Sessions &Amp; Cookies)
Using PHP sessions, cookies and header functions won’t work, but we can access them from the request object ($request->getSession()). Note that this could be a problem for other packages you may want to install into your project.
使用PHP会话时,cookie和标头函数将不起作用,但是我们可以从请求对象( $request->getSession() )中访问它们。 请注意,这对于您可能要安装到项目中的其他软件包可能是个问题。
登入 (Sign In)
Before logging users in, we need to configure our authorization component.
在登录用户之前,我们需要配置我们的授权组件。
// src/config/services.php

// ...
'auth' => [
        'class' => 'blink\auth\Auth',
        'model' => 'App\Models\User',
    ],
// ...
The next step is to update our User model and fill the Authenticatable interface methods.
下一步是更新我们的用户模型并填充Authenticatable接口方法。
// src/models/User.php

class User extends Model implements Authenticatable
{
    protected $table = 'users';

    public static function findIdentity($id)
    {
        if (is_numeric($id) || (is_array($id) && isset($id['id']))) {
            return static::where('id', $id)->first();
        } else if (is_string($id) || (is_array($id) && isset($id['email'])) ) {
            return static::where('email', $id)->first();
        } else {
            throw new \InvalidParamException("The param: id is invalid.");
        }
    }

    public function getAuthId()
    {
        return $this->id;
    }

    public function validatePassword($password)
    {
        return (new Hash)->check($password, $this->password);
    }
}
The findIdentity method will be used to authenticate users using the primary key or email, and validatePassword will test the login password against the current user instance.
findIdentity方法将用于使用主键或电子邮件对用户进行身份验证, validatePassword将针对当前用户实例测试登录密码。
// src/views/user/signin.htm

{% extends 'layouts/layout.htm' %}

{% block page_title %}Sign In{% endblock %}

{% block content %}
    <form action="/signin" method="POST" class="offset-by-six">
        <label for="email">E-mail</label>
        <input type="email" value="{{ oldInputs.email }}" name="email" id="email" />

        <label for="email">Password</label>
        <input type="password" value="" name="password" id="password" />

        <input type="submit" value="Sign in" /> or <a href="/signup">Sign up</a>
        <hr />
        <p><a class="small-red" href="/forgot_password">Forgot Password?</a></p>
    </form>
{% endblock %}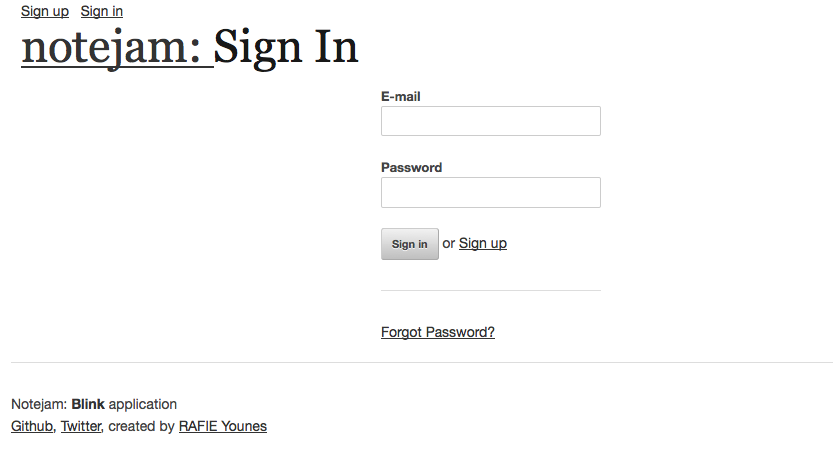
// src/controllers/UserController.php

class UserController extends Object
{
    // ...
    public function processSignin(Request $request, Hash $hash)
    {
        $rules = [
            'email'     => 'required|email',
            'password'  => 'required|min:8'
        ];
        $validator = app('validation')->make($request->all(), $rules);
        if ( $validator->fails() )
        {
            $request->session->add([
                'errors' => $validator->errors()->all(),
            ]);

            return app('twig')->render('user/signin.htm', [
                'oldInputs'     => $request->all()
            ]);
        }

        $user = auth()->attempt($request->only(['email', 'password']));

        if ( !$user )
        {
            $request->session->add([
                'errors' => ['Login error.'],
            ]);

            return app('twig')->render('user/signin.htm', [
                'oldInputs'     => $request->all()
            ]);
        }

        $cookies = $response->getCookies()->add( new \blink\http\Cookie([
            'name' => 'SESSIONID',
            'value' => $request->session->id
        ]) );

        return $response->redirect('/settings');
    }
}
We validate inputs the same way and display errors in case of failure. The auth() helper will resolve the blink/auth/Auth instance from the container, and we attempt logging the user in with the request credentials. If the login credentials are correct, we redirect the user to the settings page. Blink doesn’t manage our session automatically, so we need to set the session cookie on login and set it on the request on page load. Blink allow us to bind our services to the container using a configuration array.
我们以相同的方式验证输入,并在出现故障时显示错误。 auth()帮助程序将从容器中解析blink/auth/Auth实例,我们尝试使用请求凭据登录用户。 如果登录凭据正确,我们会将用户重定向到设置页面。 闪烁不会自动管理我们的会话,因此我们需要在登录时设置会话Cookie,并在页面加载时根据请求设置它。 闪烁允许我们使用配置数组将服务绑定到容器。
// src/config/services.php

return [
    'request' => [
        'class' => \blink\http\Request::class,
        'middleware' => [\App\Http\Middleware\AuthMiddleware::class],
        'sessionKey' => function (\blink\http\Request $request) {
                $cookie = $request->cookies->get('SESSIONID');
                if ($cookie) {
                    return $cookie->value;
                }
        }
    ],
    // ...
];
Blink uses Yii’s configuration concept to initialize class attributes. We use a closure function to initialize the sessionKey using the cookie variable if it exists.
Blink使用Yii的配置概念来初始化类属性。 我们使用闭包函数使用cookie变量(如果存在)初始化sessionKey 。
After a successful login attempt, we can access the logged in user from the request object using $request->user() and $request->guest(). Check the documentation for more details about authentication.
成功尝试登录后,我们可以使用$request->user()和$request->guest()从请求对象访问已登录的用户。 查看文档以获取有关身份验证的更多详细信息。
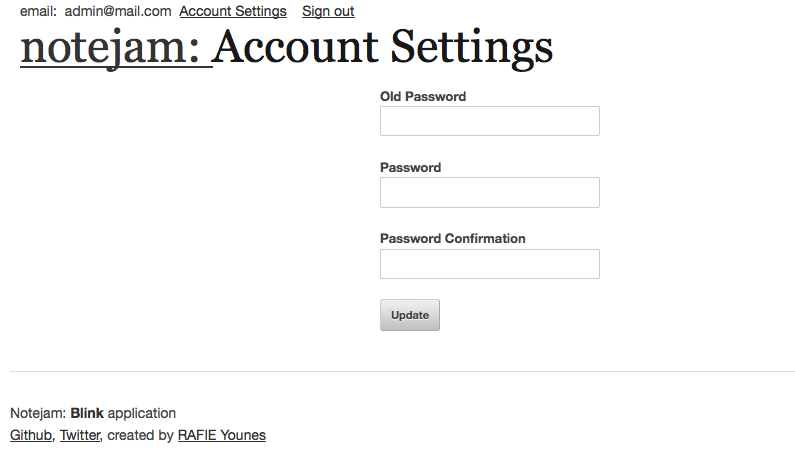
帐号设定 (Account Settings)
The logged in user has the ability to change his password. He must enter the old password, the new password and a confirmation. We follow the same steps as before.
登录的用户可以更改其密码。 他必须输入旧密码,新密码和确认。 我们遵循与以前相同的步骤。
// src/http/controllers/UserController.php

class UserController extends Object
{
    public function updateSettings(Request $request, Hash $hash)
    {
        $user = $request->user();
        $rules = [
            'old_password'   => 'required|min:8',
            'password'      => 'required|confirmed|min:8'
        ];

        $validator = app('validation')->make($request->all(), $rules);
        if ( $validator->fails() )
        {
            $request->session->add([
                'errors' => $validator->errors()->all(),
            ]);

            return app('twig')->render('user/settings.htm', [
                'oldInputs'     => $request->all()
            ]);
        }

        if( !$hash->check($request->input('old_password'), $user->password) )
        {
            $request->session->add([
                'errors' => ['Old password incorrect.'],
            ]);

            return app('twig')->render('user/settings.htm', [
                'oldInputs'     => $request->all()
            ]);
        }

        $user->password = $hash->make($request->input('old_password'));
        $user->save();

        $request->session->add([
                'success' => 'settings updated successfuly.',
        ]);

        return app('twig')->render('user/settings.htm');
    }
}
The $hash->check method compares a value with a hashed version. After updating the user settings we return with a success message. The problem here is that we are accessing the $request->user() method directly which returns the currently logged in user, but what if the user is not logged in yet and tries to access the settings page?
$hash->check方法将值与哈希版本进行比较。 更新用户设置后,我们将返回一条成功消息。 这里的问题是我们正在直接访问$request->user()方法,该方法返回当前登录的用户,但是如果该用户尚未登录并尝试访问设置页面怎么办?
中间件 (Middleware)
To guard our routes we can define a list of middleware to our request object. We can do that inside our services.php config file.
为了保护我们的路由,我们可以为请求对象定义一个中间件列表。 我们可以在services.php配置文件中执行此操作。
// config/services.php

return [
    'request' => [
        'class' => \blink\http\Request::class,
        'middleware' => [\App\Http\Middleware\AuthMiddleware::class],
        'sessionKey' => function (\blink\http\Request $request) {
                $cookie = $request->cookies->get('SESSIONID');
                if ($cookie) {
                    return $cookie->value;
                }
        }
    ],
    // ...
];
Now we need to create our AuthMiddleware inside the src/http/middleware folder. The middleware will intercept all the requests, and we should compare the current request with our guarded routes.
现在,我们需要在src/http/middleware文件夹中创建AuthMiddleware 。 中间件将拦截所有请求,我们应该将当前请求与受保护的路由进行比较。
// src/http/middleware/AuthMiddleware.php

class AuthMiddleWare implements MiddlewareContract
{
    public function handle($request)
    {
        $guardedRoutes = [
            '/\/settings/',
            '/\/logout/',
            '/\/notes?\/*.*/',
            '/\/pads?\/*.*/',
        ];

        if ( !$request->user() )
        {
            foreach ($guardedRoutes as $route)
            {
                if ( $request->match($route) )
                {
                    return response()->redirect('/signin');
                }
            }
        }

        if ( $request->user() && in_array($request->path, ['/signin', '/signup']))
        {
            return response()->redirect('/settings');
        }

    }
}
The Request@match method tests the current request path against a regular expression. It uses the PHP preg_match function, so we need to define our guarded routes as regular expressions. If the user is not logged in and tries to access one of the guarded routes, we redirect them to the sign in page. We also want to prevent the user from accessing the signin and signup pages when they are logged in.
Request@match方法针对正则表达式测试当前请求路径。 它使用PHP preg_match函数,因此我们需要将受保护的路由定义为正则表达式。 如果用户未登录并尝试访问其中一条受保护的路由,我们会将其重定向到登录页面。 我们还希望防止用户signin时访问signin页面和signup页面。
You can also use the before and after methods inside the controller to achieve the same result.
您还可以在控制器内部使用before和after方法来获得相同的结果。
// src/http/controllers/UserController.php

class UserController extends Object
{
    public function before($action, $request)
    {
        // do something
    }

    public function after($action, $request, $response)
    {
        // do something
    }
}
If you noticed, in the services file, the response object also has middleware. It can be used to intercept the response object and add some information to the response, or act as a response formatter.
如果您注意到,在服务文件中,响应对象也具有中间件。 它可用于拦截响应对象并向响应中添加一些信息,或充当响应格式化程序。
清单注释 (List Notes)
The NoteController class is responsible for handling our notes’ CRUD operations.
NoteController类负责处理笔记的CRUD操作。
// src/http/controllers/NoteController.php

class NoteController extends Object
{
    public function index(Request $request, Note $noteModel)
    {
        $notes = $noteModel
                    ->where('user_id', $request->user()->id)
                    ->with('pad')
                    ->get();

        return app('twig')->render('notes/index.htm', [
            'notes' => $notes
        ]);
    }
}
Because Blink supports method injection, we pass the Request and Note objects and query the user notes.
因为Blink支持方法注入,所以我们传递Request和Note对象并查询用户注释。
// src/views/notes/index.htm

{% extends 'layouts/layout.htm' %}

{% block page_title %}My Notes{% endblock %}

{% block content %}
    {% if notes|length %}
        <table class="notes">
            <tr>
                <th class="note">Note</th>
                <th>Pad</th>
                <th class="date">Last modified</th>
            </tr>
            {% for note in notes %}
                <tr>
                    <td><a href="/notes/{{ note.id }}">{{ note.name }}</a></td>
                    <td class="pad">
                        {% if note.pad is defined %}
                            <a href="/pads/{{ note.pad.id }}">{{ note.pad.name }}</a>
                        {% else %}
                            No pad
                        {% endif %}
                    </td>
                    <td class="hidden-text date">{{ note.updated_at|date("F jS \\a\\t g:ia") }}</td>
                </tr>
            {% endfor %}
        </table>
    {% else %}
        <p class="empty">Create your first note.</p>
    {% endif %}
    <a href="/notes/create" class="button">New note</a>
{% endblock %}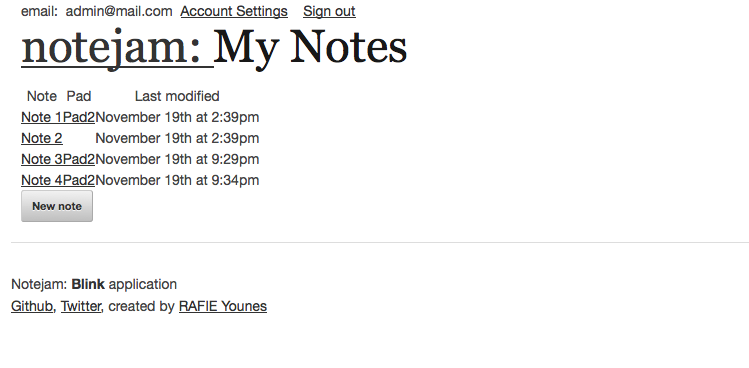
查看笔记 (View Note)
A logged in user can only view his own notes and manage them. And because we’ll need to often check for this condition, we’re going to put it in a separate method.
登录的用户只能查看和管理自己的笔记。 并且由于我们需要经常检查这种情况,因此我们将其放在单独的方法中。
// src/http/controllers/NoteController.php

class NoteController extends Object
{

    protected function noteExists( $noteId )
    {
        $request = request();
        $note = Note::with('pad')
                    ->where('user_id', $request->user()->id)
                    ->where('id', $noteId)
                    ->first();
        if( !$note )
        {
            $request->session->add([
                'errors' => ["Note not found."],
            ]);

            return false;
        }

        return $note;
    }
    // ...
}
// src/http/controllers/NoteController.php
class NoteController extends Object
{
public function show($id, Request $request, Response $response, Note $noteModel)
{
$note = $this->noteExists($id);
if( !$note )
{
return $response->redirect('/notes');
}
return app()->twig->render('notes/view.htm', [
'note' => $note
]);
}
}// src/views/notes/view.htm
{% extends 'layouts/layout.htm' %}
{% block page_title %}{{ note.name }}{% endblock %}
{% block content %}
<p class="hidden-text">Last edited at {{ note.updated_at|date("F jS \\a\\t g:ia") }}</p>
<div class="note">
<p>
{{ note.text }}
</p>
</div>
<a href="/notes/{{ note.id }}/update" class="button">Edit</a>
<a href="/notes/{{ note.id }}/delete" class="delete-note">Delete it</a>
{% endblock %}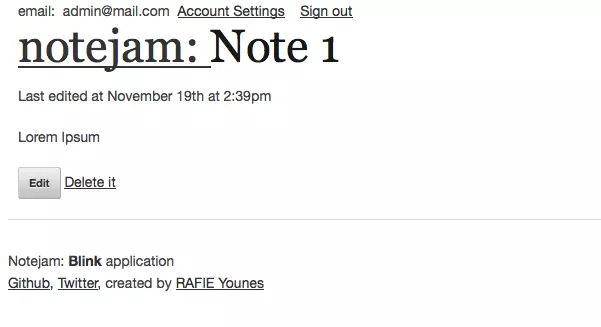
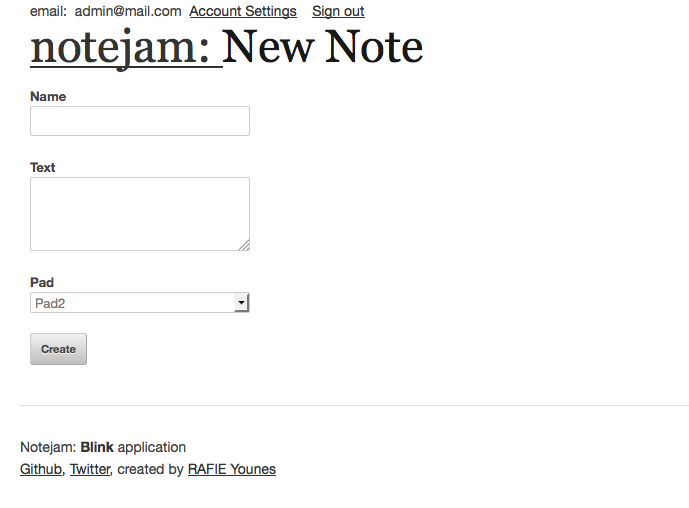
新笔记 (New Note)
The new note view has a name, a text, and a pad input.
新的便笺视图具有名称,文本和便笺输入。
// src/views/notes/create.htm

{% extends 'layouts/layout.htm' %}

{% block page_title %}New Note{% endblock %}

{% block content %}
    <form action="/notes/create" method="POST">
        <label for="name">Name</label>
        <input type="text" id="name" name="name" value="{{ oldInputs.name }}"/>

        <label for="text">Text</label>
        <textarea id="text" name="text" value="{{ oldInputs.text }}"></textarea>

        <label for="pad">Pad</label>
        <select id="pad" name="pad">
            {% for pad in pads %}
                <option value="{{ pad.id }}">{{ pad.name }}</option>
            {% endfor %}
        </select>

        <input type="submit" value="Create" />
    </form>
{% endblock %}
// src/http/controllers/NoteController.php
class NoteController extends Object
{
public function create(Request $request, Pad $padModel)
{
$pads = $padModel->where('user_id', $request->user()->id)->get();
return app('twig')->render('notes/create.htm', [
'pads' => $pads
]);
}
}
Because we already set up our model relations, we can also do something like $request->user()->pads. The store method handles the form submission.
因为我们已经建立了模型关系,所以我们还可以执行类似$request->user()->pads 。 store方法处理表单提交。
// src/http/controllers/NoteController.php

class NoteController extends Object
{
    public function store(Request $request, Response $response)
    {
        $rules = [
            'name'  => 'required',
            'text'  => 'required',
            'pad'   => 'required|exists:pads,id'
        ];
        $validator = app('validation')->make($request->all(), $rules);

        if ( $validator->fails() )
        {
            $request->session->add([
                'errors' => $validator->errors()->all(),
            ]);

            return app('twig')->render('notes/create.htm', [
                'oldInputs' => $request->all()
            ]);
        }

        $note = new Note;
        $note->name = $request->input('name');
        $note->text = $request->input('text');
        $note->user_id = $request->user()->id;
        $note->pad_id = $request->input('pad');
        $note->save();

        $request->session->add([
            'success' => 'Note saved successfully.',
        ]);

        return $response->redirect("/notes/{$note->id}/update");
    }
}
We follow the same process of validating data and returning errors in case of messages. To avoid pasting repetitive tasks for updating, deleting, and viewing notes you can check the final result on Github. The repository also contains the installation steps.
我们遵循验证数据并在出现消息的情况下返回错误的相同过程。 为了避免粘贴重复的任务来更新,删除和查看笔记,您可以在Github上检查最终结果。 该存储库还包含安装步骤。
最后说明 (Final Notes)
Although Swoole and Blink try to economize server resources by keeping your application resources alive through the application’s lifetime, the request and response objects are always refreshed on every request. Blink provides a ShouldBeRefreshed interface that you can implement to indicate that the class instance should be refreshed on every request.
尽管Swoole和Blink尝试通过在应用程序的生命周期内保持应用程序资源的使用来节省服务器资源,但始终在每次请求时刷新请求和响应对象。 Blink提供了ShouldBeRefreshed接口,您可以实现该接口以指示应在每个请求上刷新类实例。
结论 (Conclusion)
Blink is a newcomer and still in its early development stages. You can collaborate by writing documentation for different components and send pull requests for new features. If you have any questions or comments you can post them below and let us know what you think about this new framework!
Blink是一个新来者,仍处于早期开发阶段。 您可以通过编写不同组件的文档并发送对新功能的拉取请求进行协作。 如果您有任何疑问或意见,可以在下面发布,让我们知道您对这个新框架的看法!
翻译自: https://www.sitepoint.com/can-php-be-even-faster-light-speed-with-the-blink-framework/
blink 框架


 137
137

 被折叠的 条评论
为什么被折叠?
被折叠的 条评论
为什么被折叠?
 到【灌水乐园】发言


