


echrts自定义风格
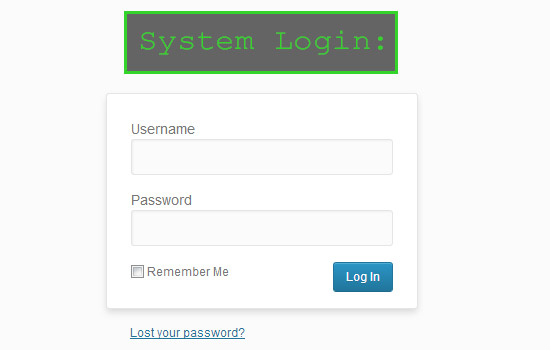
The WordPress login screen is one of the most generic, we-have-all-seen-the-same-thing, parts of a WordPress site. And, oddly enough, it’s one of the more awkward things to modify as well. There’s no built-in features for adding your logo or changing the overall look and feel.
WordPress登录屏幕是WordPress网站中最通用的,具有相同功能的部分之一。 而且,奇怪的是,它也是要修改的比较尴尬的事情之一。 没有内置功能可用于添加徽标或更改整体外观。
In this article, I’ll show you in a few short steps how to get started with modifying the login screen so that users experience a customized, branded look and feel. I went over the top with this design just to show how dramatically the login form can be stylized using a simple mod to the functions.php file and some CSS.
在本文中,我将通过几个简短的步骤向您展示如何开始修改登录屏幕,以便用户体验自定义的品牌外观。 我在此设计上进行了介绍,目的是说明使用一个简单的mods到functions.php文件和一些CSS可以极大地样式化登录表单。
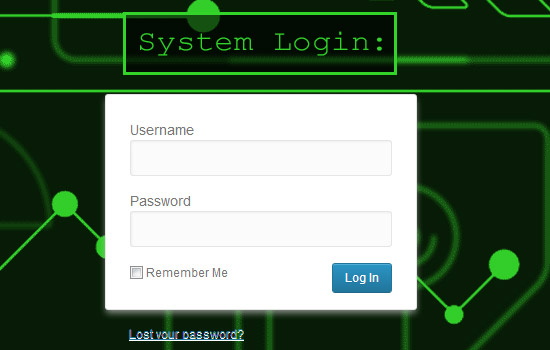
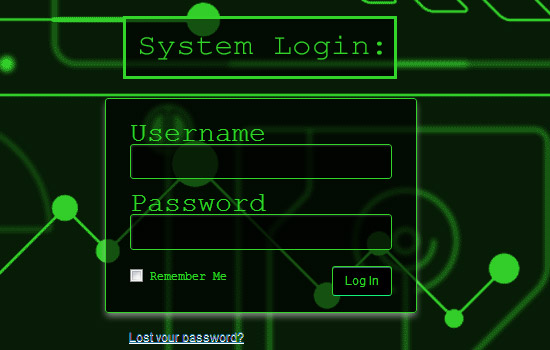
My finished product looks like this:
我的成品看起来像这样:
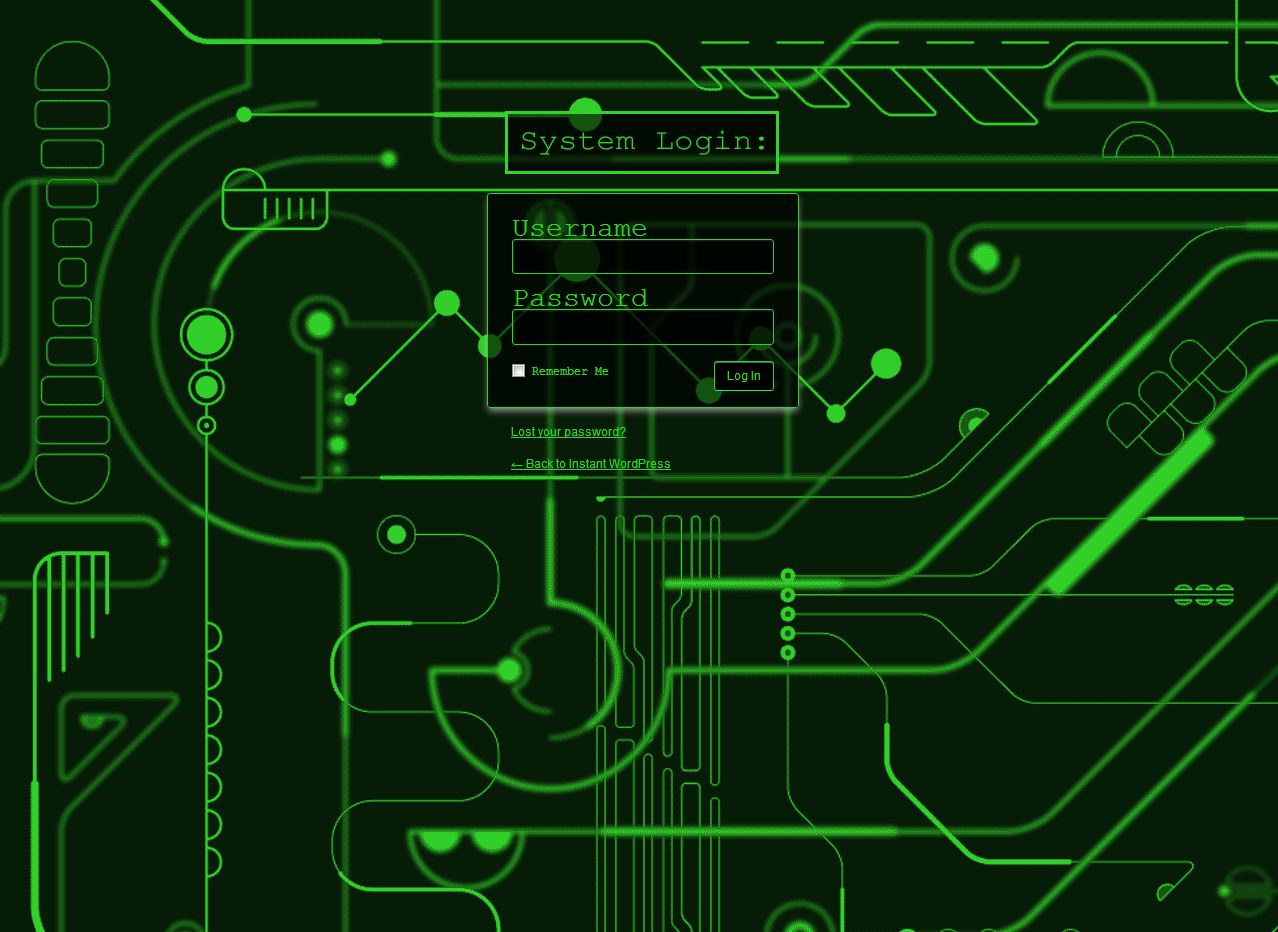
(Click to see the full version)
(单击以查看完整版本)
If you happen to want the background image that I used for this tutorial, you can download that here:
如果您恰好想要本教程使用的背景图像,可以在这里下载:
I broke this into sections, so you can change only those parts that you want. You may only want to change a few items up, change some fonts, tweak some backgrounds, and call it good. For those that want a thorough facelift, you can make a very dramatic change, as you can see from my example. So, hang on and in short order you’ll have a highly stylized WordPress login form.
我将其分为几部分,因此您只能更改所需的那些部分。 您可能只想更改一些项目,更改一些字体,调整一些背景并称其为好。 从我的例子中可以看出,对于那些想要彻底改头换面的人来说,您可以进行非常大的改变。 因此,稍等片刻,您将拥有一个高度风格化的WordPress登录表单。
修改Functions.php (Modify Functions.php)
One of the most frustrating parts about changing the login screen is that you need to add a few lines of code to your functions.php file to tell WordPress that you want a different stylesheet for the login screen. The login is a unique page in WordPress, unfortunately, but for security and other reasons, that’s just how it is.
关于更改登录屏幕的最令人沮丧的部分之一是,您需要向functions.php文件中添加几行代码,以告诉WordPress您想要登录屏幕使用不同的样式表。 不幸的是,登录名是WordPress中的唯一页面,但是出于安全性和其他原因,事实就是如此。
So, in your functions.php file, paste the following:
因此,在您的functions.php文件中,粘贴以下内容:
[sourcecode language=”php”]
[源代码语言=“ php”]
function stylized_login() {
函数stylized_login(){
echo ‘<link rel="stylesheet" type="text/css" href="’ . get_bloginfo(‘stylesheet_directory’) . ‘/stylized-login.css" />’;
回声'<link rel =“ stylesheet” type =“ text / css” href =“'。get_bloginfo('stylesheet_directory')。'/stylized-login.css” />';;
}
}
add_action(‘login_head’, ‘stylized_login’);
add_action('login_head','stylized_login');
[/sourcecode]
[/源代码]
What we’ve done here is “hooked” into login_head and told WordPress to use our stylized-login.css document that we’re about to build.
我们在这里所做的工作被“挂钩”到login_head中,并告诉WordPress使用我们将要构建的stylized-login.css文档。
You need both the function and the add_action, so don’t skip either.
您同时需要函数和add_action,因此不要跳过任何一个。
添加您CSS文档 (Add Your CSS Document)
Now you need to add the stylized-login.css document into your theme’s folder. This should be the in the folder as your style.css. If you want to put your custom login files in a separate folder, just make sure you update the folder in Step 1 accordingly.
现在,您需要将stylized-login.css文档添加到主题的文件夹中。 这应该在您的style.css文件夹中。 如果要将自定义登录文件放在单独的文件夹中,只需确保相应地在步骤1中更新该文件夹即可。
At this point you haven’t changed anything from the ordinary user’s point of view, but you have everything in place now.
在这一点上,从普通用户的角度来看,您还没有更改任何内容,但是现在一切就绪。
更改徽标 (Change the Logo)
We’re all used to the WordPress logo above the login form, so let’s start by changing this up first. In your stylized-login.css, add the following:
我们都习惯了登录表单上方的WordPress徽标,因此让我们首先进行更改。 在您的stylized-login.css中,添加以下内容:
[sourcecode language=”css”]
[源代码语言=“ css”]
.login h1 a { background-image: url(‘logo.png’); }
.login h1 a {background-image:url('logo.png'); }
[/sourcecode]
[/源代码]
I named my image logo.png. It should be 247 x 63 if you want it to fit perfectly.
我将图片命名为logo.png。 如果您希望它完全适合,则应为247 x 63。
更改页面的背景图像 (Change the Background Image for the Page)
The background image is one of the easiest ways to give your login page a back face-lift:
背景图片是使您的登录页面变脸的最简单方法之一:
[sourcecode language=”css”]
[源代码语言=“ css”]
body.login { background-image: url(‘bg.png’); }
body.login {background-image:url('bg.png'); }
[/sourcecode]
[/源代码]
You don’t have to make the background an image. You can just set the background-color and call it good.
您不必使背景成为图像。 您可以只设置背景颜色并将其命名为好。
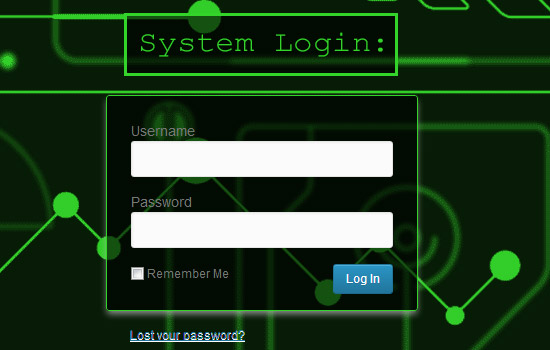
更改表单背景和边框 (Change the Form Background and Border)
The form itself, with the white background, is another calling card that screams “vanilla WordPress,” so lets change this up:
表单本身带有白色背景,是另一张尖叫“香草WordPress”的电话卡,因此让我们进行以下更改:
[sourcecode language=”css”]
[源代码语言=“ css”]
.login form { background: rgba(0, 0, 0, .6); }
.login格式{背景:rgba(0,0,0,.6); }
#loginform { border-color:#33d42a; }
#loginform {border-color:#33d42a; }
[/sourcecode]
[/源代码]
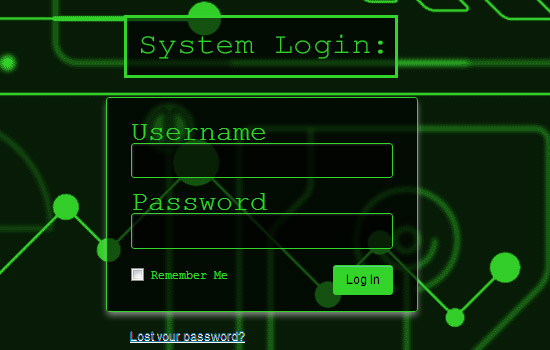
Note that I used RGBA, which allows for an alpha (transpancy), so if you want to make the form more or less transparent, this is where you would change it. I’ve added transparency, which you can see in the image below.
请注意,我使用了RGBA,它允许使用alpha(透明度),因此,如果要使窗体或多或少透明,可以在此处进行更改。 我添加了透明度,您可以在下图中看到它。
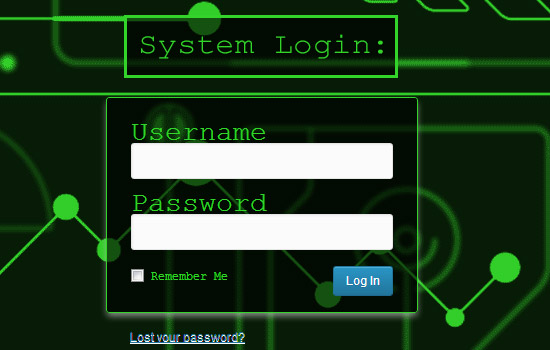
更改用户名和密码字体 (Change the Username and Password Fonts)
I’m sticking with some common system fonts, but you can always import a font of your choosing for a further stylized effect:
我坚持使用一些常见的系统字体,但是您始终可以导入您选择的字体,以获得进一步的风格化效果:
[sourcecode language=”css”]
[源代码语言=“ css”]
.login label { font-family:"Courier New", Courier, monospace; font-size: 28px; color: #33d42a; }
.login标签{font-family:“ Courier New”,Courier,等宽; 字体大小:28px; 颜色:#33d42a; }
[/sourcecode]
[/源代码]
更改输入框的背景和边框 (Change the Input Box Background and Border)
In this example, I don’t even want the standard white background for my inputs, so here’s a quick way to give these inputs a whole new look:
在此示例中,我什至不需要输入的标准白色背景,因此这是使这些输入具有全新外观的快速方法:
[sourcecode language=”css”]
[源代码语言=“ css”]
.login input[type="text"]{ font-family:"Courier New", Courier, monospace; font-size:24px; background-color:rgba(0,0,0,.6); border-color:#33d42a; }
.login input [type =“ text”] {font-family:“ Courier New”,Courier,等宽; font-size:24px; 背景颜色:rgba(0,0,0,.6); 边框颜色:#33d42a; }
.login input[type="password"]{ background-color:rgba(0,0,0,.6); border-color:#33d42a; }
.login input [type =“ password”] {background-color:rgba(0,0,0,.6); 边框颜色:#33d42a; }
[/sourcecode]
[/源代码]
Once again, I’m using RGBA to get the transparency effect for those input boxes.
再一次,我使用RGBA来获得那些输入框的透明效果。

更改登录按钮 (Change the Login Button)
Now we have get that blue login button out of there. It’s ruining everything!
现在,我们有了蓝色的登录按钮。 它毁了一切!
[sourcecode language=”css”]
[源代码语言=“ css”]
.wp-core-ui .button-primary{ background-color:#000; background-image:none; border-color:#33d42a; border-bottom-color:#13f278; color:#33d42a; }
.wp-core-ui .button-primary {background-color:#000; 背景图片:无; 边框颜色:#33d42a; 边框底色:#13f278; 颜色:#33d42a; }
.wp-core-ui .button-primary:hover { background-color:#33d42a; background-image:none; border-color:#33d42a; color:#000; }
.wp-core-ui .button-primary:hover {background-color:#33d42a; 背景图片:无; 边框颜色:#33d42a; 颜色:#000; }
[/sourcecode]
[/源代码]
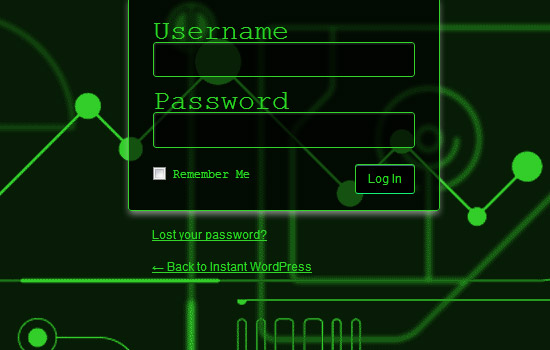
This also takes care of our hover state. When hovered, the button goes bright green. Look below for clarity.
这也照顾我们的悬停状态。 悬停时,按钮变为亮绿色。 请看下面的内容。
更改丢失的密码和“返回...”链接 (Change the Lost Password and “Back to…” Links)
Almost done! Those little links at the bottom are now all that’s in the way of our completely stylized form.
快完成了! 现在,底部的那些小链接已成为我们完全样式化形式的全部。
[sourcecode language=”css”]
[源代码语言=“ css”]
.login #nav a, .login #backtoblog a { color: #33d42a !important; text-shadow:none; }
.login #nav a,.login #backtoblog a {color:#33d42a!important; 文字阴影:无; }
.login #nav a:hover, .login #backtoblog a:hover { color: #33d42a !important; text-shadow:0 1px 0 #33d42a; }
.login #nav a:hover,.login #backtoblog a:hover {color:#33d42a!important; 文本阴影:0 1px 0#33d42a; }
[/sourcecode]
[/源代码]
更改徽标链接按钮 (Change the Logo Link Button)
Last, but not least, I couldn’t leave well enough alone and had to change the logo link to go to my own site — sorry WordPress.org, I don’t want that link any more.
最后但并非最不重要的一点是,我不能独自离开,不得不更改徽标链接以转到我自己的网站-抱歉,WordPress.org,我不再希望该链接了。
To make this change, you’re going to have to go back to your functions.php file and add the following:
要进行此更改,您将必须返回到functions.php文件并添加以下内容:
[sourcecode language=”php”]
[源代码语言=“ php”]
function login_link( $url ) {
函数login_link($ url){
return get_bloginfo( ‘url’ );
返回get_bloginfo('url');
}
}
add_filter( ‘login_headerurl’, ‘login_link’ );
add_filter('login_headerurl','login_link');
[/sourcecode]
[/源代码]
最终CSS (Final CSS)
Here’s the CSS in one big block with comments for your copy and pasting pleasure:
这是CSS中的一个大块,其中包含有关复制和粘贴乐趣的注释:
[sourcecode language=”css”]
[源代码语言=“ css”]
/* Logo above login form */ .login h1 a { background-image: url(‘logo.png’); }
/ *登录表单上方的徽标* / .login h1 a {background-image:url('logo.png'); }
/* Background image */ body.login { background-image: url(‘bg.png’); }
/ *背景图片* / body.login {background-image:url('bg.png'); }
/* Background of form */ .login form { background: rgba(0, 0, 0, .6); }
/ *形式* / .login的背景{形式:rgba(0,0,0,.6); }
/* Border for the form */ #loginform { border-color:#33d42a; }
/ *格式的边框* / #loginform {border-color:#33d42a; }
/* Labels for the form */ .login label { font-family:"Courier New", Courier, monospace; font-size: 28px; color: #33d42a; }
/ *形式的标签* / .login标签{font-family:“ Courier New”,Courier,等宽; 字体大小:28px; 颜色:#33d42a; }
/* Username text box */ .login input[type="text"]{ font-family:"Courier New", Courier, monospace; font-size:24px; background-color:rgba(0,0,0,.6); border-color:#33d42a; }
/ *用户名文本框* / .login输入[type =“ text”] {font-family:“ Courier New”,Courier,等宽; font-size:24px; 背景颜色:rgba(0,0,0,.6); 边框颜色:#33d42a; }
/* Password text box */ .login input[type="password"]{ background-color:rgba(0,0,0,.6); border-color:#33d42a; }
/ *密码文本框* / .login输入[type =“ password”] {background-color:rgba(0,0,0,.6); 边框颜色:#33d42a; }
/* Login button */ .wp-core-ui .button-primary{ background-color:#000; background-image:none; border-color:#33d42a; border-bottom-color:#13f278; color:#33d42a; }
/ *登录按钮* / .wp-core-ui .button-primary {background-color:#000; 背景图片:无; 边框颜色:#33d42a; 边框底色:#13f278; 颜色:#33d42a; }
/* Login button hover */ .wp-core-ui .button-primary:hover { background-color:#33d42a; background-image:none; border-color:#33d42a; color:#000; }
/ *登录按钮悬停* / .wp-core-ui .button-primary:hover {background-color:#33d42a; 背景图片:无; 边框颜色:#33d42a; 颜色:#000; }
/* Lost password and ‘Back to’ links */ .login #nav a, .login #backtoblog a { color: #33d42a !important; text-shadow:none; }
/ *丢失密码和“返回”链接* / .login #nav a,.login #backtoblog a {颜色:#33d42a!important; 文字阴影:无; }
/* Lost password and ‘Back to’ hover links */ .login #nav a:hover, .login #backtoblog a:hover { color: #33d42a !important; text-shadow:0 1px 0 #33d42a; }
/ *丢失密码和“返回”悬停链接* / .login #nav a:hover,.login #backtoblog a:hover {颜色:#33d42a!important; 文本阴影:0 1px 0#33d42a; }
[/sourcecode]
[/源代码]
That’s all. Enjoy tailoring WordPress to suit your (client’s) needs!
就这样。 享受量身定制WordPress以适合您(客户)的需求!
翻译自: https://www.sitepoint.com/design-a-stylized-custom-wordpress-login-screen/
echrts自定义风格


 296
296

 被折叠的 条评论
为什么被折叠?
被折叠的 条评论
为什么被折叠?
 到【灌水乐园】发言


