


 本文是3部分系列的第一部分,介绍了如何使用WordPress Links Manager API构建轮播插件。我们将创建一个展示背景图片和链接的轮播,其中包含上一个/下一个箭头。首先,我们需要了解轮播的外观和所需工具。然后,我们将利用WordPress的链接管理器存储链接,并使用JavaScript和jQuery进行动画处理。最后,我们将创建插件并定义显示轮播的函数。
wordpress插件
In this 3 part series, we will take a look at how to build a WordPress carousel plugin using the WordPress Links Manager API.
在这个分为3部分的系列文章中,我们将介绍如何使用WordPress Links Manager API构建WordPress轮播插件。
As we saw when we introduced it, the Links Manager is the best way to manage a list of links in WordPress. Its API doesn’t contain many functions, but there are enough to be able to develop some useful applications.
正如我们在介绍它时所看到的那样, 链接管理器是管理WordPress中的链接列表的最佳方法。 它的API并不包含许多功能,但是有足够的能力来开发一些有用的应用程序。
We won’t use wp_list_bookmarks(), we’ll be using other functions we saw in our previous article.
我们将不使用wp_list_bookmarks() ,而将使用在上一篇文章中看到的其他功能。
If you’re not already familiar with the WordPress Links Manager and its API, then you may need to have a look at both of these articles mentioned above first, before continuing to build your carousel.
如果您还不熟悉WordPress Links Manager及其API,那么在继续构建轮播之前,您可能需要先阅读上面提到的这两篇文章。
Carousels are not a rare thing on the web, and that’s why I thought it is interesting to see how to build one. It is also a good way to test our knowledge of the WordPress Links Manager API, so why not?
轮播在网络上并不罕见,这就是为什么我认为看到如何构建轮播很有趣。 这也是测试我们对WordPress Links Manager API的了解的一种好方法,为什么不呢?
我们会怎样做? (What Will We Do?)
We can find many different carousels around the web, so before beginning, we need to define exactly what we want to build.
我们可以在网上找到许多不同的轮播,因此在开始之前,我们需要准确定义要构建的内容。
访客会看到什么? (What Will Visitors See?)
Our carousel will display a series of ‘items’ each consisting of a background image (large or small, it’s your choice!) and each one will be linked to a custom URL. The name of the image will be displayed at the top, while its description will be found right below. The image below is an example an item which could appear in our carousel.
我们的轮播会显示一系列“项目”,每个“项目”都包含一个背景图片(大小由您选择!),每个项目都将链接到自定义网址。 图像的名称将显示在顶部,而其描述则在下面。 下图是一个示例示例,该示例可能会出现在我们的轮播中。
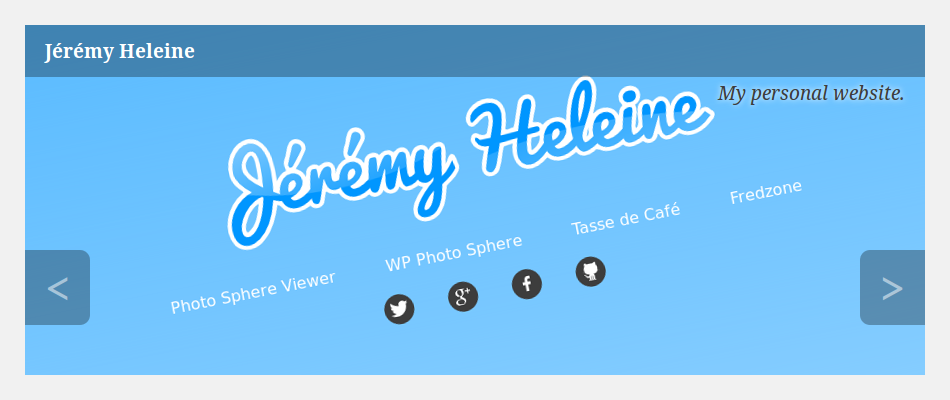
You should note the arrows on this image. As we are building a carousel, we want to display a series of items. Our visitors will be able to display the next / previous one thanks to these arrows.
您应该注意此图像上的箭头。 在构建轮播时,我们要显示一系列项目。 由于这些箭头,我们的访客将能够显示下一个/上一个。
Note that this image is just an example and you will be able to customize the style of what we will do.
请注意,此图像只是一个示例,您将能够自定义我们将做的样式。
我们需要什么? (What Do We Need?)
Now that we know what to build, it’s time to see what tools we will need to achieve our goal.
现在我们知道要构建什么,现在该看看要实现目标所需的工具。
As our carousel is no more than a list of links, we will use the WordPress Links Manager to store them. From the Links Manager API, we’ll only use the function get_bookmarks() to get the links we display in the carousel as ‘items’.
由于轮播仅是链接列表,因此我们将使用WordPress链接管理器来存储它们。 从Links Manager API中,我们将仅使用函数get_bookmarks()来获取我们在轮播中显示为“项”的链接。
To animate this carousel, we will use JavaScript and jQuery. That way, we don’t have to worry about browser compatibility.
要为该轮播设置动画,我们将使用JavaScript和jQuery。 这样,我们就不必担心浏览器的兼容性。
In order to write readable and easily editable code, we will create a plugin defining the function which displays the carousel. Then, we can use this function anywhere we want to display the carousel.
为了编写可读且易于编辑的代码,我们将创建一个插件,该插件定义显示轮播的功能。 然后,我们可以在想要显示转盘的任何地方使用此功能。
向我们的轮播中添加项目 (Adding an Item to Our Carousel)
Before displaying the items, we need to add them and their associated information. We have to respect some rules to get the same result for each item (image, name, description and link URL) we add to the carousel.
在显示项目之前,我们需要添加它们及其相关信息。 我们必须遵守一些规则,以使添加到轮播中的每个项目(图像,名称,描述和链接URL)获得相同的结果。
You can choose the name, URL and the description of the link you prefer. However, the image you use in the ‘Advanced’ section must have the right dimensions as we won’t resize it. You can choose the size you want but be sure to always select an image of the same size (or, at least, bigger).
您可以选择您喜欢的链接的名称,URL和描述。 但是,您在“高级”部分中使用的图像必须具有正确的尺寸,因为我们不会调整其大小。 您可以选择所需的尺寸,但请确保始终选择相同尺寸(或至少更大)的图像。
We need to create a category dedicated to our carousel. That way, we will know where to search, and we can continue to use the Links Manager without adding new links in the carousel. I chose to create a category named ‘Carousel’ but, here again, you are free to use whatever you want.
我们需要创建一个专门用于轮播的类别。 这样,我们将知道要在哪里搜索,并且我们可以继续使用链接管理器而无需在轮播中添加新链接。 我选择创建一个名为“轮播”的类别,但是在这里再次可以随意使用任何内容。
Finally, regarding the target and rel attributes, you can use them if you want as our code will display them.
最后,关于target和rel属性,如果需要,可以使用它们,因为我们的代码将显示它们。
让我们创建我们的插件! (Let’s Create Our Plugin!)
Our plugin will use several files so we need to create a folder which will contain those files. You can give this folder any name you want, but you must place it into the wp-content/plugins folder, unless you want to make it a mu-plugin.
我们的插件将使用几个文件,因此我们需要创建一个包含这些文件的文件夹。 您可以为该文件夹指定任何名称,但是除非要将其设置为mu-plugin ,否则必须将其放置在wp-content/plugins文件夹中。
The plugin’s main file has two important roles: indicating our plugin’s name and other information used by WordPress, and defining the function which displays the carousel. I called it carousel.php but you can choose any name you want. Place it into the folder you just created.
插件的主文件具有两个重要作用:指示插件的名称和WordPress使用的其他信息,以及定义显示轮播的功能。 我称它为carousel.php但您可以选择任何名称。 将其放入您刚创建的文件夹中。
As we saw in our article about how to create an awesome plugin page on WordPress.org, this file must begin with a special comment like the one below.
正如我们在有关如何在WordPress.org上创建一个很棒的插件页面的文章中所看到的,此文件必须以特殊注释开头,如下所示。
/*
Plugin Name: Carousel
Plugin URI:
Description: Creates a simple carousel
Version: 0
Author: Jérémy Heleine
Author URI: http://jeremyheleine.me
License: MIT
*/
Once again, you’re free to fill these fields in as you prefer. In particular, I’m pretty sure that your name is not mine!
再一次,您可以随意填写这些字段。 特别是,我非常确定您的名字不是我的!
展示我们的轮播 (Displaying Our Carousel)
In this same file we define a new function. I chose to call it display_carousel(). It must be unique if possible (we can’t know all the function names used by all the developers around the world) but it should also be simple, as this function will be the one we call whenever we want to display the carousel.
在同一文件中,我们定义了一个新函数。 我选择将其命名为display_carousel() 。 如果可能的话,它必须是唯一的(我们不知道世界上所有开发人员使用的所有函数名称),但它也应该很简单,因为只要要显示轮播,我们都会调用此函数。
function display_carousel() {
}
检索正确的项目 (Retrieving the Right Items)
The first thing we do in this function is retrieve the items to display. As we want to create a display a bit more complex than a list, wp_list_bookmarks() isn’t suitable, so we will use get_bookmarks().
我们在此功能中要做的第一件事是检索要显示的项目。 由于我们想要创建比列表稍微复杂的显示,因此wp_list_bookmarks()不适合,因此我们将使用get_bookmarks() 。
We don’t want to retrieve all the links in the Links Manager so we must pass a parameter to this function. We will use four options, listed in the array below.
我们不想在链接管理器中检索所有链接,因此我们必须将参数传递给此函数。 我们将使用以下阵列中列出的四个选项。
$args = array(
	'category_name' => 'carousel',
	'orderby' => 'link_id',
	'order' => 'DESC',
	'limit' => 5
);
The first option selects the category we want to display. We only want one category and we know its name so the simplest way to selecting it is using the option category_name.
第一个选项选择我们要显示的类别。 我们只需要一个类别,并且知道其名称,因此选择category_name的最简单方法是使用category_name选项。
Then we order our items. With the values we’re passing to orderby and order, the first item to display in our carousel will be the last one added by the user. That way, the oldest items will appear at the end of the carousel, or even not at all thanks to the option limit. I chose to not display more than five items. You can choose a different limit and you can even choose to always display all the items, but the advantage of using a limit is that we don’t have to remove old items to hide them on the carousel.
然后我们订购我们的物品。 使用我们传递给orderby和order的值,轮播中显示的第一个项目将是用户添加的最后一个项目。 这样,最旧的项目将出现在轮播的末尾,或者由于选项limit甚至根本不会出现。 我选择不显示五个以上的项目。 您可以选择一个不同的限制,甚至可以选择始终显示所有项目,但是使用限制的好处是我们不必删除旧项目就可以将它们隐藏在转盘上。
Now that we have our options, we pass them to get_bookmarks() to retrieve our items. Then we count the number of retrieved links, which may not be the same as the limit set above if we have fewer items stored then the limit we specified (we will use this number later).
现在我们有了选项,我们将它们传递给get_bookmarks()来检索我们的项目。 然后,我们计算检索到的链接数,如果存储的项目少于我们指定的limit ,则该数目可能与上面设置的限制不同(稍后将使用此数目)。
$links = get_bookmarks($args);
$n = count($links);
轮播就是列表 (A Carousel Is Nothing Other than a List)
Then we display our carousel, with a condition: if there’s nothing to display we don’t want to display anything, so we have to test if our $links array is empty or not.
然后,我们显示带有条件的轮播:如果没有要显示的内容,我们不想显示任何内容,因此我们必须测试$links数组是否为空。
if (!empty($links)) {
	// Here's the code to display the carousel
}
All the code we write from now must be in this condition.
我们现在编写的所有代码都必须处于这种状态。
We encapsulate our carousel into a div so, first of all, we open it. You can use echo or you can exit the PHP code using ?>. I personally prefer the second option so this is the one I’ll use here.
我们将轮播封装到div因此,首先打开它。 您可以使用echo或使用?>退出PHP代码。 我个人更喜欢第二种选择,所以这是我将在这里使用的选择。
if (!empty($links)) {
	?>
	<div id="carousel">
		<ul>
		</ul>
	</div>
	<?php
}
Note the ul tag. If we think about it, our carousel is no more than a list of links with fancy styles and features, so displaying our links (items) in a list is a good idea.
注意ul标签。 如果我们考虑一下,我们的轮播只不过是具有精美样式和功能的链接列表,因此在列表中显示我们的链接(项目)是一个好主意。
For each item contained in the $links array we display a li tag in the list opened above. To do that we open a foreach loop in this tag.
对于$links数组中包含的每个项目,我们在上面打开的列表中显示一个li标签。 为此,我们在此标记中打开一个foreach循环。
<ul>
	<?php
	foreach ($links as $i => $link) {
	}
	?>
</ul>
Note the $i variable. We need this iterator to know our position in the list. This way, we’ll know if we must show the ‘previous’ and ‘next’ arrows (thanks to the $n variable we defined above).
注意$i变量。 我们需要这个迭代器来知道我们在列表中的位置。 这样,我们将知道是否必须显示“上一个”和“下一个”箭头(由于上面定义了$n变量)。
准备未来的属性 (Preparing the Future Attributes)
Before displaying the li tag, we will create some variables. In fact, all our items won’t display the same thing. For each of them we have a different image to show and different values for the target and rel attributes. Here I chose to begin the loop by creating these variables. If you prefer you can define them later, right before their use.
在显示li标签之前,我们将创建一些变量。 实际上,我们所有的物品都不会显示相同的东西。 对于它们中的每一个,我们都有不同的图像显示,并且target和rel属性的值也不同。 在这里,我选择通过创建这些变量来开始循环。 如果您愿意,可以稍后在使用它们之前对其进行定义。
// We are here in the loop
// Background image
if (!empty($link->link_image))
	$background = 'url(' . $link->link_image . ')';
else
	$background = 'rgb(' . rand(0, 255) . ', ' . rand(0, 255) . ', ' . rand(0, 255) . ')';
First we determine the value of the background variable. We will display the value of $background in the CSS property background. We make a test to be sure that we have an image to show: if present we display it in the background. If the current link does not have an image we display a random color in the background. As you can imagine, this isn’t the best solution so you may choose to create something different such as a fixed color, a random color picked in a predefined list, or a default image. Here we punish an item’s creator who forgot to include an image by displaying a random color which has a great chance of being ugly.
首先,我们确定背景变量的值。 我们将在CSS属性background显示$background的值。 我们进行测试以确保有图像要显示:如果存在,则将其显示在背景中。 如果当前链接没有图像,我们将在背景中显示随机颜色。 可以想象,这不是最佳解决方案,因此您可以选择创建其他内容,例如固定颜色,在预定义列表中选择的随机颜色或默认图像。 在这里,我们通过显示随机颜色来惩罚忘记创建图像的项目创建者,而随机颜色很有可能会变得丑陋。
// Target attribute
if (!empty($link->link_target))
	$target = ' target="' . $link->link_target . '"';
else
	$target = '';
After defining the background we define the target attribute. If a value for the link’s target was specified link_target is not empty so we display the attribute, otherwise it is ignored and the target attribute is not used in order to keep the code as clean as possible.
定义背景后,我们定义target属性。 如果为链接target指定了一个值,则link_target不为空,因此我们显示该属性,否则将忽略该属性,并且不使用target属性,以保持代码尽可能整洁。
Below you will find the last variable we define in the beginning of our loop. To manage the rel attribute we use the same process we did for target.
在下面,您将找到我们在循环开始时定义的最后一个变量。 为了管理rel属性,我们使用与target相同的过程。
// Rel attribute
if (!empty($link->link_rel))
	$rel = ' rel="' . $link->link_rel . '"';
else
	$rel = '';
Note that we wrote if… else statements here but we could also use ternary operators.
请注意,我们在此处编写了if… else语句,但是我们也可以使用三元运算符。
显示主链接 (Displaying the Main Link)
We then create the li tag with the background.
然后,我们使用背景创建li标签。
foreach ($links as $i => $link) {
	// …
	// Creation of the background, target and rel variables
	// …
	?>
	<li style="background: <?php echo $background; ?>;">
	</li>
	<?php
}
We will find three a tags in this li tag: the main one which will contain the target URL used if someone clicks on the image, and the two arrows (if we need them). Each of them will have its own CSS class so they can be styled accordingly.
我们会在li标签中找到三个a标签:一个主要标签,其中包含有人单击图像时使用的目标URL,以及两个箭头(如果需要)。 它们每个都有自己CSS类,因此可以相应地设置样式。
First we find the main a tag that will be a ‘real’ link pointing to the URL we want (the two other a tags are just buttons). In the li tag previously created, we insert the a tag with the right attributes.
首先,我们发现主要的a ,这将是一个“真实”的链接指向我们想要的网址标签(另外两个a标签都只是按钮)。 在先前创建的li标签中,我们插入具有正确属性a标签。
<a
	class="carousel-link"
	href="<?php echo $link->link_url; ?>"
	title="<?php echo $link->link_name; ?>"
	<?php echo $target . $rel; ?>
	>
</a>
The first attribute is the CSS class. You can choose whatever you want as the class name but you’ll have to choose different names for the two other a tags. Then we find the href attribute. We’ve also included the title attribute which displays the link’s name. It’s optional, but why not?
第一个属性是CSS类。 您可以选择任何要用作类名的名称,但必须为其他两个a标签选择不同的名称。 然后我们找到href属性。 我们还包括显示链接名称的title属性。 它是可选的,但为什么不呢?
Finally we find the target and rel attributes which will only be displayed if there are values for them.
最后,我们找到target和rel属性,它们只有在有值的情况下才会显示。
In the a element below we will display the name of the link and its description as the content. I chose to display the name in a strong tag and the description in a em tag but you are free to choose whatever you want.
在下面的a元素中,我们将显示链接的名称及其描述作为内容。 我选择在strong标签中显示名称,在em标签中显示说明,但是您可以随意选择任何内容。
<a href="<?php echo $link->link_url; ?>">
	<strong><?php echo $link->link_name; ?></strong>
	<?php
	if (!empty($link->link_description)) {
		?>
		<em><?php echo $link->link_description; ?></em>
		<?php
	}
	?>
</a>
Note here that I removed all the attributes except for href to make the code more readable.
请注意,此处删除了href以外的所有属性,以使代码更具可读性。
I have also added a test for displaying the description. This condition tests whether the description field is empty or not. If it empty, we display nothing, therefore if you didn’t enter a description we won’t find an empty em tag in the carousel.
我还添加了一个显示描述的测试。 此条件测试描述字段是否为空。 如果为空,则不显示任何内容,因此,如果您不输入说明,则不会在轮播中找到空的em标签。
显示箭头 (Displaying the Arrows)
The display of the carousel is almost finished, as the only missing details now are the arrows. We display them in the li tag, right after the link we just created, but not every time. We don’t want to display a “previous” arrow on the first item, or a “next” one on the last item.
轮播的显示即将完成,因为现在唯一缺少的细节是箭头。 我们将它们显示在li标记中,就在我们刚刚创建的链接之后,但并非每次都显示。 我们不想在第一个项目上显示“上一个”箭头,或者在最后一个项目上显示“下一个”箭头。
Let’s display the ‘previous’ arrow if needed. To determine if the current link is the first one or not we can test the iterator $i. If it is equal to zero, then it refers to the first link and we don’t display anything.
如果需要,让我们显示“上一个”箭头。 要确定当前链接是否是第一个链接,我们可以测试迭代器$i 。 如果等于零,则它指向第一个链接,并且我们不显示任何内容。
<li>
<!-- Here is the link created above -->
<?php
// Previous link
if ($i > 0) {
?>
<a href="#prev" class="carousel-prev"><</a>
<?php
}
?>
</li>Once again the attributes in the li tag have been removed in the above code to make the example clearer.
再次在上面的代码中删除了li标记中的属性,以使示例更加清晰。
There’s not much to say about the a tag. The value of the href attribute can be anything you want, and likewise with the class name. The content is what users will see so it’s important. Here I chose to display a < symbol.
关于a标签没有太多要说的。 href属性的值可以是您想要的任何值,并且可以使用类名。 内容就是用户看到的内容,因此很重要。 在这里,我选择显示一个<符号。
The code to display the ‘next’ arrow is similar. We change the test to detect if we are on the last item or not. To do that we use the $n variable previously created. If the current link is the last one, then $i is equal to $n - 1 (since $i begins with the value 0 and not 1).
显示“下一个”箭头的代码类似。 我们更改测试以检测我们是否在最后一项上。 为此,我们使用先前创建的$n变量。 如果当前链接是最后一个链接,则$i等于$n - 1 (因为$i以值0而不是1开头)。
<?php
// Next link
if ($i < $n - 1) {
?>
<a href="#next" class="carousel-next">></a>
<?php
}
?>And we’re done, all the elements of our carousel are displayed.
至此,轮播的所有元素都将显示出来。
下一步是什么? (What’s Next?)
We’ve just created our plugin, saw how to add an item compatible with our carousel, and how to display these items. Currently, the result is not very pretty, that’s why we must enhance it.
我们刚刚创建了插件,了解了如何添加与轮播兼容的项目以及如何显示这些项目。 当前,结果还不是很漂亮,这就是为什么我们必须对其进行增强。
In the next part of this tutorial, we will see how to stylize our elements with a bit of CSS using an external stylesheet, and in Part 3 we’ll use JavaScript to enable the animation of the items to create the functioning slider.
在本教程的下一部分中,我们将看到如何使用外部样式表使用一些CSS来样式化元素,在第3部分中,我们将使用JavaScript启用项目的动画来创建功能性滑块。
翻译自: https://www.sitepoint.com/building-a-wordpress-carousel-plugin-part-1/
wordpress插件


 425
425

 被折叠的 条评论
为什么被折叠?
被折叠的 条评论
为什么被折叠?
 到【灌水乐园】发言


